History of Auto Layout constraints
Learn different ways to define Auto Layout constraints programmatically.
Table of Contents
Auto Layout was introduced in iOS 6, and it changes the way we think of the layout of our UI elements. It is not the most elegant or beautiful API back then. That's why you might see a lot of Auto Layout library popping up here and there. I also used some of them at that time, but the APIs around Auto Layout has improved a lot since then. If you are the one who is still using a third-party library for Auto Layout, I want to show how Apple improve this over the years. At the end of this article, you might consider ditch out all those external dependencies and adopt the standard APIs.
Distance Past (iOS 6)
When Auto Layout first came out in iOS 6, there are three ways in which constraints in a user interface layout can be created:
- Interface Builder, which we won't talk about it in this article, but it also improves a lot since then.
- Visual Format Language (VFL). This is a way to create constraints using an ASCII-art-like visual format string. It looks something like this
|-[find]-[findNext]-[findField(>=20)]-|.
The following is an example of defining constraints of content view with a padding of 20.
override func viewDidLoad() {
super.viewDidLoad()
let contentView = UILabel()
contentView.backgroundColor = .systemPink
contentView.translatesAutoresizingMaskIntoConstraints = false
view.addSubview(contentView)
let views: [String: Any] = [
"contentView": contentView
]
let verticalConstraints = NSLayoutConstraint.constraints(
withVisualFormat: "V:|-20-[contentView]-20-|",
metrics: nil,
views: views)
let horizontalConstraints = NSLayoutConstraint.constraints(
withVisualFormat: "H:|-20-[contentView]-20-|",
metrics: nil,
views: views)
view.addConstraints(horizontalConstraints)
view.addConstraints(verticalConstraints)
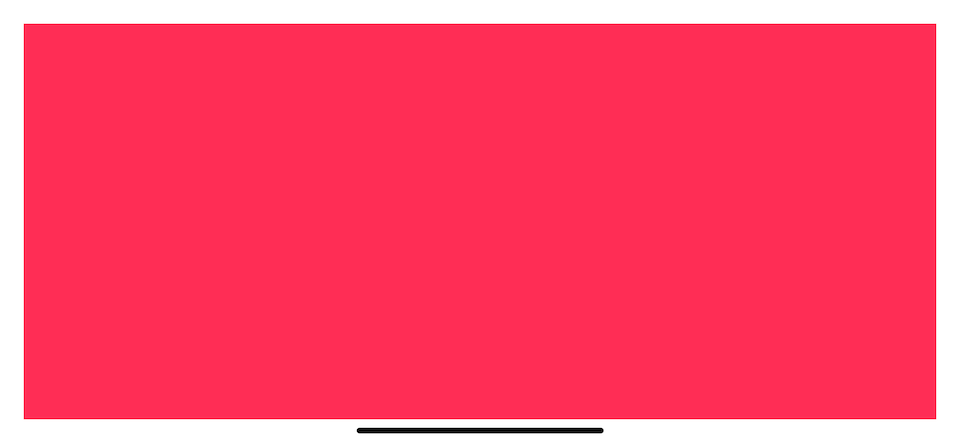
}Result:
For a simple layout, this might look like a good way to create a layout, but for a complex one, it might not be the case. There is some goodness in VFL, but it's lack of support for a number of layout attributes like height/width percentages and centering, and for me, it can easily go wrong with this ASCII. It is not the best solution, but people still using it because another way of creating a constraint, NSLayout Constraint API, is not that good either.
- NSLayoutConstrint APIs. This is the reason where all those libraries gain popularity in the first place. Back then, this is how we define constraints.
let leadingConstraint = NSLayoutConstraint(
    item: contentView,
    attribute: .leading,
    relatedBy: .equal,
    toItem: view,
    attribute: .leading,
    multiplier: 1,
    constant: 20)

let bottomConstraint = NSLayoutConstraint(
    item: contentView,
    attribute: .bottom,
    relatedBy: .equal,
    toItem: view,
    attribute: .bottom,
    multiplier: 1,
    constant: -20)

let topConstraint = NSLayoutConstraint(
    item: contentView,
    attribute: .top,
    relatedBy: .equal,
    toItem: view,
    attribute: .top,
    multiplier: 1,
    constant: 20)

let trailingConstraint = NSLayoutConstraint(
    item: contentView,
    attribute: .trailing,
    relatedBy: .equal,
    toItem: view,
    attribute: .trailing,
    multiplier: 1,
    constant: -20)

view.addConstraints([
    leadingConstraint,
    trailingConstraint,
    topConstraint,
    bottomConstraint
])
The above example would also add a contentView with a padding of 20. Nothing wrong with the API, the concept is solid, it can do everything and support every layout attribute. The only con is its verbosity. It is not a surprise people looking for an alternative, and when they found one, they never returned.
You can easily support sarunw.com by checking out this sponsor.
Note Taking:Quickly take note using Voice, Camera, or Typing
Small Improvement (iOS 8)
In iOS 8, Apple introduces a concept of active state to NSLayoutConstraint. Only active constraints affect the calculated layout. You can enable/disable any constraints without to remove and re-add it to a view.
Activate/Deactivate a collection of constraints
The old way of adding constraints is still compatible with the active state; all constraints pass in addConstraints(_:) will mark as active. Even though we can use addConstraints(_:), it is no longer a recommended way of doing it. There is a small catch in addConstraints(_:).
All constraints must involve only views that are within scope of the receiving view. Specifically, any views involved must be either the receiving view itself, or a subview of the receiving view.
This might not be an issue for an experienced developer but might confuse a newcomer on which view should they add constraints to.
You might get this error if you try to add constraints to the wrong ancestor.
Terminating app due to uncaught exception 'NSInternalInconsistencyException', reason: 'Impossible to set up layout with view hierarchy unprepared for constraint.'To mitigate this, in iOS 8, Apple introduces a new method activate(_:). The activate(_:) method automatically adds the constraints to the correct views. We don't have to worry about which view should hold a constraint you are about to add.
So, instead of calling addConstraints(_:) on view:
view.addConstraints([
    leadingConstraint,
    trailingConstraint,
    topConstraint,
    bottomConstraint
])
We call NSLayoutConstraint.activate instead:
NSLayoutConstraint.activate([
    leadingConstraint,
    trailingConstraint,
    topConstraint,
    bottomConstraint
])
We also have deactivate(_:) as a new way of removeConstraint(_:).
view.removeConstraints([
    leadingConstraint,
    trailingConstraint,
    topConstraint,
    bottomConstraint
])

NSLayoutConstraint.deactivate([
    leadingConstraint,
    trailingConstraint,
    topConstraint,
    bottomConstraint
])
Activate/Deactivate individual constraint
You can also activate/deactivate a single constraint by changing isActive property.
let leadingConstraint = NSLayoutConstraint(
    item: contentView,
    attribute: .leading,
    relatedBy: .equal,
    toItem: view,
    attribute: .leading,
    multiplier: 1,
    constant: 20)

leadingConstraint.isActive = true
leadingConstraint.isActive = falseException
The only time this will break is when you try to activate a constraint whose items have no common ancestor. In short, don't forget to add your view into a view hierarchy before calling activate(_:), deactivate(_:), and isActive. Failing to do so, and you will get the following exception.
*** Terminating app due to uncaught exception 'NSGenericException', reason: 'Unable to activate constraint with anchors <NSLayoutXAxisAnchor:0x600002cb44c0 "UIView:0x7f803d407450.leading"> and <NSLayoutXAxisAnchor:0x600002ca4200 "UIView:0x7f803d705d40.leading"> because they have no common ancestor.  Does the constraint or its anchors reference items in different view hierarchies?  That's illegal.'

Will attempt to recover by breaking constraint
<NSLayoutConstraint:0x600002443160 UIView:0x7fe0d8404e60.trailing == UIView:0x7fe0d860e910.trailing - 20   (active)>

Make a symbolic breakpoint at UIViewAlertForUnsatisfiableConstraints to catch this in the debugger.
The methods in the UIConstraintBasedLayoutDebugging category on UIView listed in <UIKitCore/UIView.h> may also be helpful.
This change solves some pain in adding and removing constraints, but the constraint creation syntax still wordy.
Layout Anchors to the rescue (iOS 9)
Apple finally solves the problem in iOS 9. They come up with a new NSLayoutAnchor. Think of it as a specific point in a view which you can use as a reference point when creating a constraint.
UIView comes with a collection of anchor properties that you can use to create a constraint.
| Property | Layout Anchor | Description |
|---|---|---|
| bottomAnchor | NSLayoutYAxisAnchor | A layout anchor representing the bottom edge of the view's frame. |
| centerXAnchor | NSLayoutXAxisAnchor | A layout anchor representing the horizontal center of the view's frame. |
| centerYAnchor | NSLayoutYAxisAnchor | A layout anchor representing the vertical center of the view's frame. |
| firstBaselineAnchor | NSLayoutYAxisAnchor | A layout anchor representing the baseline for the topmost line of text in the view. |
| heightAnchor | NSLayoutDimension | A layout anchor representing the height of the view's frame. |
| lastBaselineAnchor | NSLayoutYAxisAnchor | A layout anchor representing the baseline for the bottommost line of text in the view. |
| leadingAnchor | NSLayoutXAxisAnchor | A layout anchor representing the leading edge of the view's frame. |
| leftAnchor | NSLayoutXAxisAnchor | A layout anchor representing the left edge of the view's frame. |
| rightAnchor | NSLayoutXAxisAnchor | A layout anchor representing the right edge of the view's frame. |
| topAnchor | NSLayoutYAxisAnchor | A layout anchor representing the top edge of the view's frame. |
| trailingAnchor | NSLayoutXAxisAnchor | A layout anchor representing the trailing edge of the view's frame. |
| widthAnchor | NSLayoutDimension | A layout anchor representing the width of the view's frame. |
Each anchor can only form a constraint with an anchor of the same axis.
Create a constraint with anchor
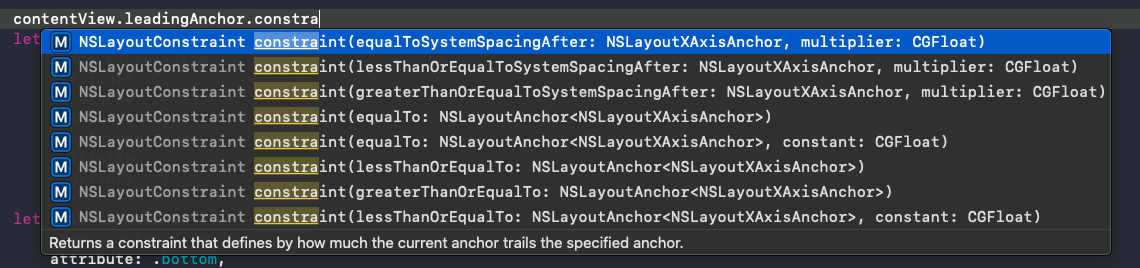
NSLayoutAnchor comes with a set of methods including operations that you would see in NSLayoutConstraint, e.g., equal to (=), greater than or equal to (>=), less than or equal to(<=). All of these with a variant of parameters, including both multiplier and constant. Even there is a lot of variation, you can access all of them by typing constraint, and Xcode should list all of them for you. To explore all of them, check out Apple Documentation.
Our constraints code will come down to this.
let constraints = [
    contentView.leadingAnchor.constraint(equalTo: view.leadingAnchor, constant: 20),
    contentView.trailingAnchor.constraint(equalTo: view.trailingAnchor, constant: -20),
    contentView.topAnchor.constraint(equalTo: view.topAnchor, constant: 20),
    contentView.bottomAnchor.constraint(equalTo: view.bottomAnchor, constant: -20)
]
NSLayoutConstraint.activate(constraints)
This new API removes a lot of boilerplate code and significantly reduces the line of code.
Conclusion
It took three years before Apple tackle the verbosity problem of Auto Layout; some people seeking an alternative library and never look back. If you are one who is still using external dependency for this job, you might consider using the standard APIs in the next project. With all of these improvements that Apple keeps adding throughout these years, it is more pleasant to work with.
You can easily support sarunw.com by checking out this sponsor.
Note Taking:Quickly take note using Voice, Camera, or Typing
Related Resources
Read more article about Swift, Auto Layout, or see all available topic
Enjoy the read?
If you enjoy this article, you can subscribe to the weekly newsletter.
Every Friday, you'll get a quick recap of all articles and tips posted on this site. No strings attached. Unsubscribe anytime.
Feel free to follow me on Twitter and ask your questions related to this post. Thanks for reading and see you next time.
If you enjoy my writing, please check out my Patreon https://www.patreon.com/sarunw and become my supporter. Sharing the article is also greatly appreciated.
Become a patron Buy me a coffee Tweet ShareHow to preserve a struct memberwise initializer when you have a custom initializer
A tip to declare a custom initializer without losing a memberwise initializer.
How to make multi-line text in UIButton
The default appearance of UIButton is a single line text, but it also supports a multi-line text with some minor tweak.