How to set up iOS environments: develop, staging, and production
Table of Contents
When you create a new project in Xcode, you will get two configurations, Debug and Release. This is enough for most of us in the early day where we build a simple app without connecting with third-party services or API.
When things get more complicated, these two configurations are no longer enough. If your app needs to communicate with an external service, you can't afford to develop and test your app in the same environment that your users use, where one mistake can harm your users. That's why we need multiple environments for our development (Assume your external service also has a separate environment for testing).
Everybody has a testing environment. Some people are lucky enough to have a totally separate environment to run production in.
– Michael Stahnke
You can create multiple environments for your project with the help of Configuration and Scheme.
Configuration
As I mentioned earlier, every new Xcode project comes with two default configurations, Debug and Release.
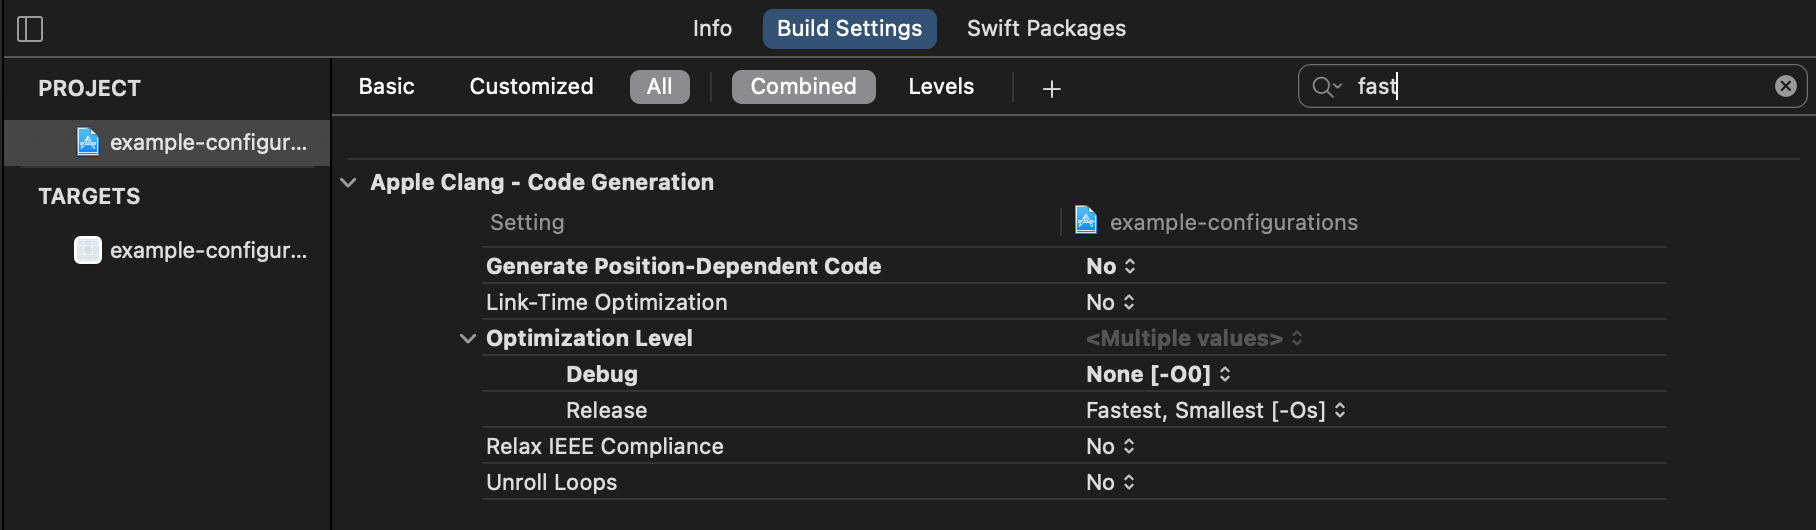
These configurations capture a build configuration that matches their intention. For example, Debug configuration set Optimization Level to None because we want to debug our code without the compiler interfering. In comparison, the Release configuration set this value to Fastest, Smallest to let the compiler optimize our code for performance and space.
Build configuration also includes not-so-technical things like application name and application identifier, which is very helpful to differentiate each app environment.
You can easily support sarunw.com by checking out this sponsor.
Tiny OCR: Extract text from image directly from your mac.
Add a new configuration
In this article, I will create three environments, Development, Staging, and Production. For each environment, I will create two configurations, Debug and Release configurations resulting in six configurations as follows.
- Debug Development
- Release Development
- Debug Staging
- Release Staging
- Debug Production
- Release Production
Xcode already creates two default configurations for us, so we need to create four more.
Open Project Configuration
To create a new configurations, select your project name in a Project navigator (View > Navigators > Project (⌘ + 1)).
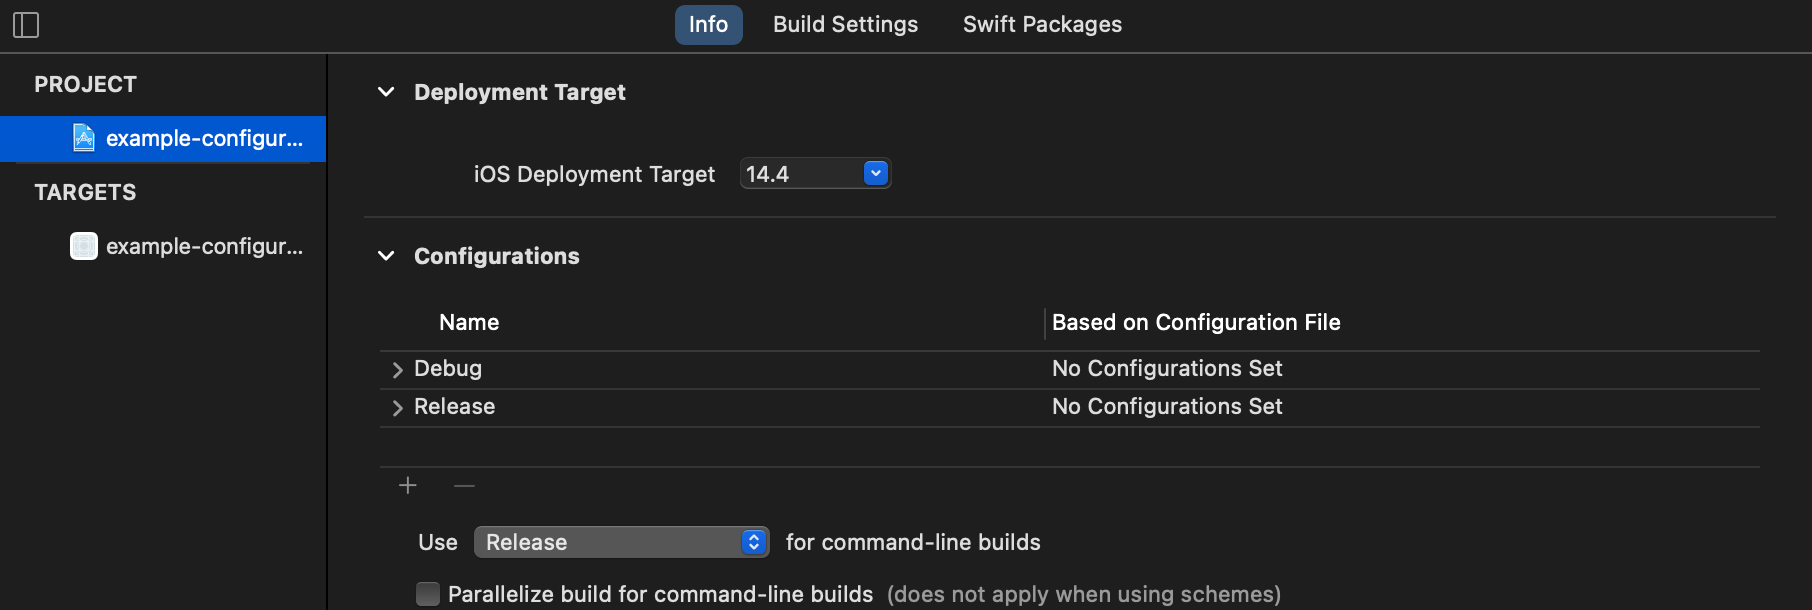
Then, in the Editor Area, select your project under the Project section and select the Info tab.

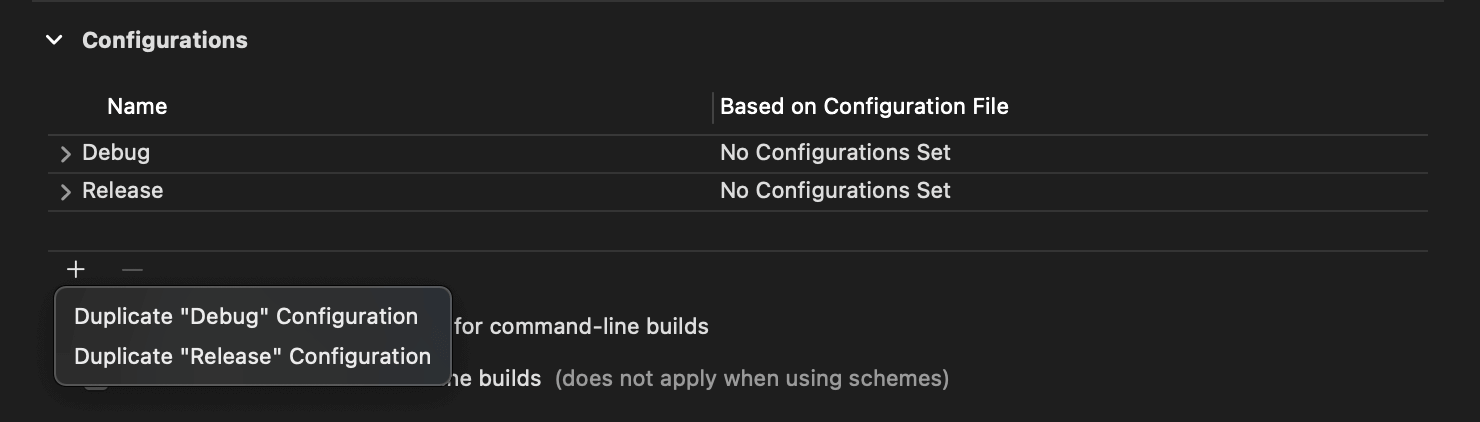
Under the Configurations section, you will see the default configurations, Debug and Release. We will use these as a template for other environments.
Duplicate Debug and Release configurations
Select the + icon at the bottom of the Configurations section and select Duplicate “Debug” Configuration two times, and select Duplicate “Release” Configuration two times.
You will get something like this, then rename them to match our environment name.
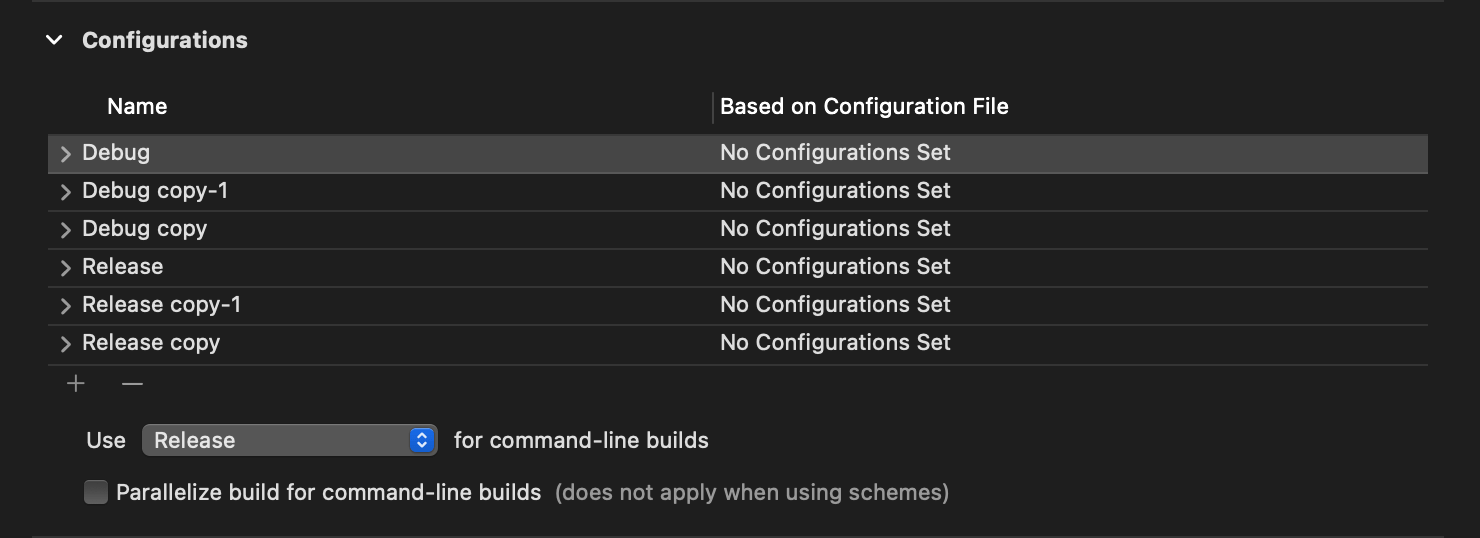
Rename
Double-click on a configuration name to rename it.
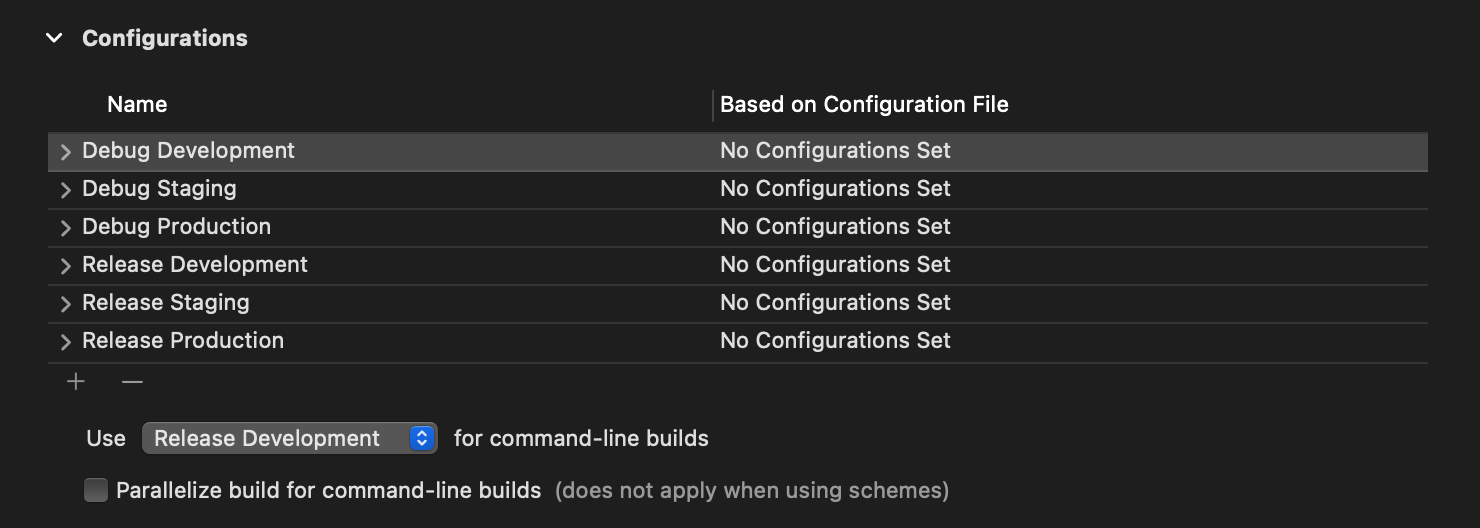
We now have configurations ready for each of our environments. At the moment, there are no differences between each of them. I will show you how we can use this environment in the code later. First, I want to show you how to use them in a scheme.
Scheme
An Xcode scheme defines a collection of targets to build, a configuration to use when building, and a collection of tests to execute.
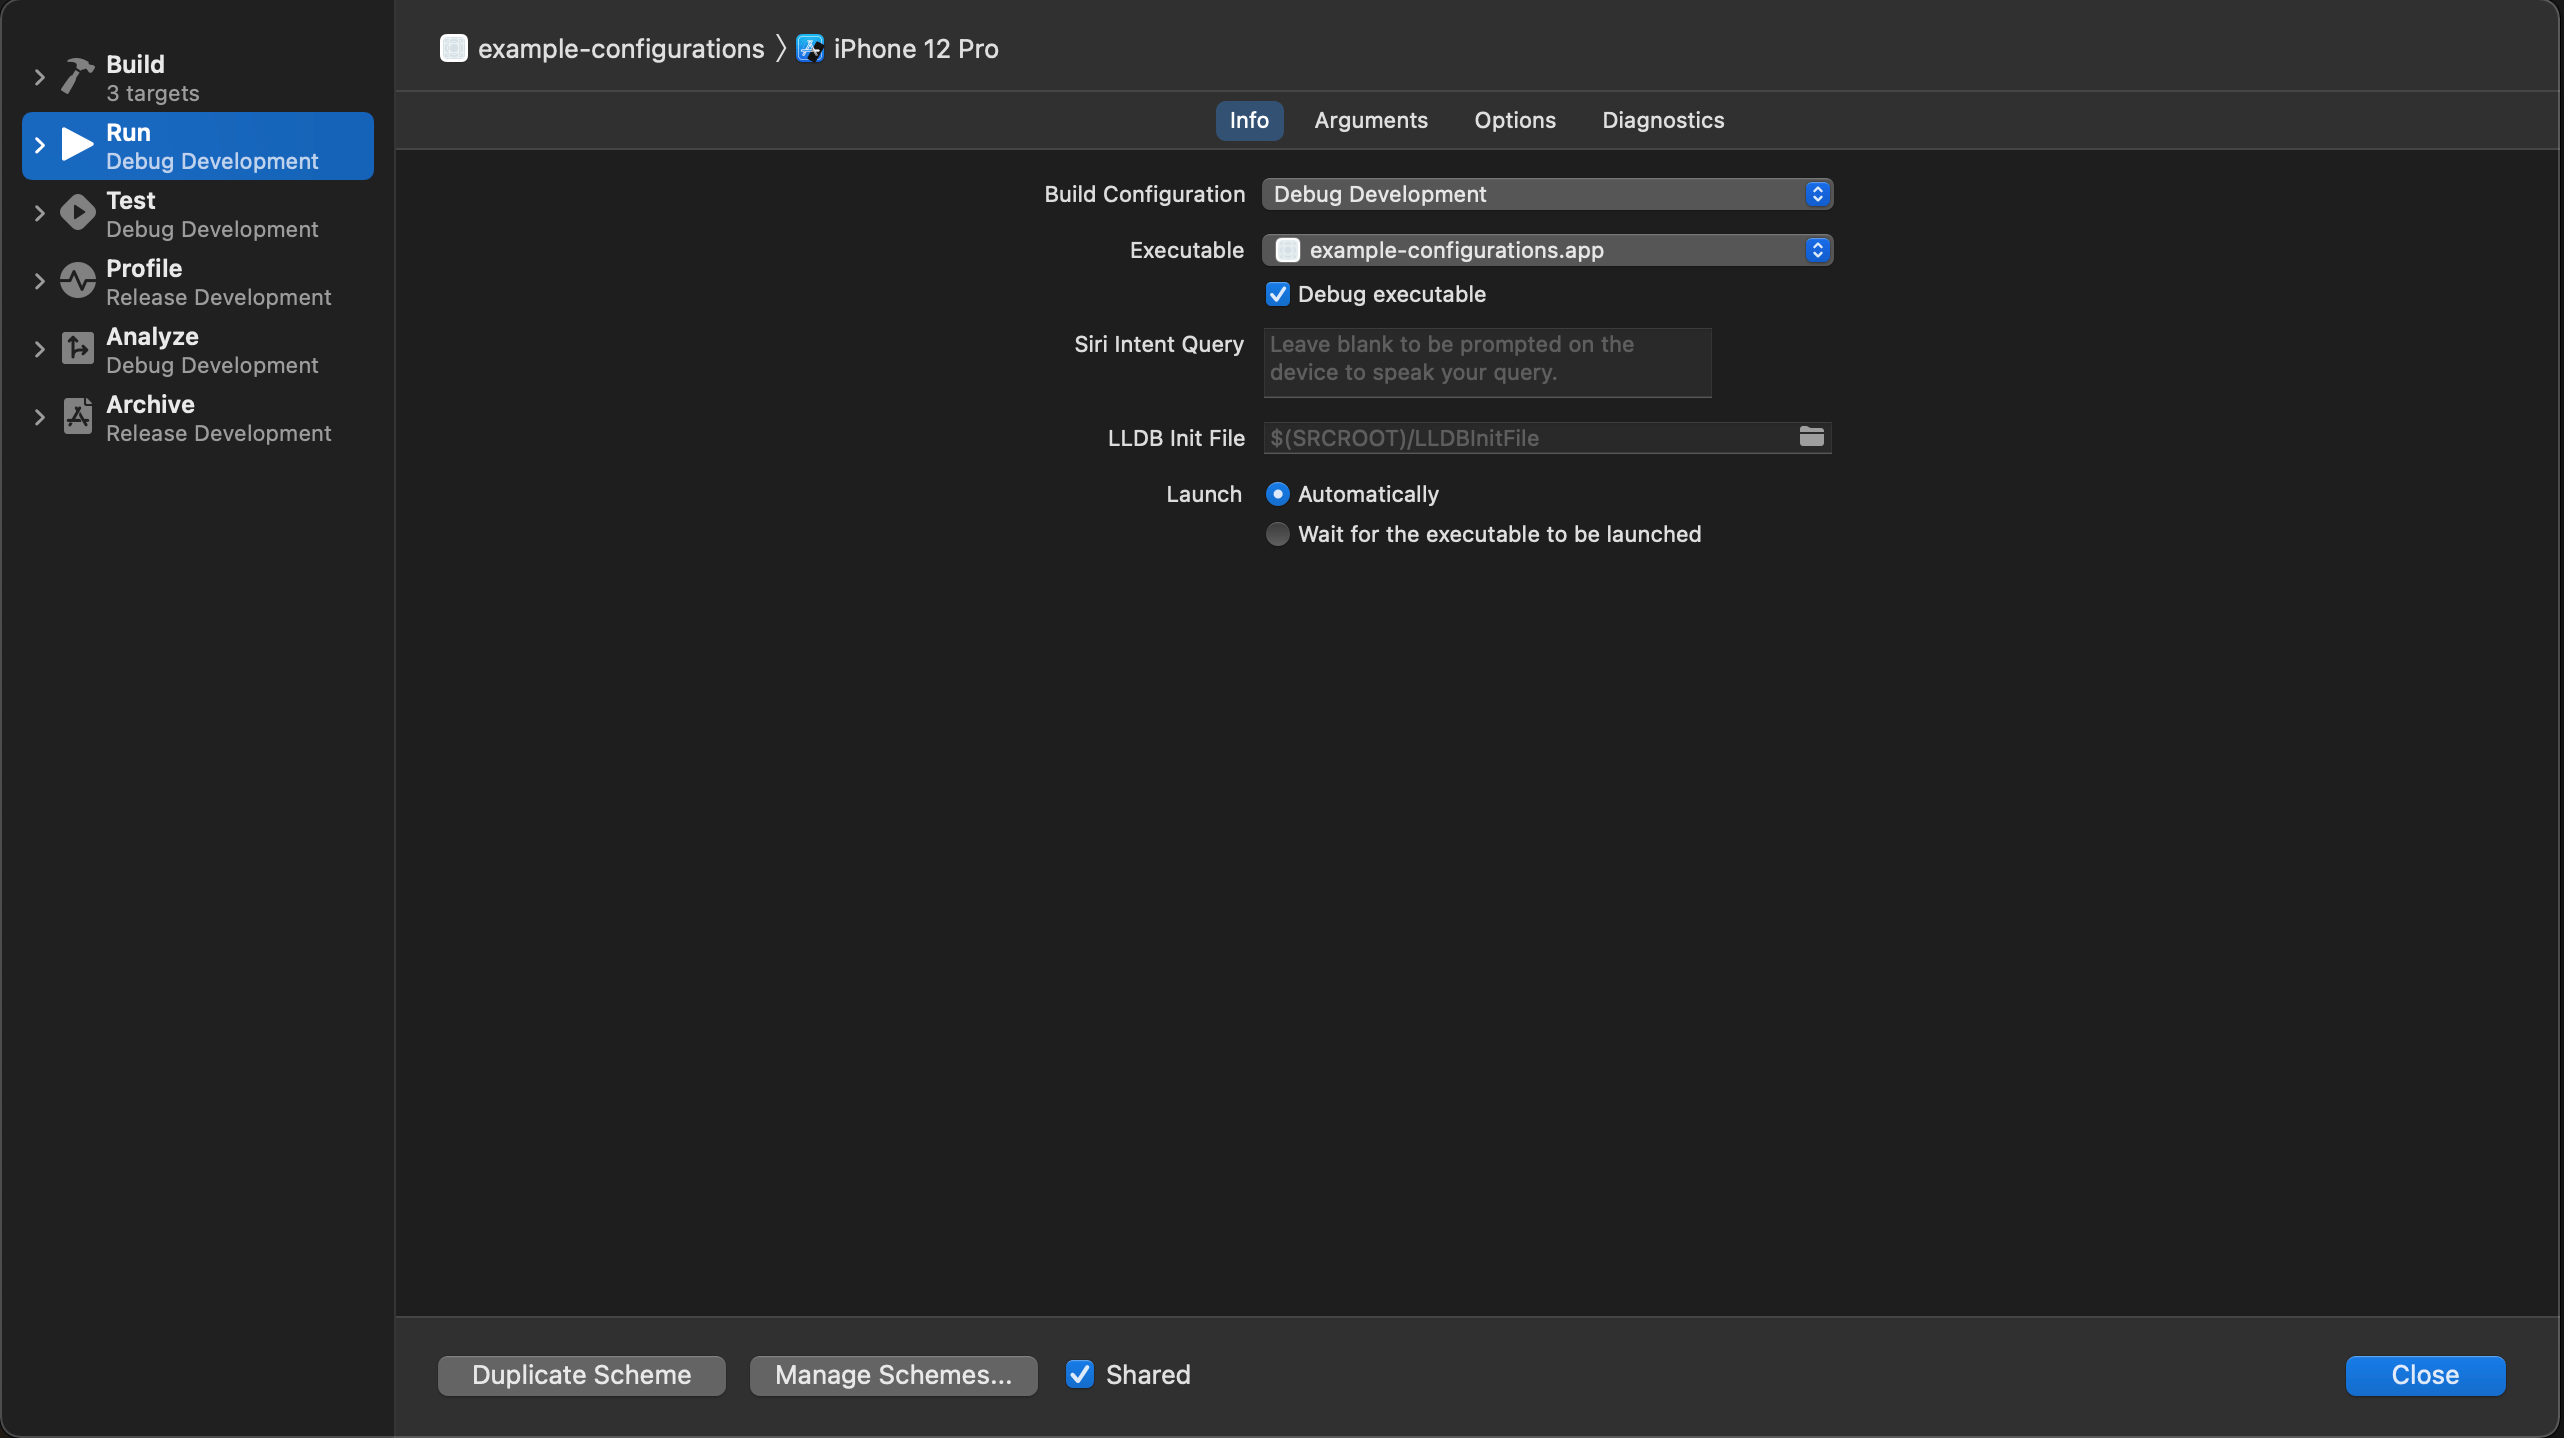
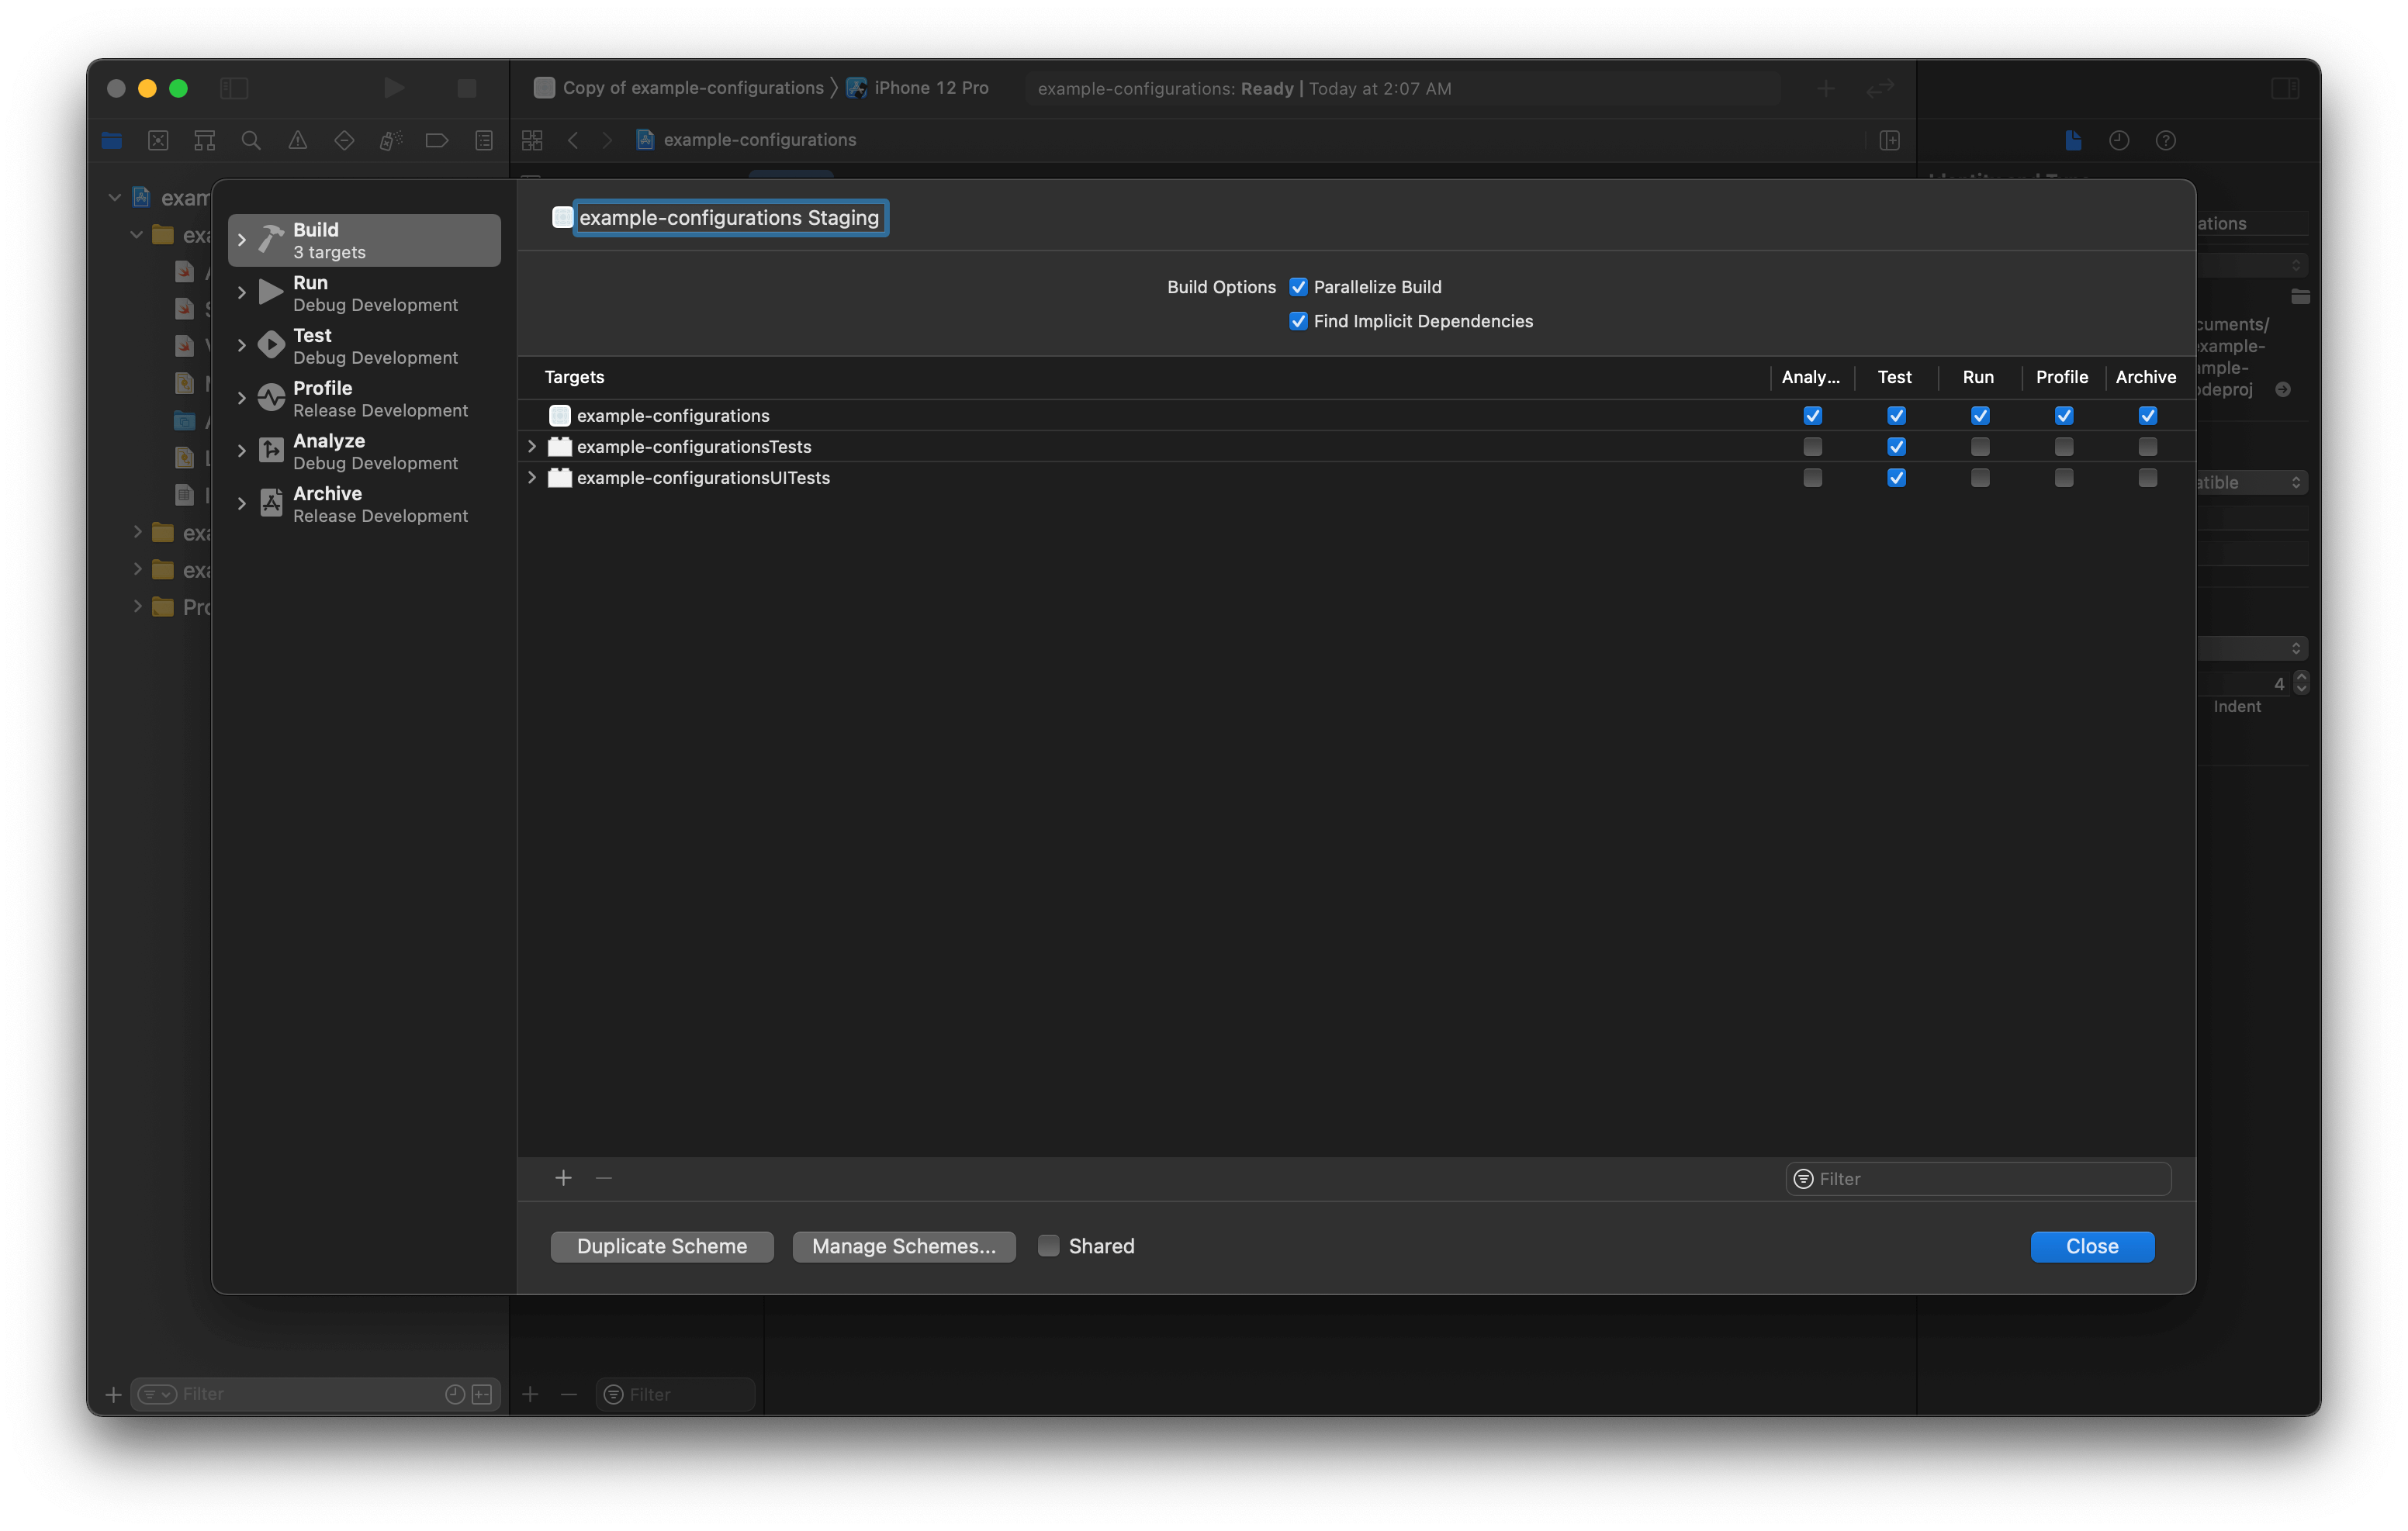
Here is an example of a scheme. We can set which targets to build for each operation, e.g., Test, Run, Archive.
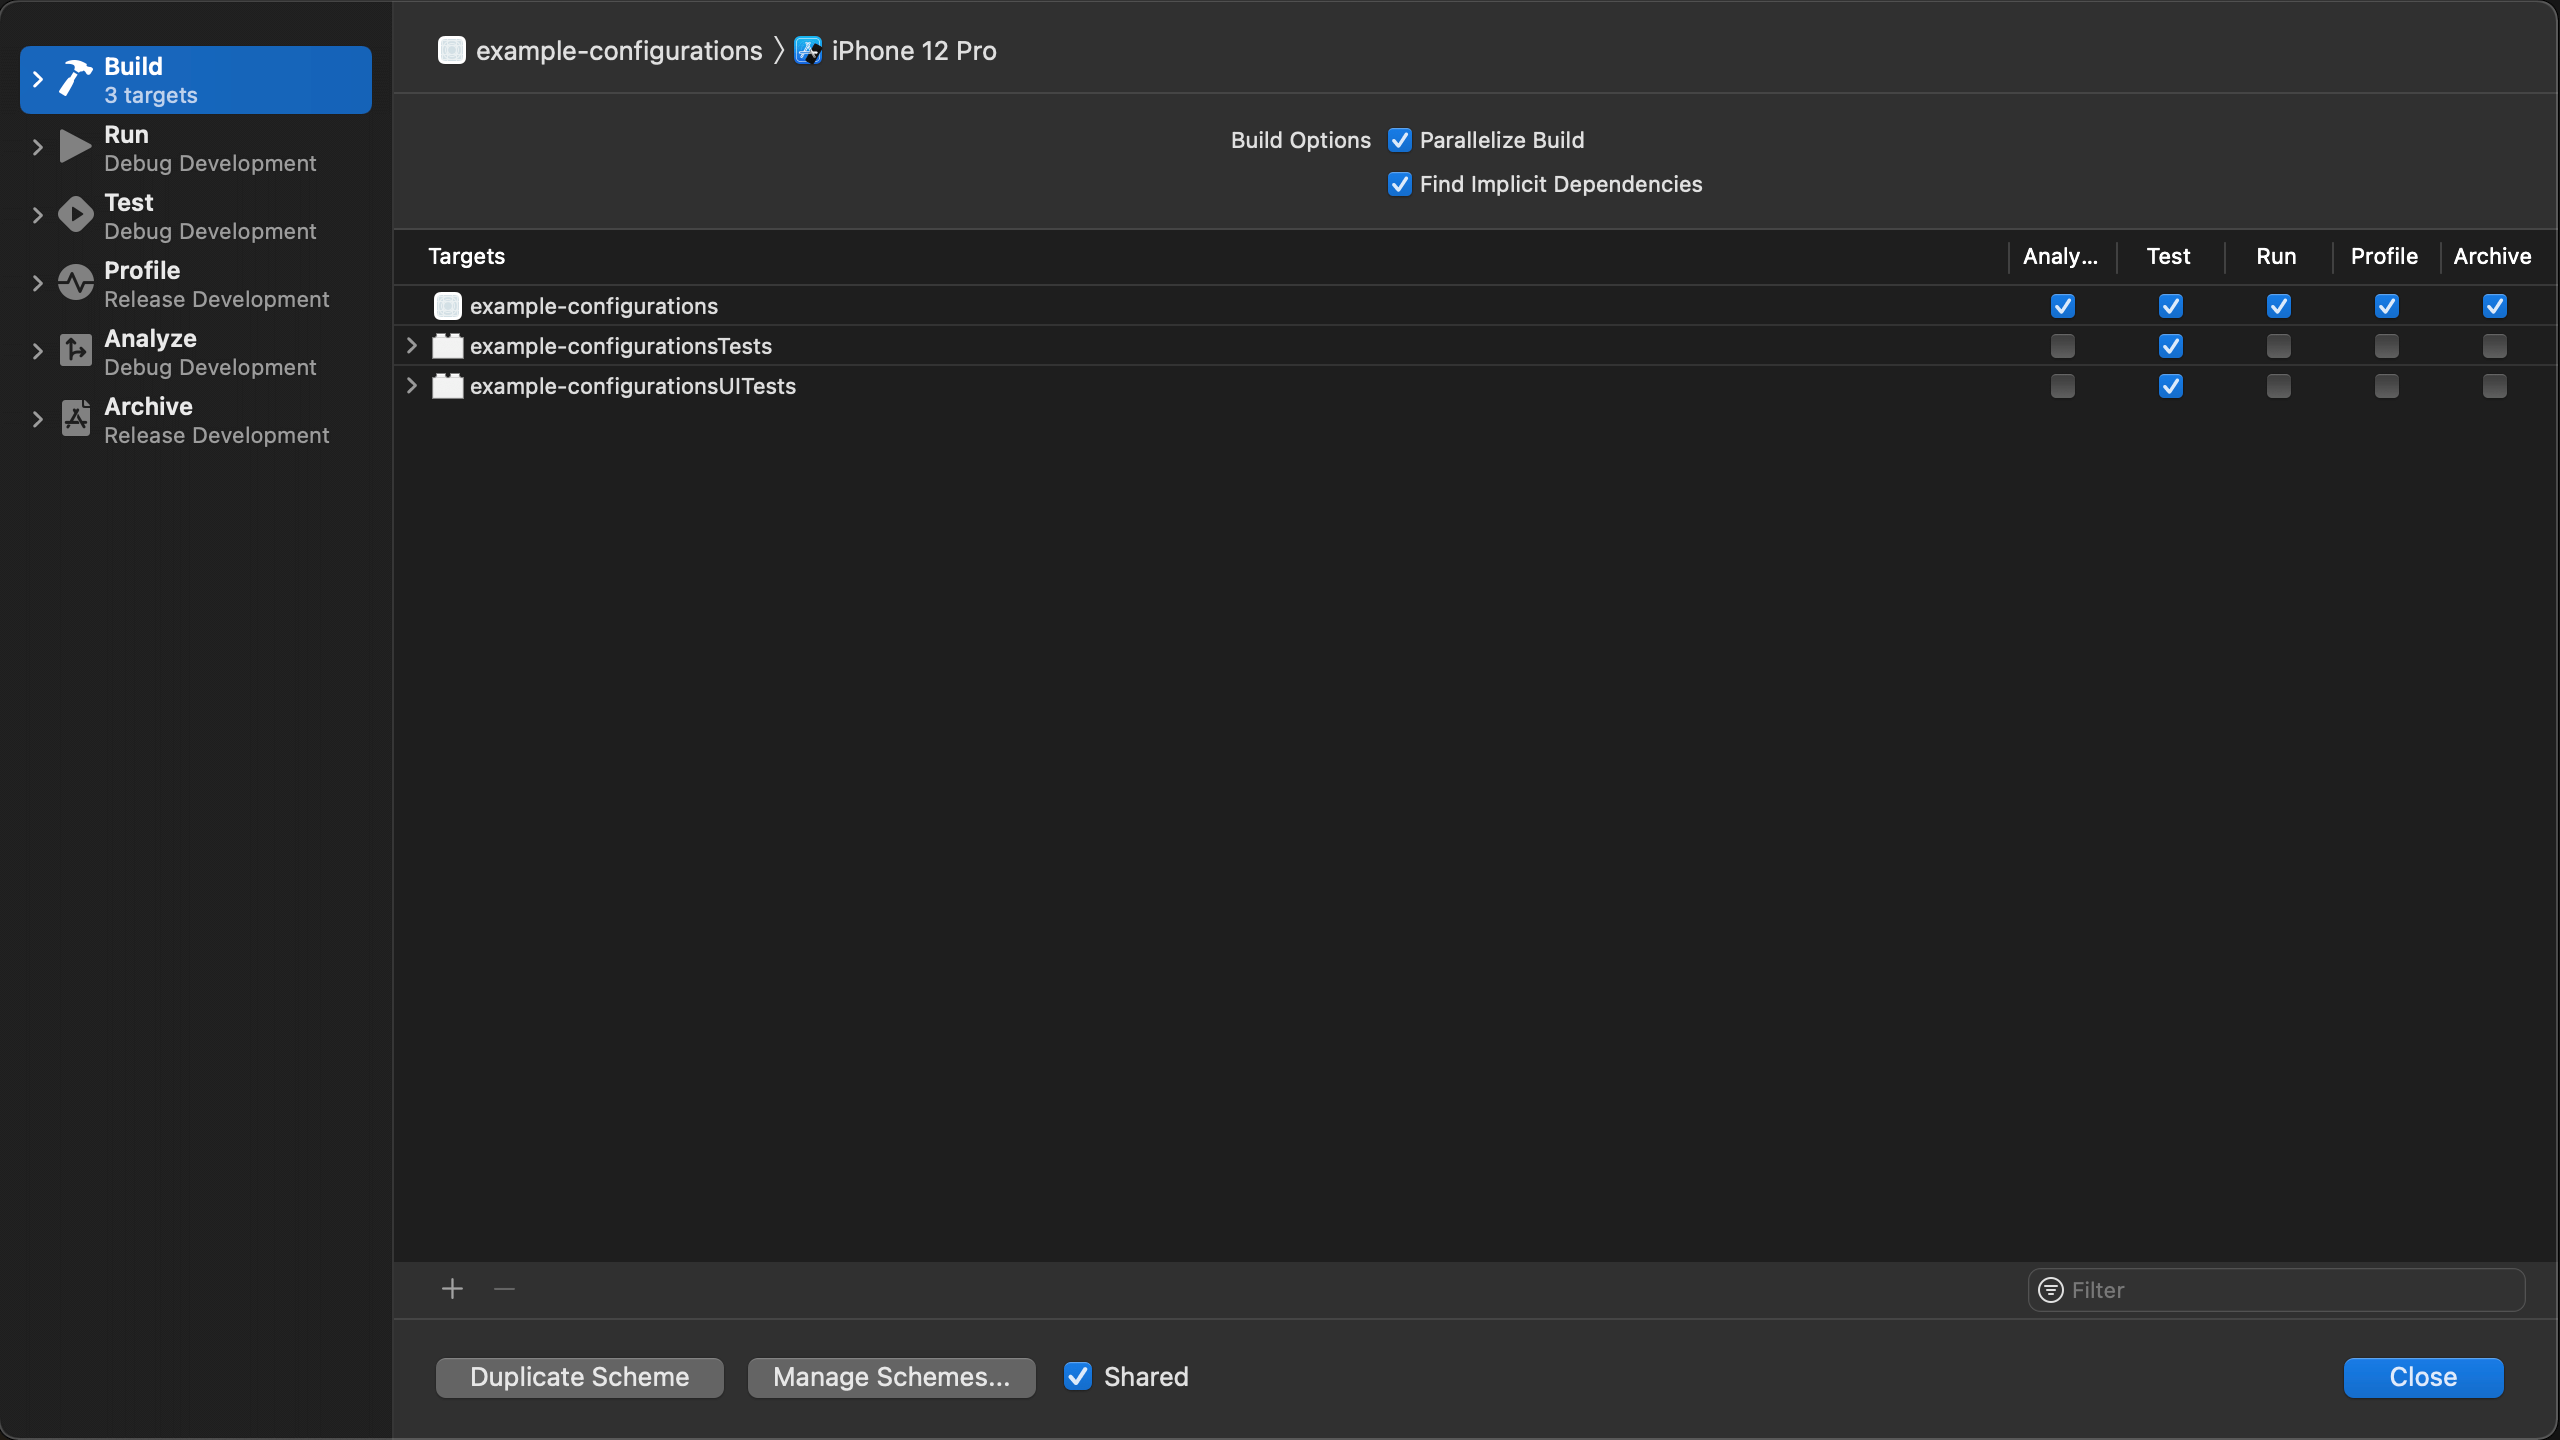
We can also set a build configuration for each operation. In the following example, we set the build configuration to Debug Development for Run action and Release Development for Archive action.
Having only one scheme mean you have to keep coming here and change a build configuration back and forth, so the better way is to create a new scheme for each environment.
Add a new scheme
Every new Xcode project comes with one default scheme. The easiest way to create a new scheme for our environment is to duplicate the default one and change the build configuration.
Open Scheme Manager
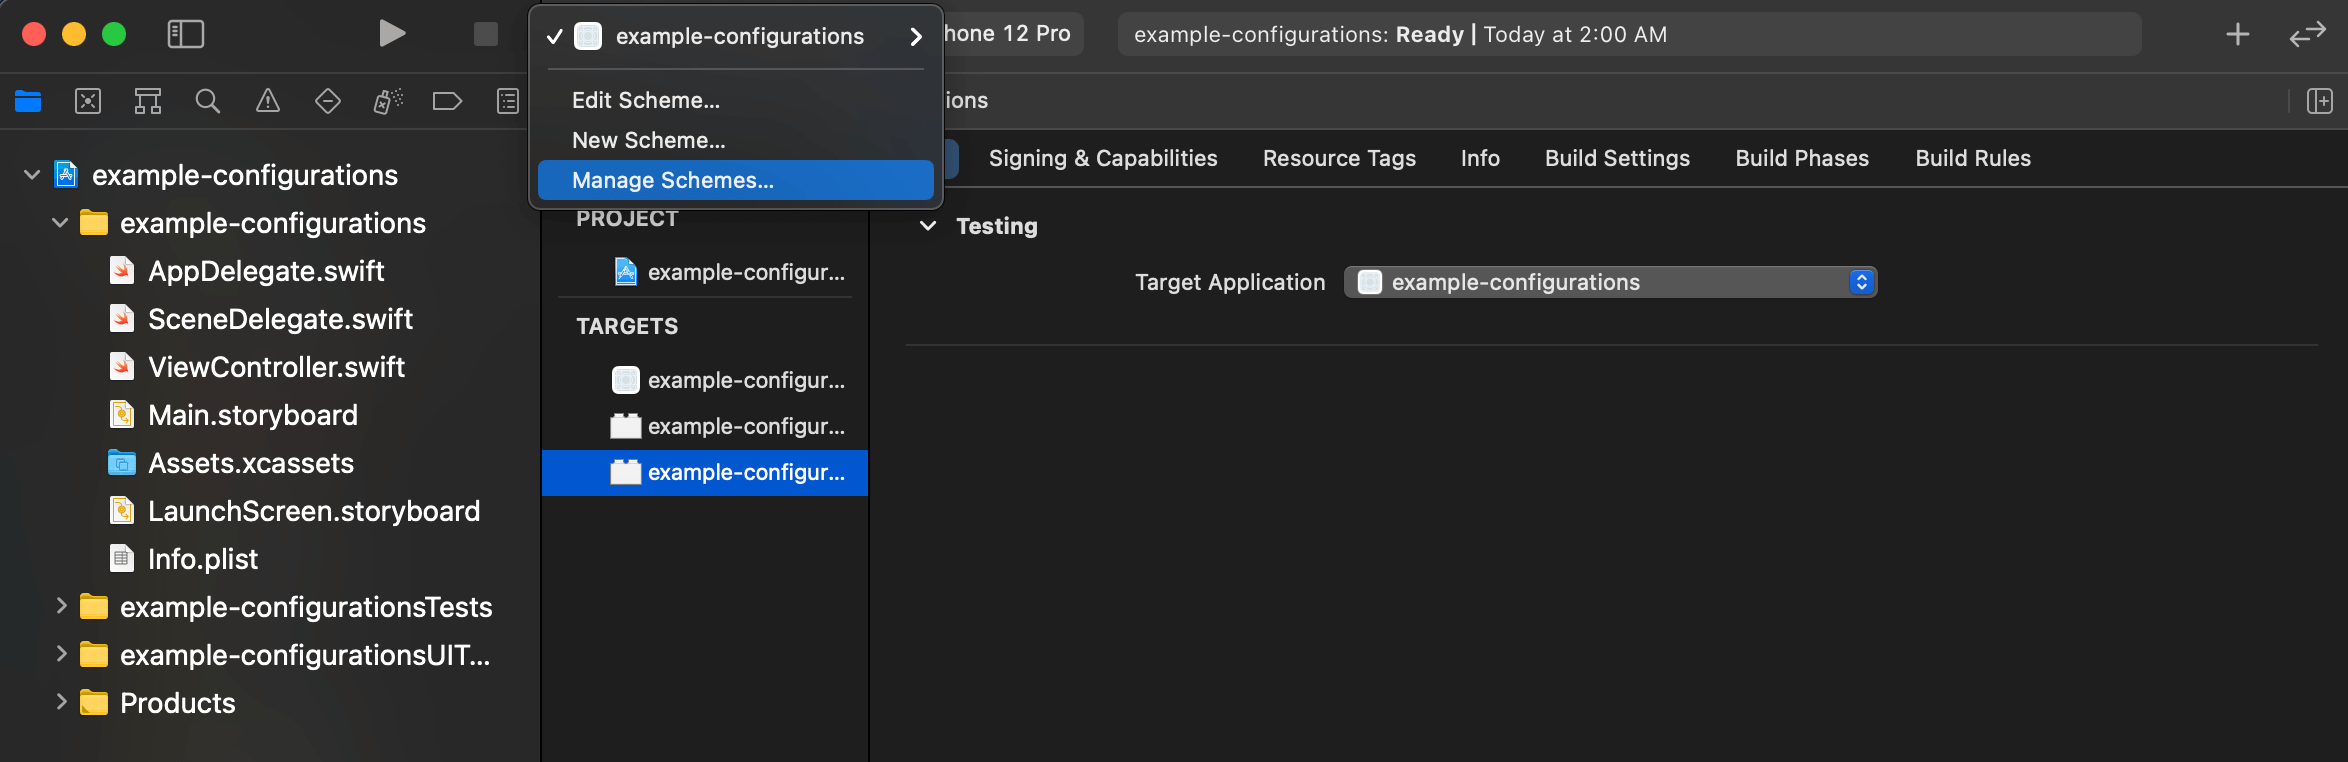
Select active scheme on Xcode toolbar, and select Manage Schemes... from the pop-up menu. You can also access it via Product menu > Scheme > Manage Schemes....
Duplicate the default scheme
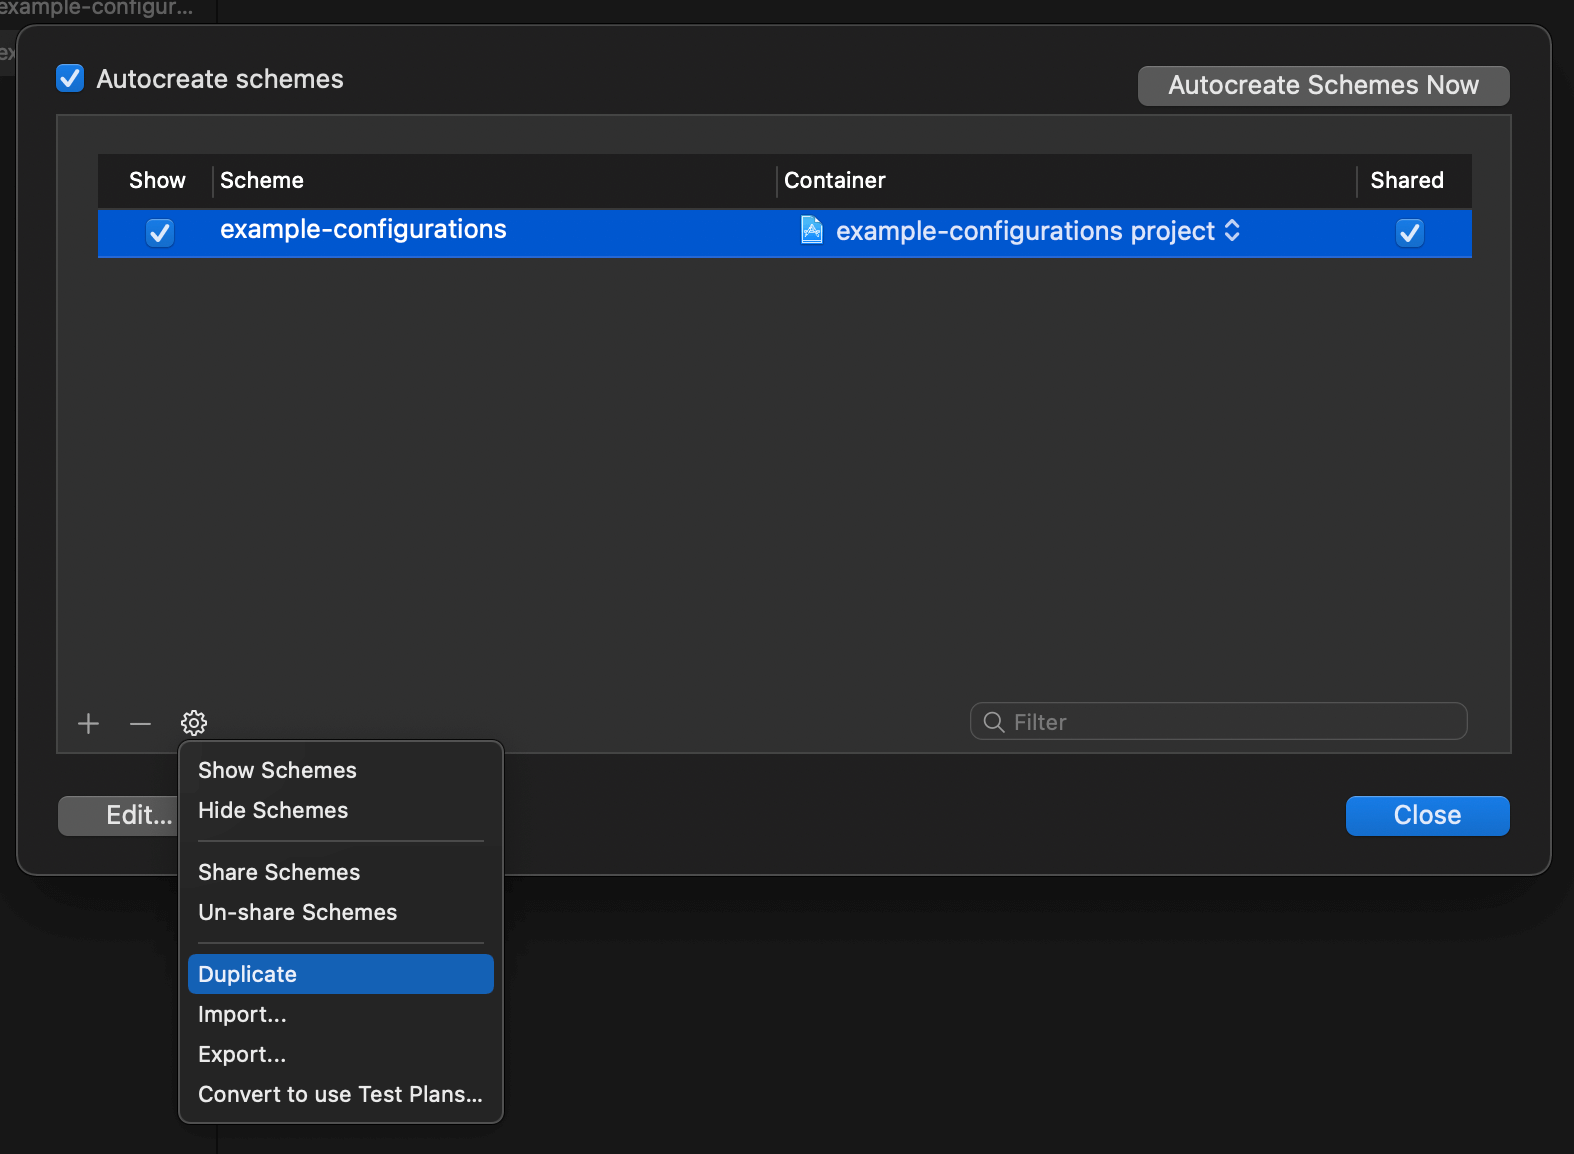
In the Scheme manager dialog, select the scheme you want to copy and click the cog icon at the bottom to open all available actions. Select Duplicate.
Customize build configuration for each environment
Scheme Editing screen will open prompt you to edit it.
In my case, I use the default scheme for Development, so I need to duplicate it for Staging and Production.
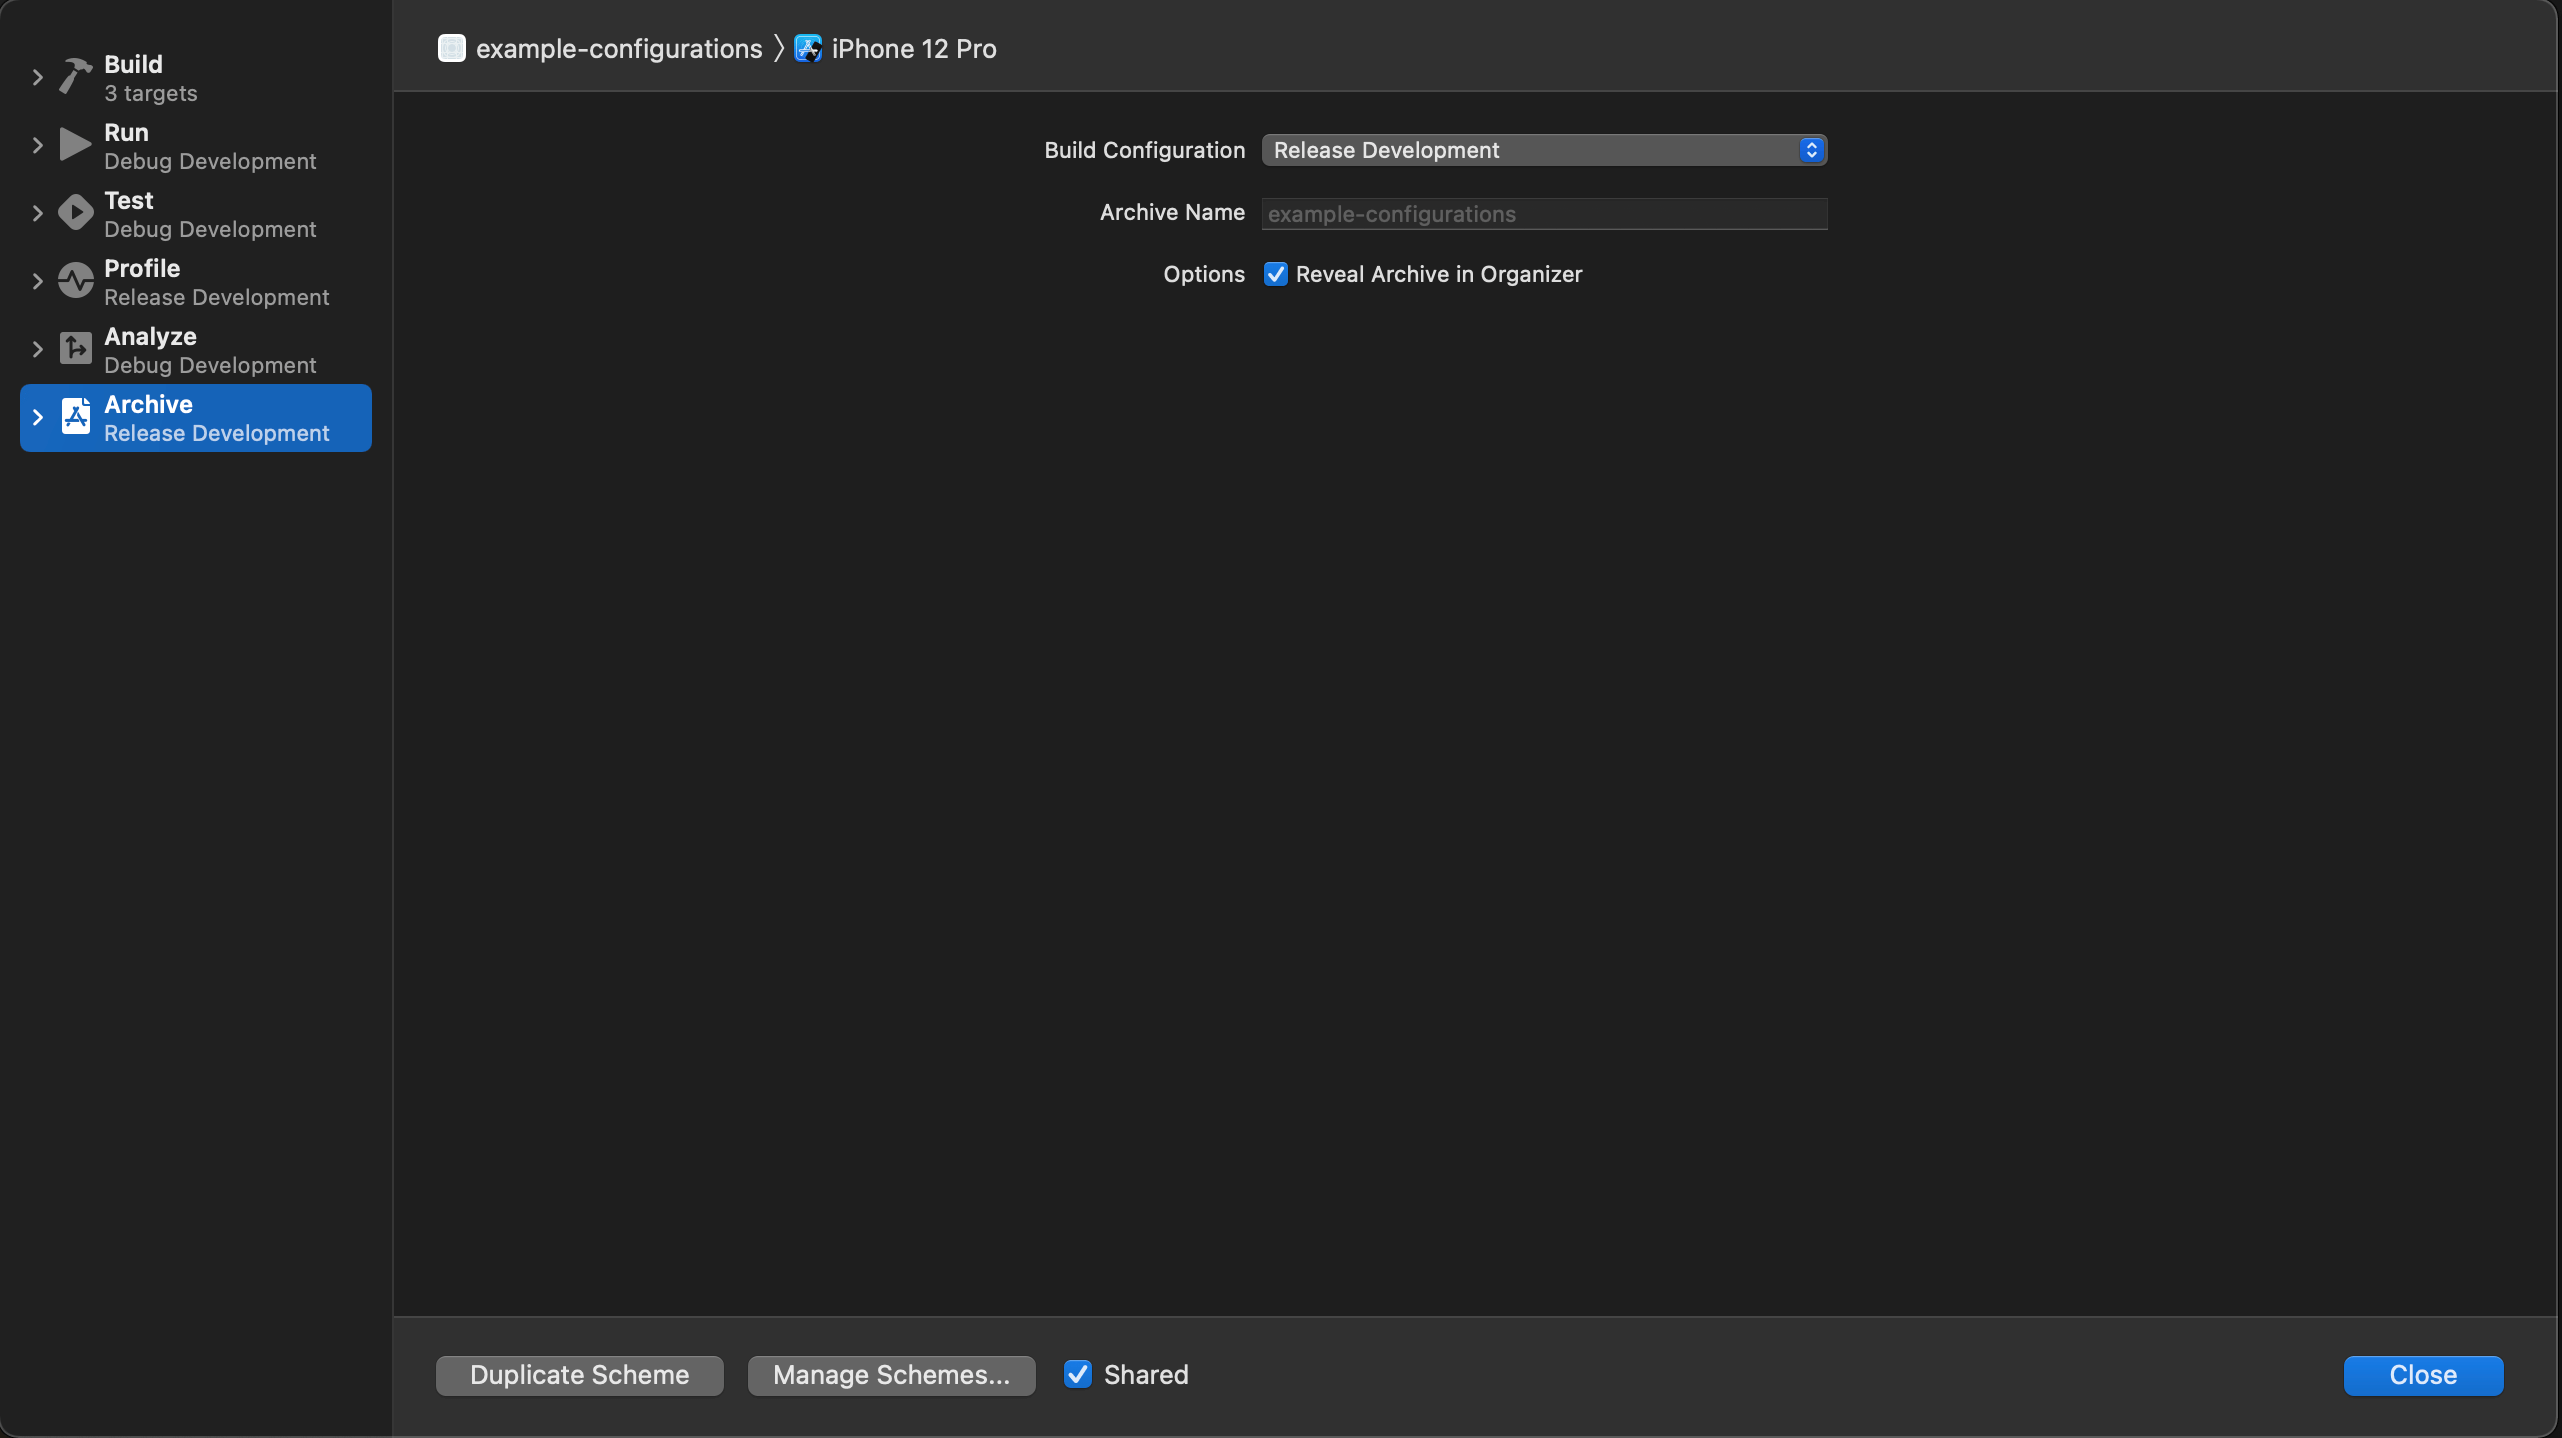
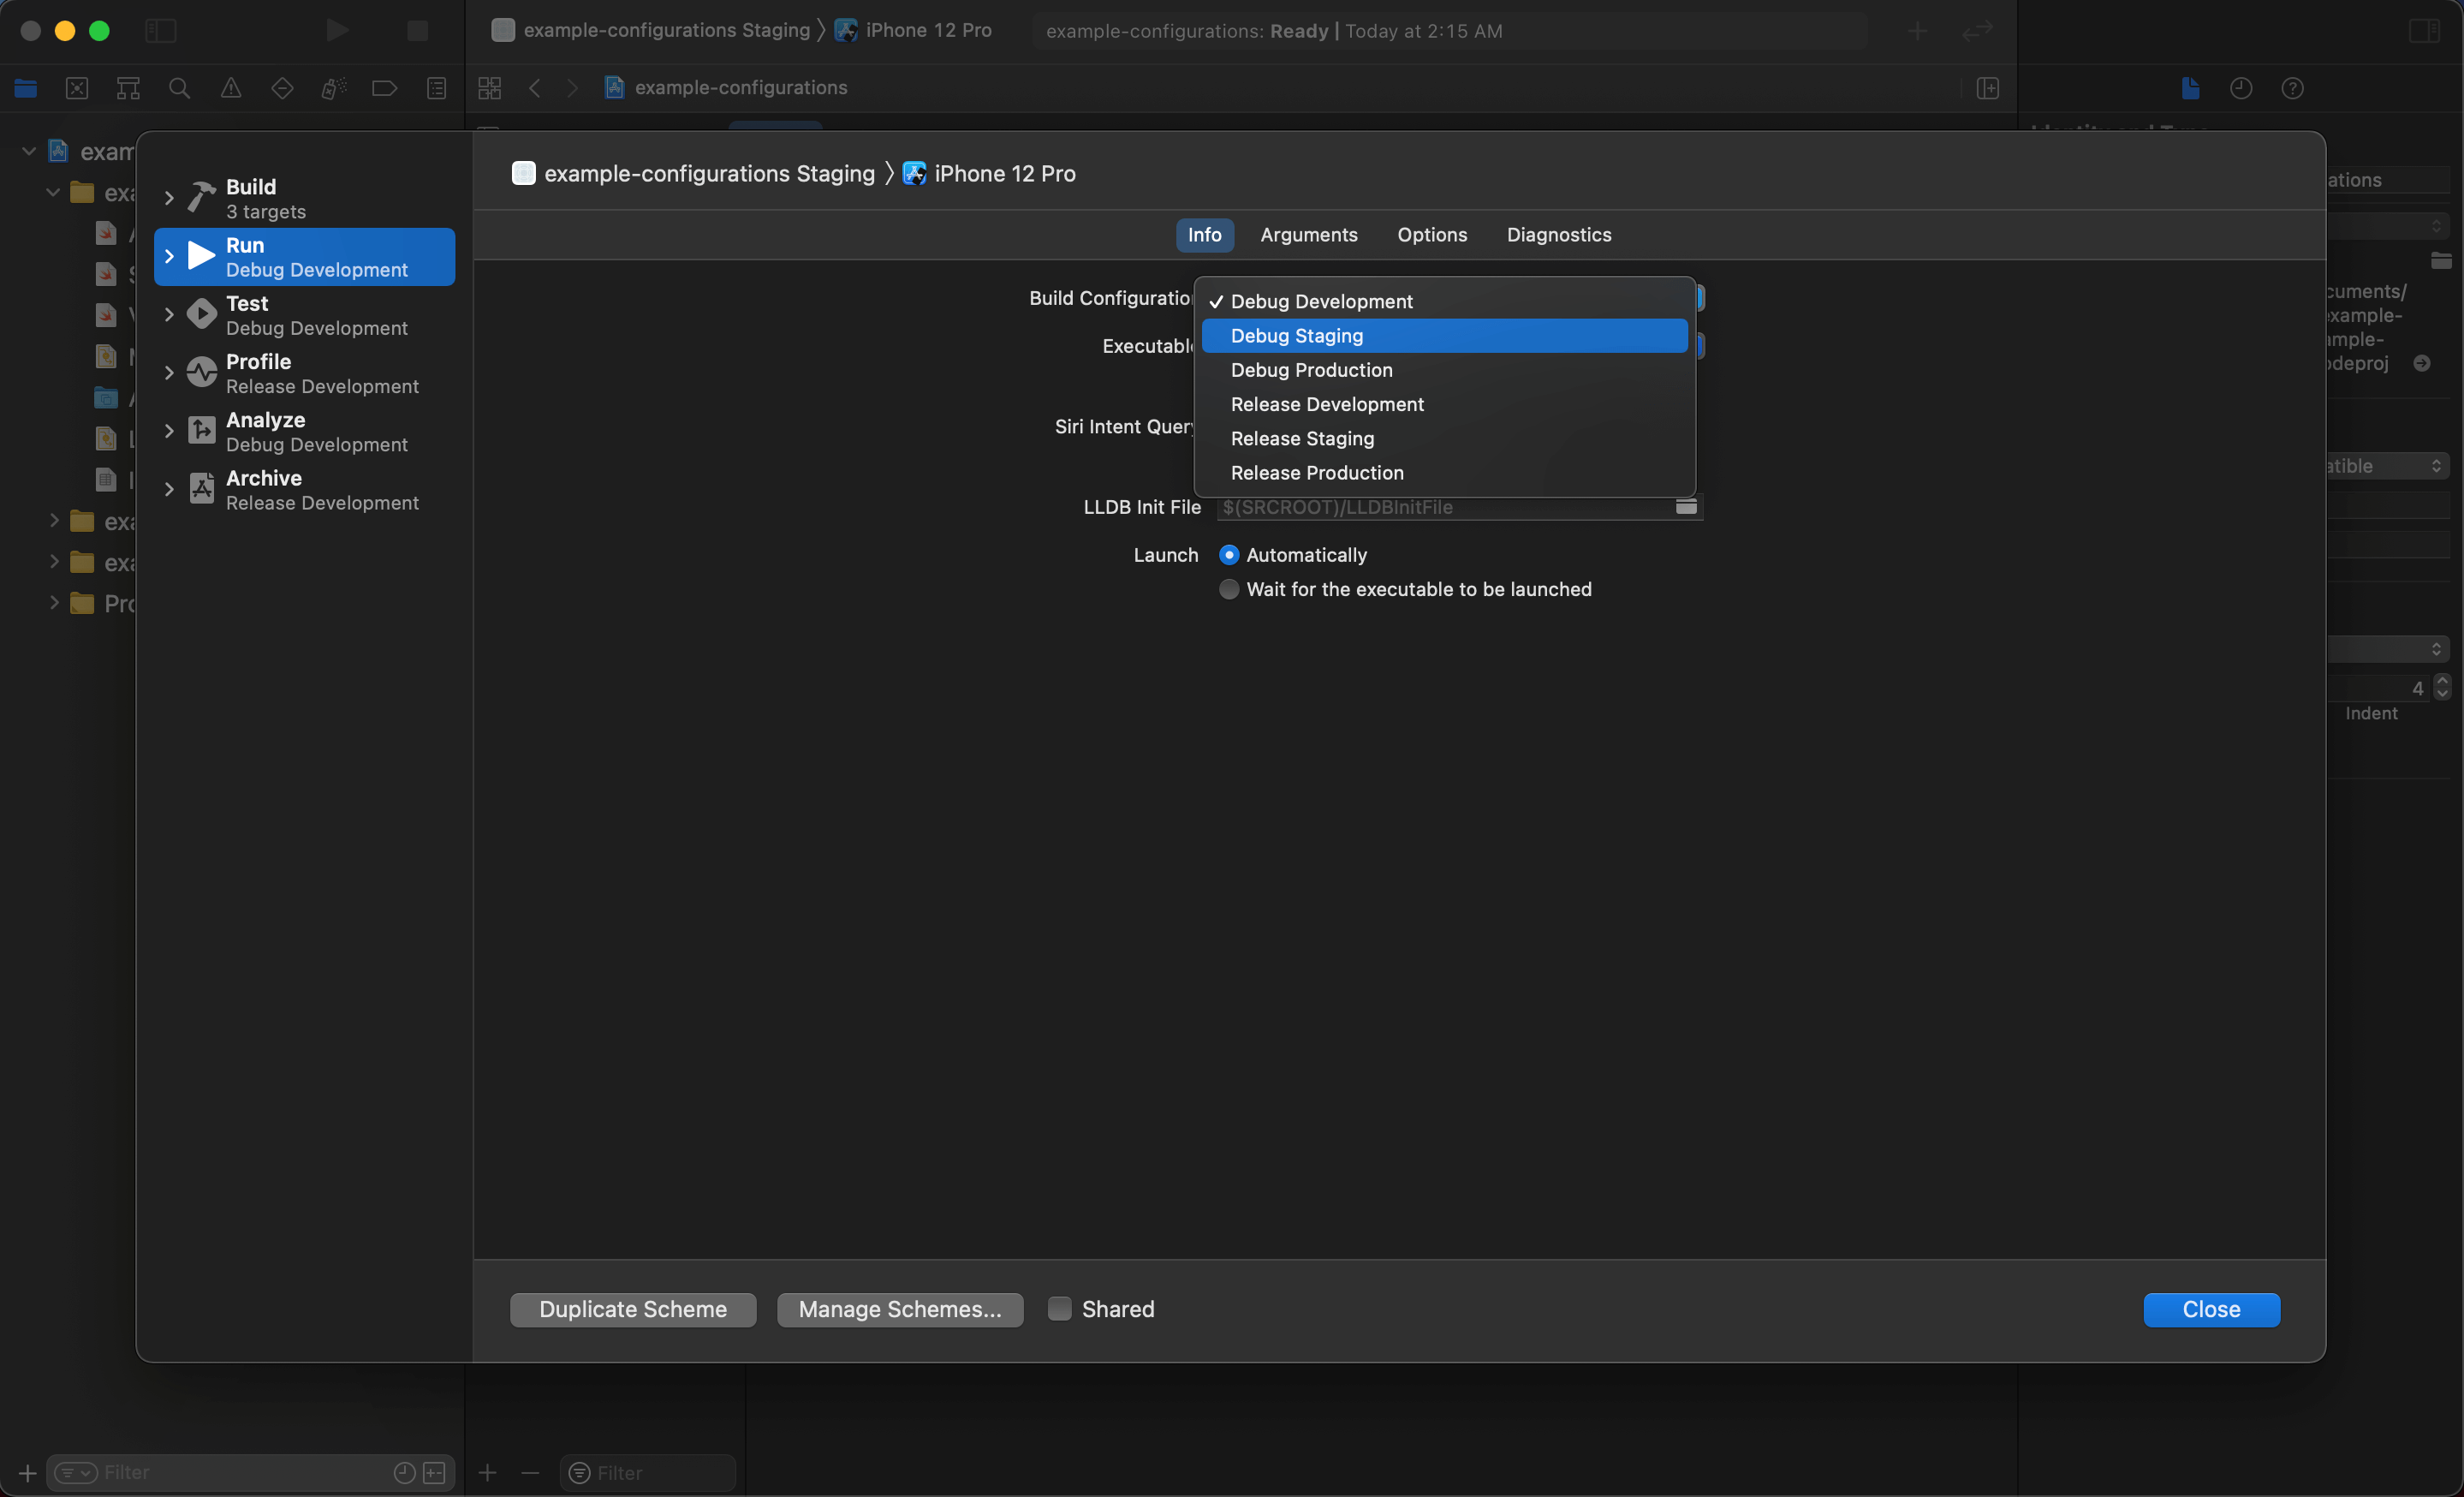
Go through all the five operations (Run, Test, Profile, Analyze, and Archive) and change Build Configuration to the appropriate environment.
Change Debug Development to Debug Staging/Production and Release Development to Release Staging/Production.
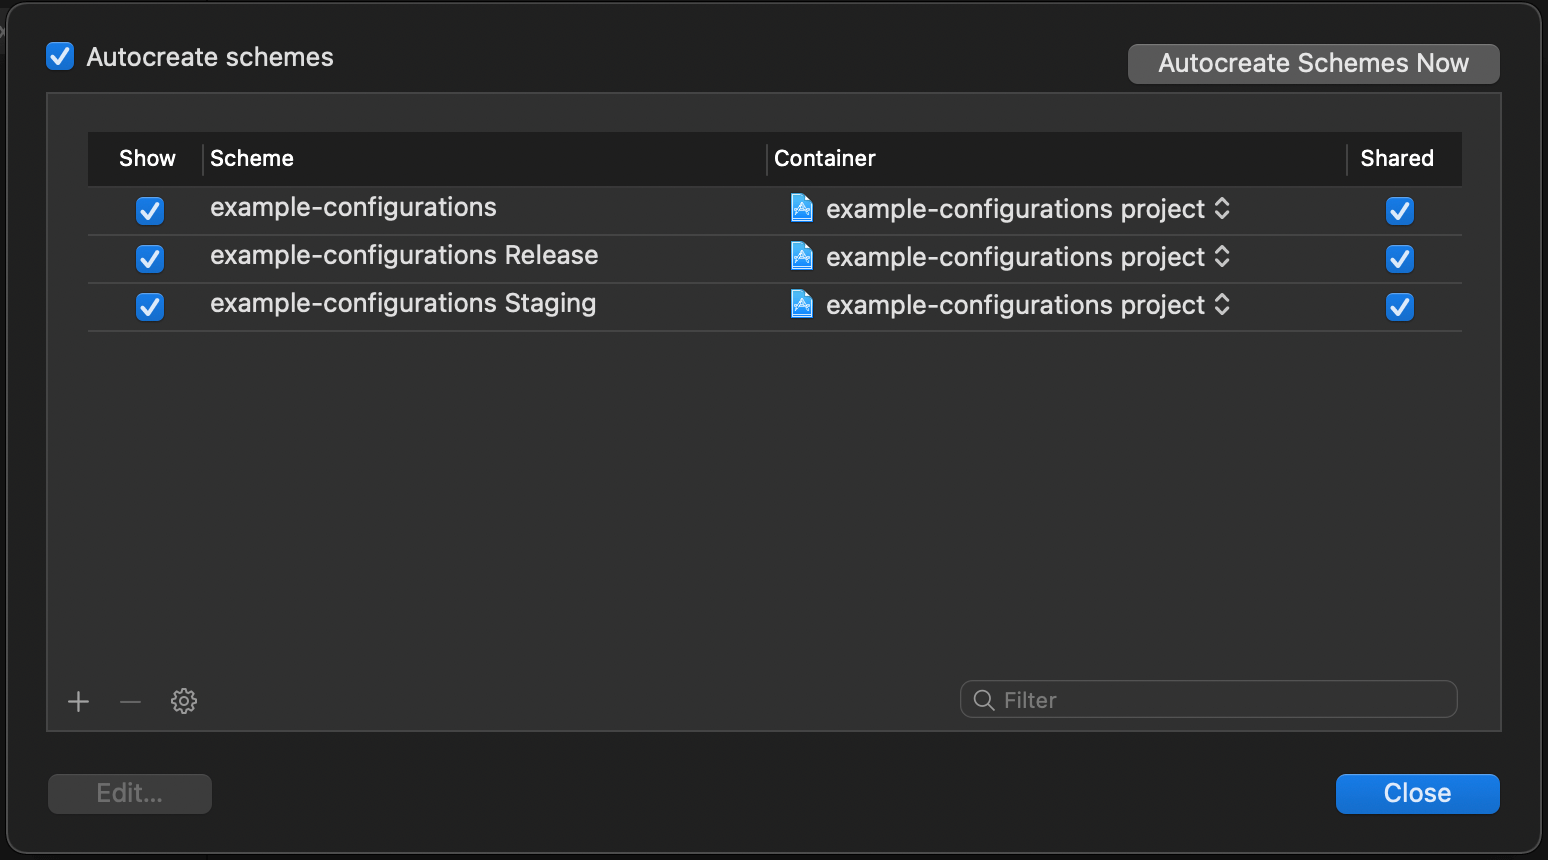
Share newly created scheme
Finally, you would likely want to mark newly created schemes as Shared, so your team members can access them. To do that, go to Scheme Manager and check the Shared checkbox.
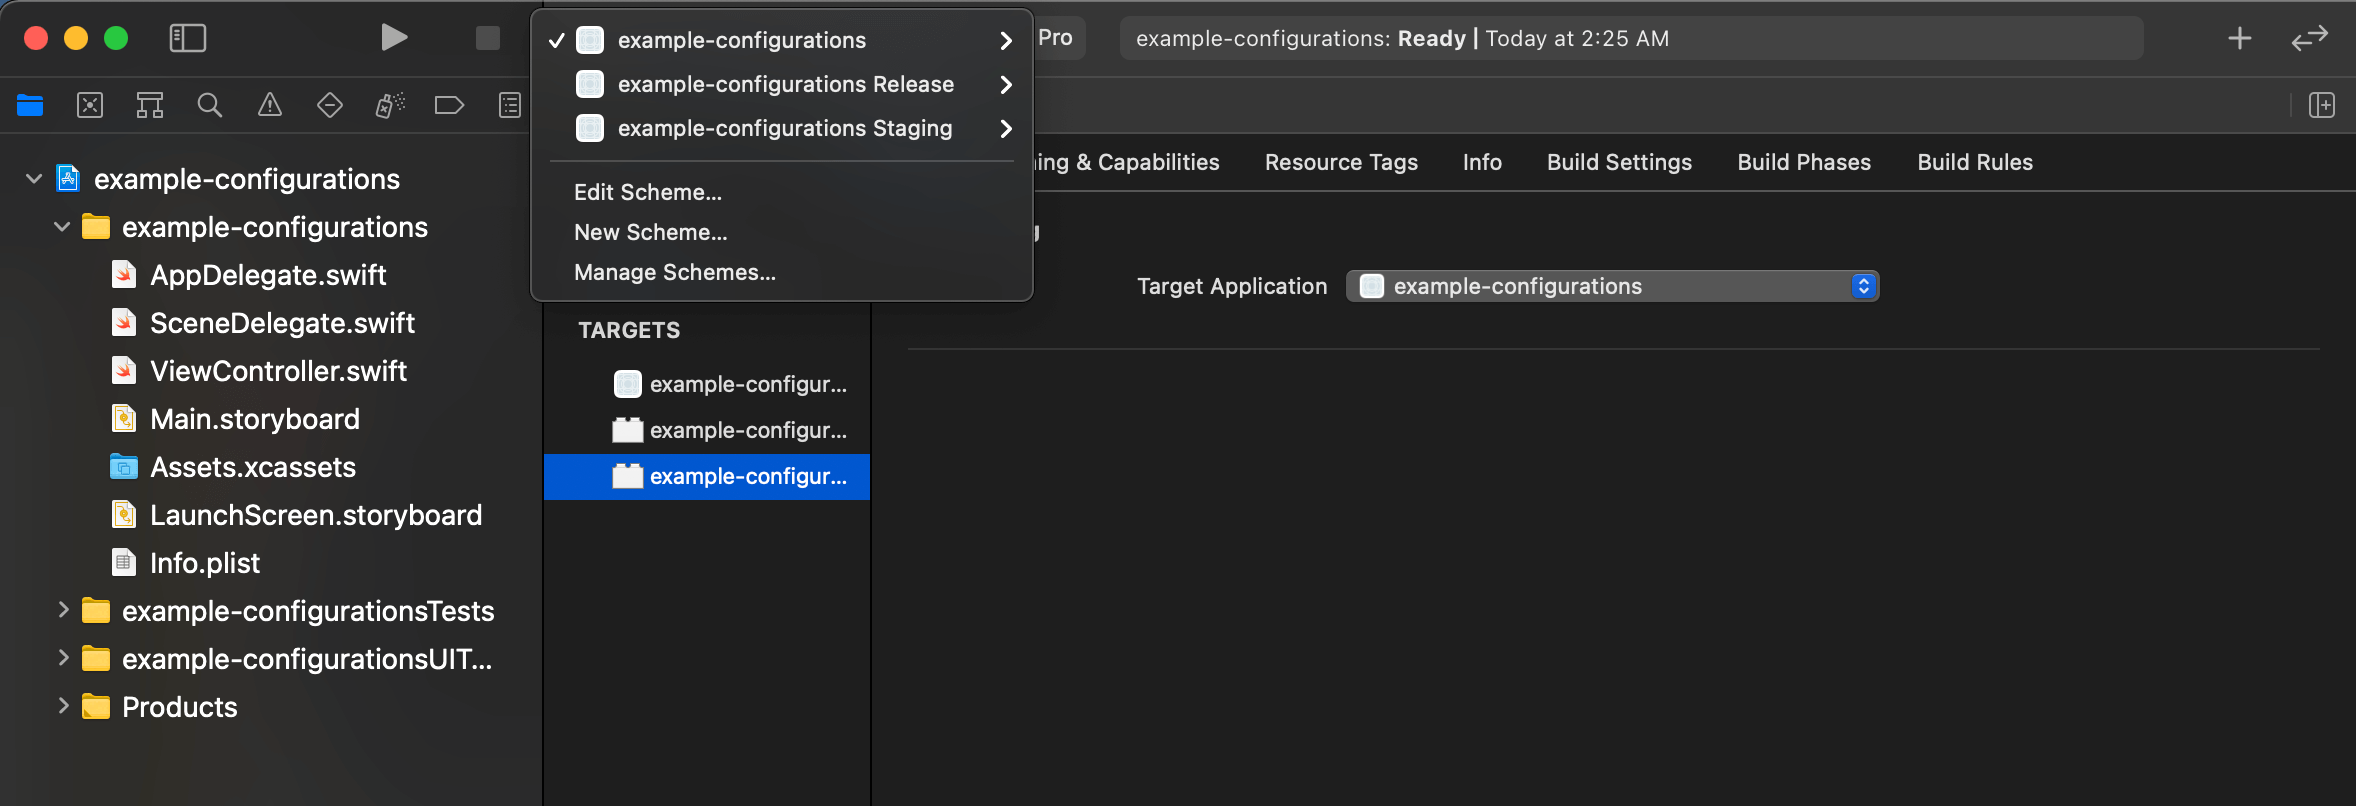
Change scheme
After all the hard work, select the active scheme on the Xcode toolbar again, and you will see all the schemes we just created. You can easily change the active scheme by click on it.
Try running your app on a different scheme right now. You won't see any noticeable difference because what we did so far is duplicating the default configuration and scheme over. Next section, we will start editing them.
Customization
At this point, we have a separate Xcode configuration for each environment. There are many things you can do with it. In this article, I will show you some editing that I usually do.
Change build configuration
We can have different build configurations for each environment. There are many ways to do this, e.g., via the Xcode interface or an .xcconfig file. For simplicity, I will show you how to do this via the Xcode interface.
I will change the app name and bundle identifier for each environment.
Change app's name
Select your project name in a Project navigator (View > Navigators > Project (⌘ + 1)).
Then, in the Editor Area, select your main app target and go to the Build Settings tab. Scroll down until you find the Product Name field or search it from the search box.
Hover your mouse over the field name, and you will see an arrow icon showing up. Click that arrow to expand the field. You will see an array of values representing each build configuration. All of them should have the same name since we duplicate them over.
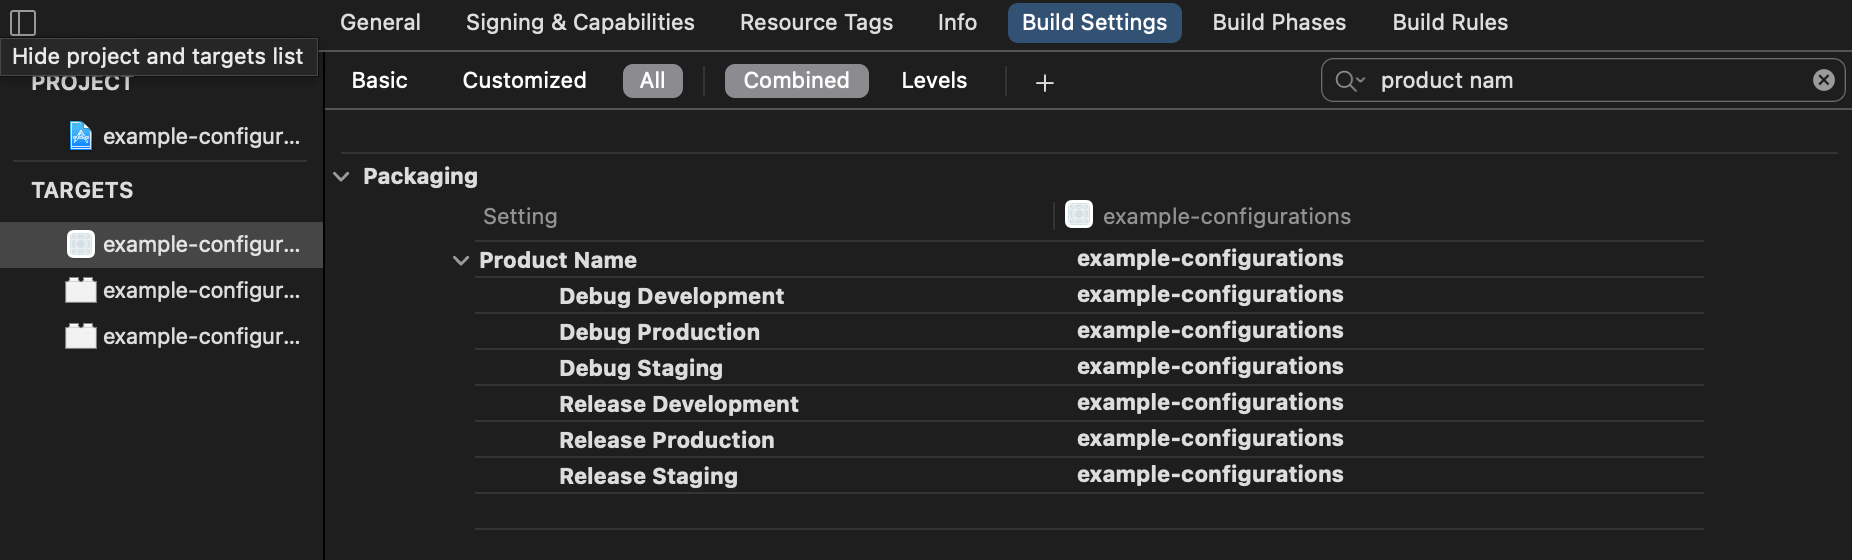
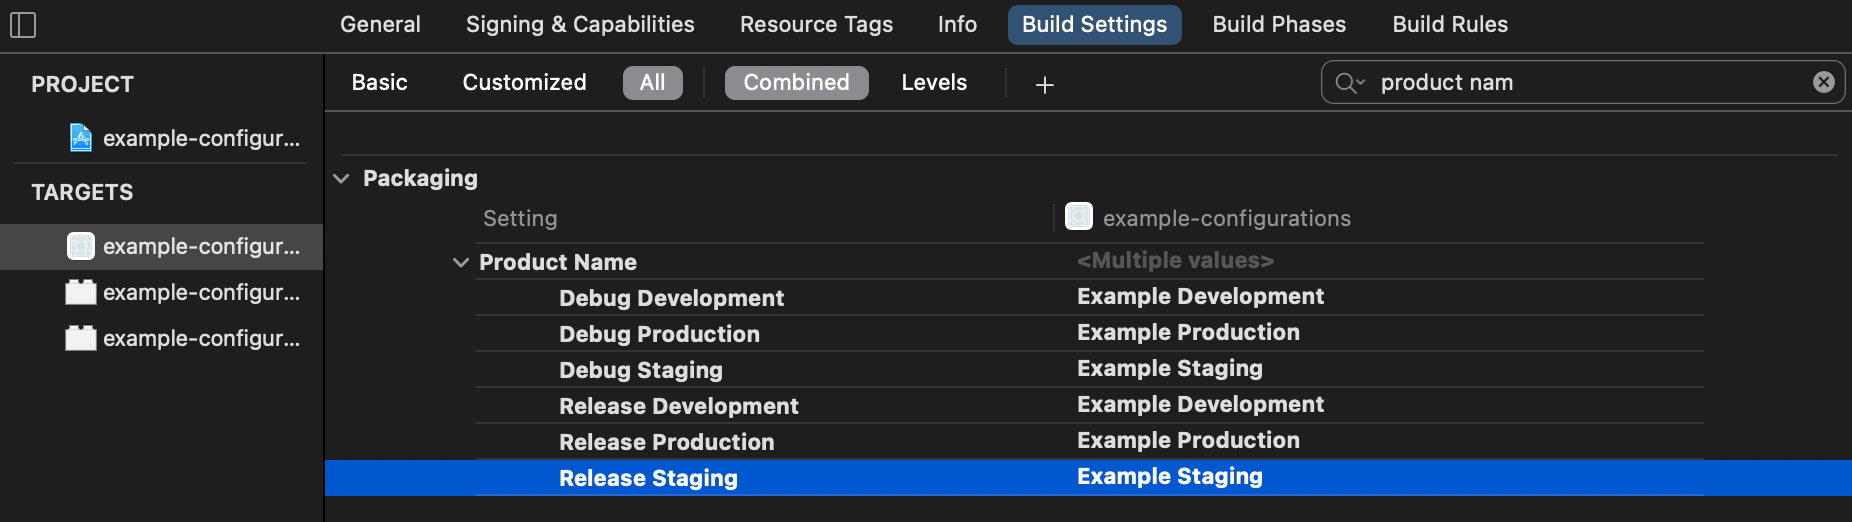
Double-click on each value to edit it. I rename them as follows.
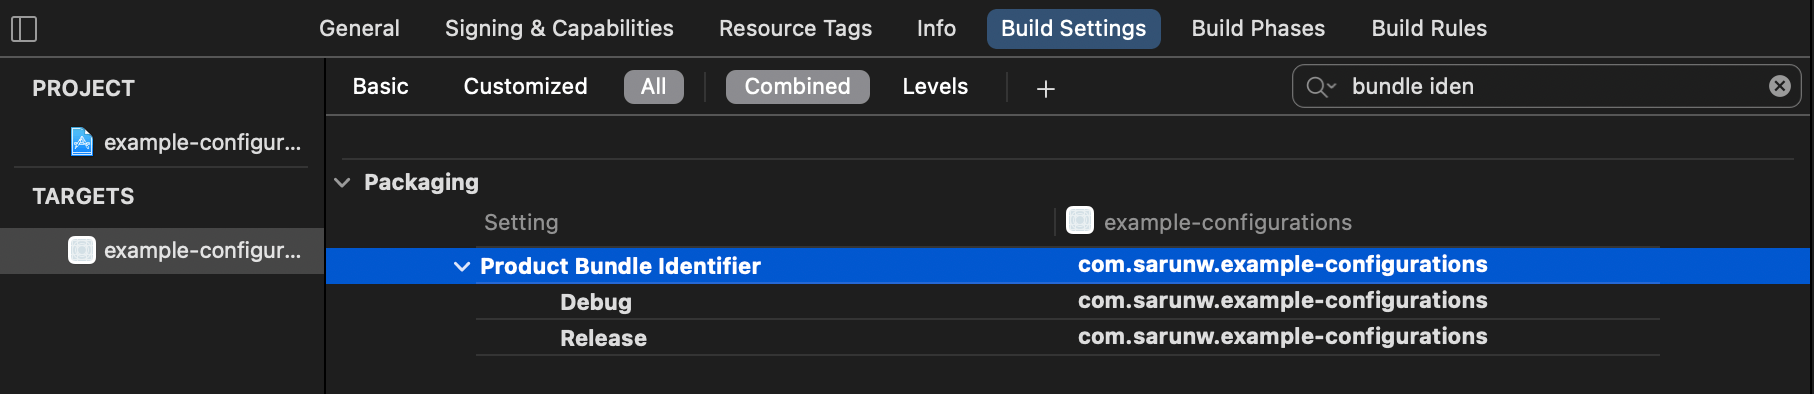
Change app's bundle identifier
To change the app's bundle identifier, we repeat the same process as changing the app name, but this time we do it over Product Bundle Identifier.
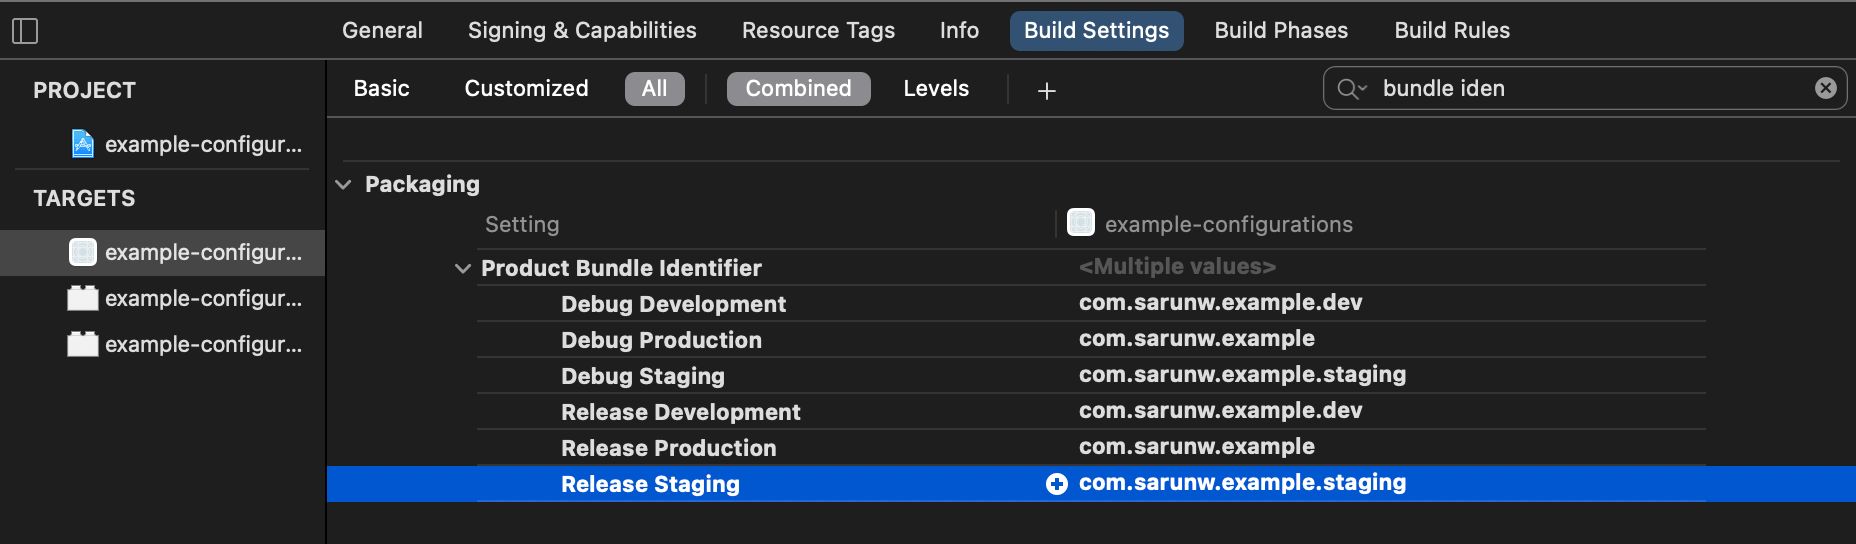
Having a unique id for each environment will treat them as a different app. This allows us to test them side by side and to release them separately.
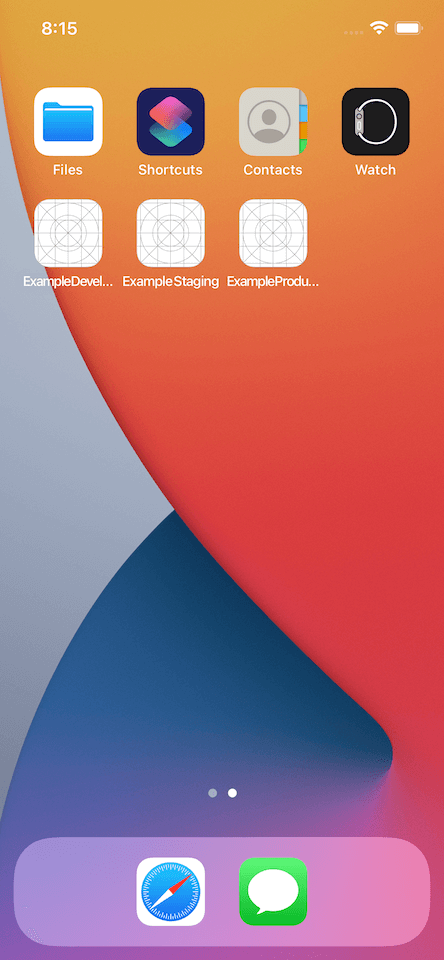
Demo
I run my app three times with a different scheme each time, and this is what I got. Three separate apps (different bundle id) with a different name.
Storing and accessing environment variables
Most of the time, you will want to have a different variable for each environment, e.g., API key, base URL for your endpoint.
There might be many ways to tackle this problem, but I usually do two things to make this happen.
Expose the current configuration to make it readable from the code.
Use that configuration to fetch the correct variables.
Assign current configuration to Info.plist
Xcode exposes the build configuration (Debug or Release) that the target uses to generate the product via the $(CONFIGURATION) variable. We will pass this information to our code via Info.plist.
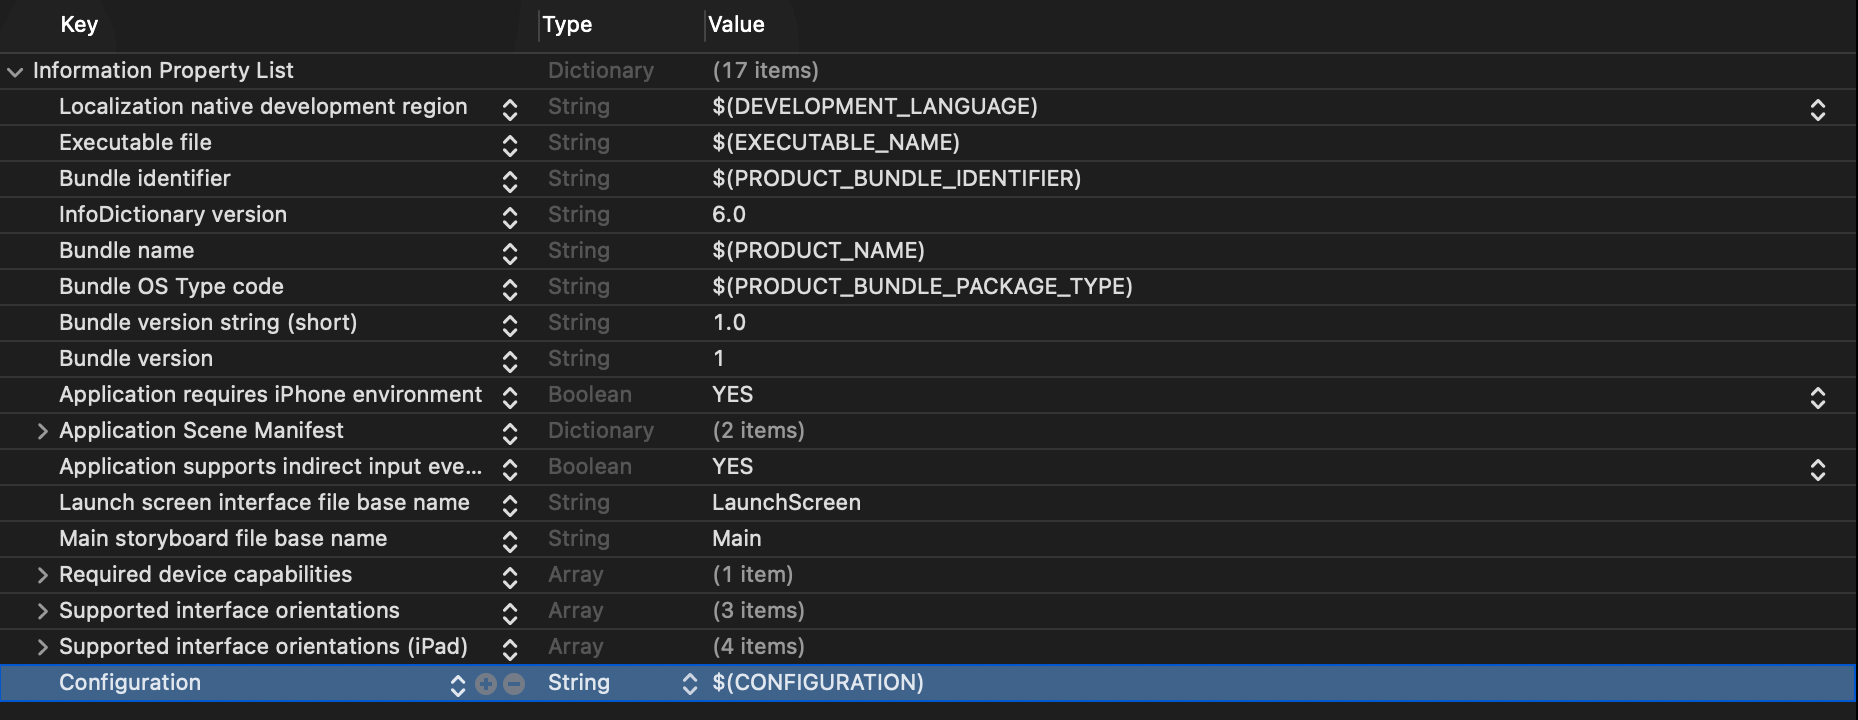
To do that, select Info.plist. You will see all of your project key-value pairs. Right-click and choose Add Row or hover on any row and click + button.
Name your key anything you want (you need to reference this key in your code, so make sure it reasonable). I named it Configuration. Set the value to $(CONFIGURATION).
Access current configuration from the code
This is just a matter of reading Info.plist content. Here is an example.
enum Environment: String { // 1
    case debugDevelopment = "Debug Development"
    case releaseDevelopment = "Release Development"

    case debugStaging = "Debug Staging"
    case releaseStaging = "Release Staging"

    case debugProduction = "Debug Production"
    case releaseProduction = "Release Production"
}

class BuildConfiguration { // 2
    static let shared = BuildConfiguration()

    var environment: Environment

    init() {
        let currentConfiguration = Bundle.main.object(forInfoDictionaryKey: "Configuration") as! String

        environment = Environment(rawValue: currentConfiguration)!
    }
}
I create an enum to represent each build configuration <1>, the string value must match the name of your build configuration defined here.
Then I create a singleton to read the current configuration from the plist. We have a build-it method to do this Bundle.main.object(forInfoDictionaryKey: "Configuration"). The key must match the one you defined here.
Try to call this in your view controller or app/scene delegate, and your configuration will show up in the debug console.
print("Current configuration: \(BuildConfiguration.shared.environment)")
// Current configuration: debugStaging
Declare environment variables
There are several ways to load the variable associated with a particular environment. Since you already know the current configuration, it is up to you to decide where to keep your variable and read it.
You can store them in JSON file or Info.plist and named it after your configuration name and read it based on your environment.
Development.plist
Staging.plist
Production.plist
You can even read them remotely if you want. It totally up to you at this point. I will show you a simple approach where everything is kept inside a codebase.
class BuildConfiguration {
    static let shared = BuildConfiguration()

    var environment: Environment

    var baseURL: String { // 1
        switch environment {
        case .debugStaging, .releaseStaging:
            return "https://staging.example.com/api"
        case .debugDevelopment, .releaseDevelopment:
            return "https://dev.example.com/api"
        case .debugProduction, .releaseProduction:
            return "https://example.com/api"
        }
    }

    init() {
        let currentConfiguration = Bundle.main.object(forInfoDictionaryKey: "Configuration") as! String

        environment = Environment(rawValue: currentConfiguration)!
    }
}
<1> Getting baseURL based on the current environment.
Security Considerations
This article doesn't take security into account. I recommended you read the Secret Management on iOS article from nshipster for an overview of secret management.
You can easily support sarunw.com by checking out this sponsor.
Tiny OCR: Extract text from image directly from your mac.
Conclusion
Using Xcode configuration and scheme is an easy and powerful way to create an environment for your project. This is not the only way to do it, and I'm sure you will need to modify and tweak it to suit your need. But I think the solution I show you today would be a good start for you to build upon.
Read more article about Xcode, Development, or see all available topic
Enjoy the read?
If you enjoy this article, you can subscribe to the weekly newsletter.
Every Friday, you'll get a quick recap of all articles and tips posted on this site. No strings attached. Unsubscribe anytime.
Feel free to follow me on Twitter and ask your questions related to this post. Thanks for reading and see you next time.
If you enjoy my writing, please check out my Patreon https://www.patreon.com/sarunw and become my supporter. Sharing the article is also greatly appreciated.
Become a patron Buy me a coffee Tweet ShareHow to make a simple bevel effect using inner shadows in SwiftUI
We can make a simple bevel effect using two inner shadows. SwiftUI has a built-in way to add a drop shadow with the shadow modifier. But if you want to add an inner shadow effect, you need to be a bit creative.
How to read App Name, Version, and Build Number from Info.plist
Learn an easy way to read the information in Info.plist.