Timer in SwiftUI
Table of Contents
The ability to run some code periodically is an important task in iOS development.
Some examples are:
- A countdown timer view.
- Polling for status or result, e.g., Food order status.
Whenever you want to do something every specific interval in SwiftUI, you need Timer and the onReceive() modifier.
How to use Timer in SwiftUI
To use a timer in SwiftUI.
- You create a
Timerand - Listen to it with the
.onReceivemodifier.
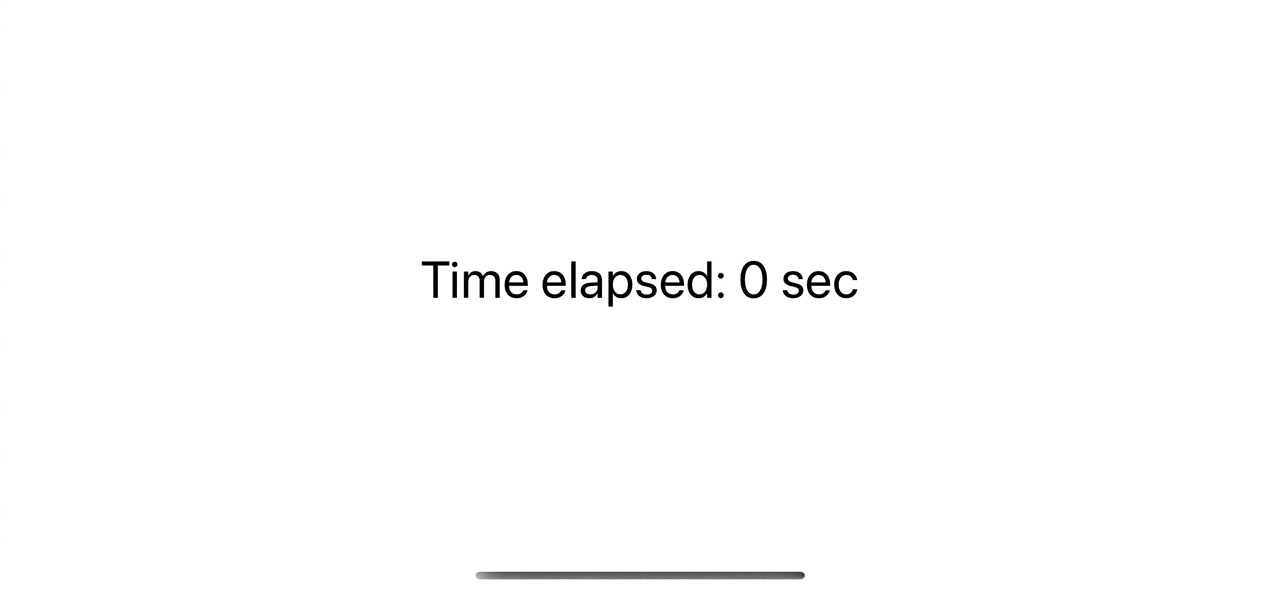
struct ContentView: View {
    @State var startDate = Date.now
    @State var timeElapsed: Int = 0

    // 1
    let timer = Timer.publish(every: 1, on: .main, in: .common).autoconnect()

    var body: some View {
        Text("Time elapsed: \(timeElapsed) sec")
            // 2
            .onReceive(timer) { firedDate in
                print("timer fired")
                // 3
                timeElapsed = Int(firedDate.timeIntervalSince(startDate))
            }
            .font(.largeTitle)
    }
}
1 We create timer using Timer.publish(every: 1, on: .main, in: .common).autoconnect().
- In this case, we want our timer to trigger every second.
- We run it on the
.mainrun loop since we use it to update the UI. - Last parameter is run loop mode, you can think it as a kind of priority. For UI-related stuff, you use
.commonrun loop. - The
.autoconnect()part is telling the timer to start once we listen to it.
2 We listen to a timer using the .onReceive modifier.
3 Every second, an onReceive closure will trigger with a fired date parameter. We use this to calculate the time elapsed in this case.
You can easily support sarunw.com by checking out this sponsor.
Note Taking:Quickly take note using Voice, Camera, or Typing
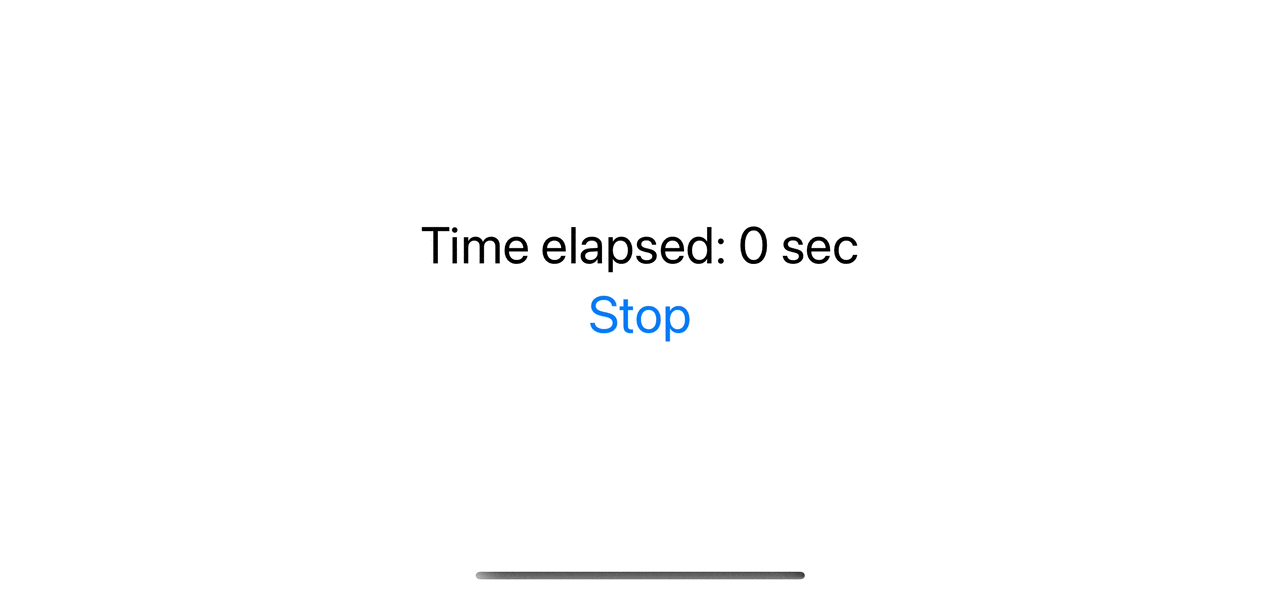
How to Cancel Timer in SwiftUI
To stop or cancel the timer, you use timer.upstream.connect().cancel().
In this case, I add a button to stop the timer.
struct ContentView: View {
    @State var startDate = Date.now
    @State var timeElapsed: Int = 0

    let timer = Timer.publish(every: 1, on: .main, in: .common).autoconnect()

    var body: some View {
        VStack {
            Text("Time elapsed: \(timeElapsed) sec")
                .onReceive(timer) { firedDate in
                    print("timer fired")
                    timeElapsed = Int(firedDate.timeIntervalSince(startDate))
                }
            Button("Stop") {
                timer.upstream.connect().cancel()
            }
        }
        .font(.largeTitle)
    }
}
You can easily support sarunw.com by checking out this sponsor.
Note Taking:Quickly take note using Voice, Camera, or Typing
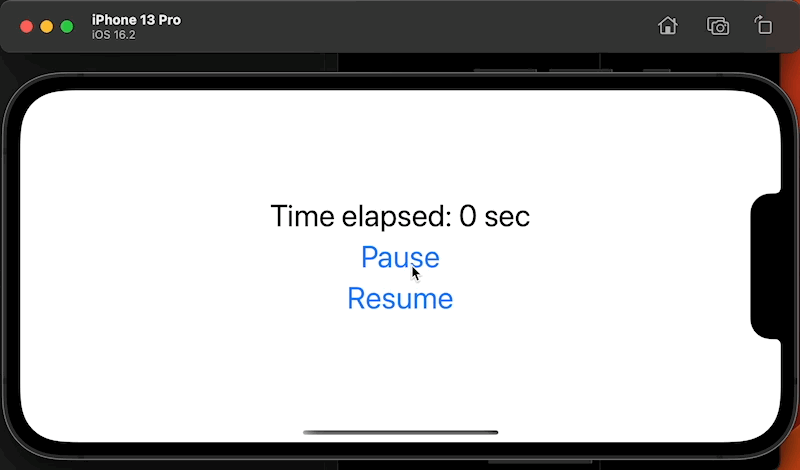
How to Restart Timer in SwiftUI
Once you stop or cancel the timer with timer.upstream.connect().cancel(), you can't resume it.
The only way to restart a timer is to recreate and reconnect it.
In this example, we recreate a timer in the Resume button's action.
struct ContentView: View {
    @State var startDate = Date.now
    @State var timeElapsed: Int = 0

    // 1
    @State var timer = Timer.publish(every: 1, on: .main, in: .common).autoconnect()

    var body: some View {
        VStack {
            Text("Time elapsed: \(timeElapsed) sec")
                .onReceive(timer) { firedDate in
                    print("timer fired")
                    timeElapsed = Int(firedDate.timeIntervalSince(startDate))
                }
            Button("Pause") {
                timer.upstream.connect().cancel()
            }
            Button("Resume") {
                // 2
                timer = Timer.publish(every: 1, on: .main, in: .common).autoconnect()
            }
        }
        .font(.largeTitle)
    }
}
1 We want to be able to recreate a timer, so we change from let to @State var.
2 We add a button to recreate a timer.
Read more article about SwiftUI, Timer, or see all available topic
Enjoy the read?
If you enjoy this article, you can subscribe to the weekly newsletter.
Every Friday, you'll get a quick recap of all articles and tips posted on this site. No strings attached. Unsubscribe anytime.
Feel free to follow me on Twitter and ask your questions related to this post. Thanks for reading and see you next time.
If you enjoy my writing, please check out my Patreon https://www.patreon.com/sarunw and become my supporter. Sharing the article is also greatly appreciated.
Become a patron Buy me a coffee Tweet ShareSwift Ternary operator (?:)
The Ternary operator is quite similar to if-else statements, but it isn't the same. Let's learn what it is and how to use it.