How to initialize NSViewController programmatically without nib
Table of Contents
In iOS, you can ditch out storyboard/nib and initialize UIViewController programmatically without any problem.
import UIKit

class ViewController: UIViewController {}

let vc = ViewController()
The situation isn't easy for AppKit and NSViewController. If you try to do the same with an NSViewController subclass, you will get an "[NSNib _initWithNibNamed:bundle:options:] could not load the nibName: ModuleName.ViewController in bundle (null)" error.
import Cocoa

class ViewController: NSViewController {}

// Error
let vc = ViewController()
Initialize NSViewController subclass this way would cause the following runtime error.
-[NSNib _initWithNibNamed:bundle:options:] could not load the nibName: example_mac_no_storyboard.ViewController in bundle (null).
How does NSViewController work behind the scene
To solve this problem, let's find out what caused the error.
From an Apple NSViewController documentation, the default implementation of NSViewController's loadView() method will automatically look for a nib file with the same name as the view controller. That's why you get an error about nib name not being found.
... in macOS 10.10 and later, the loadView() method automatically looks for a nib file with the same name as the view controller. To take advantage of this behavior, name a nib file after its corresponding view controller and pass nil to both parameters of the init(nibName:bundle:) method.
You can confirm this behavior by overriding the loadView() method with an empty implementation—this will opt out from that default behavior.
class ViewController: NSViewController {
    override func loadView() {

    }
}
Run your app again, and the error is gone.
You can easily support sarunw.com by checking out this sponsor.
Localization Buddy: Easiest way to localize and update App Store metadata.
Override loadView
We know the default implementation of the loadView() method is the problem and opt-out from this by overriding it with an empty statement. One problem remains, what should we put in the loadView() method implementation?
There is no better place to find an answer than the Apple documentation. From the documentation, loadView() instantiates a view from a nib file and sets the value of the view property. That's all we need to do.
Since we no longer rely on a nib file, we need to create an NSView and set it to view property ourselves.
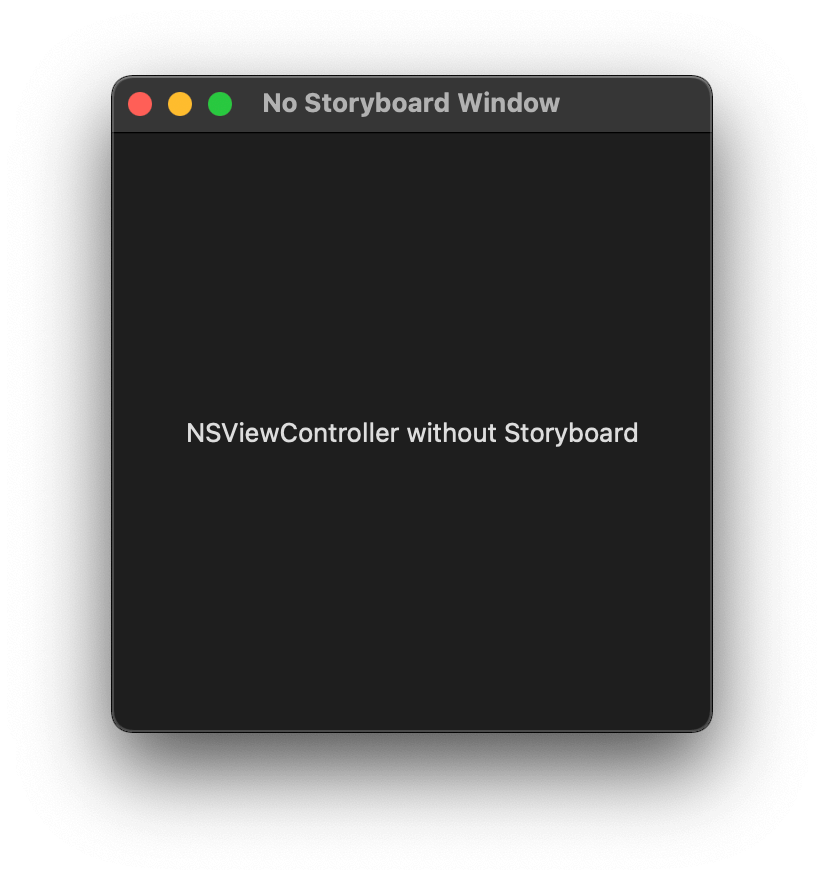
In this case, we create a view of size 300x300 and add a label at the center of the view.
override func loadView() {
    // 1
    view = NSView(frame: NSMakeRect(0.0, 0.0, 300, 300))

    // 2
    let label = NSTextField(labelWithString: "NSViewController without Storyboard")
    label.translatesAutoresizingMaskIntoConstraints = false
    view.addSubview(label)

    NSLayoutConstraint.activate([
        label.centerXAnchor.constraint(equalTo: view.centerXAnchor),
        label.centerYAnchor.constraint(equalTo: view.centerYAnchor),
    ])
}
1 We crate an NSView and assign it to the view property. That's all we need to do.
2 This is where we do the customization for your view controller. In this case, I added a label at the center of our view.
Here is the result.
Read more article about macOS, SwiftUI, or see all available topic
Enjoy the read?
If you enjoy this article, you can subscribe to the weekly newsletter.
Every Friday, you'll get a quick recap of all articles and tips posted on this site. No strings attached. Unsubscribe anytime.
Feel free to follow me on Twitter and ask your questions related to this post. Thanks for reading and see you next time.
If you enjoy my writing, please check out my Patreon https://www.patreon.com/sarunw and become my supporter. Sharing the article is also greatly appreciated.
Become a patron Buy me a coffee Tweet ShareHow to use different fonts for different languages in an iOS application
There is no way to add a custom font for each language. Luckily, we can indirectly set that with fallback fonts. Let's learn how to do it.
How to make a macOS menu bar app
Let's learn how to make a simple menu bar app in this article.