How to create a macOS app without storyboard or xib files
Table of Contents
When you create a new macOS project in Xcode 13, you have three options to choose from, SwiftUI, storyboard, and xib. Unfortunately, Xcode doesn't provide an option for those who want to do all the interfaces in code. In this article, we are going to do just that. We will set up a new macOS project without relying on a storyboard or xib.
At first, I thought this would be as simple as how we do with an iOS project, but a macOS project required some extra work which isn't very obvious for a newcomer like me. Let's see what we need to do to go storyboard-less.
It consist of three steps to create a macOS app without storyboard.
Creating a macOS project
We start off by creating a macOS project from the existing template. In my case, I choose Swift language and storyboard as interface.
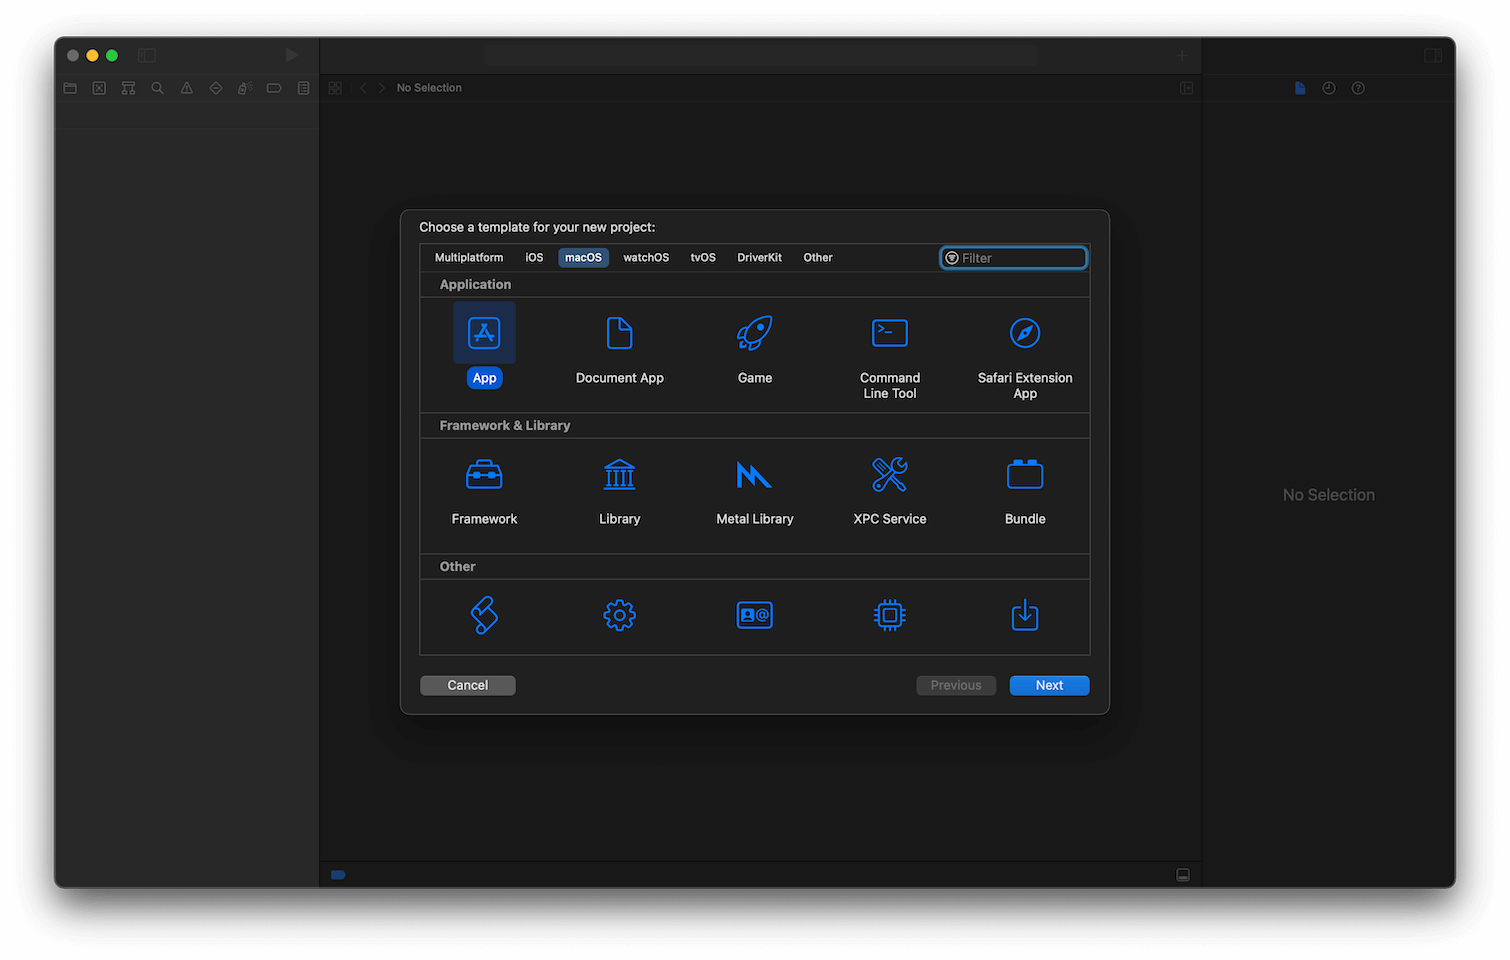
- Go to menu File > New > Project..., then select App under the macOS tab.
![]()
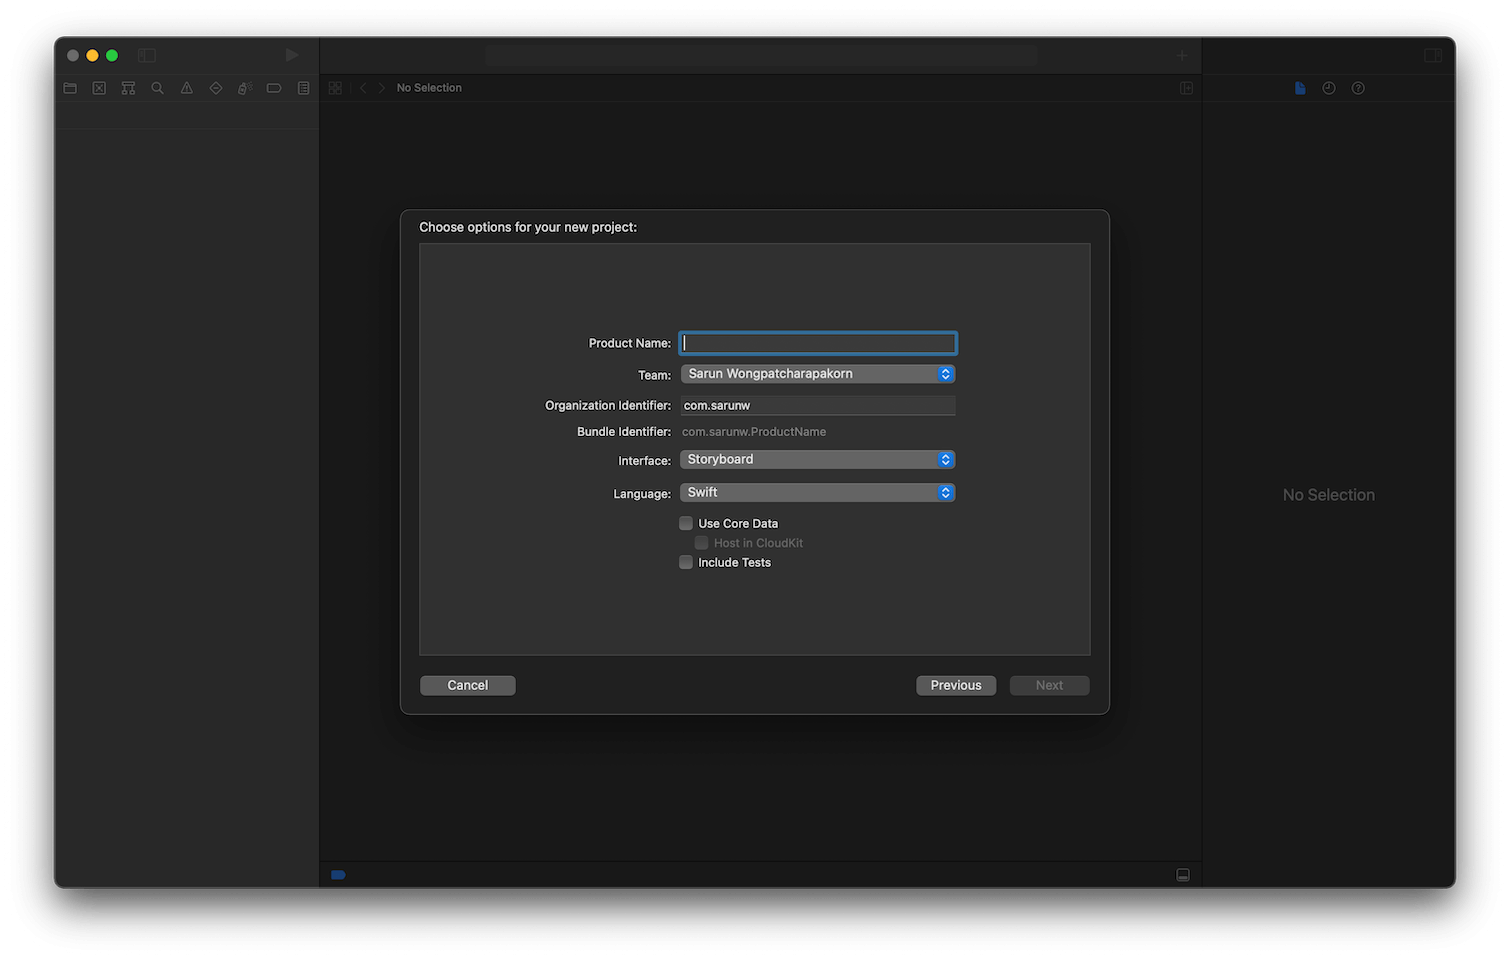
- Create a new macOS project. I choose Swift language and Storyboard as interface.
![]()
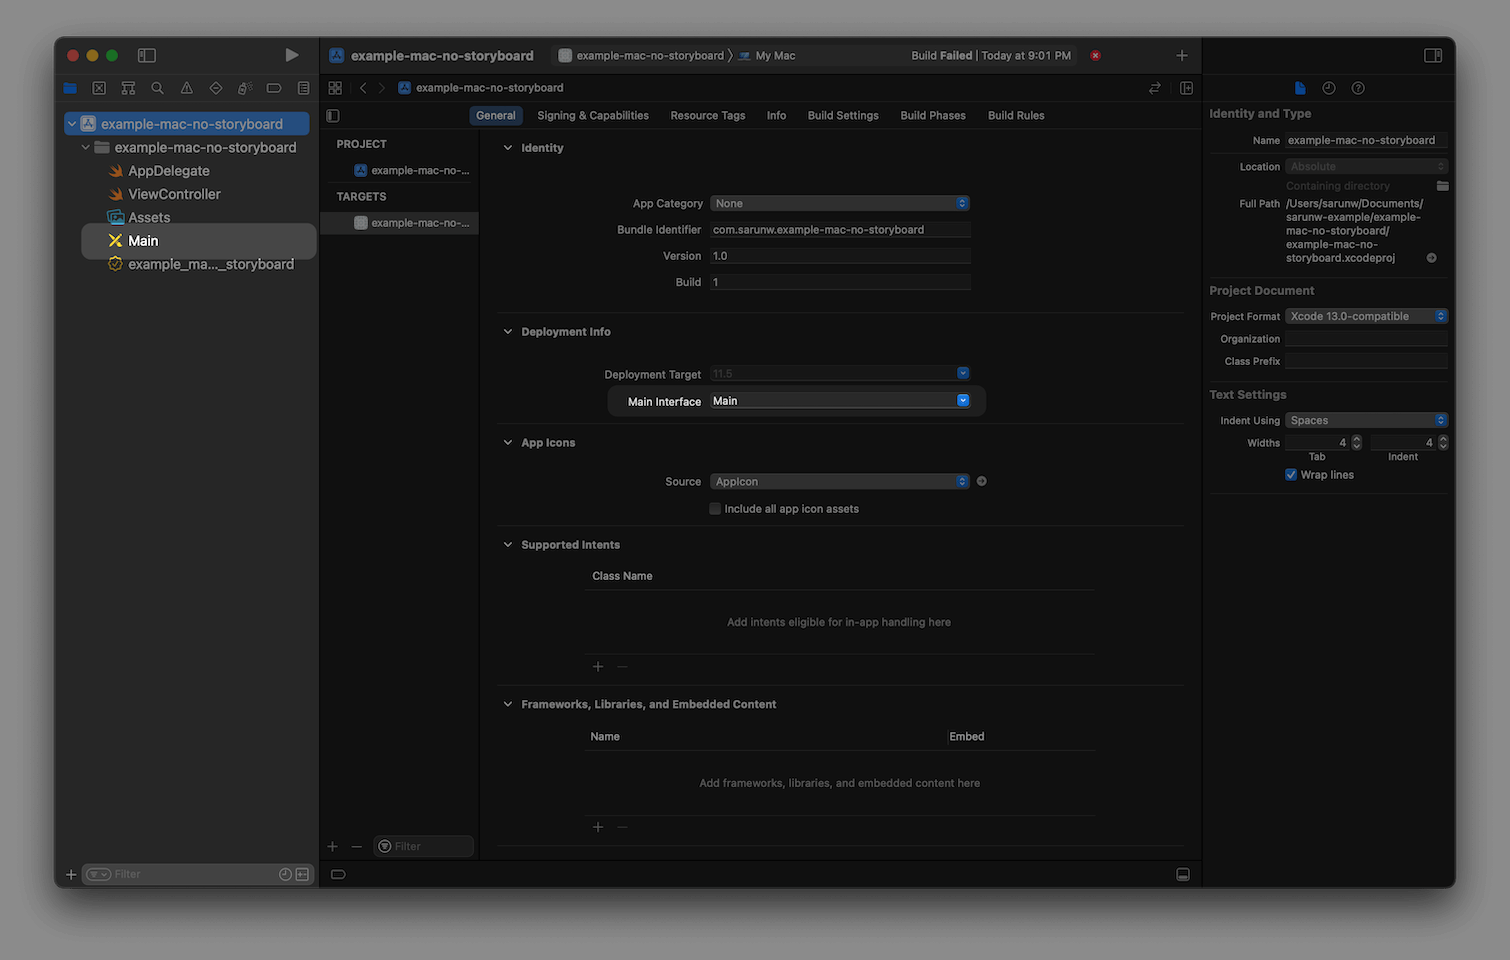
- Remove Storyboard-related file and information. In this case, delete Main.storyboard and the reference to Main.storyboard in Deployment Info.
![]()
Run the app, and nothing will show up, which is not a surprise. Everything was set up in the storyboard with this Xcode template, and we removed all of that. We need to reconstruct everything ourselves.
You can easily support sarunw.com by checking out this sponsor.
Screenshot Studio: Create App Store screenshots in seconds not minutes.
Replicate storyboard functionality
The main storyboard in a macOS application does a lot of things. Luckily, we need to do only two things to make our app show up again.
Create NSWindow
One function of a storyboard is creating a window (NSWindow). Since it's gone, we need to create and maintain NSWindow ourselves. We can do this in AppDelegate.
Create an NSWindow instance in the AppDelegate.swift.
@main
class AppDelegate: NSObject, NSApplicationDelegate {

    private var window: NSWindow!

    func applicationDidFinishLaunching(_ aNotification: Notification) {

        window = NSWindow(
            contentRect: NSRect(x: 0, y: 0, width: 480, height: 270),
            styleMask: [.miniaturizable, .closable, .resizable, .titled],
            backing: .buffered, defer: false)
        window.center()
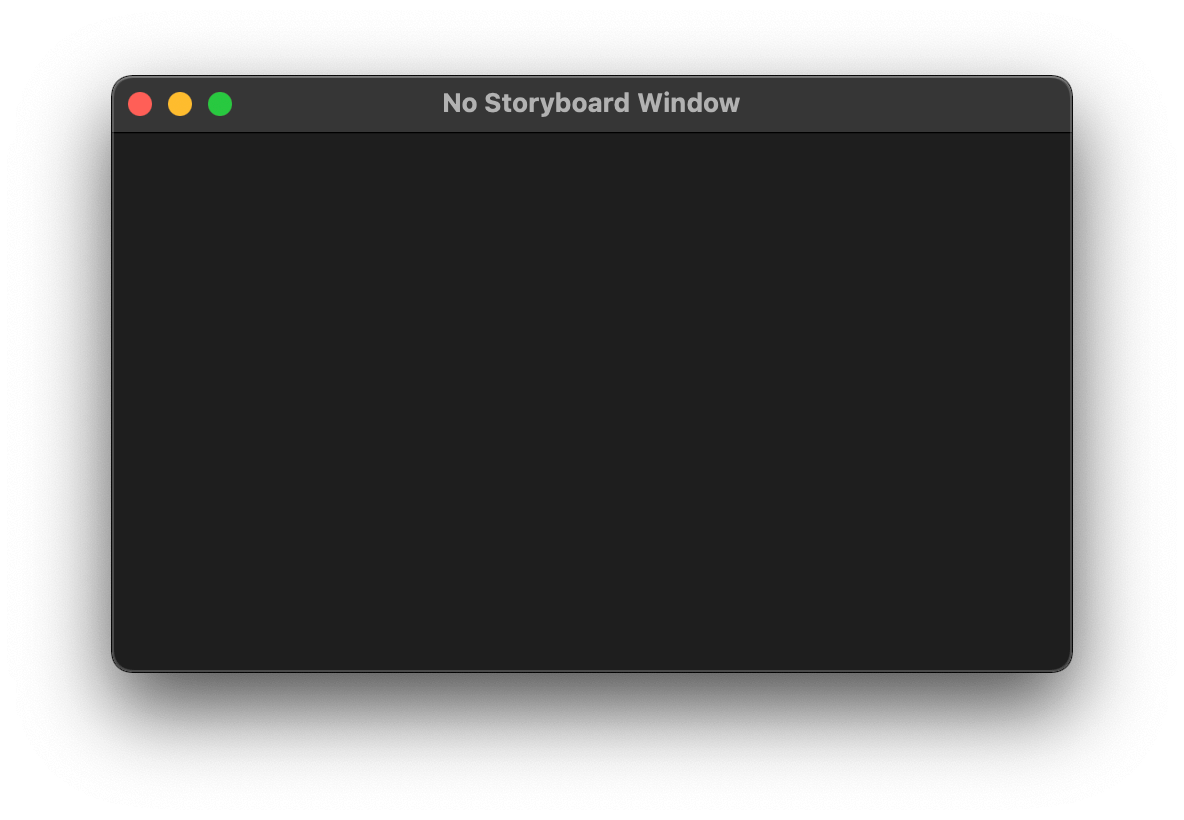
        window.title = "No Storyboard Window"
        window.makeKeyAndOrderFront(nil)
    }
}
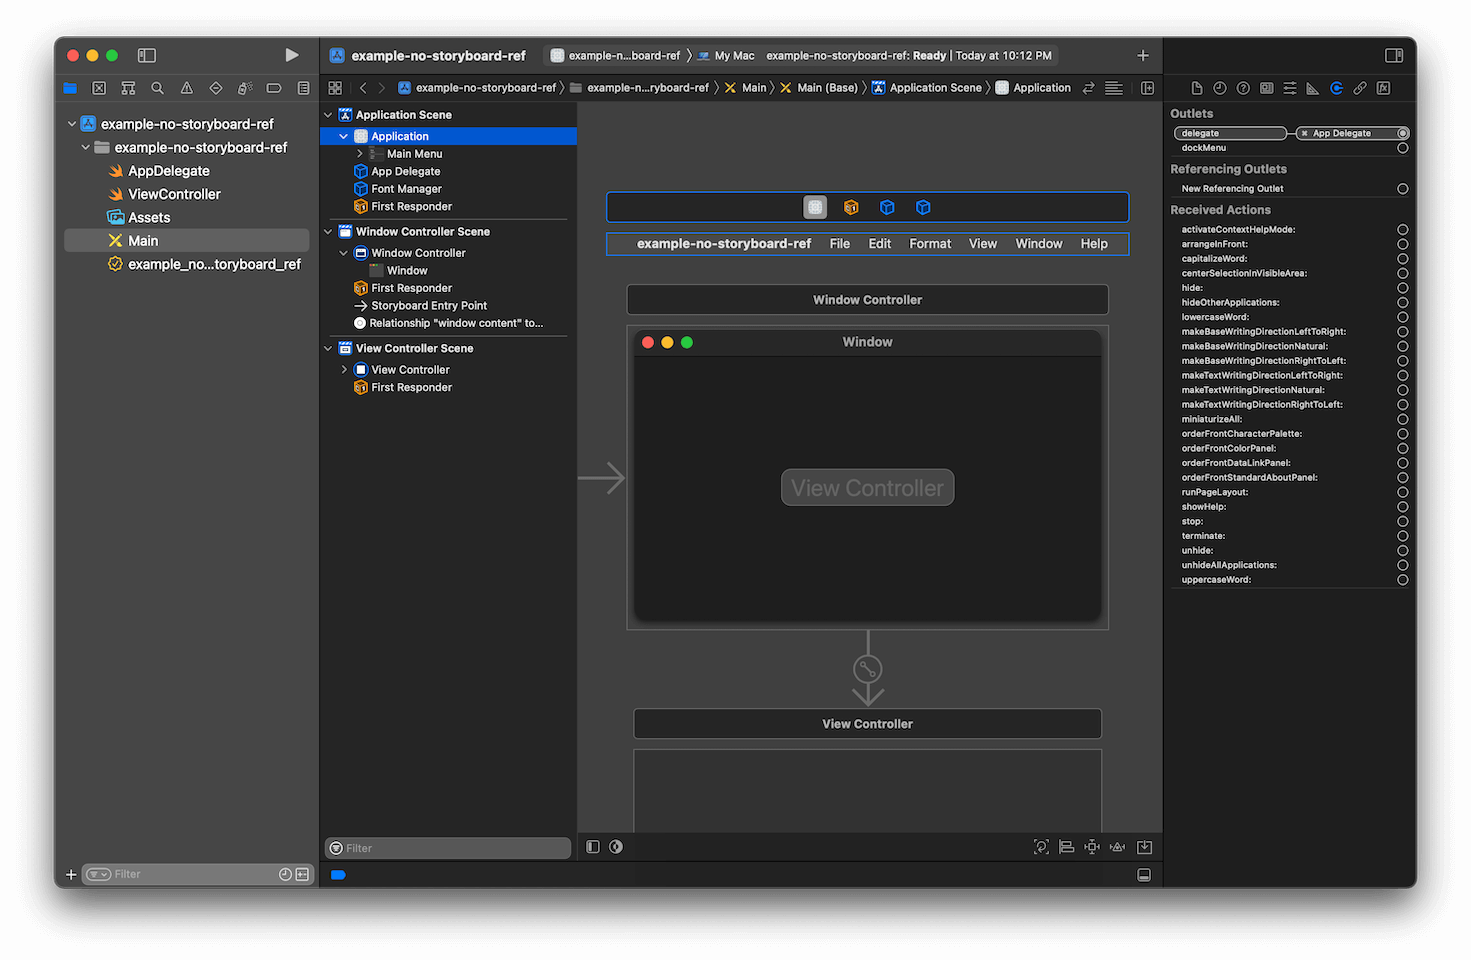
Run the app, but our app still does not show up. If you put a breakpoint in applicationDidFinishLaunching, you will find that this method isn't running. It turns out that a storyboard file is also the one that set up AppDelegate to NSApplication. So, that is another thing we need to do.
Assign AppDelegate to NSApplication
To be able to assign AppDelegate to NSApplication, we need to do three things.
- Remove
@mainfromAppDelegate.
// @main
class AppDelegate: NSObject, NSApplicationDelegate {- Add a new Swift file named
main.swift. The filename is case-sensitive. It needs to be main with lowercase. - Assign AppDelegate as an NSApplication's delegate in the
main.swift.
Here is how the main.swift looks like.
// 1
let app = NSApplication.shared
let delegate = AppDelegate()
app.delegate = delegate

// 2
_ = NSApplicationMain(CommandLine.argc, CommandLine.unsafeArgv)
1 We assign AppDelegate to NSApplication.shared.
2 @main attributed is equivalent to calling the NSApplicationMain(_:_:) function manually from main.swift. We remove that @main in AppDelegate and manually call NSApplicationMain(_:_:) because we want to assign an app delegate to NSApplication. You can read more about the @main attribute here.
Rerun the app, and our window finally shows up.
You can easily support sarunw.com by checking out this sponsor.

Screenshot Studio: Create App Store screenshots in seconds not minutes.
Set NSWindow content
At the current stage, we have a working macOS application. But it is just an empty frame. We need to add some content to it. It is up to you to use AppKit or SwiftUI for the content. As an example, I will show you how to populate our window with a SwiftUI view.
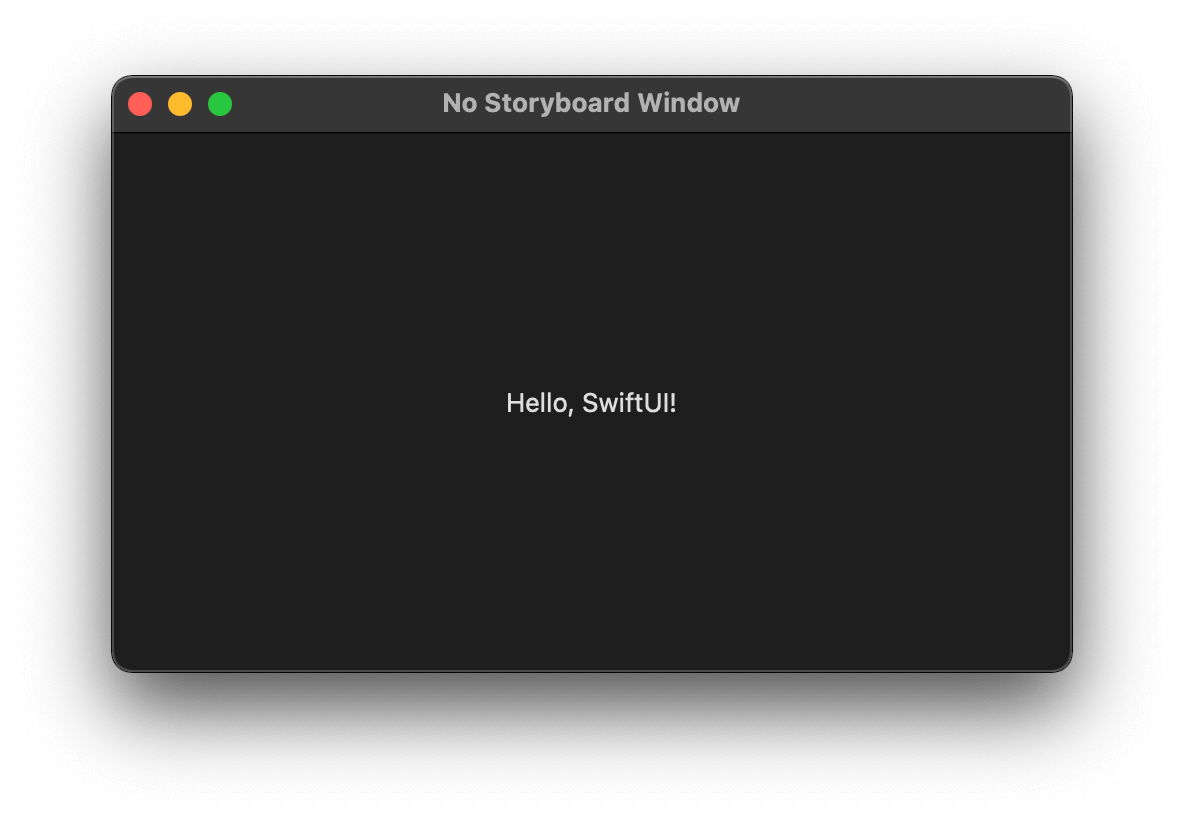
Create a SwiftUI view with a text, "Hello, SwiftUI!".
struct SwiftUIView: View {
    var body: some View {
        Text("Hello, SwiftUI!")
            .frame(maxWidth: .infinity, maxHeight: .infinity)
    }
}
Then assign that to window.contentView.
func applicationDidFinishLaunching(_ aNotification: Notification) {
    window = NSWindow(
        contentRect: NSRect(x: 0, y: 0, width: 480, height: 270),
        styleMask: [.miniaturizable, .closable, .resizable, .titled],
        backing: .buffered, defer: false)
    window.center()
    window.title = "No Storyboard Window"
    window.contentView = NSHostingView(rootView: SwiftUIView())
    window.makeKeyAndOrderFront(nil)
}
Run the app, and our window is populated with the content from our SwiftUI view.
Read more article about macOS, Xcode, Workflow, or see all available topic
Enjoy the read?
If you enjoy this article, you can subscribe to the weekly newsletter.
Every Friday, you'll get a quick recap of all articles and tips posted on this site. No strings attached. Unsubscribe anytime.
Feel free to follow me on Twitter and ask your questions related to this post. Thanks for reading and see you next time.
If you enjoy my writing, please check out my Patreon https://www.patreon.com/sarunw and become my supporter. Sharing the article is also greatly appreciated.
Become a patron Buy me a coffee Tweet ShareHow to simulate location in Xcode and Simulator
Both Xcode and Simulator can simulate location, but they serve different purposes. The Simulator provided a quick and easy way to simulate location and movement. On the other hand, Xcode offers more customization. Let's learn the differences so you can pick the right tool for your needs.
How to use custom fonts in WKWebView
Learn how to use local custom fonts that bundle with your application in WKWebView. It isn't hard, but not very obvious how to do it.
