AttributedString in iOS 15
Table of Contents
Introduction of AttributedString
Over the years, Apple has made many improvements over old data types. We got an equivalent structural data type of reference types, e.g., String (NSString), Date (NSDate), Calendar (NSCalendar).
In iOS 15, we got the new AttributedString, an improved version of NSAttributedString.
NSAttributedString allow us to associate attributes such as visual style and hyperlinks to a part of its string.
To appreciate the new AttributedString, let's have a quick comparison between NSAttributedString and AttributedString.
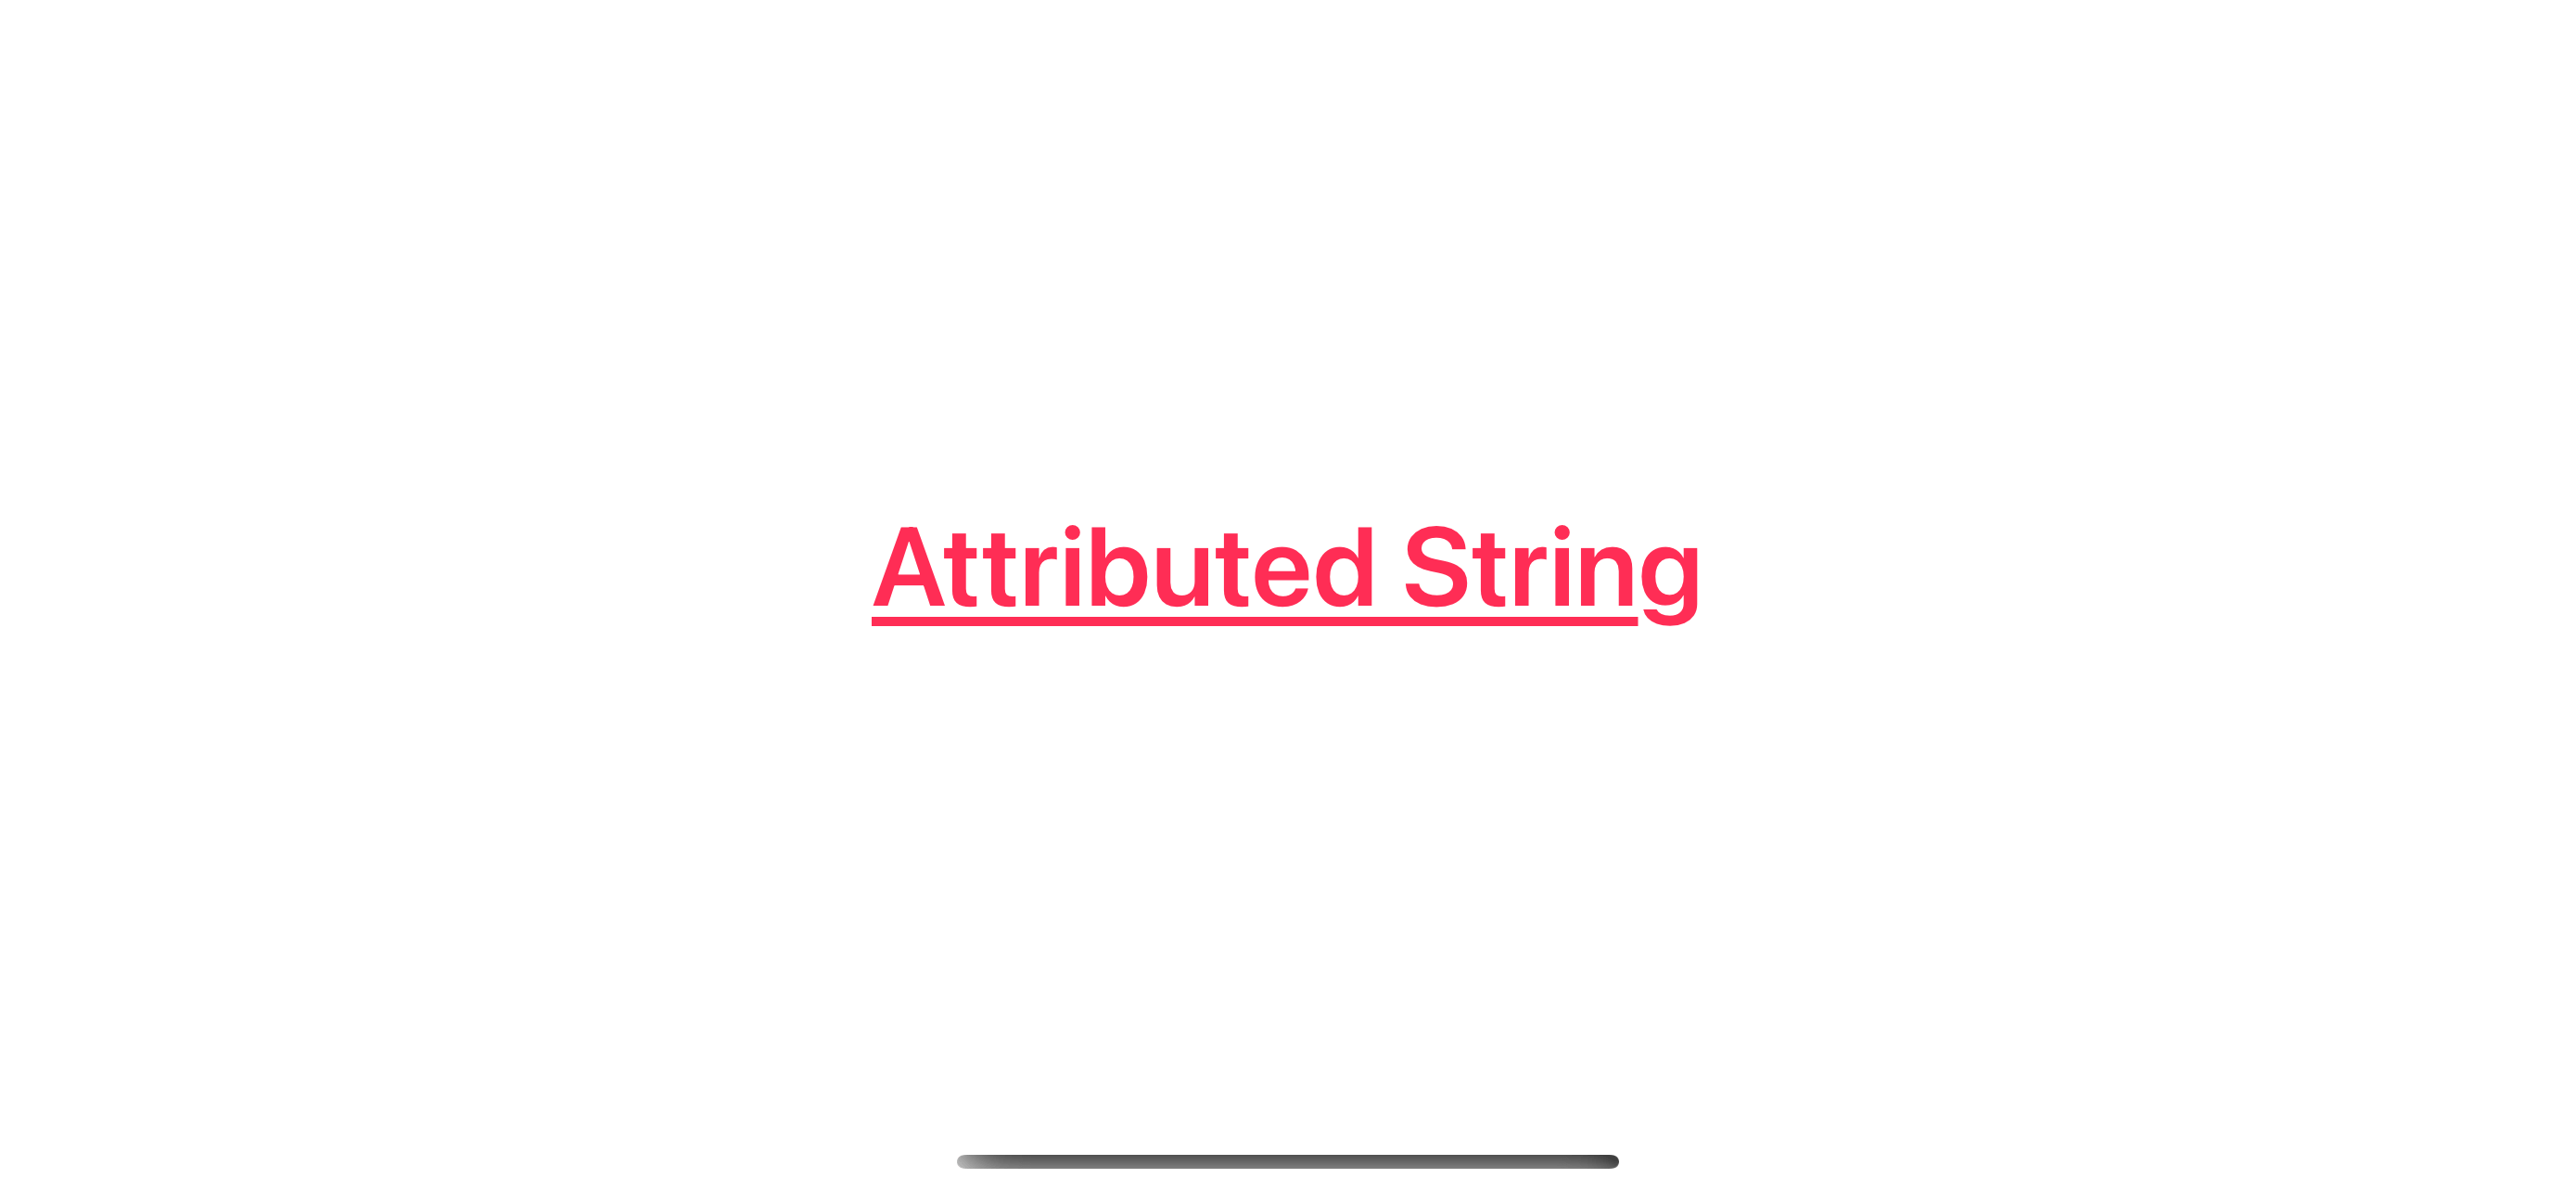
Here is a simple example where we apply three attributed, foreground color, font, and underline style to a string.
NSAttributedString
let string = "Attributed String"
let attributes: [NSAttributedString.Key : Any] = [
    NSAttributedString.Key.foregroundColor: UIColor.systemPink,
    NSAttributedString.Key.font: UIFont.boldSystemFont(ofSize: 40),
    NSAttributedString.Key.underlineStyle: NSUnderlineStyle.single.rawValue
]
let attributedString = NSAttributedString(string: string, attributes: attributes)

let label = UILabel()
label.attributedText = attributedString
AttributedString
private var attributedString: AttributedString {
    let string = "Attributed String"
    var attributedString = AttributedString(string)

    attributedString.foregroundColor = .pink
    attributedString.font = .boldSystemFont(ofSize: 40)
    attributedString.underlineStyle = .single

    return attributedString
}

var body: some View {
    Text(attributedString)
}
Both AttributedString and NSAttributedString yield the same result and have similar syntax.
But one thing that stands out is that all attributes in AttributedString are strong types.
So, we can safely set attributed in AttributedString while in NSAttributedString, we hope we don't mistype something in a dictionary of Any value, [NSAttributedString.Key : Any].
In the rest of the article, we will explore how to use AttributedString in other scenarios.
You can easily support sarunw.com by checking out this sponsor.
AI Grammar: Correct grammar, spell check, check punctuation, and parphrase.
Basic Usage
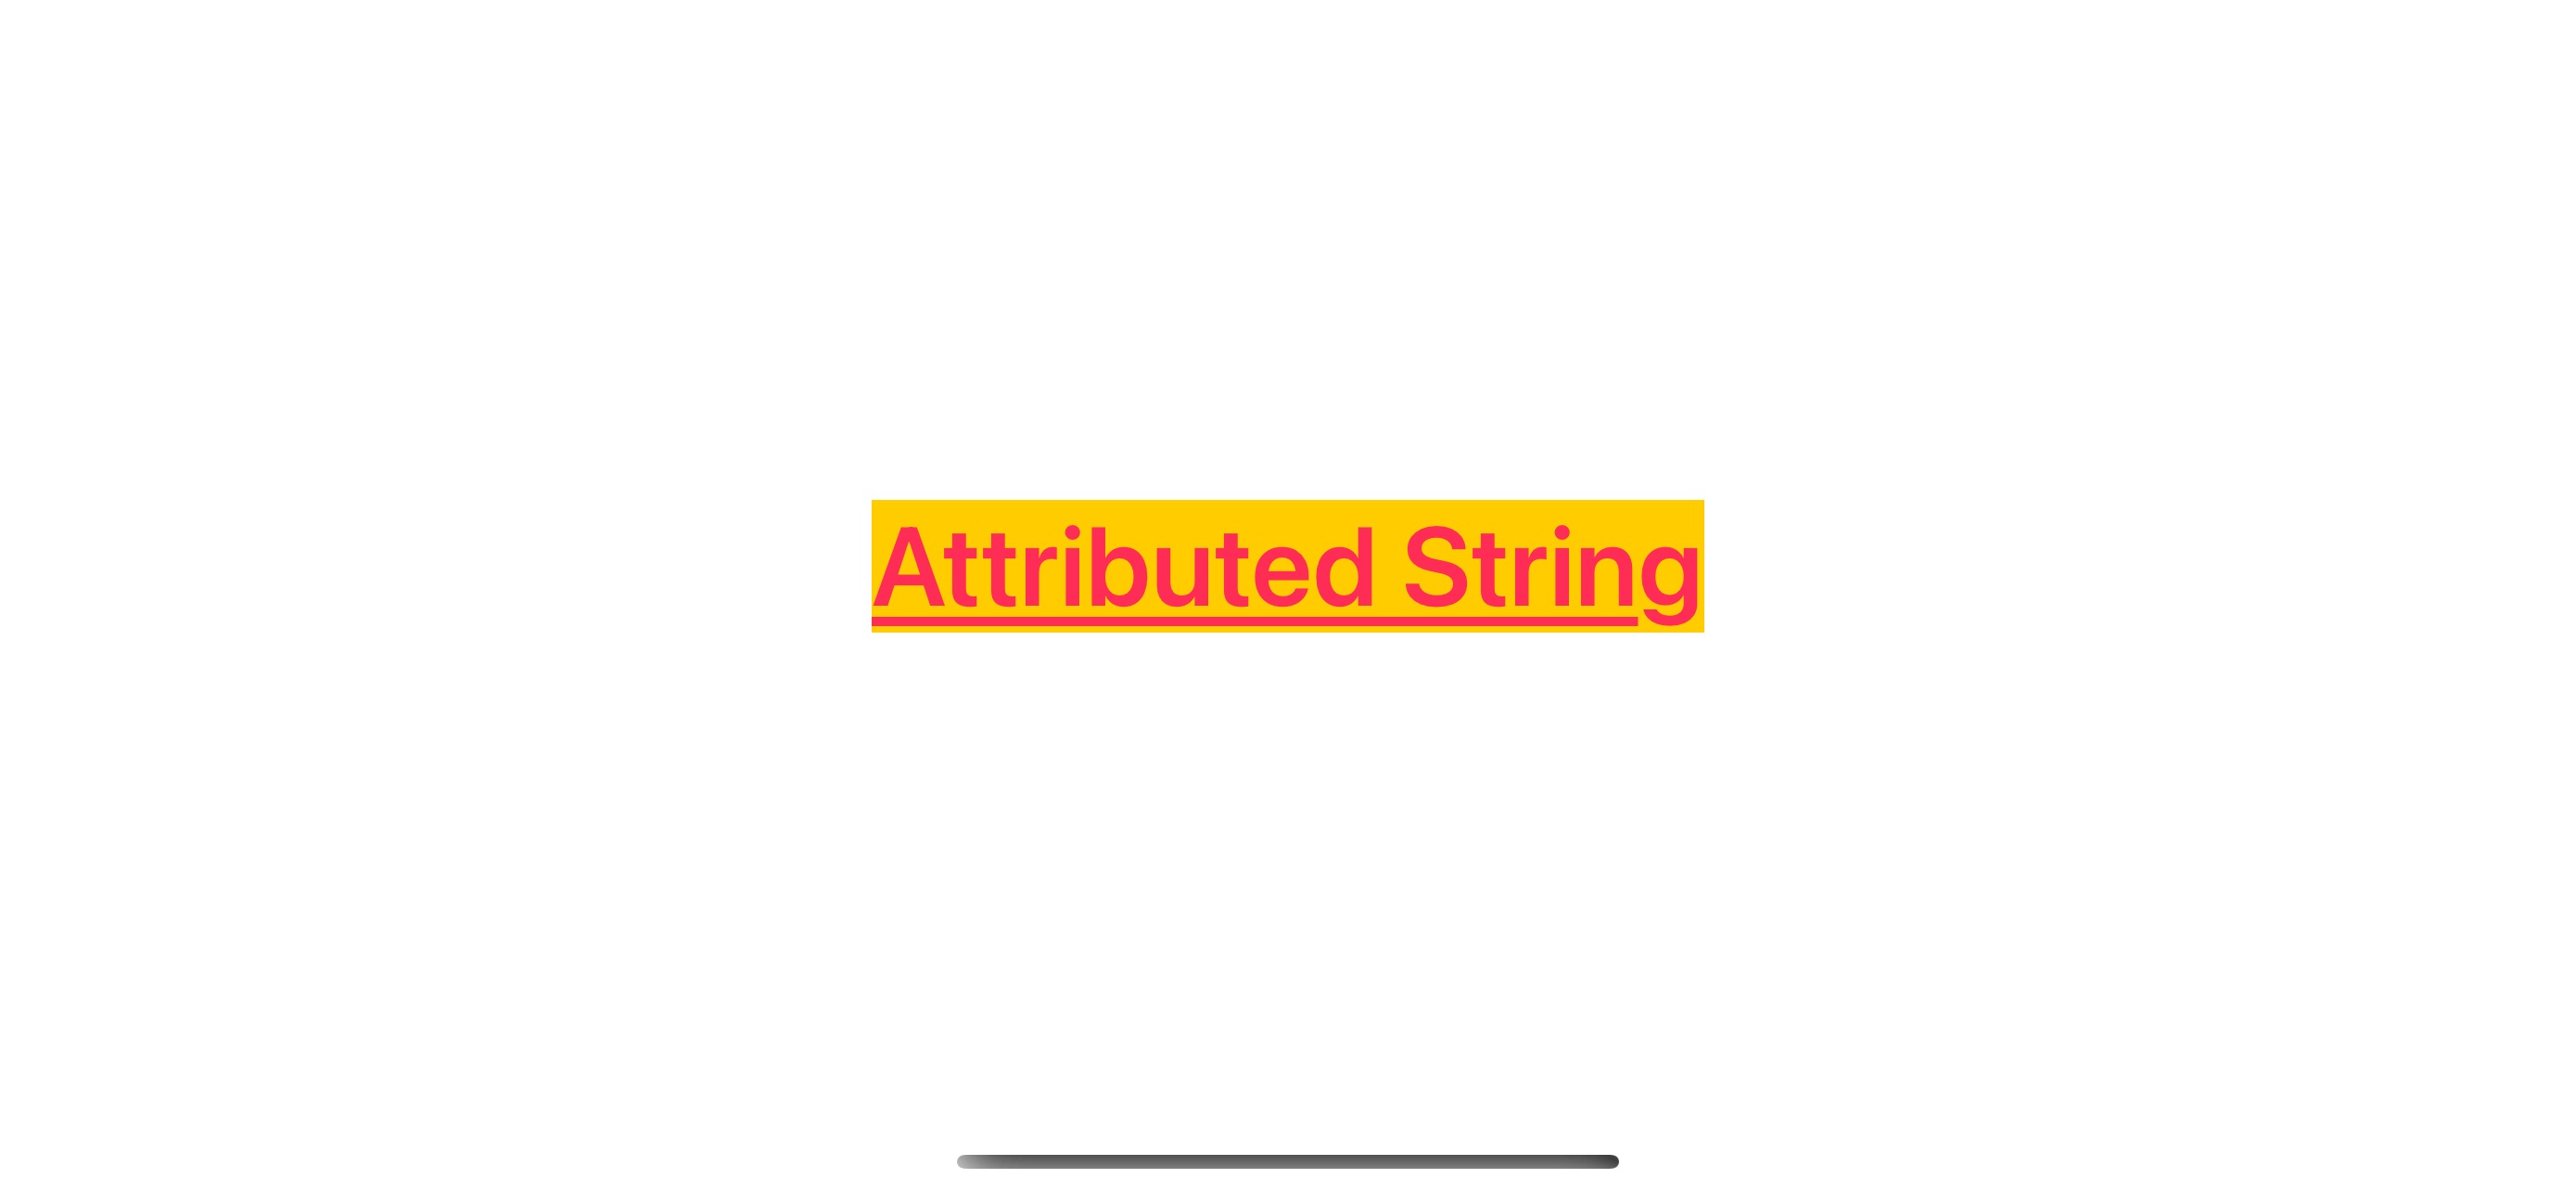
You can create an AttributedString from a string and customize its appearance via a property.
private var attributedString: AttributedString {
    let string = "Attributed String"
    // 1
    var attributedString = AttributedString(string)

    // 2
    attributedString.foregroundColor = .pink
    attributedString.backgroundColor = .yellow
    attributedString.font = .boldSystemFont(ofSize: 40)
    attributedString.underlineStyle = .single

    return attributedString
}

var body: some View {
    Text(attributedString)
}
1 Initialize AttributedString with a string that you want.
2 Then customize its appearance via available properties.
In this example, we change the foreground color, background color, font, and underline style.
Concatenate Two AttributedString
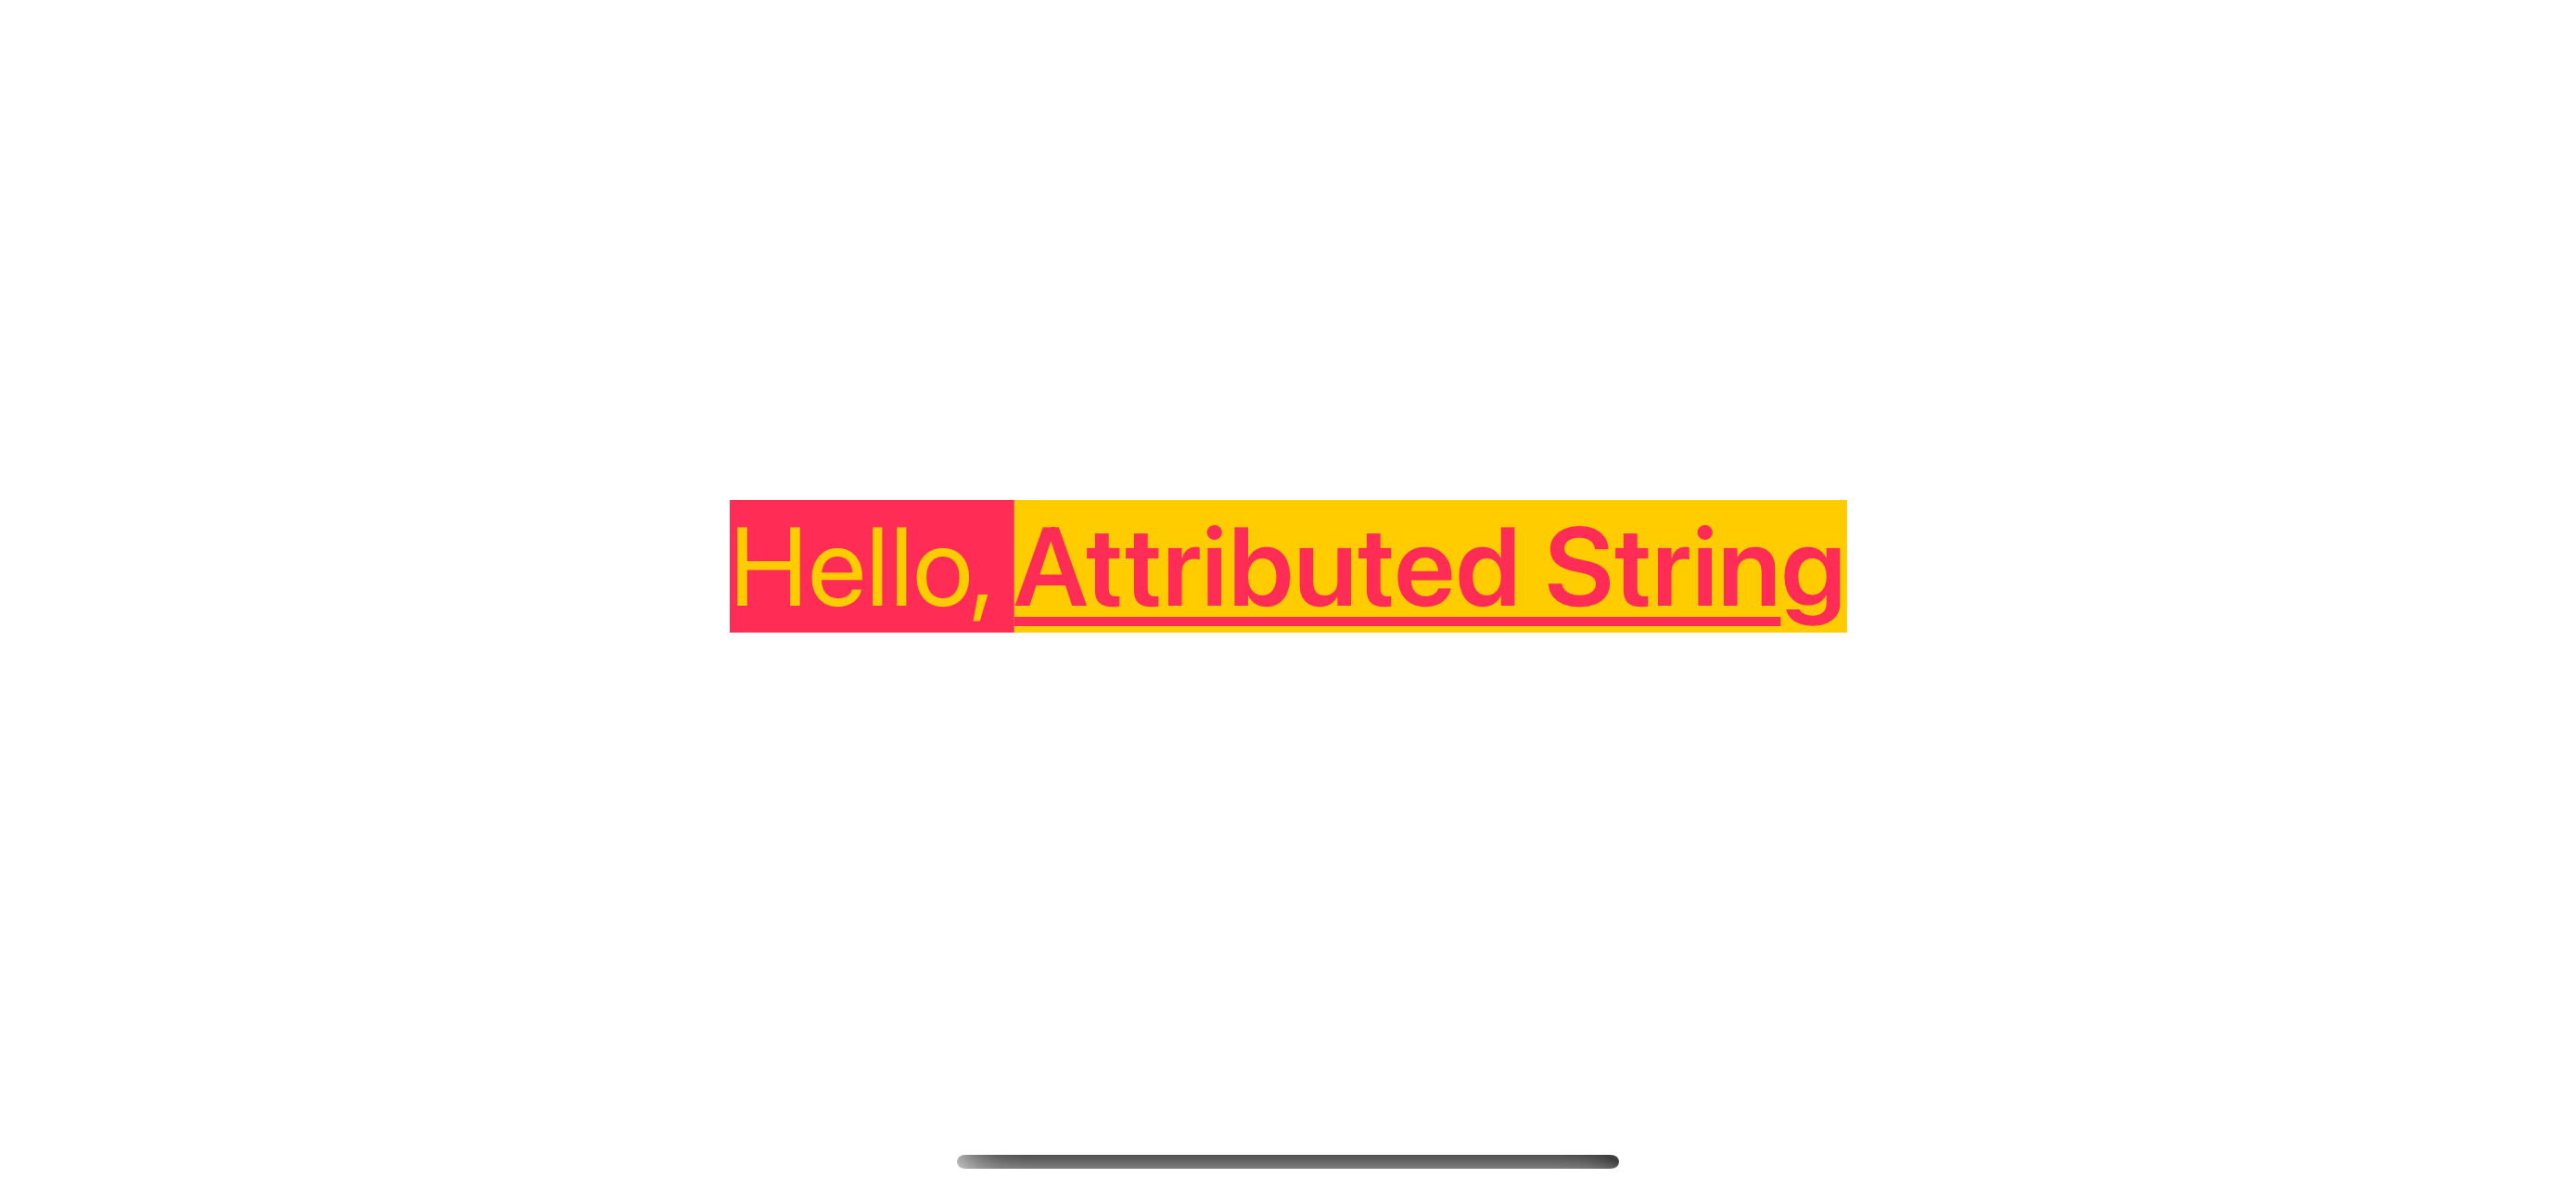
You can create two attributed strings with different styles and concatenate them together using the + operator.
private var helloString: AttributedString {
    let string = "Hello, "
    var attributedString = AttributedString(string)

    attributedString.foregroundColor = .yellow
    attributedString.backgroundColor = .pink
    attributedString.font = .systemFont(ofSize: 40)

    return attributedString
}

private var attributedString: AttributedString {
    let string = "Attributed String"
    var attributedString = AttributedString(string)

    attributedString.foregroundColor = .pink
    attributedString.backgroundColor = .yellow
    attributedString.font = .boldSystemFont(ofSize: 40)
    attributedString.underlineStyle = .single

    return attributedString
}

var body: some View {
    // 1
    Text(helloString + attributedString)
}
1 Concatenate two attributed string using + operator.
We style two strings separately and combine them later.
Create attributed using AttributedContainer
If you have common styles that you want to use in multiple places, you can extract that out in an AttributedContainer.
AttributeContainer is a struct that can store attributes and their values outside of an attributed string.
You can use attribute containers in many ways.
- You can use it as a parameter when creating
AttributedString. - You can merge it with the existing
AttributedString. - And you can also merge it with another
AttributeContainer.
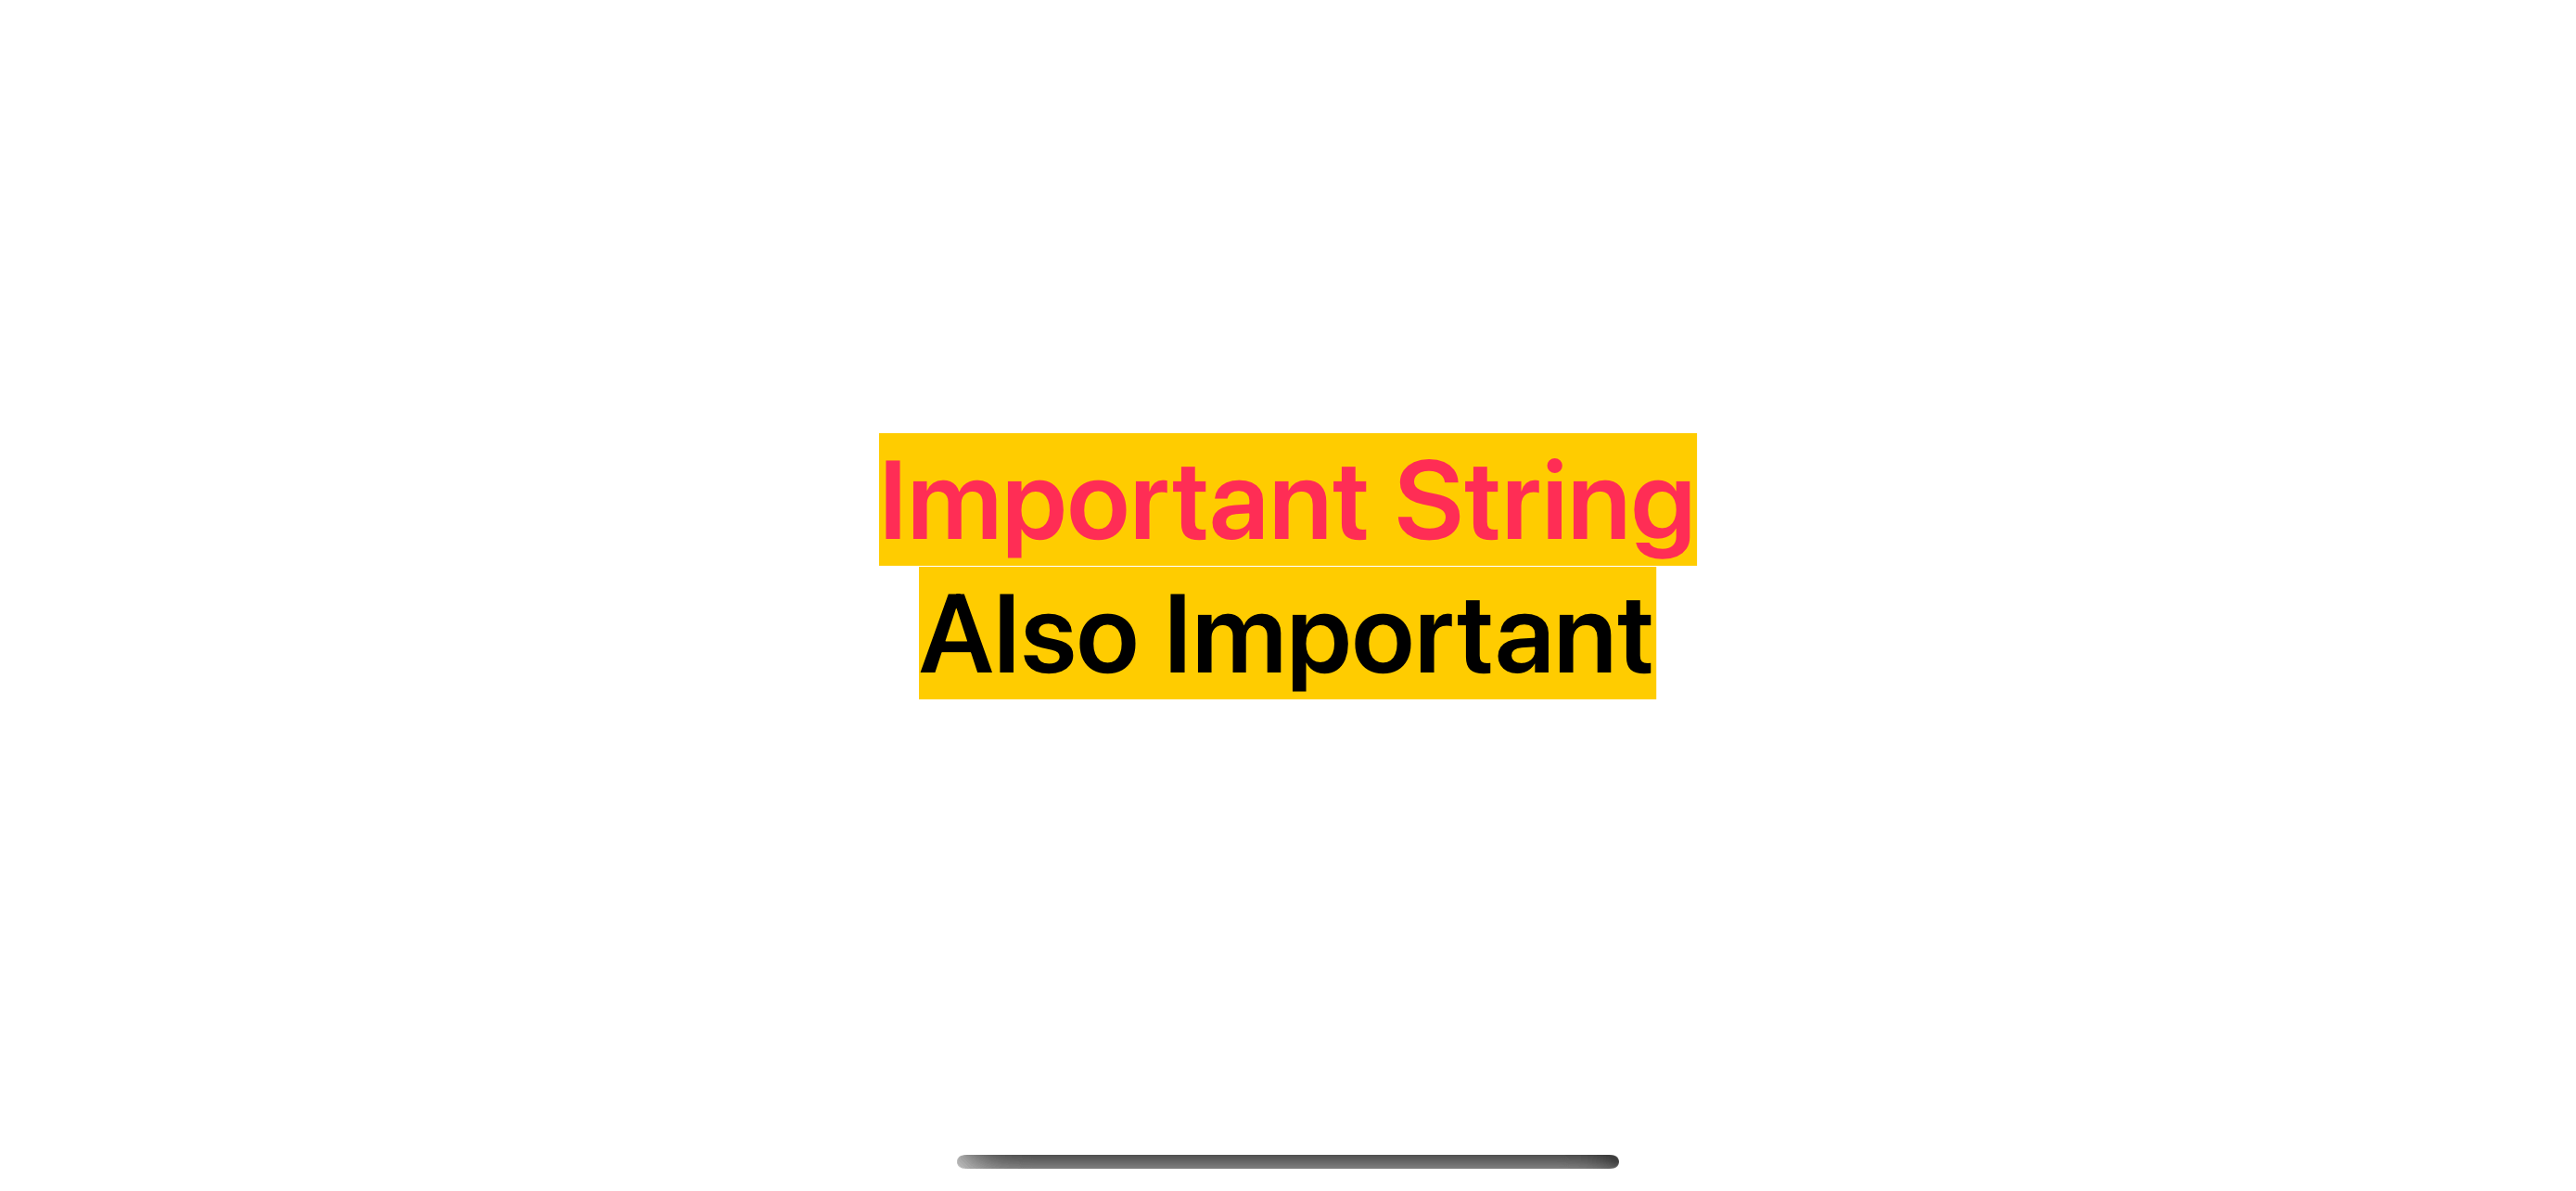
In this example, we create an attribute container, highlightedAttributes, and use it to create an attributed string and also apply that style to an existing attributed string.
// 1
private var highlightedAttributes: AttributeContainer {
    var container = AttributeContainer()
    container.backgroundColor = .yellow
    container.font = .boldSystemFont(ofSize: 40)

    return container
}

// 2
private var importantString: AttributedString {
    let string = "Important String"
    var attributedString = AttributedString(string)

    attributedString.foregroundColor = .pink
    attributedString.font = .systemFont(ofSize: 40)


    return attributedString
}

var body: some View {
    VStack {
        // 3
        Text(importantString.mergingAttributes(highlightedAttributes))
        // 4
        Text(AttributedString("Also Important", attributes: highlightedAttributes))
    }
}
1 Create highlightedAttributes that has a yellow background and bold text style.
2 Create an attributed string with the pink text color.
3 We can merge the attribute container to the existing attributed string using mergingAttributes. The resulting text will have both styles included.
4 We can also provide an attribute container as an argument at creation time.
As a result, both strings got the styles from highlightedAttributes.
You can easily support sarunw.com by checking out this sponsor.
AI Grammar: Correct grammar, spell check, check punctuation, and parphrase.
Styling part of a string
You can apply a style to some parts of your string using a range.
First, you get a range of a string of your interest using range instance method.
var attributedString = AttributedString("Attributed String")
let range = attributedString.range(of: "Attributed")!
After you get a range, you access the substring of the attributed string by providing that range as an argument of a subscript, [range].
attributedString[range]Then, you can change the attribute in that specific substring.
attributedString[range].foregroundColor = .orange
attributedString[range].underlineStyle = .single
Here is an example of changing foreground color and underline style to a string "Attributed".
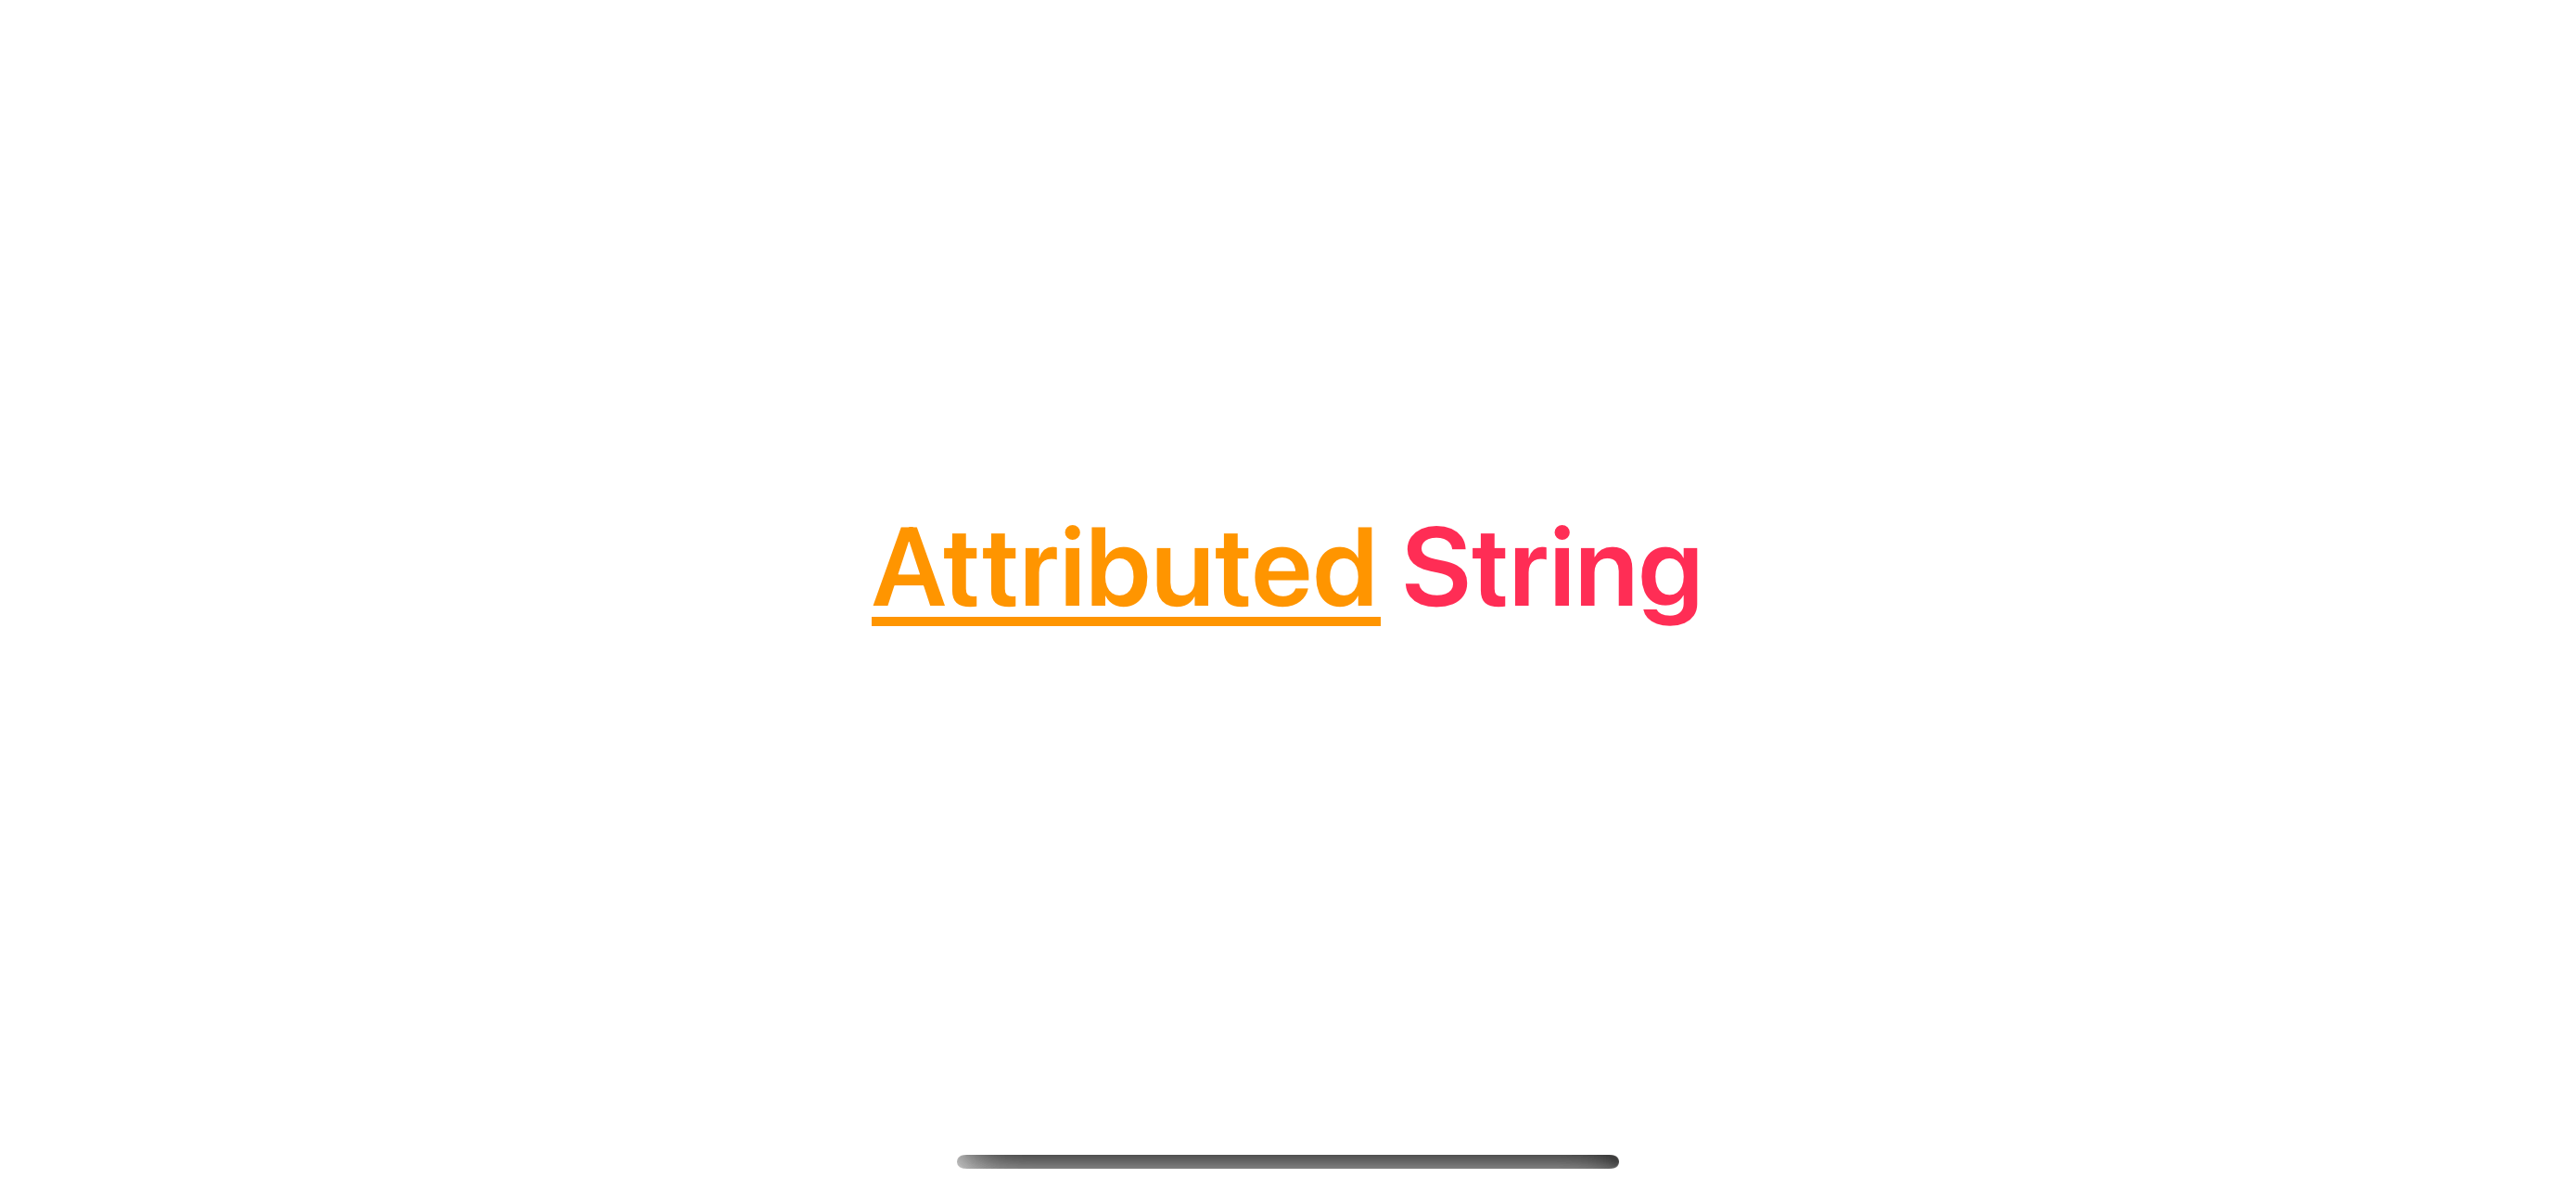
private var attributedString: AttributedString {
    let string = "Attributed String"
    var attributedString = AttributedString(string)

    attributedString.font = .boldSystemFont(ofSize: 40)
    attributedString.foregroundColor = .pink
    // 1
    if let range = attributedString.range(of: "Attributed") {
        attributedString[range].foregroundColor = .orange
        attributedString[range].underlineStyle = .single
    }

    return attributedString
}

var body: some View {
    Text(attributedString)
}
1 We get a range of string "Attributed", then apply an orange color and underline style.
Read more article about Foundation, iOS 15, AttributedString, or see all available topic
Enjoy the read?
If you enjoy this article, you can subscribe to the weekly newsletter.
Every Friday, you'll get a quick recap of all articles and tips posted on this site. No strings attached. Unsubscribe anytime.
Feel free to follow me on Twitter and ask your questions related to this post. Thanks for reading and see you next time.
If you enjoy my writing, please check out my Patreon https://www.patreon.com/sarunw and become my supporter. Sharing the article is also greatly appreciated.
Become a patron Buy me a coffee Tweet ShareHow to set Info.plist Values based on Build Configuration in Xcode
Learn how to configure Info.plist value per build configuration.
How to create SwiftUI Picker from Enum
An Enum is one of the data structures that best represents options for the Picker view. Let's learn what we need to do to make an enum usable in a Picker.