How to use NSAttributedString in SwiftUI
Table of Contents
In iOS 15, Apple introduces AttributedString as a way to styling string. It is a replacement for NSAttributedString.
We can use this new struct to initialize a SwiftUI Text view.
private var attributedString: AttributedString {
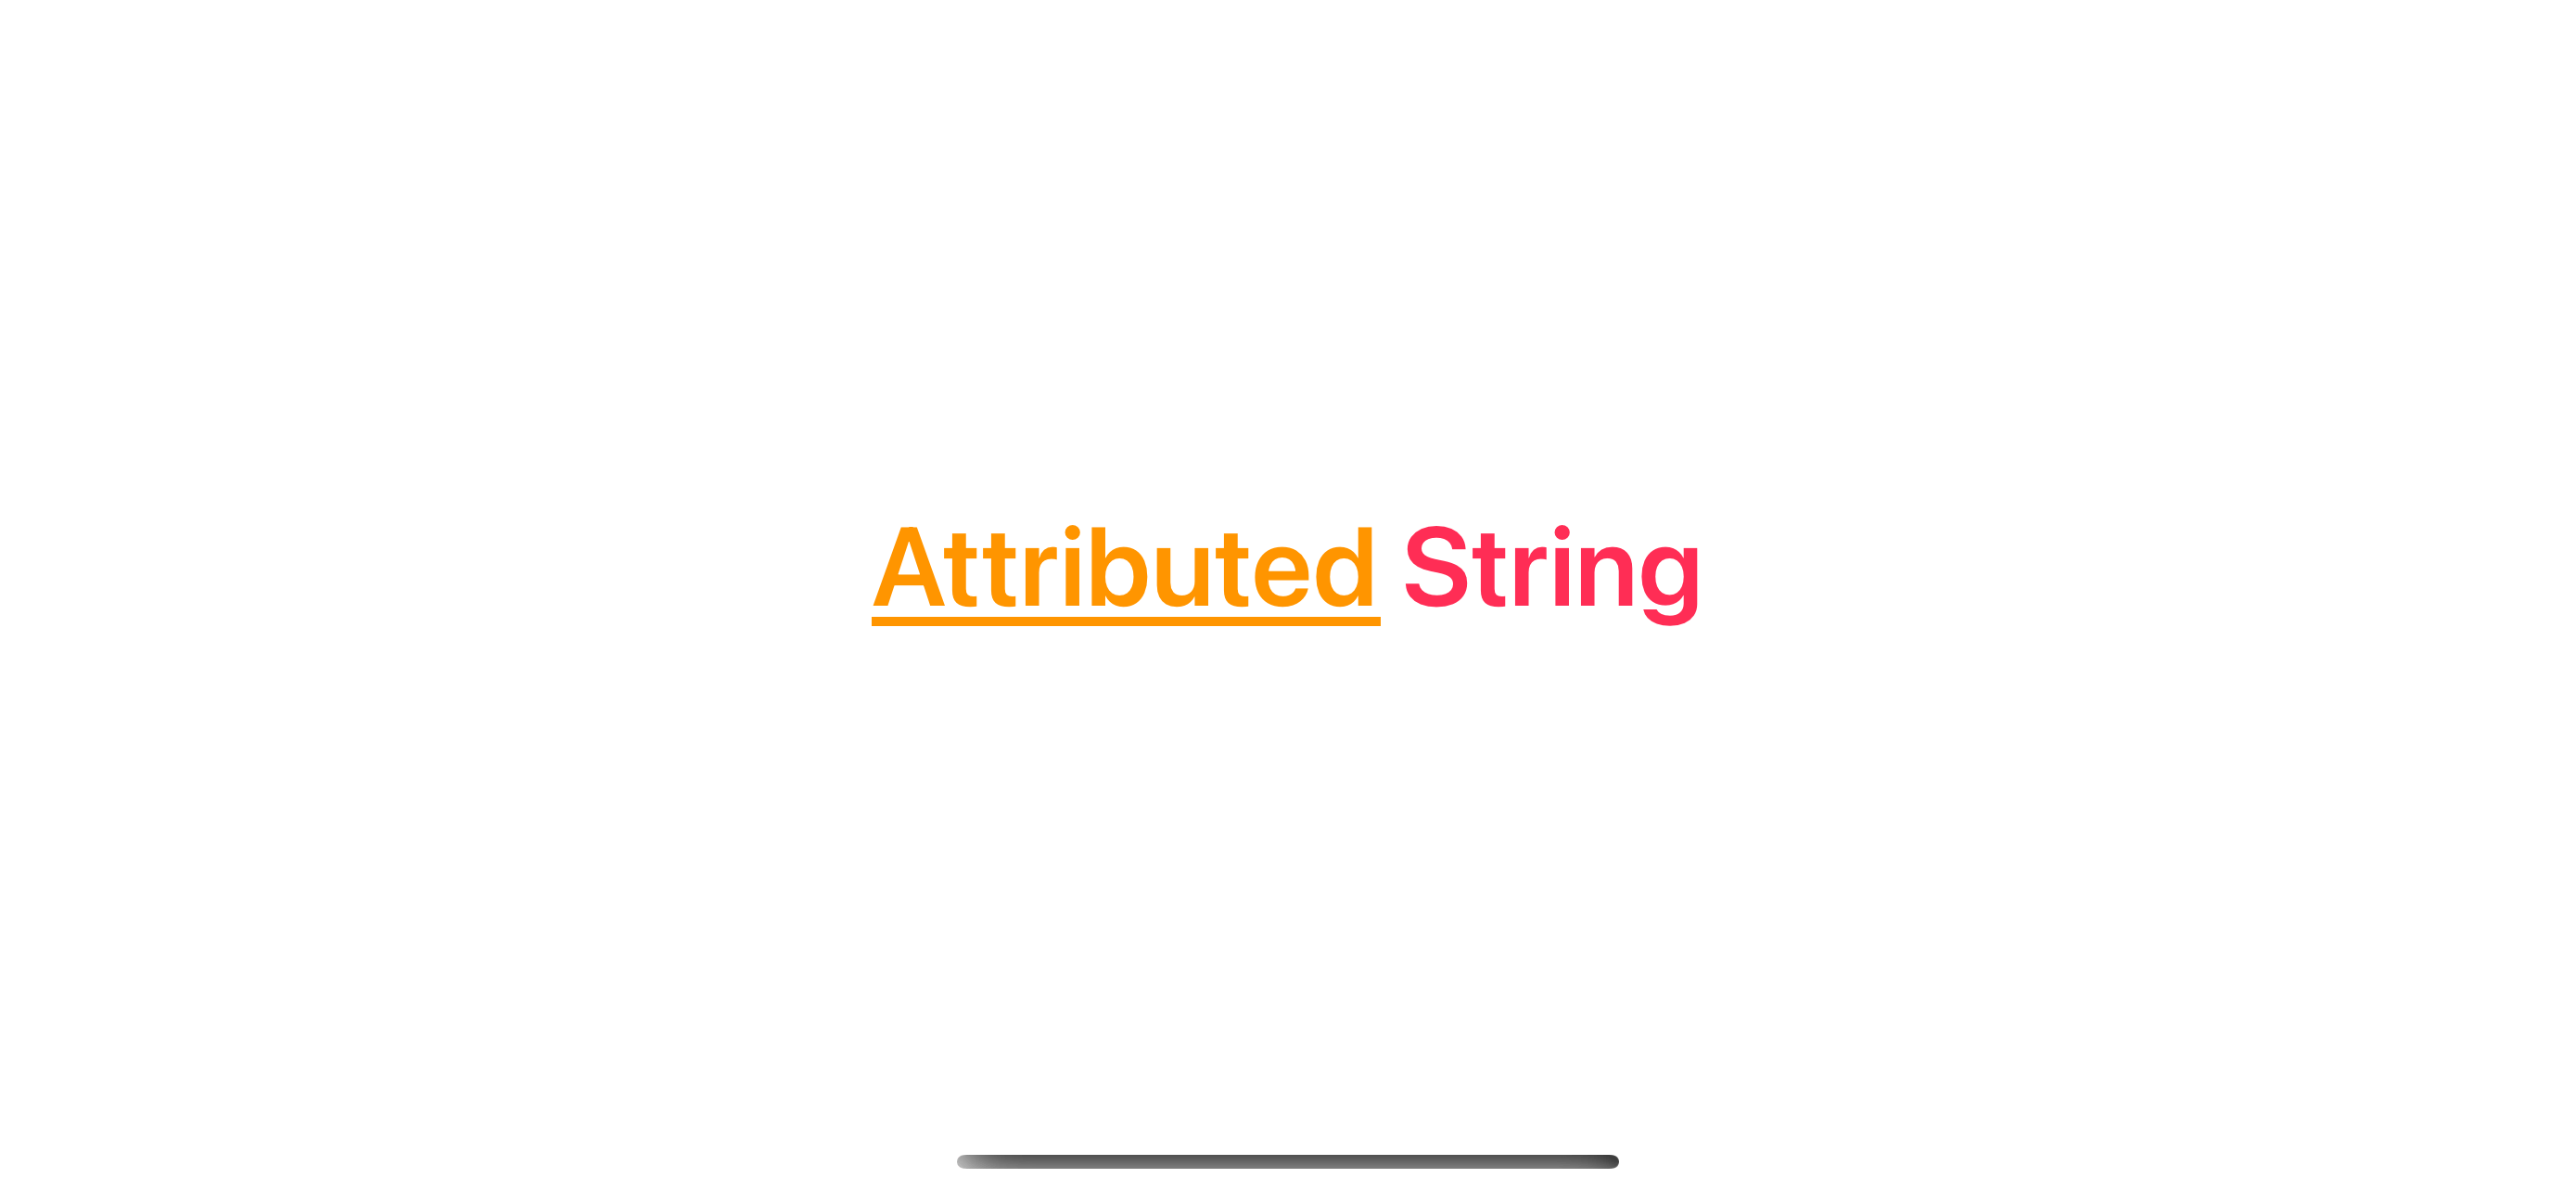
let string = "Attributed String"
var attributedString = AttributedString(string)
// 1
attributedString.font = .boldSystemFont(ofSize: 40)
attributedString.foregroundColor = .pink
// 2
if let range = attributedString.range(of: "Attributed") {
attributedString[range].foregroundColor = .orange
attributedString[range].underlineStyle = .single
}
return attributedString
}
var body: some View {
Text(attributedString)
}1 We set font and text color.
2 And set different colors and underline style for a substring.
If you start a new SwiftUI project, you might no longer need to care about NSAttributedString.
But if you are in the process of gradually migrating from UIKit to SwiftUI. There might be a time when you need to use NSAttributedString in SwiftUI code.
The good news is you can easily do that.
You can easily support sarunw.com by checking out this sponsor.
Localization Buddy: Easiest way to localize and update App Store metadata.
How to use NSAttributedString in SwiftUI
AttributedString comes pre-equipped with an initializer that can initialize AttributedString from an NSAttributedString.
init(_ nsStr: NSAttributedString)In the following example, we convert an existing NSAttributedString to AttributedString to be able to use it in SwiftUI text view.
private var content: AttributedString {
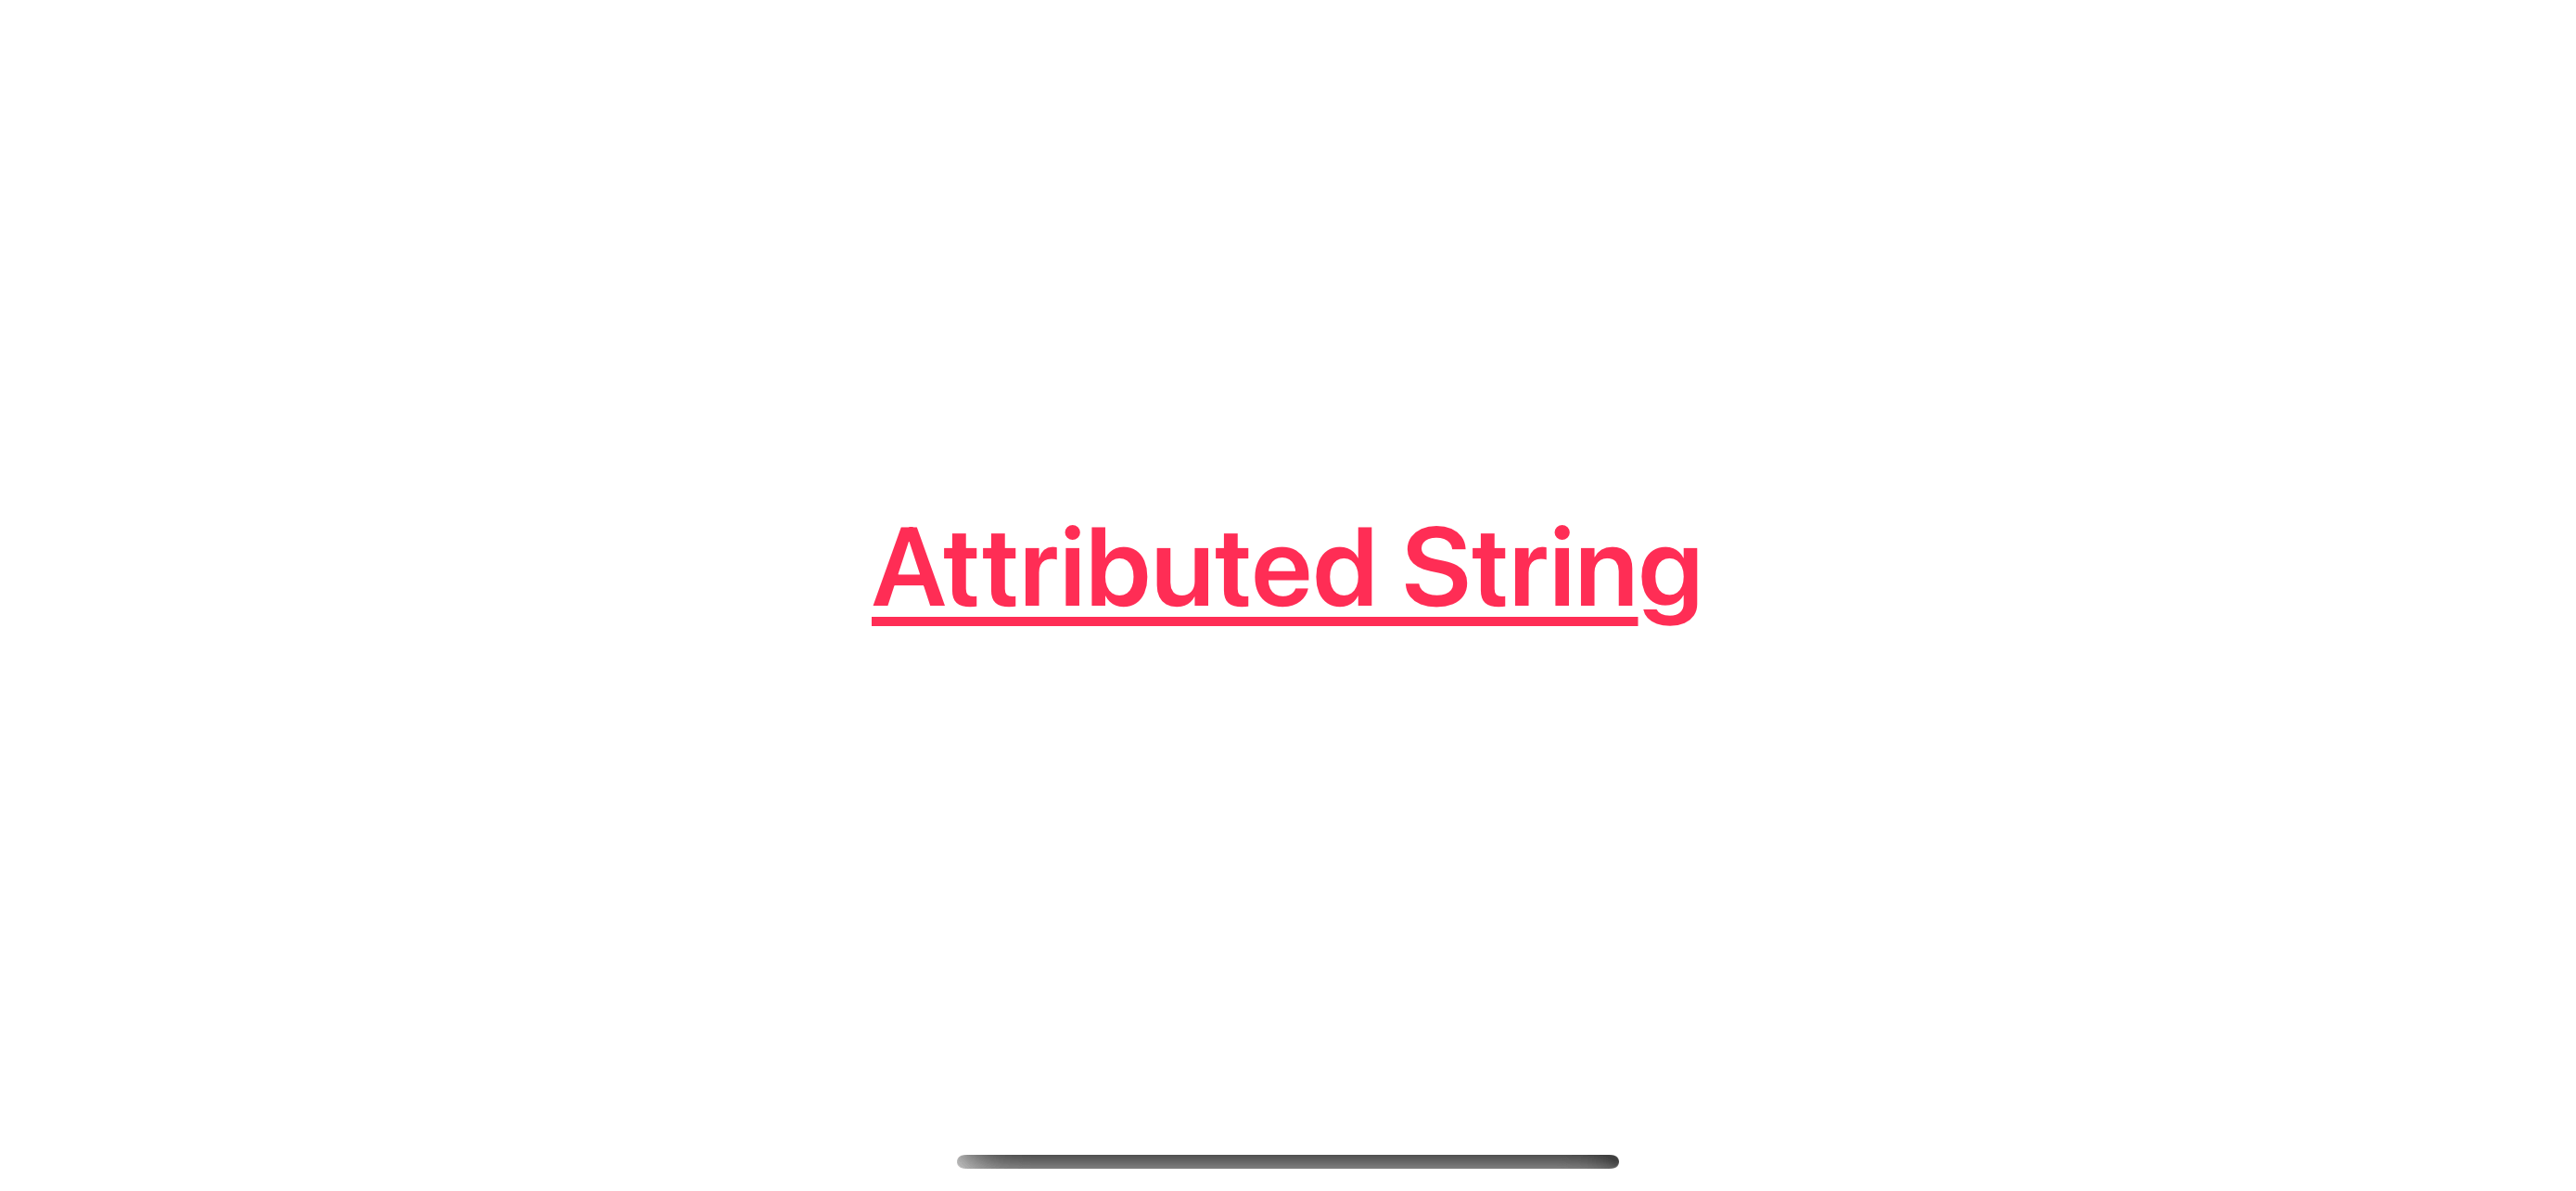
let string = "Attributed String"
let attributes: [NSAttributedString.Key : Any] = [
NSAttributedString.Key.foregroundColor: UIColor.systemPink,
NSAttributedString.Key.font: UIFont.boldSystemFont(ofSize: 40),
NSAttributedString.Key.underlineStyle: NSUnderlineStyle.single.rawValue
]
// 1
let nsAttributedString = NSAttributedString(string: string, attributes: attributes)
// 2
let attributedString = AttributedString(nsAttributedString)
return attributedString
}
var body: some View {
// 3
Text(content)
}1 An example of NSAttributedString.
2 Create an AttributedString from NSAttributedString.
3 Text view work with AttributedString.
Read more article about Foundation, NSAttributedString, SwiftUI, String, or see all available topic
Enjoy the read?
If you enjoy this article, you can subscribe to the weekly newsletter.
Every Friday, you'll get a quick recap of all articles and tips posted on this site. No strings attached. Unsubscribe anytime.
Feel free to follow me on Twitter and ask your questions related to this post. Thanks for reading and see you next time.
If you enjoy my writing, please check out my Patreon https://www.patreon.com/sarunw and become my supporter. Sharing the article is also greatly appreciated.
Become a patron Buy me a coffee Tweet ShareBuilt-in symbol animations in UIKit controls
In iOS 17, we can enable symbols animation in UIKit controls using the new property. Let's learn how to do it.
Bookmark in Xcode 15
Xcode 15 brings one of the great features of Xcode, the ability to bookmark your code.