How to set Info.plist Values based on Build Configuration in Xcode
Table of Contents
Info.plist is a file that contains information about an app, e.g., app name, app version, or even API Key for third-party service.
If you use build configuration to separate setting between development, stating, and production, you might want to configure Info.plist value based differently based on build configuration.
In this article, we will learn how to do that.
I will give you two examples.
- Setting a value that Xcode already provided. I will set a different app's name based on the build configuration.
- Setting a custom value. I will set an imaginary API key.
Setting a predefined value
If you open Info.plist or Info tab, under the "Bundle name", which is a key for the app name, you will see the value set to $(PRODUCT_NAME).
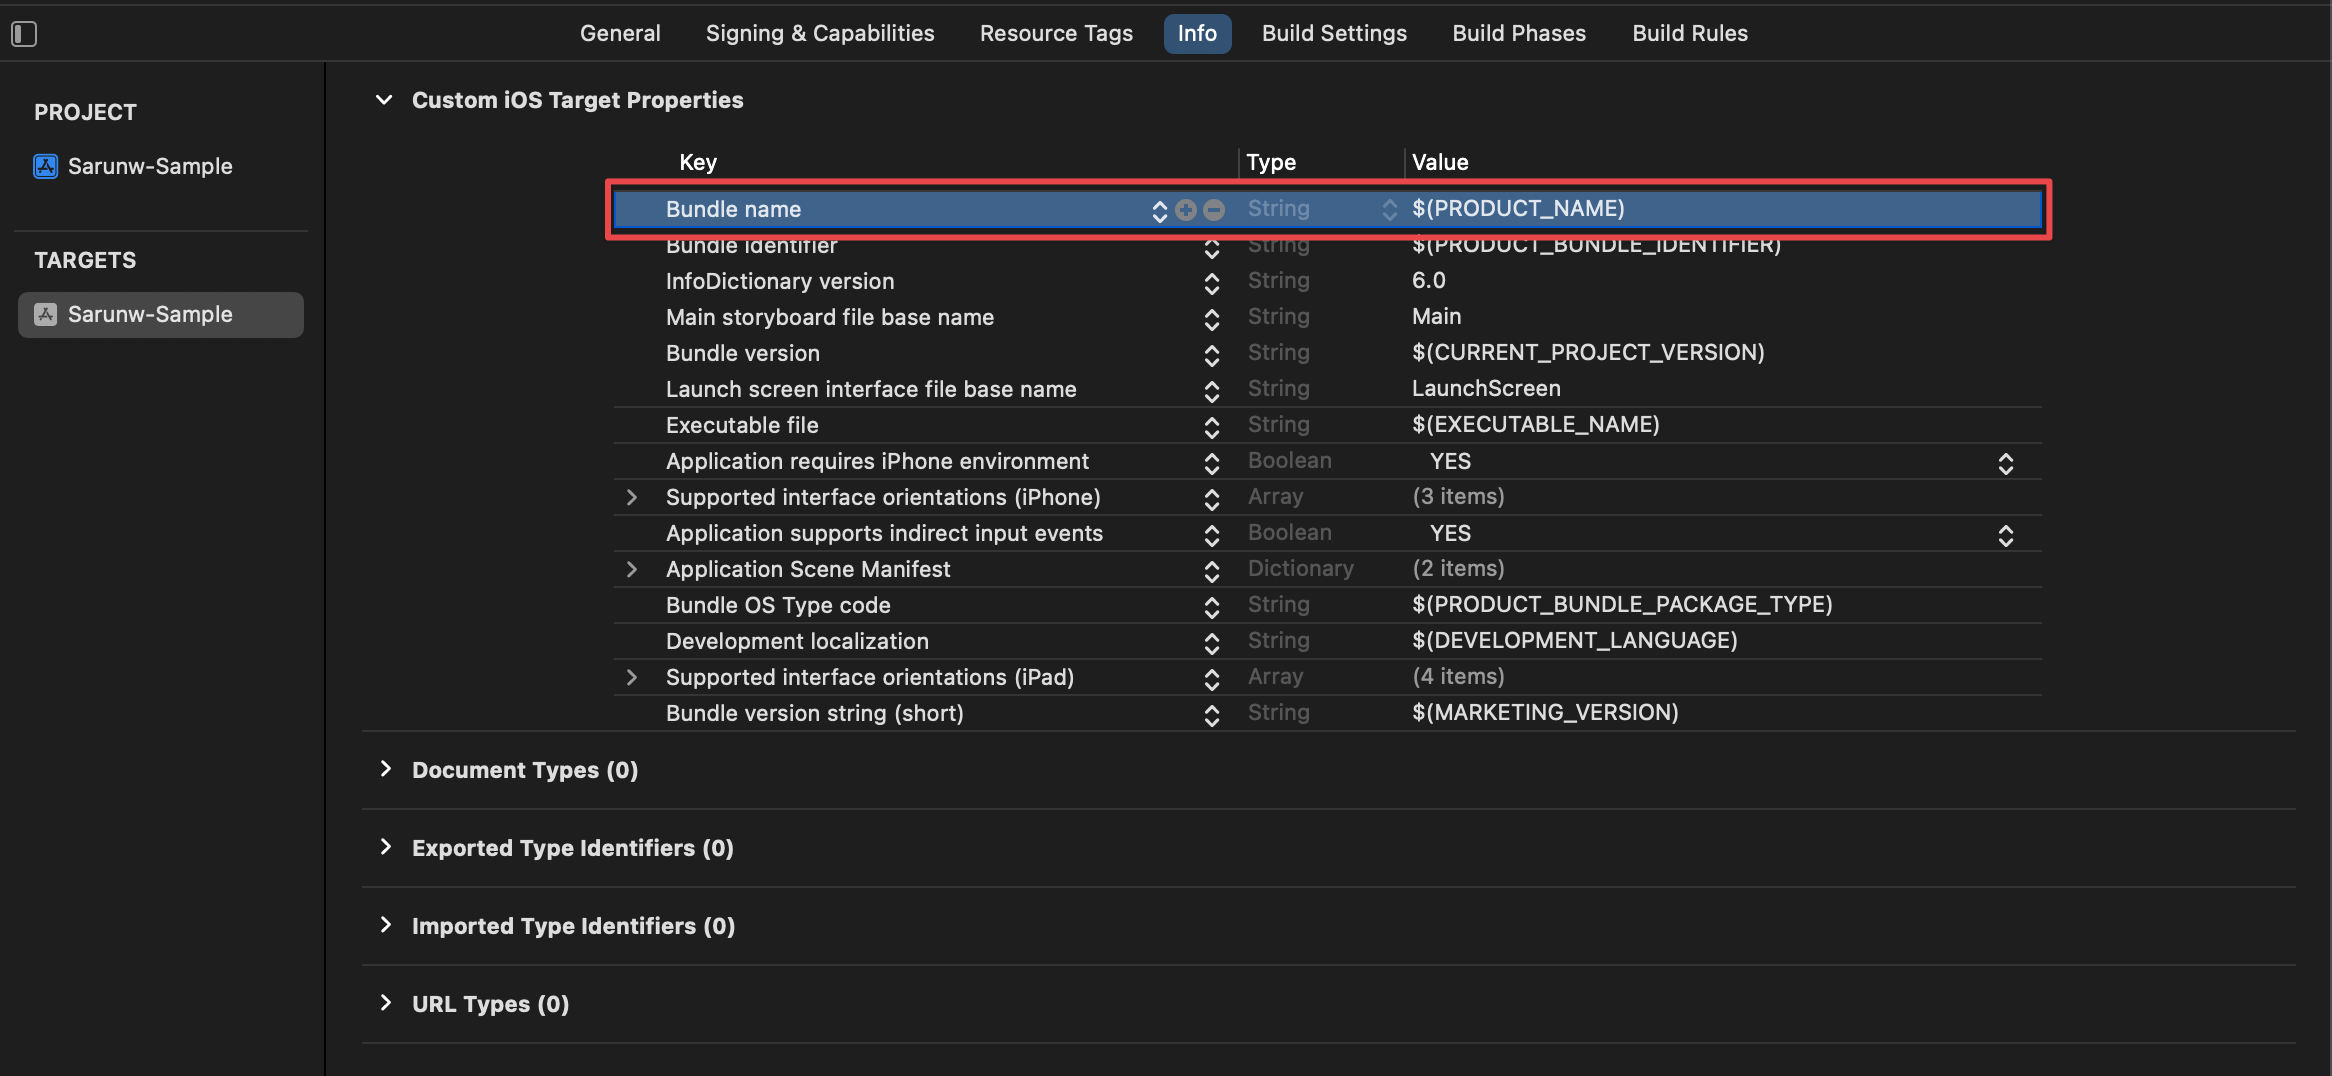
Dolla sign ($) and a build settings key between curly brackets (${BUILD_SETTINGS_KEY}) is a way to reference a build setting value.
In this case, our bundle name is set to the PRODUCT_NAME key in the build setting.
So, we need to modify the PRODUCT_NAME value in the build setting if we want to change the app name.
To do that.
- Select the "Build Settings" tab.
- Search for "product name". The key in the build setting is usually named after the key you see in the Info.plist, which is
PRODUCT_NAMEin this case. - Click on the arrow on the left of the "Product Name". You will see two nested rows with the key named after the Xcode build configuration,
Debug, andRelease. - Double-click on the value to change it. In this case, I change the app name for debug configuration to "Sarunw-Sample Debug".

That's all you need to do to change the app name based on the build configuration.
You can easily support sarunw.com by checking out this sponsor.
Localization Buddy: Easiest way to localize and update App Store metadata.
Setting a custom value
If you need to define a new Info.plist key and new Build configuration value, you can also do that.
In this example, I will create a new Info.plist key for an imaginary API Key, SARUNW_API_KEY.
Create a new Info.plist key
To create a new Info.plist key.
- Open the Info tab.
- Hover on the last row and click on the plus button (+).
- New row will appear. Name it whatever you want. In this case, I named it
SARUNW_API_KEY.
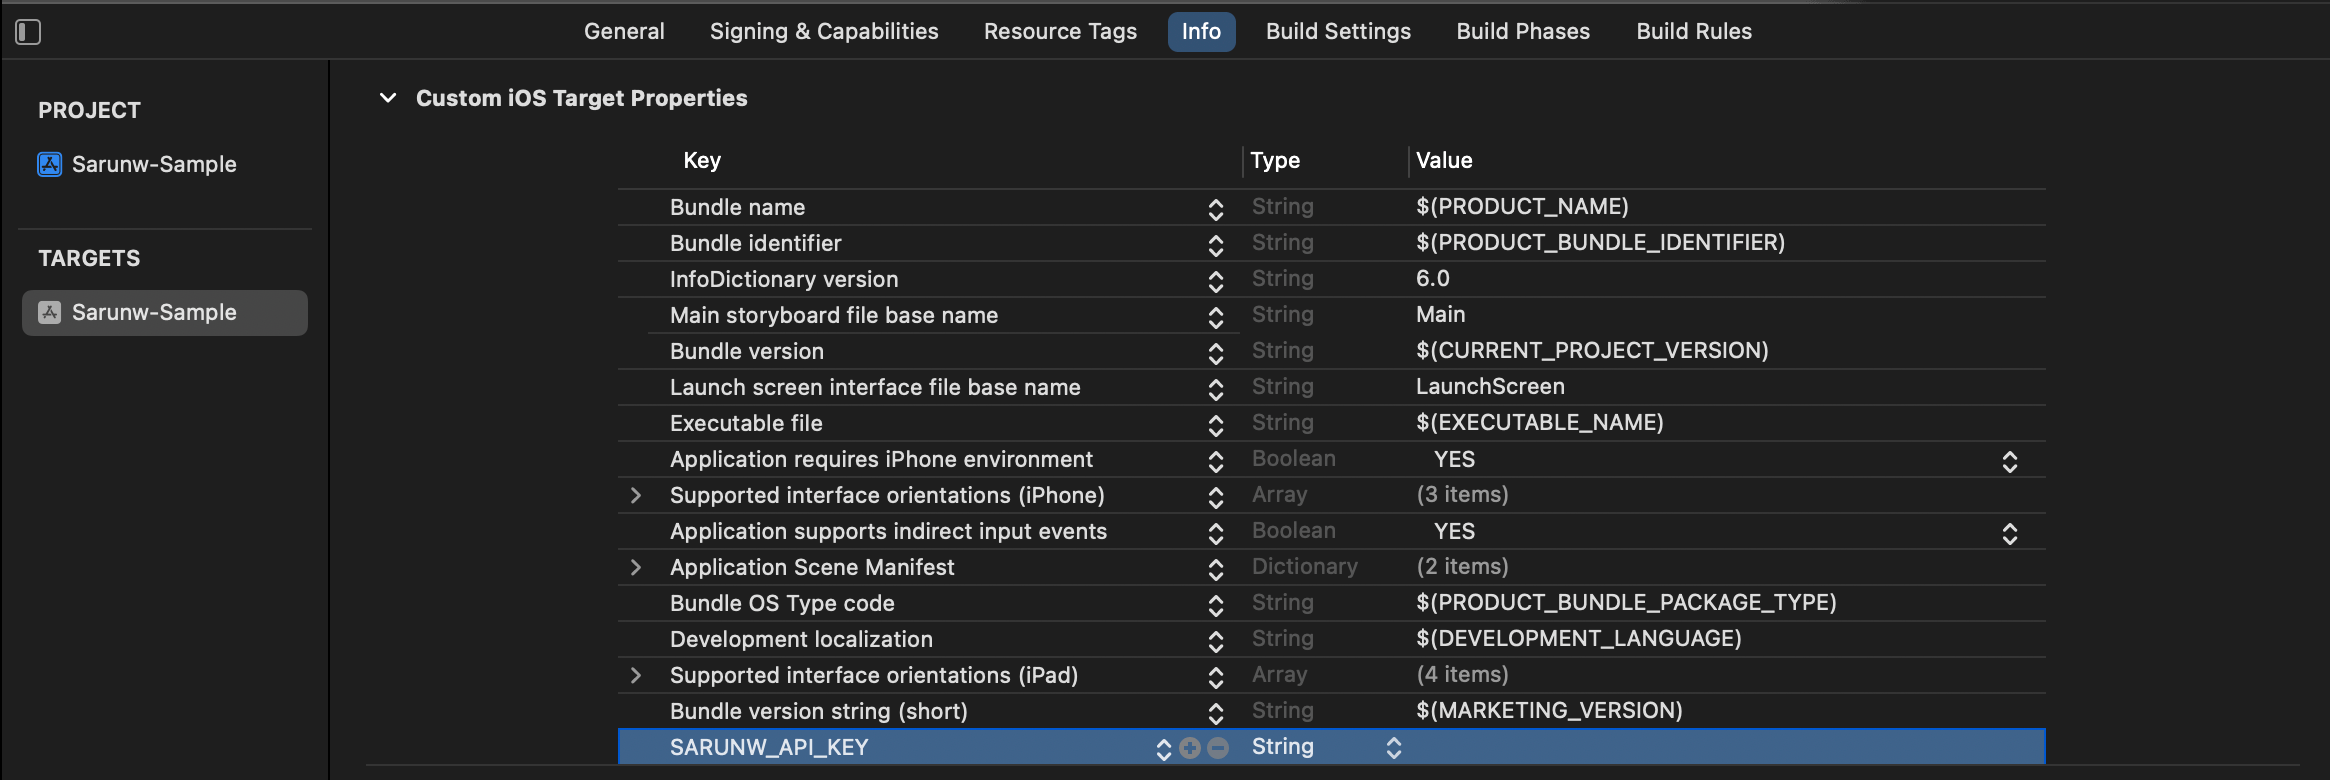
- Set the value by double-clicking on the value column. I want to use different values based on the build setting, so I will put a reference to a key in the build setting. In this case, I put it under the same name,
${SARUNW_API_KEY}.
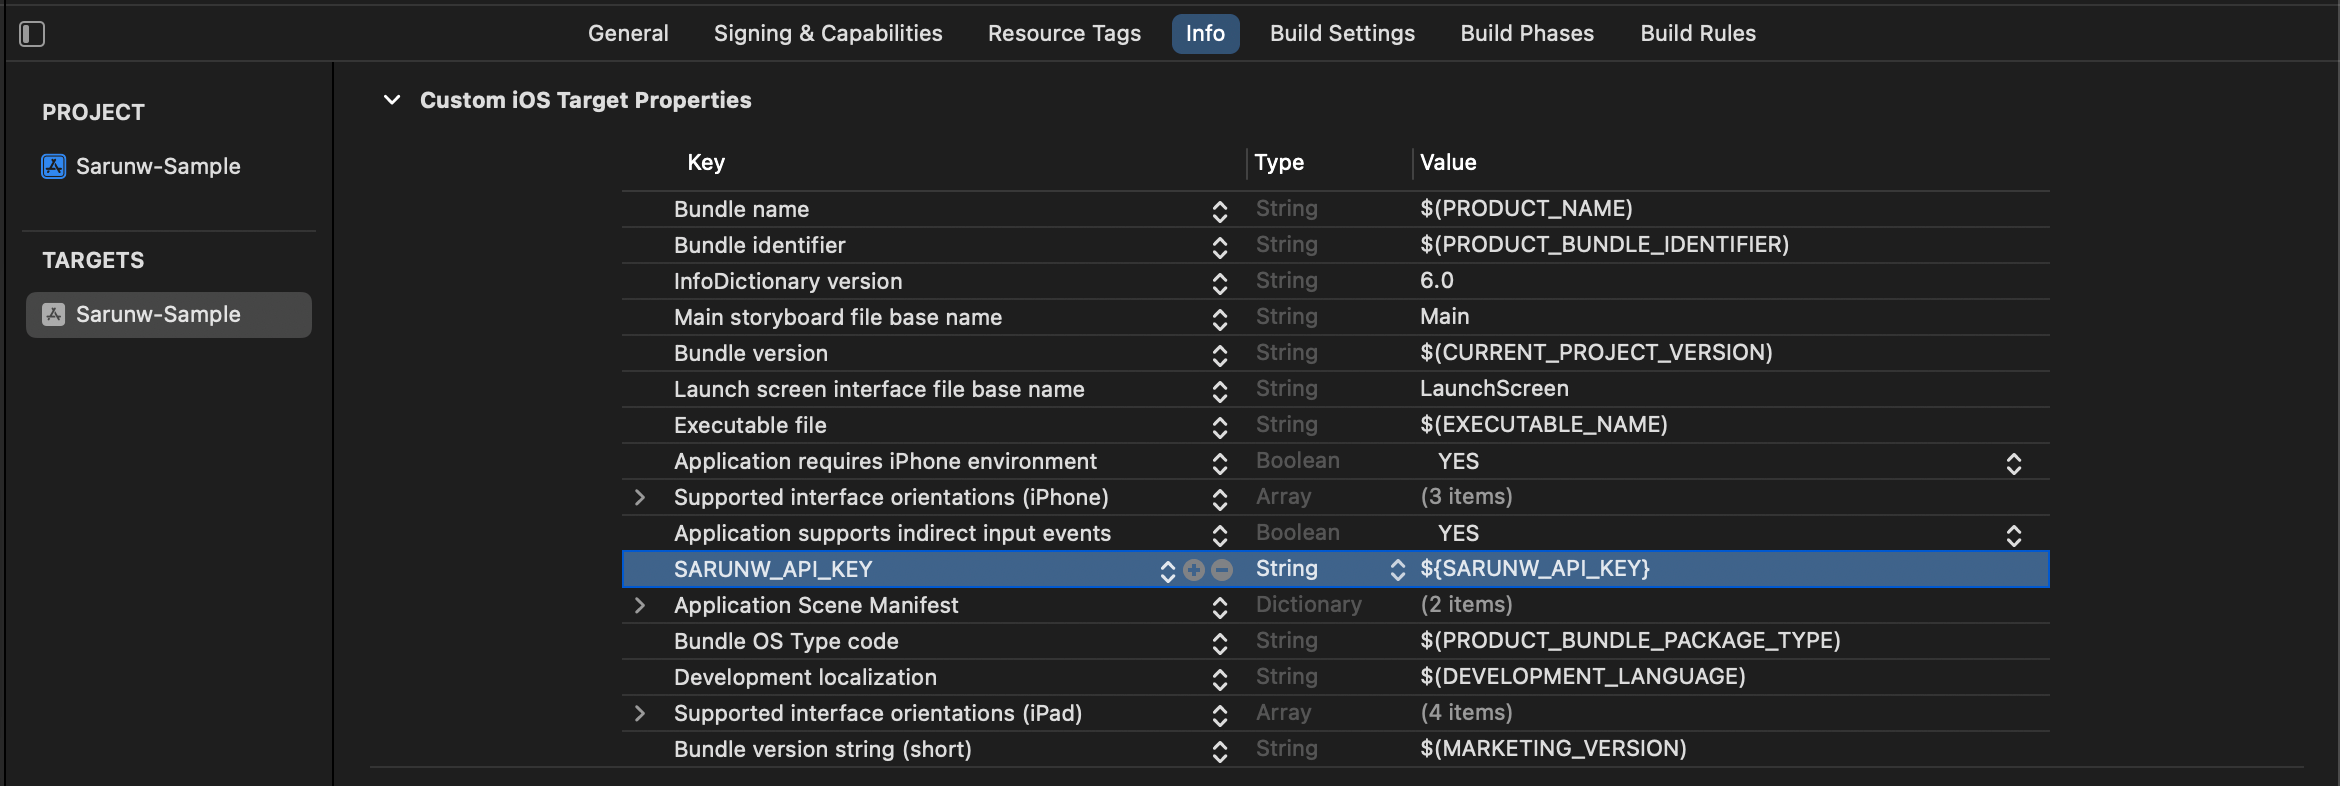
At this point, we got new Info.plist key with the value point to the SARUNW_API_KEY key in the build setting.
The last thing we need to do is create this key in the build setting.
Create a user-defined setting
To create a new key in the build setting.
- Open the Build Settings tab.
- Click on the plus button (+) at the upper left, then select "Add User-Defined Setting". Enter the name of the new key. In this case, I named it
SARUNW_API_KEY.
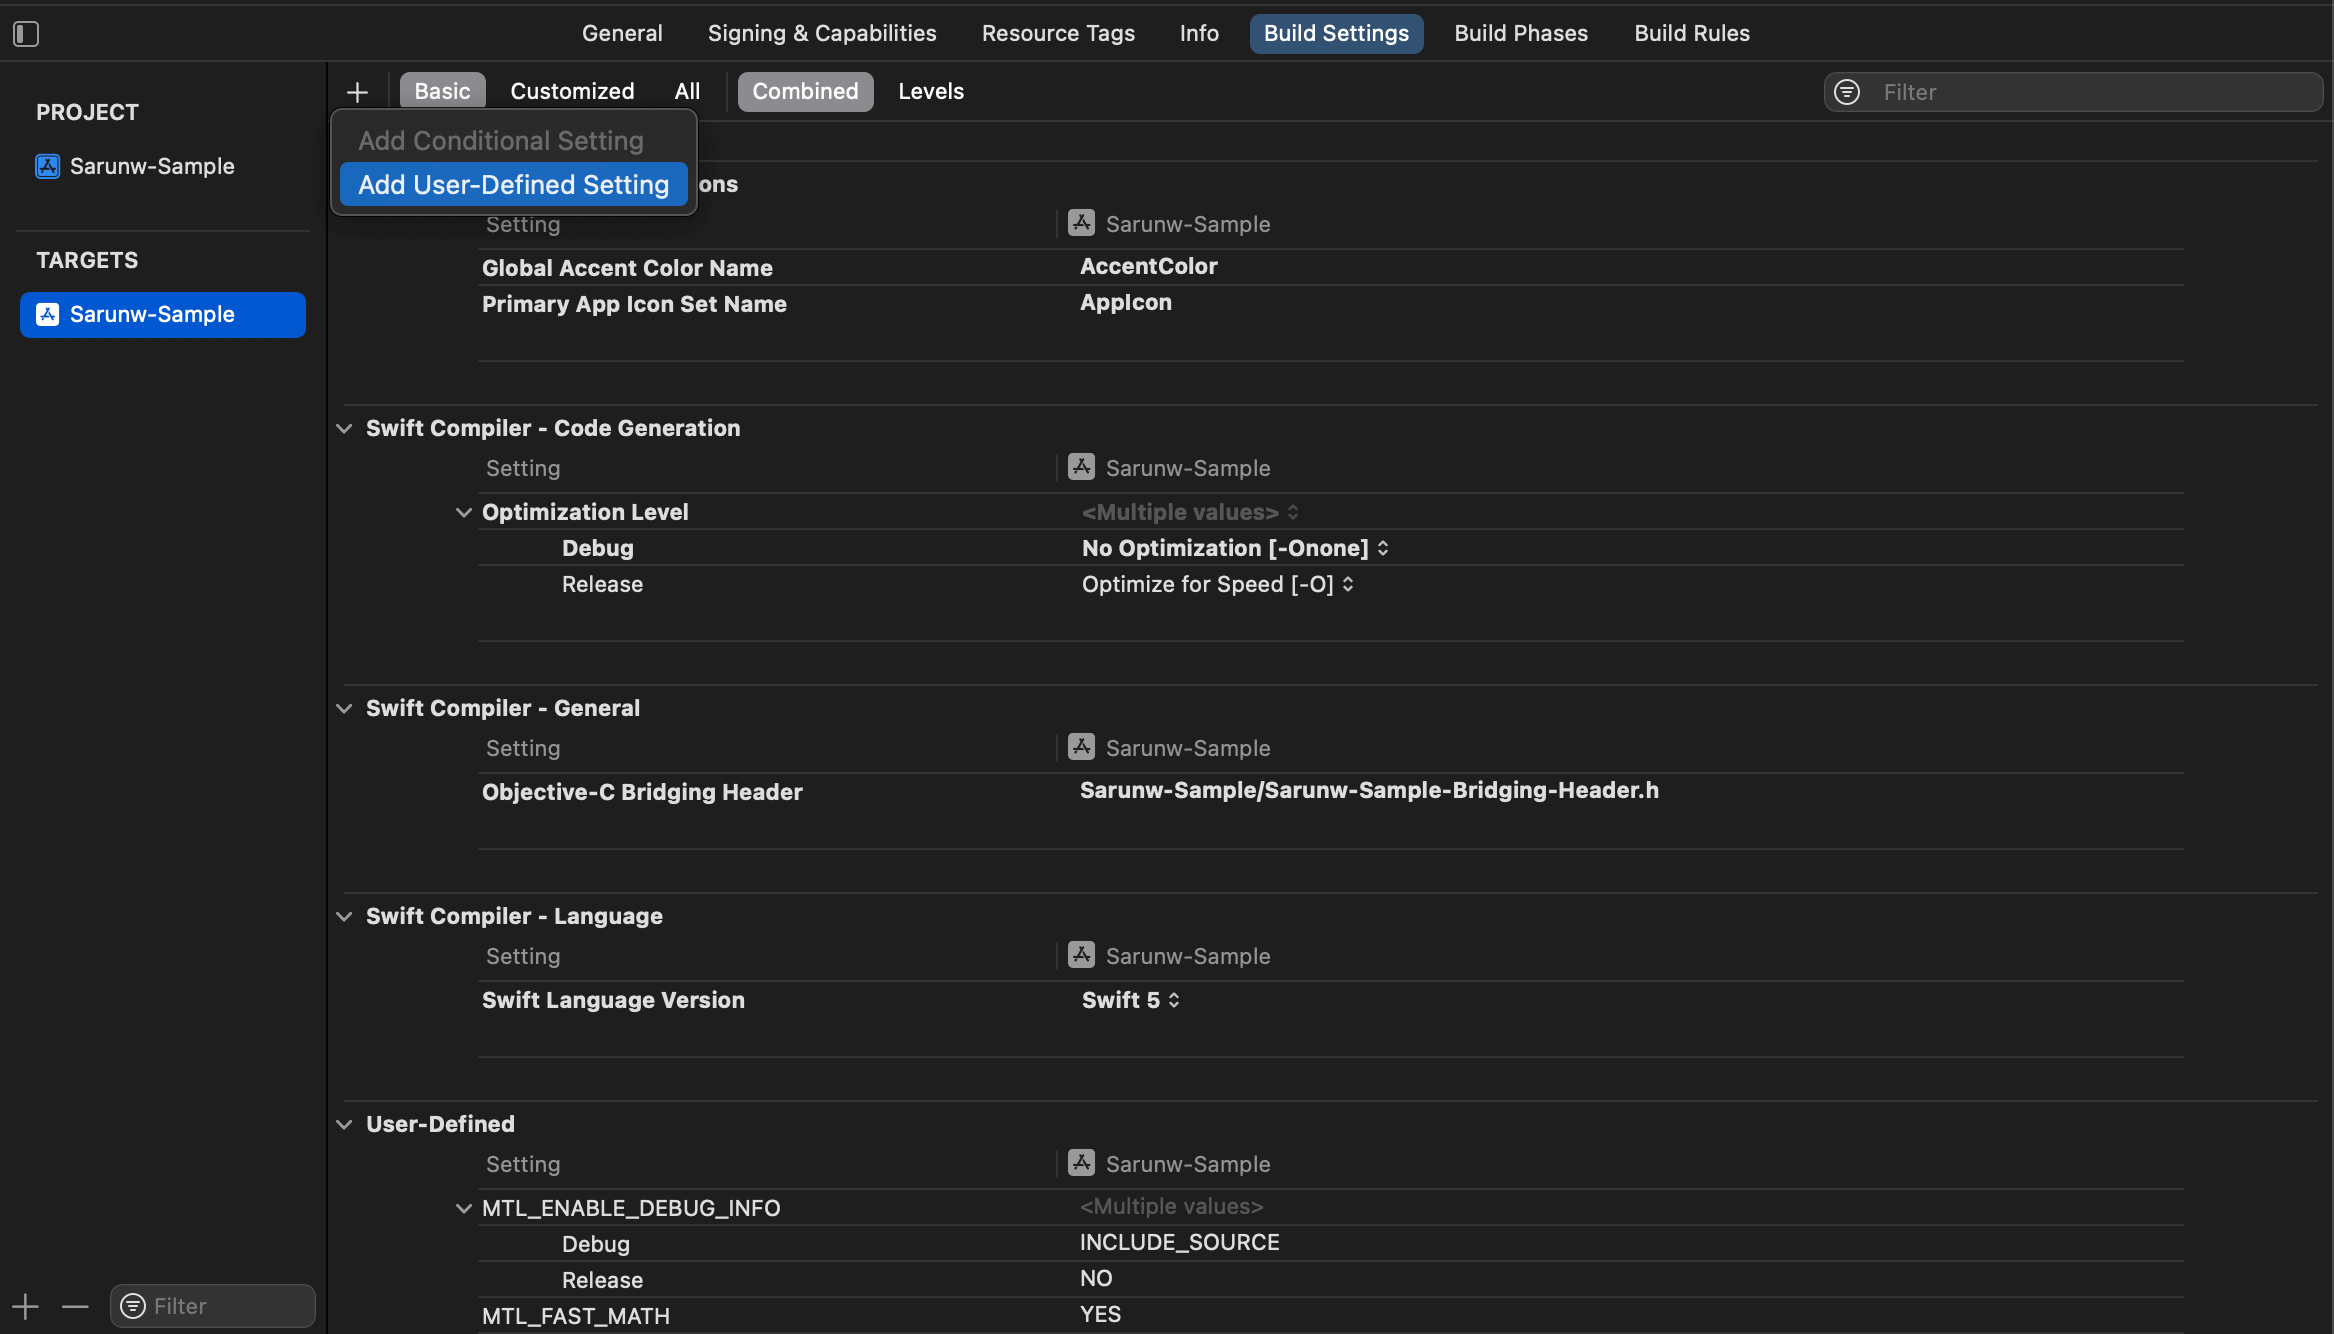
- Expand the new setting, and set the value based on the build configuration.
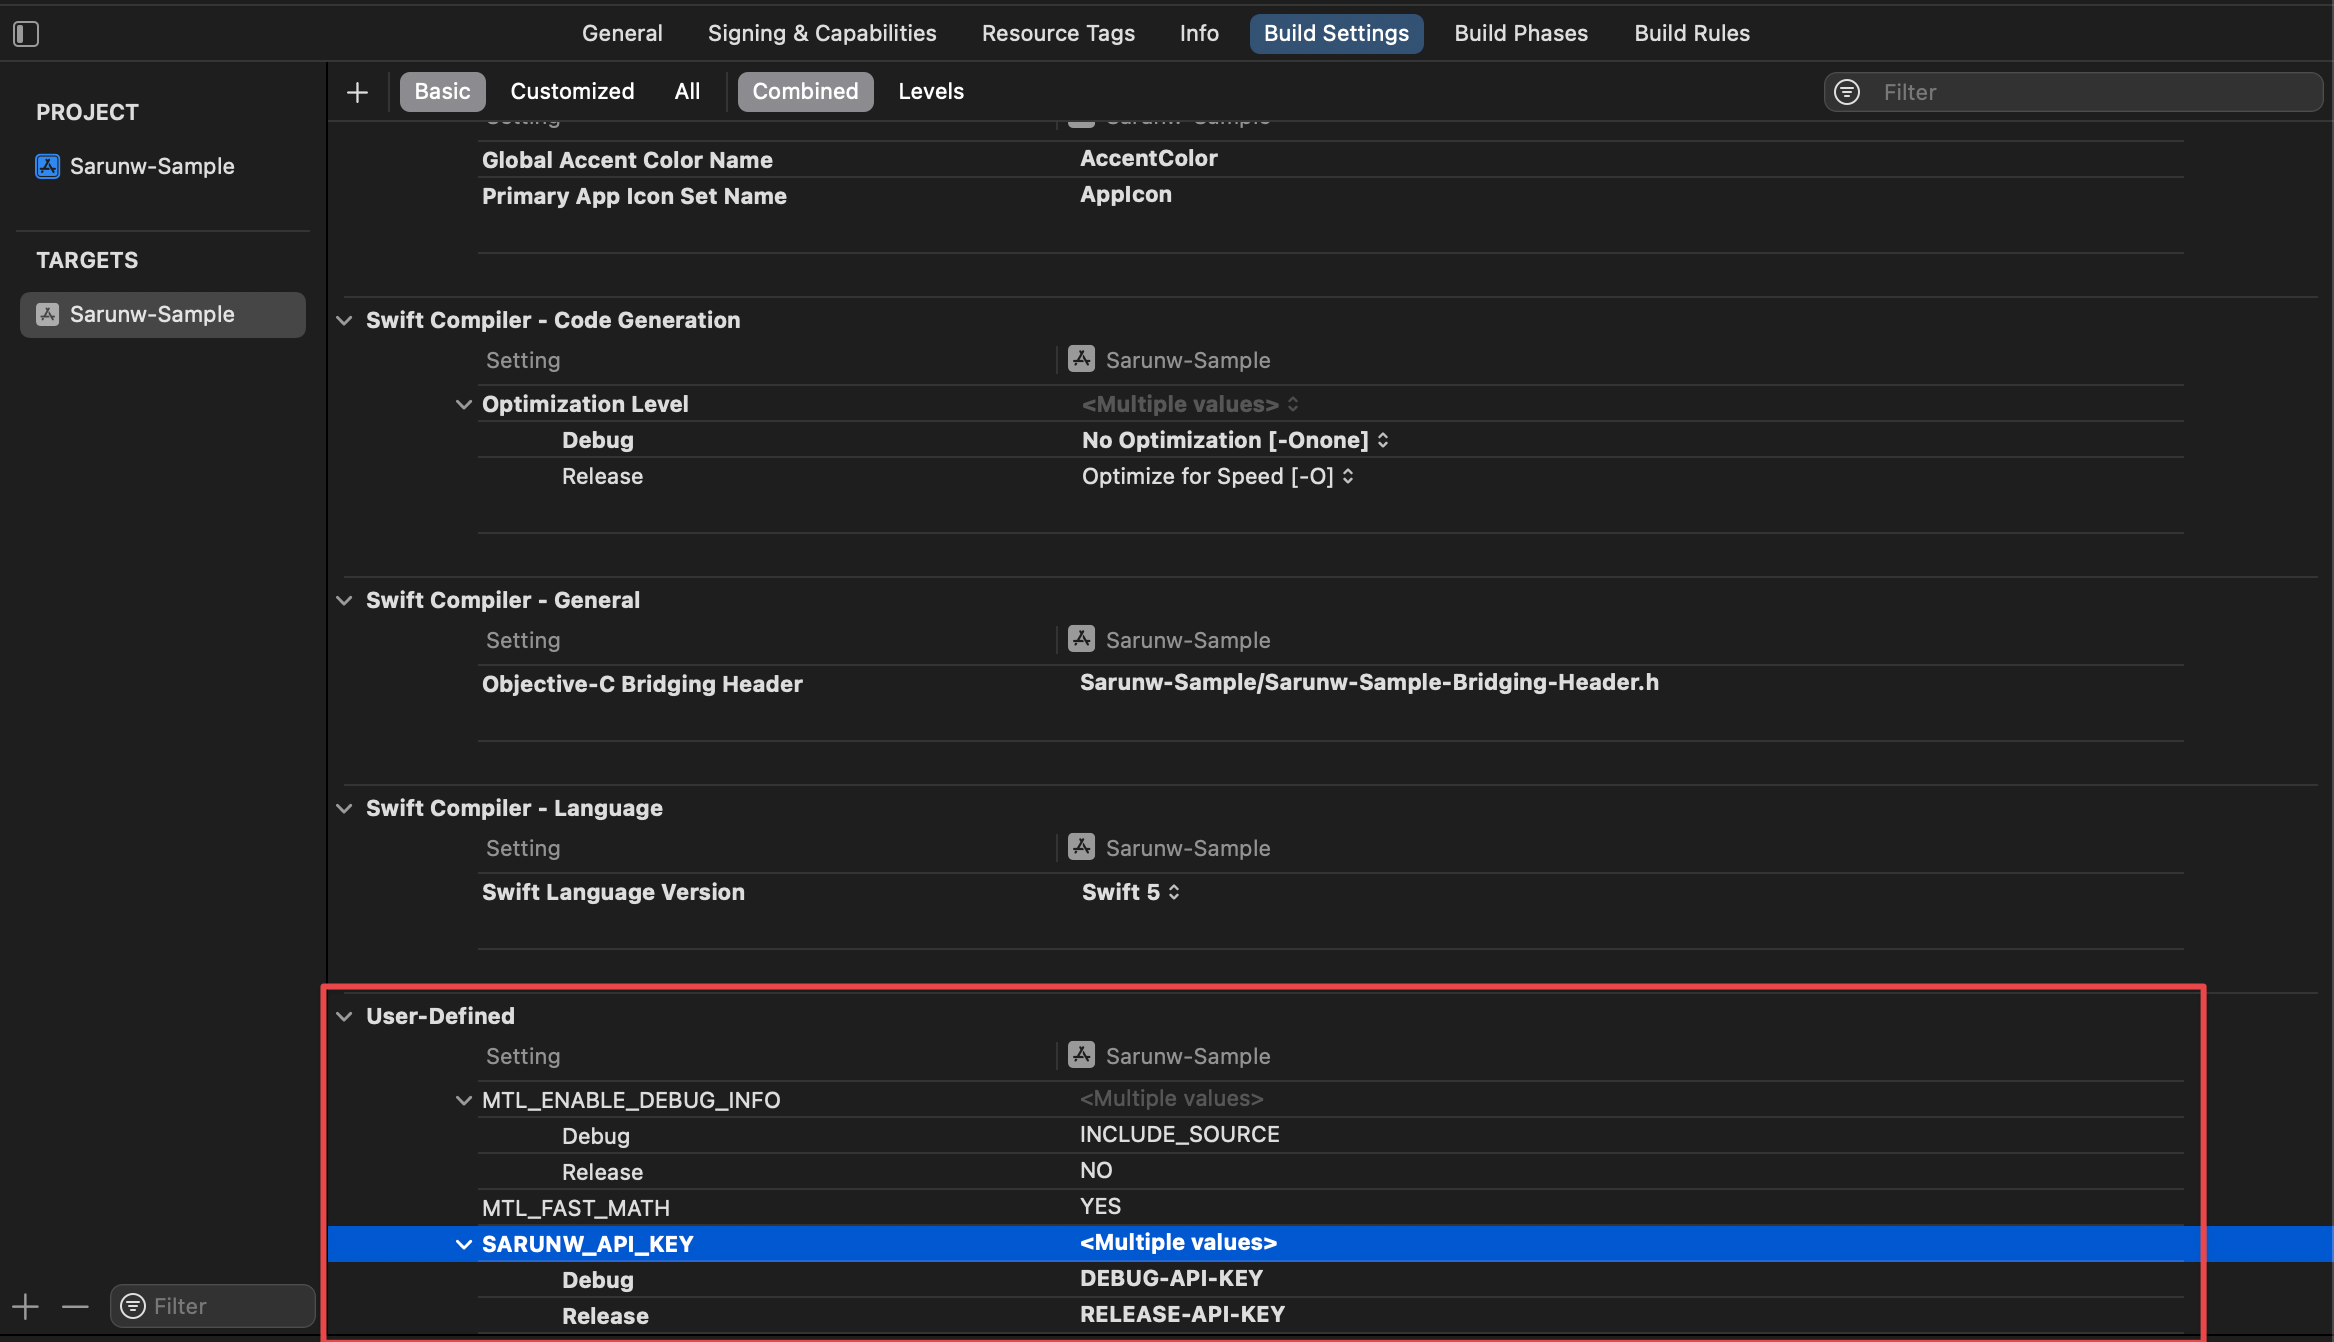
With this setting, you can have different SARUNW_API_KEY based on debug and release configuration.
You can test it by reading the value from the Info.plist file.
print(Bundle.main.object(forInfoDictionaryKey: "SARUNW_API_KEY"))
// Debug configuration
// DEBUG-API-KEY

// Release configuration
// RELEASE-API-KEYRead more article about Xcode, Development, or see all available topic
Enjoy the read?
If you enjoy this article, you can subscribe to the weekly newsletter.
Every Friday, you'll get a quick recap of all articles and tips posted on this site. No strings attached. Unsubscribe anytime.
Feel free to follow me on Twitter and ask your questions related to this post. Thanks for reading and see you next time.
If you enjoy my writing, please check out my Patreon https://www.patreon.com/sarunw and become my supporter. Sharing the article is also greatly appreciated.
Become a patron Buy me a coffee Tweet ShareConfigure Launch screen in SwiftUI using Storyboard
Configure a launch screen via Info.plist is quite limited. If you want greater control and flexibility, you can use a Storyboard as a launch screen instead.