How to make custom XCTest assertions show an error at the call site
Table of Contents
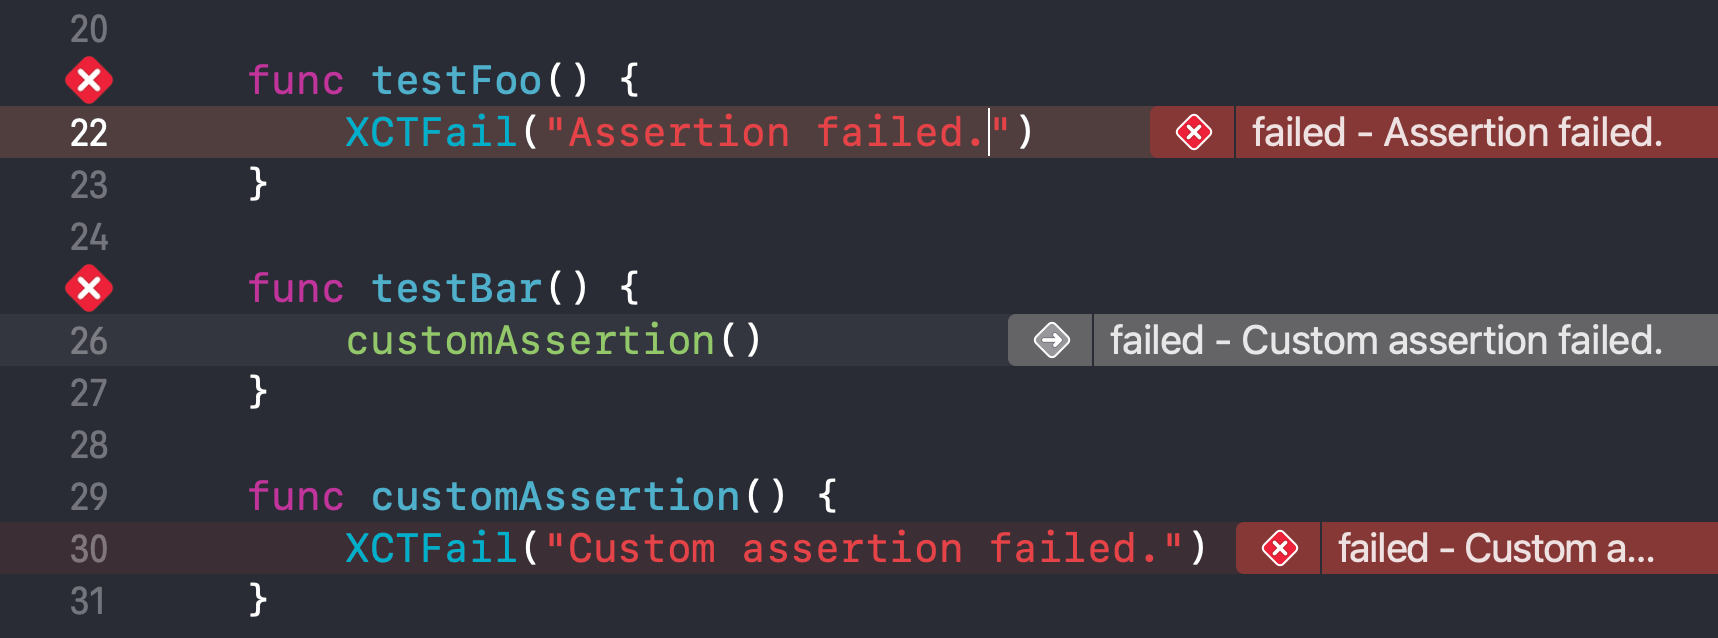
If you have ever written a custom XCTest assertion, you might notice that when that assertion fails, the error doesn't show up at the line that is called the custom assertion, but the actual implementation of that helper method.
In the following example, when customAssertion() fails, the error shows up inside its implementation, not the line that calls the assertion (line 26 in testBar()).

We will learn how to make an error show up at the call site in this article.
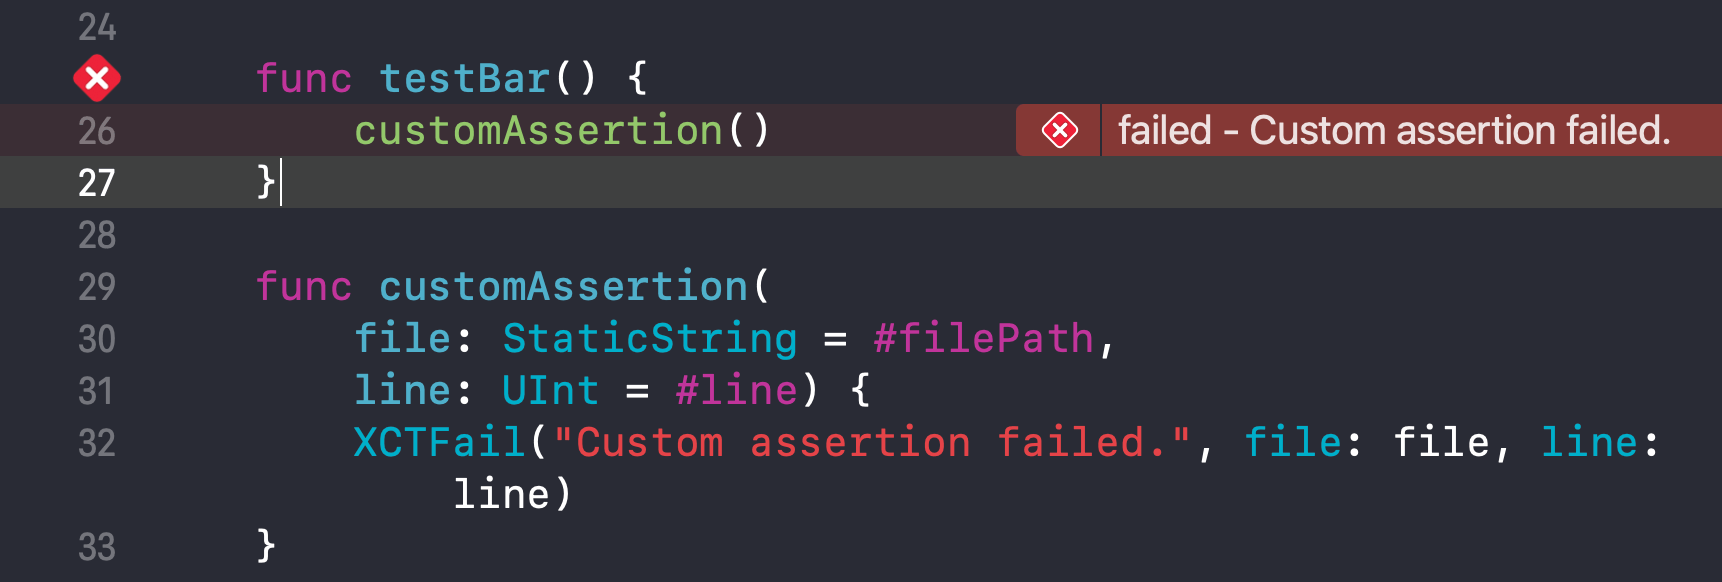
In the end, we will get something like this.

Capture current file and line number
Swift provides many debugging identifiers such as #filePath, #line, #function, that expands to string and integer corresponding to a current location in source code (file path, line number, function name).
These identifiers allow built-in assertions to show an error at the line where the error occurs.
#filePath and #line are two debugging identifiers that we need in this situation.
#filePathwill capture a full path to the current file.#linehas two behaviors.- When used in a normal context, it will return the line number at that point.
- When used as a default argument, it will return the line number of the caller.
You can use it like other identifiers such as #available or #selector(...).
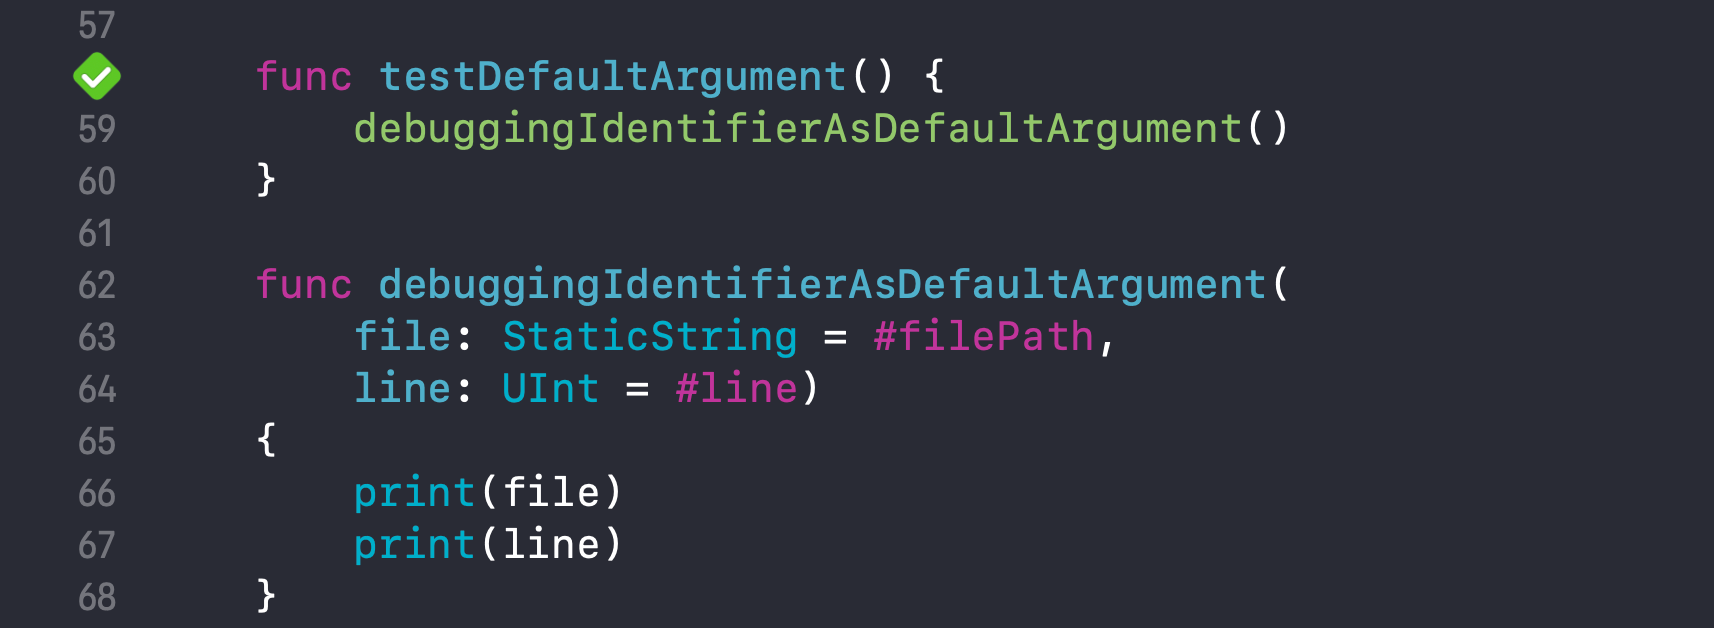
Using #line in a normal context will return the line number at the execution point, line 34 in this case.

This is an output.
/Users/sarunw/Documents/sarunw-example/test-util/test-utilTests/test_utilTests.swift
34
But when using #line as a default argument, it will return the line number of the caller. In this case, the #line is 59 instead of 64.

Here is an output.
/Users/sarunw/Documents/sarunw-example/test-util/test-utilTests/test_utilTests.swift
59
Now that you know the behaviors of #line and #filePath, let's put them into use.
You can easily support sarunw.com by checking out this sponsor.

Translate your app In 1 click: Simplifies app localization and helps you reach more users.
Pass file and line number into custom assertions
All XCTTest assertions accept #filePath and #line in their method signature.
Here is the method signature of XCTFail and XCTAssertEqual.
func XCTFail(
    _ message: String = "",
    file: StaticString = #filePath,
    line: UInt = #line) {}

func XCTAssertEqual<T>(
    _ expression1: @autoclosure () throws -> T,
    _ expression2: @autoclosure () throws -> T,
    _ message: @autoclosure () -> String = "",
    file: StaticString = #filePath,
    line: UInt = #line) where T : Equatable {}
This #filePath and #line make it possible for assertions to show an error message at the line the assertion is was called.
When using
#lineas a default argument, it will return the line number of the caller.
To make our custom assertions show an error at the call site, we have to pass down #filePath and #line to underlying assertions.
We add two new parameters, #filePath and #line, in our custom assertion and pass down that argument to underlying assertions, which is XCTFail in this case.
func customAssertion(
  file: StaticString = #filePath,
  line: UInt = #line) {
    XCTFail("Custom assertion failed.", file: file, line: line)
}
With this small change, our customAssertion() shows an error at the call site the same way as the built-in XCTest assertions.

You can easily support sarunw.com by checking out this sponsor.

Translate your app In 1 click: Simplifies app localization and helps you reach more users.
Conclusion
To make your custom XCTest assertions act like the built-int one, you need to do two things.
- Accept two parameters with a default argument to
#filePathand#line. - Pass
#filePathand#lineto every assertion in your method.
Here is how your custom assertion would look like.
func assertname(
  parameters,
  file: StaticString = #filePath,
  line: UInt = #line) {
    call assertions passing file and line arguments
    // XCTAssertTrue(true, file: file, line: line)
    // XCTAssertFalse(false, file: file, line: line)
    // XCTAssertNil(nil, file: file, line: line)
}
Read more article about Testing, XCTest, or see all available topic
Enjoy the read?
If you enjoy this article, you can subscribe to the weekly newsletter.
Every Friday, you'll get a quick recap of all articles and tips posted on this site. No strings attached. Unsubscribe anytime.
Feel free to follow me on Twitter and ask your questions related to this post. Thanks for reading and see you next time.
If you enjoy my writing, please check out my Patreon https://www.patreon.com/sarunw and become my supporter. Sharing the article is also greatly appreciated.
Become a patron Buy me a coffee Tweet ShareWhat is image rendering mode in iOS
When using an image in iOS, you have an opportunity to control how you want the image to be rendered. Most of the time, you don't need to care about this, but when images do not render the way you want, make sure you know how to customize them.