What is image rendering mode in iOS
Table of Contents
When using an image in iOS, you have an opportunity to control how you want the image to be rendered. The image property that controls this is called rendering mode.
Types of rendering modes
There are two types of rendering modes.
Original
Original rendering mode will draw an image as-is.
Template
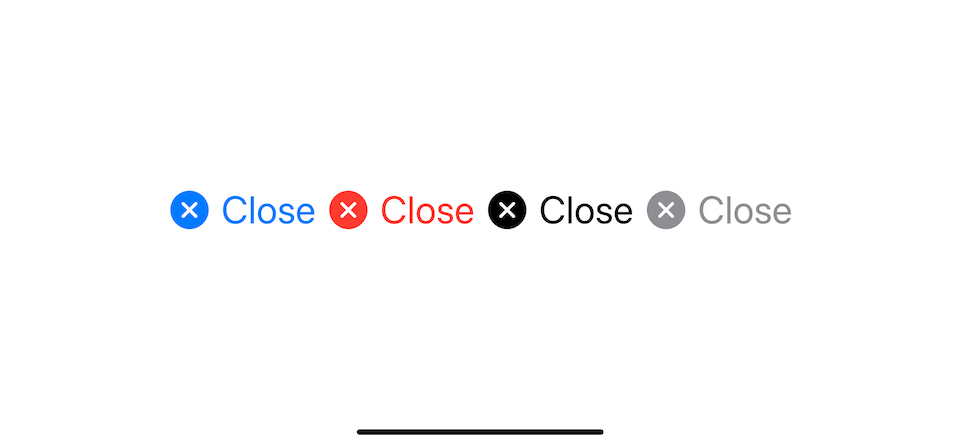
Template rendering mode will draw an image ignoring its color information, creating tintable images where a new color will paint over all non-transparent pixels.
Here is an example of the same image rendered in original and template mode.[1]

You can easily support sarunw.com by checking out this sponsor.
Offline Transcription: Fast, privacy-focus way to transcribe audio, video, and podcast files. No data leaves your Mac.
How to set the rendering mode
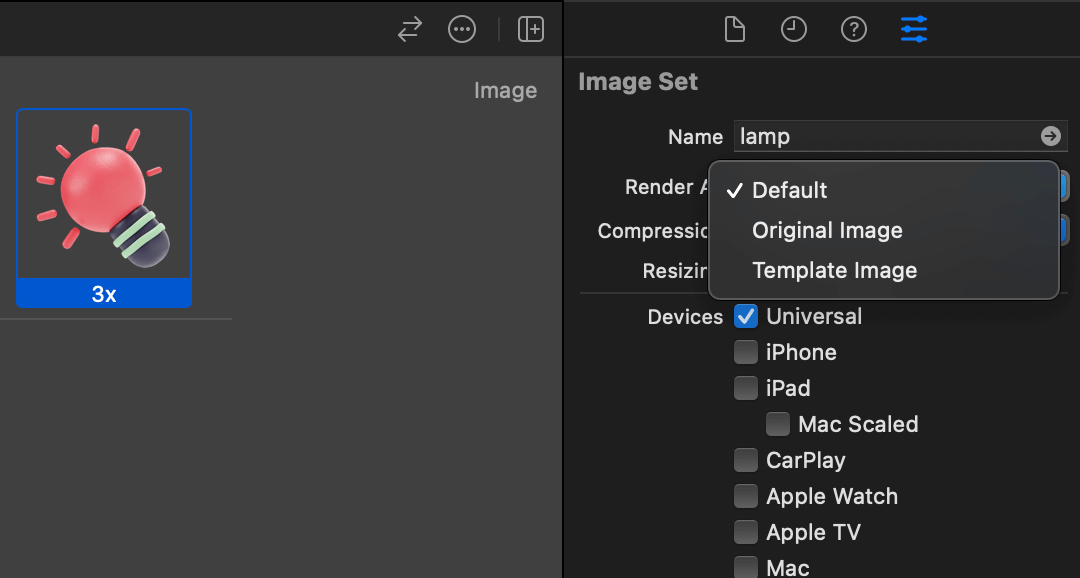
You can set image rendering mode through the Asset Catalog[2] or programmatically.
Asset Catalog
When adding a new image into Asset Catalog, Xcode will set its rendering mode to Default.
We will discover the default rendering mode in the later section. Right now, you can think of it as no preference.
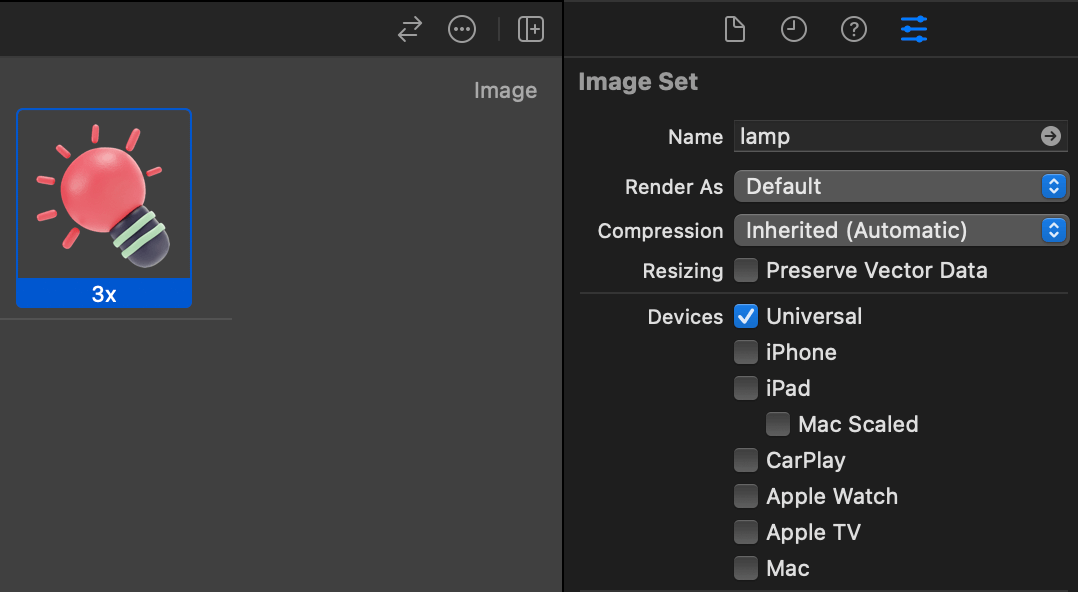
You can change image rendering mode by selecting it from the Render As option under the Attributed Inspector.
Programmatically via UIKit
We can set image rendering mode by using the UIImage instance method, withRenderingMode(_:). This method will return a new instance of UIImage that uses the specified rendering mode.
let templateImage = UIImage(named: "lamp")?.withRenderingMode(.alwaysTemplate)Programmatically via SwiftUI
We have an equivalent view modifier in SwiftUI called renderingMode(_:).
Image("lamp")
    .renderingMode(.template)
What is the template rendering mode for
We learn how to set rendering mode, but a more important question is why we need template rendering mode.
Original rendering mode renders an image as they appear in the original source image. This might be what we expected from most images, such as product images and onboarding illustrations.

Not every image is created equals. Some images are designed with purposes to use as image masks, such as a button icon where we want to use an image shape, not its original color.
What is the default rendering mode
In the How to set rendering mode in Asset Catalog section, we see that the default rendering mode is set to "Default". Ideally, you should set rendering mode for all of your images to match the purpose of that image. Setting it to default means that the image has no specific purpose and can be rendered in either original or template mode.
How does the system know which mode to render if we don't specify one
If we don't specify rendering mode to an image, the system will render it based on the rendering mode of where it used.
Each view or control has its own default rendering mode. This rendering mode doesn't document anywhere, but it is the one that matches the system style, such as template rendering mode for tab bar item or navigation bar item.
Here are some examples of default rendering modes for each view and control.
| View/Control | rendering mode |
|---|---|
| UIImageView | Original |
| UIButton(type: .system) | Template |
| UIButton(type: .custom) | Original |
| UITabBarItem | Template |
| UIBarButtonItem | Template |
let image = UIImage(named: "small-lamp")

let imageView = UIImageView(image: image)
imageView.contentMode = .center

let systemButton = UIButton(type: .system)
systemButton.setImage(image, for: .normal)
systemButton.setTitle("UIButton(type: .system)", for: .normal)

let customButton = UIButton(type: .custom)
customButton.setImage(image, for: .normal)
customButton.setTitle("UIButton(type: .custom)", for: .normal)

let barButtonItem = UIBarButtonItem(image: image, style: .plain, target: nil, action: nil)
navigationItem.rightBarButtonItem = barButtonItem

let tabBarItem = UITabBarItem(title: "Small lamp", image: image, selectedImage: nil)
self.tabBarItem = tabBarItem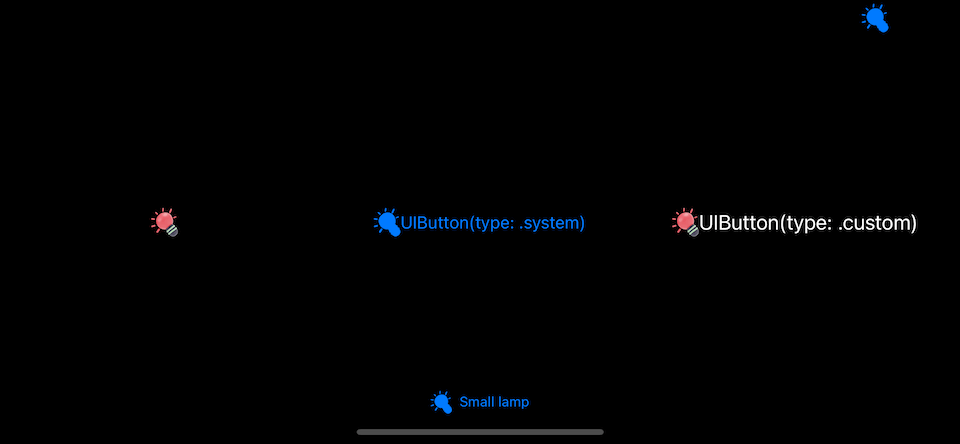
If we change the rendering mode of the image, the system will respect that and ignore the default rendering mode of the destination view.
let image = UIImage(named: "small-lamp")?.withRenderingMode(.alwaysTemplate)
Here is how it looks for the original rendering mode.
let image = UIImage(named: "small-lamp")?.withRenderingMode(.alwaysOriginal)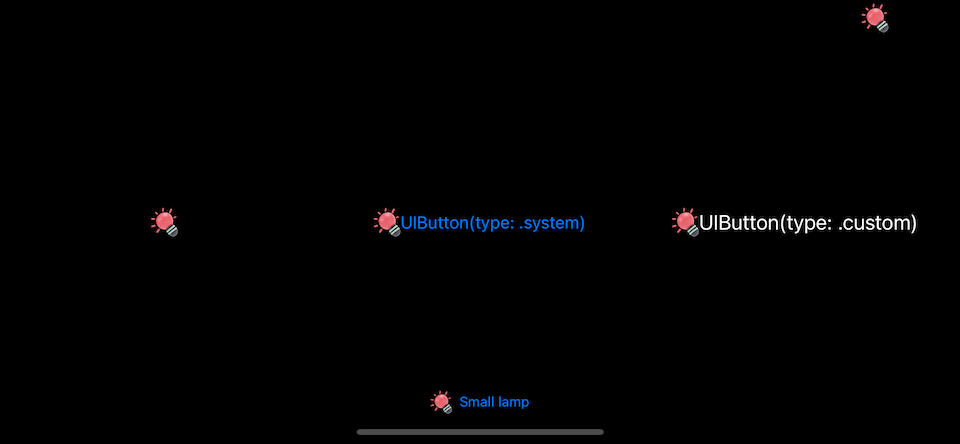
You can easily support sarunw.com by checking out this sponsor.
Offline Transcription: Fast, privacy-focus way to transcribe audio, video, and podcast files. No data leaves your Mac.
Conclusion
Image rendering mode is where we can set the purpose of that image, whether it means using as-is or as a template.
Setting this for every image is troublesome, so each UI element comes with a default rendering mode that makes sense for that UI, e.g., original rendering mode for UIImageView, template rendering mode for UITabBarItem.
So, most of the time, you can leave rendering mode as default and depend on the view to choose the right one for you, but if you have a specific need that doesn't match the default behavior, you can control it by setting the rendering mode.
Read more article about Image or see all available topic
Enjoy the read?
If you enjoy this article, you can subscribe to the weekly newsletter.
Every Friday, you'll get a quick recap of all articles and tips posted on this site. No strings attached. Unsubscribe anytime.
Feel free to follow me on Twitter and ask your questions related to this post. Thanks for reading and see you next time.
If you enjoy my writing, please check out my Patreon https://www.patreon.com/sarunw and become my supporter. Sharing the article is also greatly appreciated.
Become a patron Buy me a coffee Tweet ShareWhat is a variant in SF Symbols
iOS introduces a new concept to SF Symbols, SymbolVariants. Let's see how this improves the way we interact with symbols.
How to make custom XCTest assertions show an error at the call site
Learn how to write custom XCTest assertions that match the behavior of the built-in ones.