How to set UserDefaults value with Launch Arguments
Table of Contents
Learn how to use a launch argument to override UserDefaults value and test your apps.
What is a launch argument
In programming, we can provide different inputs to a method by passing an argument. Launch argument is a way to pass arguments to the iOS application on launch.
Launch Argument has many functions, but I will use a launch argument to set UserDefaults values.
You can easily support sarunw.com by checking out this sponsor.

Localization Buddy: Easiest way to localize and update App Store metadata.
How to set a launch argument
Before we explore how to set a UserDefaults value, let's learn how to set launch argument in Xcode.
To set launch argument in Xcode:
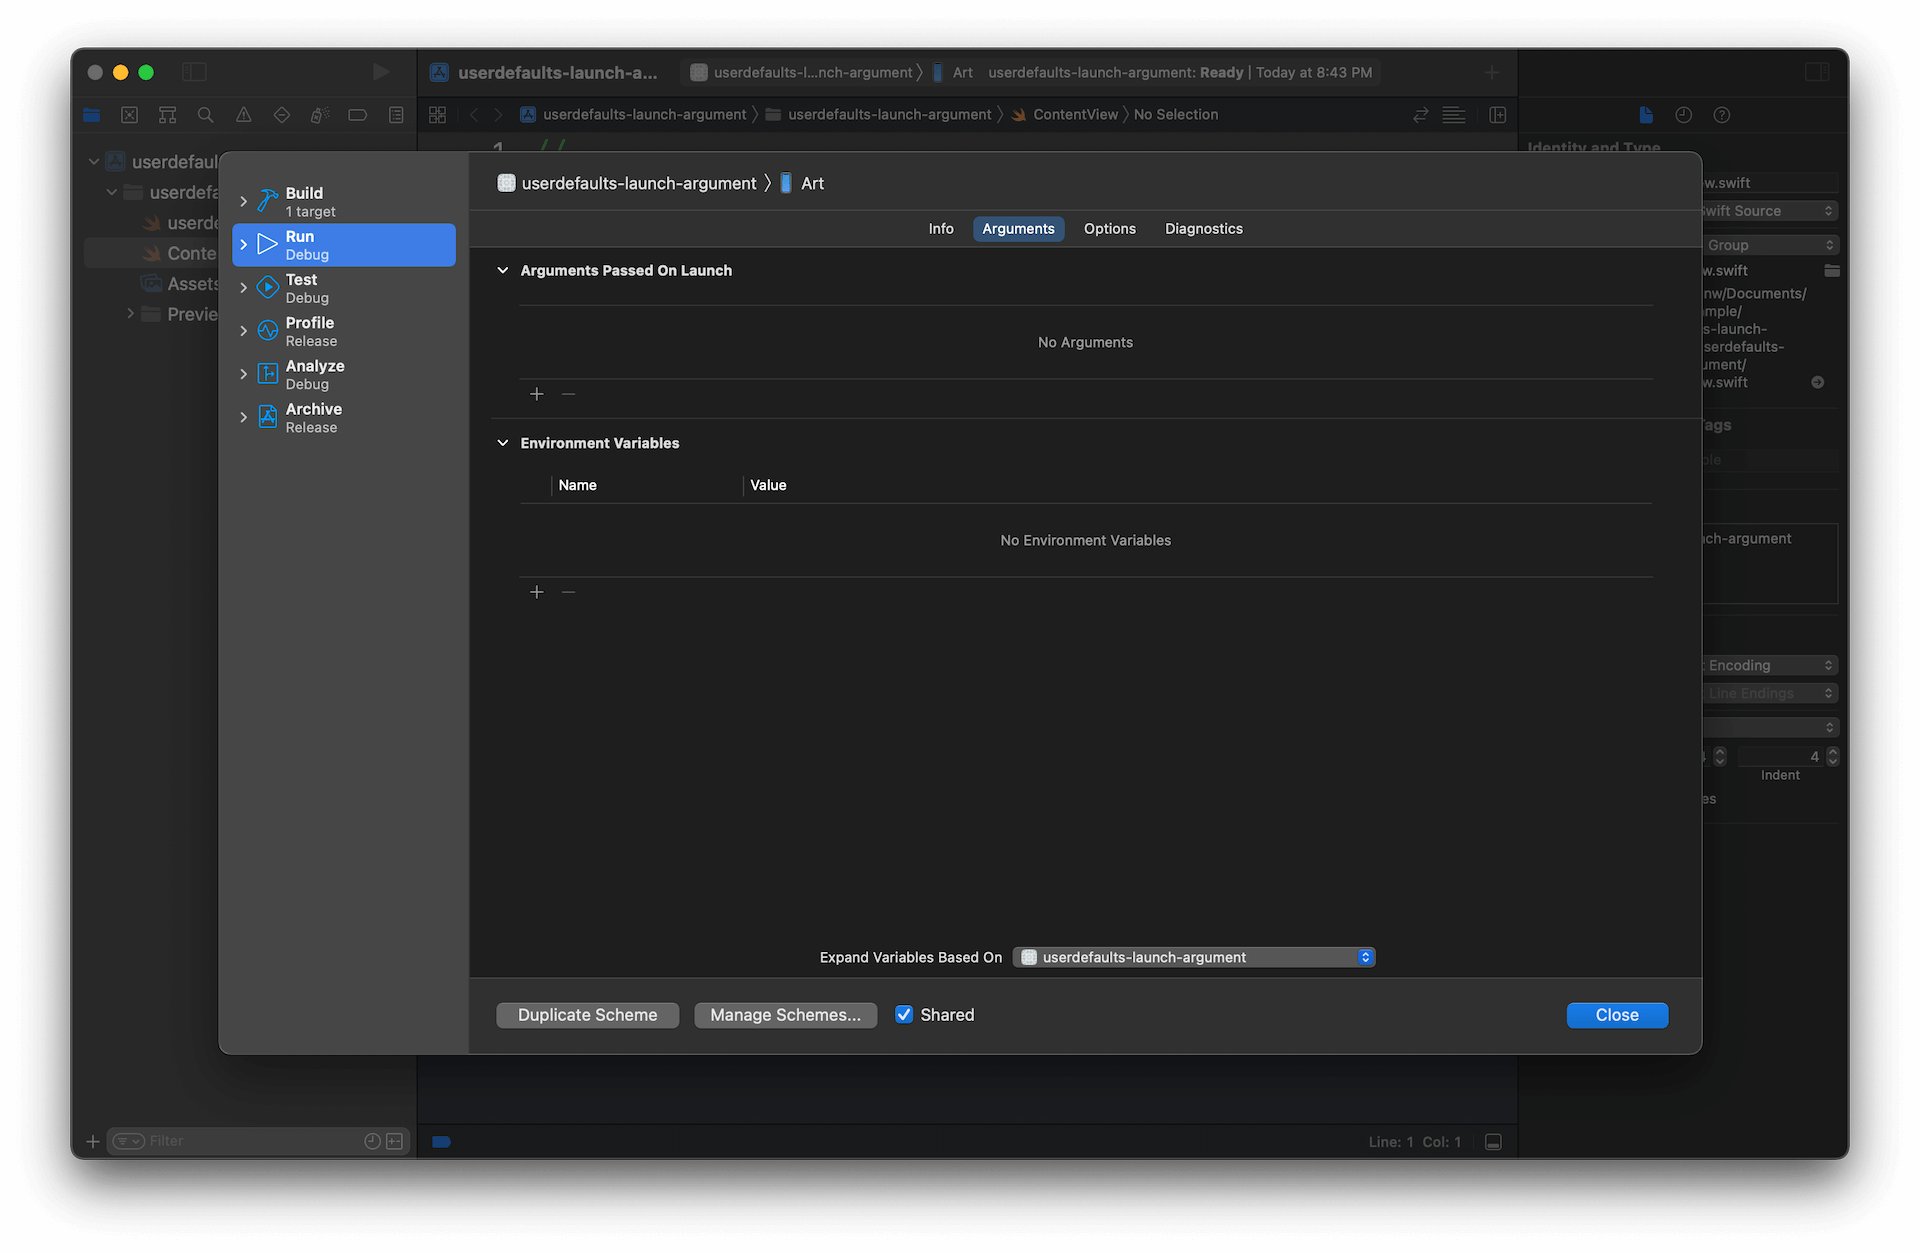
- Go to Edit Scheme screen either by select Product Menu > Scheme > Edit Scheme... (⌘ - command + <) or click on scheme name and select Edit Scheme.
![]()
- Select Run on the left panel, then select Arguments tab.
![]()
- Under Arguments Passed On Launch section, click plus button (
+) to add a new argument.
![]()
How to set UserDefaults key value with launch argument
You don't have to do anything here. UserDefaults contains all arguments parsed from the application's arguments. So, all we need to do is add a launch argument and access it from UserDefaults.
Add a launch argument
You can set the Xcode launch argument with the following syntax.
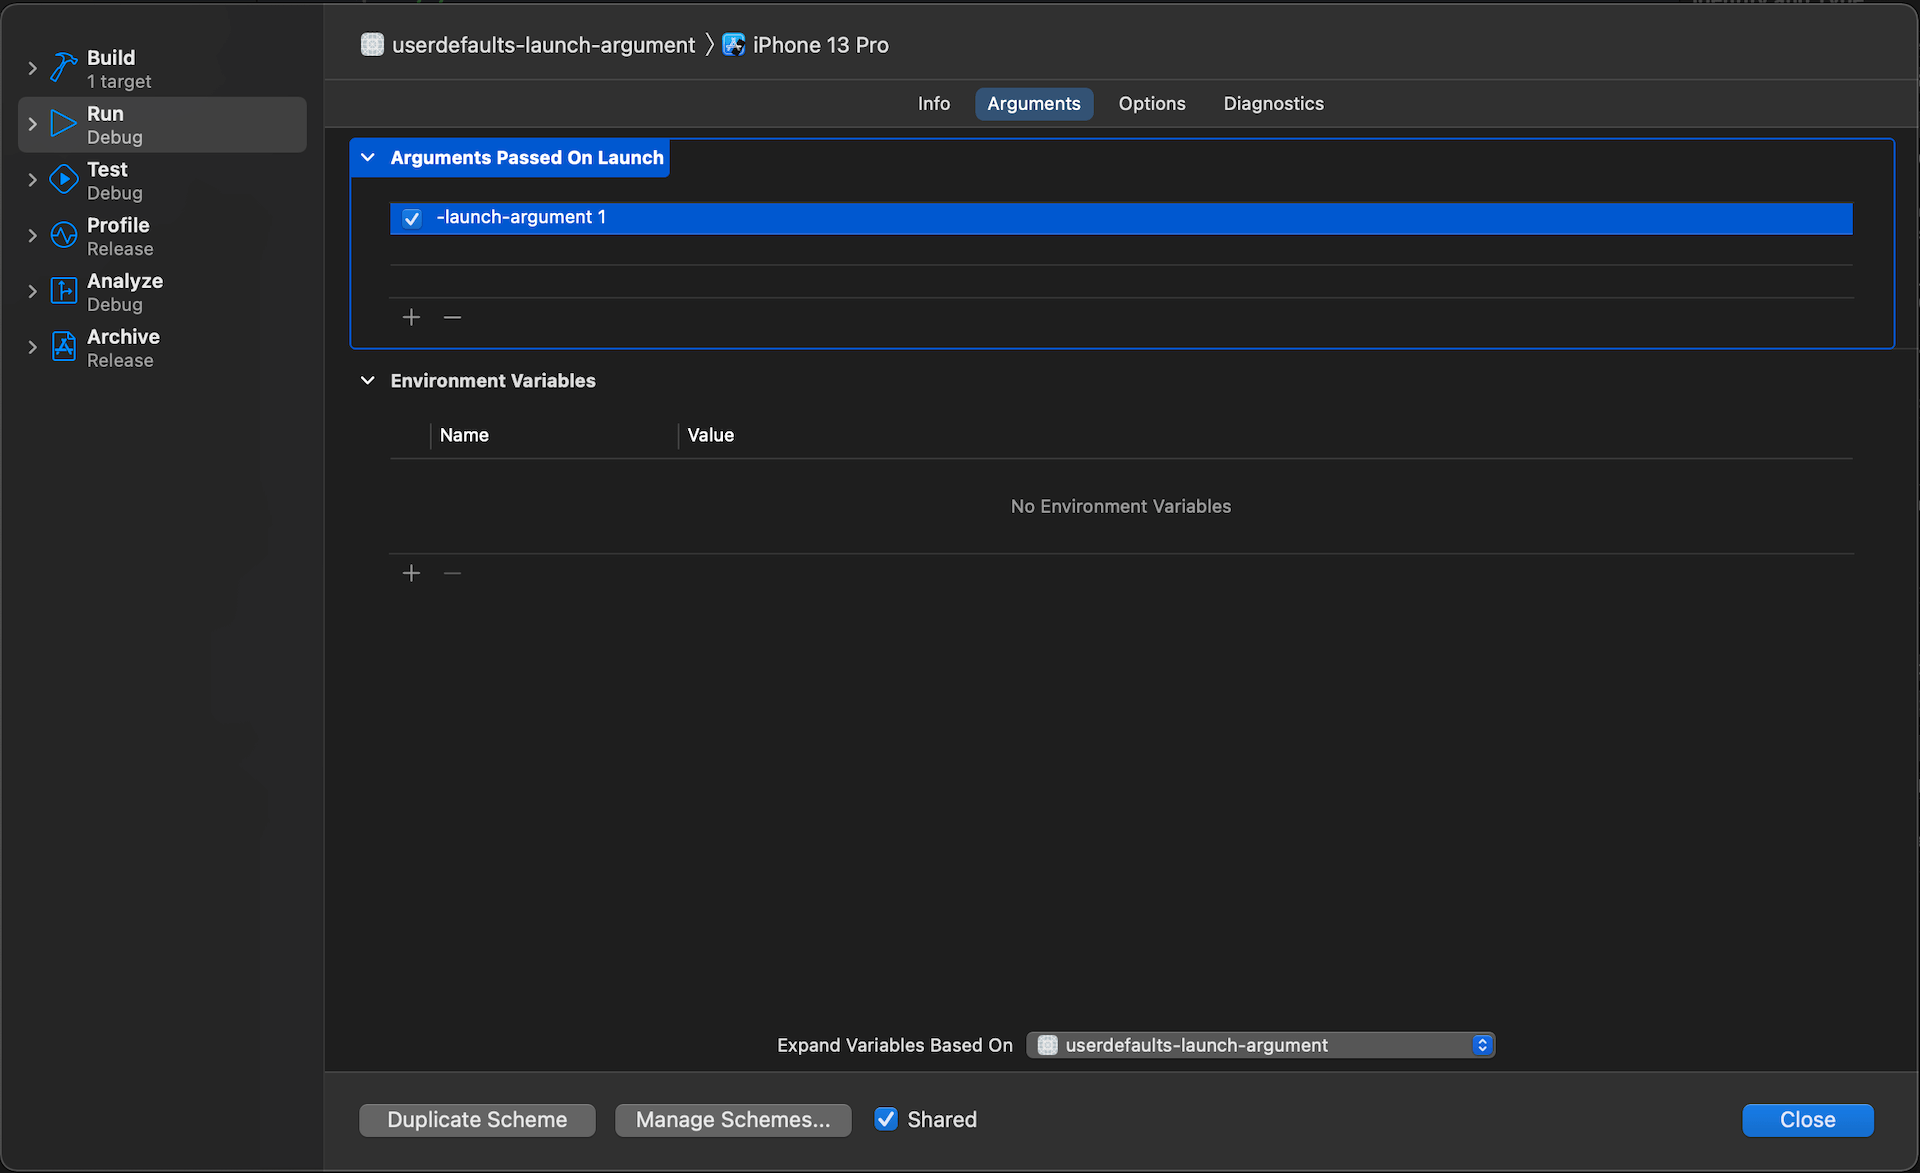
-argument_name argument_valueIn the following example, we add -launch-argument 1. Our argument name is launch-argument, and our value is 1.

Read a launch argument
To read it, you simply reference the passing argument with its name.
If you add a launch argument like this:
-launch-argument 1You can read it using the name launch-argument (Don't include -).
UserDefaults.standard.string(forKey: "launch-argument")
// Optional("1")
UserDefaults also support basic type conversion like String, bool, Int, and Double.
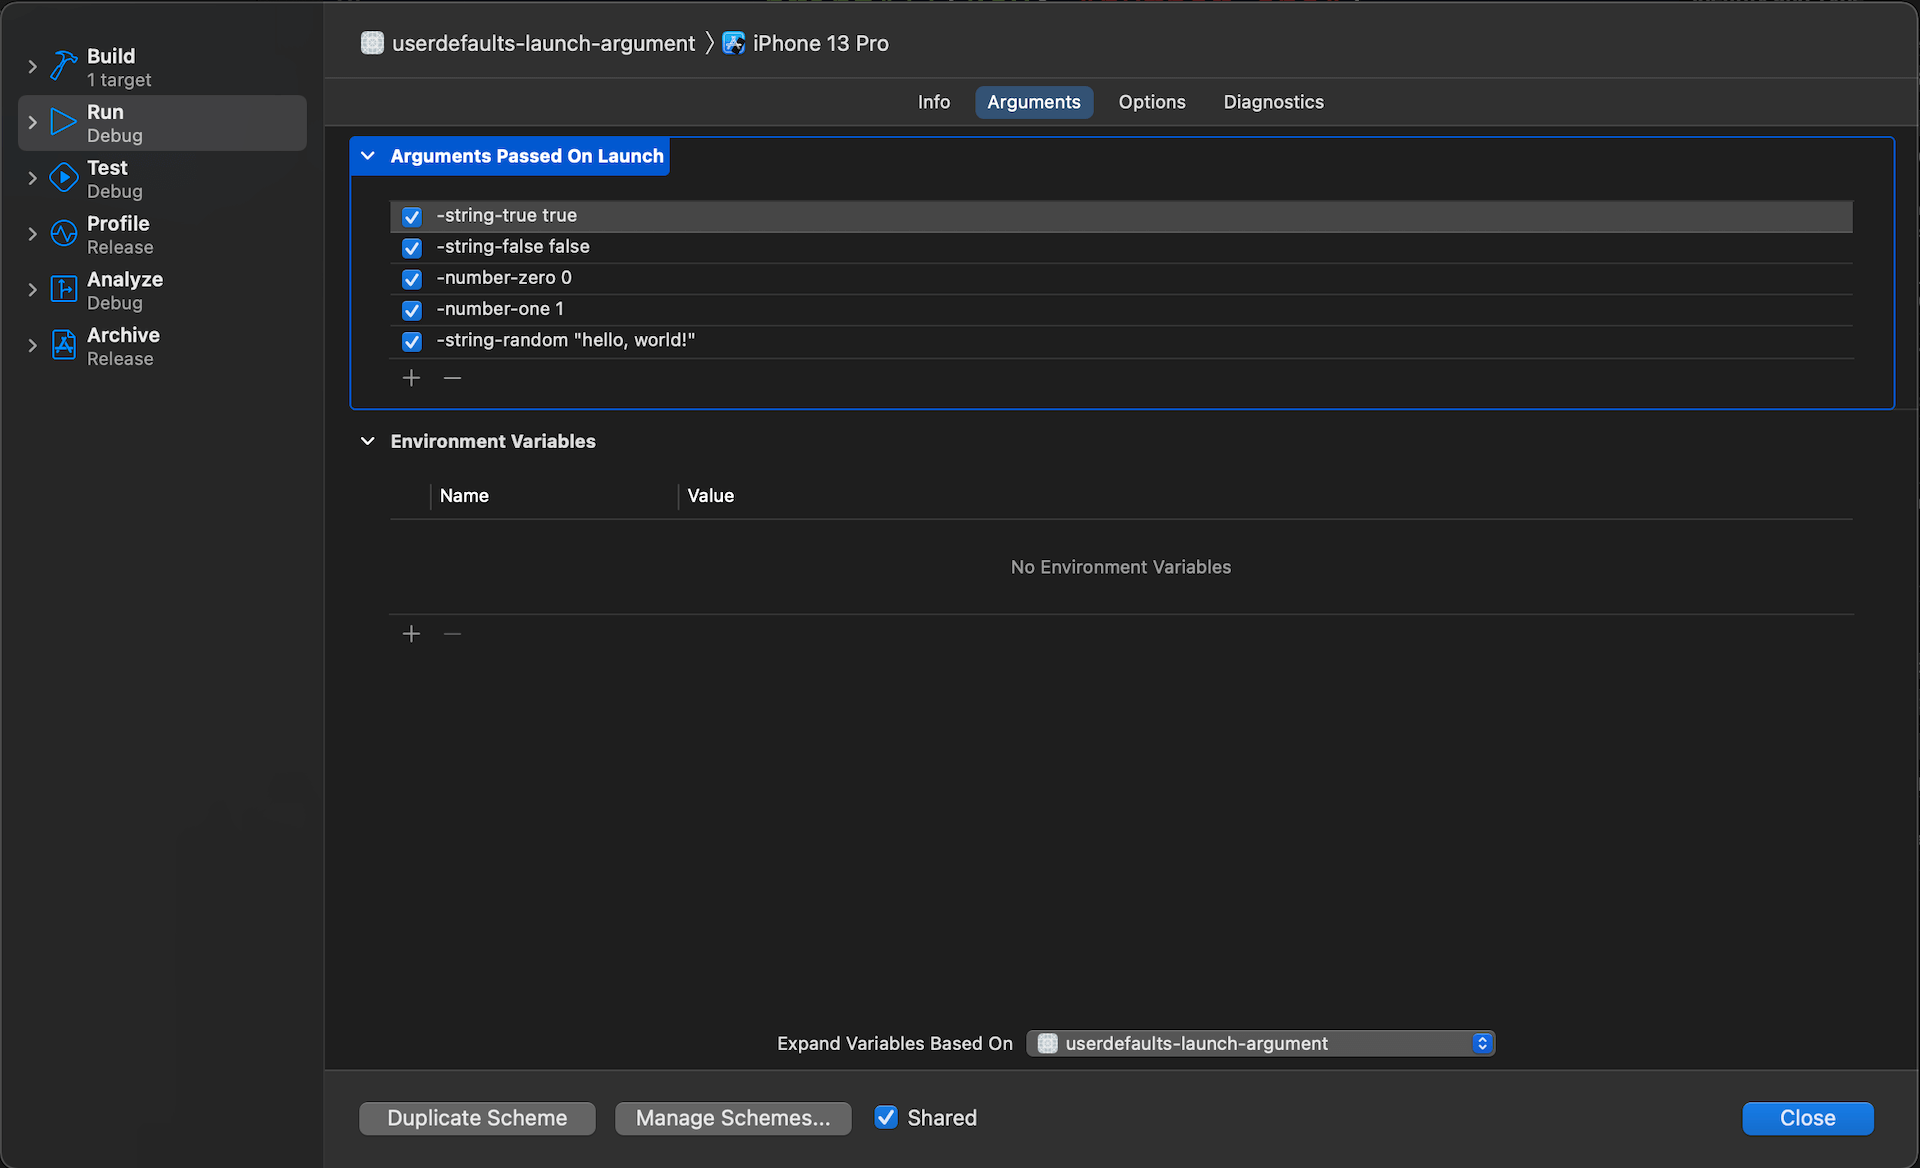
As an example, I will set five launch arguments with different values and try to access them using provided UserDefaults methods.
The values are 0, 1, true, false, and hello, world.

I access it through four different getter methods.
UserDefaults.standard.string(forKey: "string-true")
    UserDefaults.standard.integer(forKey: "string-true")
    UserDefaults.standard.double(forKey: "string-true")
    UserDefaults.standard.bool(forKey: "string-true")
And here is the result.
| Commands | 1 | 0 | "true" | "false" | "hello, world!" |
| ------------------ | ----------- | ---- | ---------- | ---- |
| .string(forKey:) | 1 | 0 | true | false | hello, world! |
| .integer(forKey:)|1 | 0 | 0 | 0 | 0 |
| .double(forKey:) |1.0 | 0.0 | 0.0 | 0.0 | 0.0 |
| .bool(forKey:) |true | false | true | false | false |
Behaviors
Setting UserDefaults with launch argument doesn't really set the value. It is just a temporary override of the value for that particular running session.
You should know two behaviors when setting UserDefaults value via launch arguments.
Tempolary effect
The key/value that is set from the launch argument doesn't register into a UserDefaults. The value is gone if you remove launch arguments in the subsequence run.
Override value
A key/value set with a launch argument will take precedence over the one set in your app.
So with the launch argument set to -number-one 1, the following code will print out 1.
UserDefaults.standard.set("Hello, world!", forKey: "number-one")
print(UserDefaults.standard.string(forKey: "number-one") ?? "n/a")
// 1, not Hello, world!
The "Hello, world!" text is already set, but the launch argument shadows it. Once you remove -number-one 1, it will print out the actual value.
You can easily support sarunw.com by checking out this sponsor.

Localization Buddy: Easiest way to localize and update App Store metadata.
Conclusion
The fact that we can temporarily override UserDefaults with launch argument makes it a convenient tool to test out screen or part of an app that relies on a UserDefaults value.
Here is a sample SwiftUI view that uses the skipOnboarding flag to determine which view to show.
struct ContentView: View {

    @AppStorage("skipOnboarding")
    var skipOnboarding = false

    var body: some View {
        if skipOnboarding {
            Text("Home")
        } else {
            Text("Onboarding")
            Button("Skip") {
                skipOnboarding = true
            }
        }
    }
}
You can use a launch argument to directly run the app with skipOnboarding set to true or false.
-skipOnboarding false
-skipOnboarding true
Once you finish testing, you can simply remove the launch argument without polluting your current skipOnboarding value.
Read more article about Swift, Debugging, UserDefaults, or see all available topic
Enjoy the read?
If you enjoy this article, you can subscribe to the weekly newsletter.
Every Friday, you'll get a quick recap of all articles and tips posted on this site. No strings attached. Unsubscribe anytime.
Feel free to follow me on Twitter and ask your questions related to this post. Thanks for reading and see you next time.
If you enjoy my writing, please check out my Patreon https://www.patreon.com/sarunw and become my supporter. Sharing the article is also greatly appreciated.
Become a patron Buy me a coffee Tweet ShareHow to run a Flutter app with arguments in VS Code with launch configuration
Learn what launch configuration is and how to use it.
How to add Lint rules in Flutter
As your team and project grow, you might need to enforce some coding rules to make your code go the same direction. Luckily, adding custom lint rules in Flutter is very easy. Let's learn how to do it.

