How to quickly test apps in other languages with an Xcode scheme
Table of Contents
When you write an app that supports multiple languages, you need to go back and forth between languages from time to time to make sure your design works great in every language.
If you are still going to "Settings > General > Languages & Region" to change your app language, this article would help you. I will show you how to set multiple schemes to quickly run your app in the language of your interest.
Change running app language with scheme options
By default, an app will run with the same language set in your device Settings app. We can override this in Scheme Options.
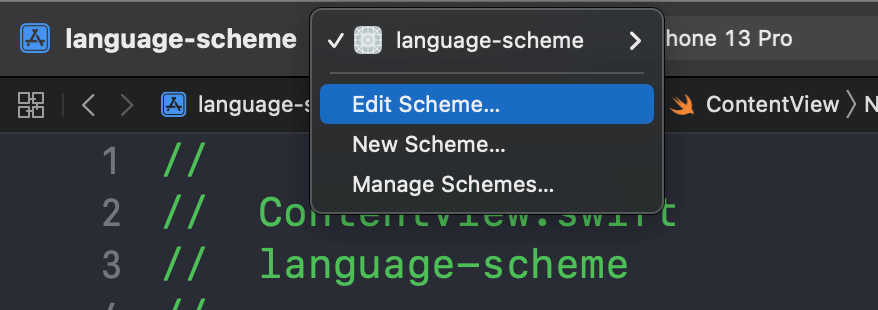
Open Scheme Editing window either by choose "Product menu > Scheme > Edit Scheme" (⌃ – Control + <) or click on "Scheme Menu" and choose "Edit Scheme..."

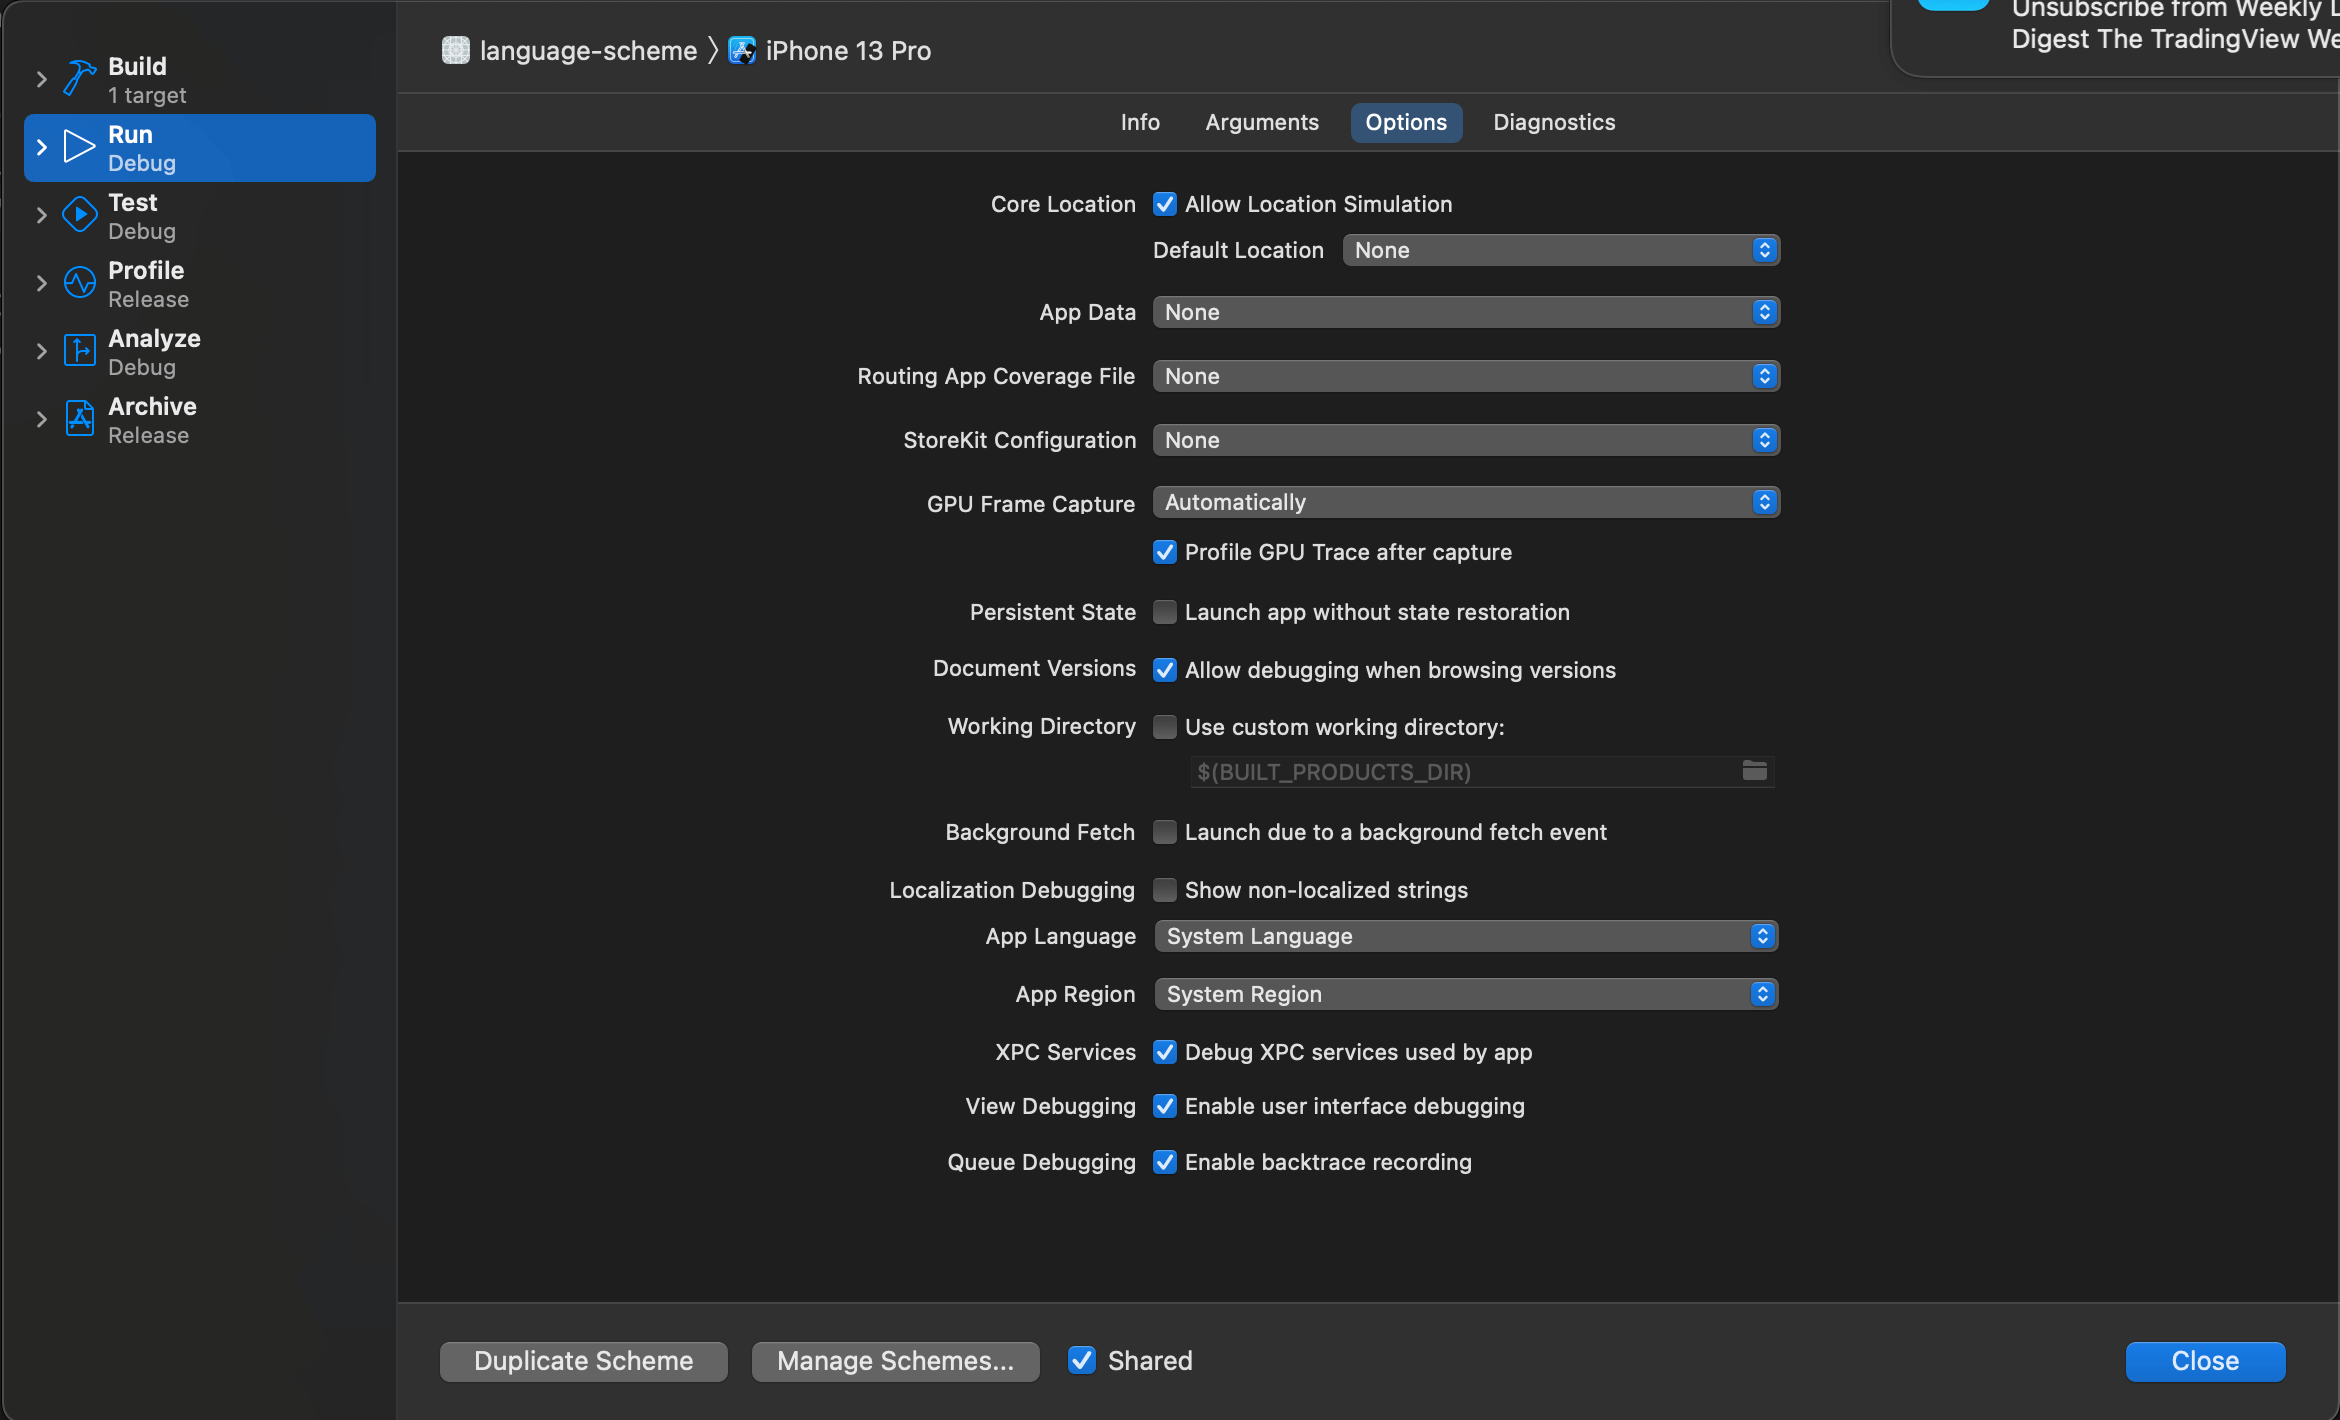
This will open up a "Scheme Editing" popup window, click on "Run" section and then click "Options" tab to see all available options.
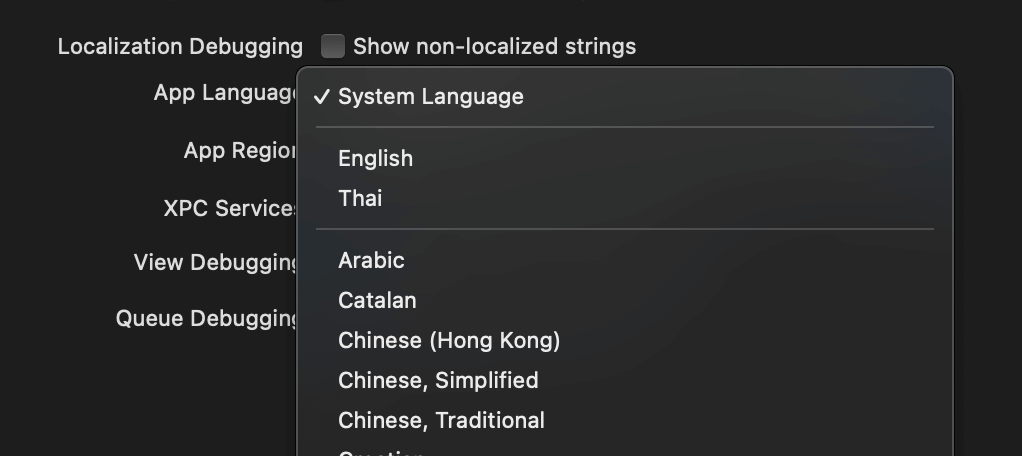
You can change the language that your app will launch by choosing it from the "App Language" option. The default is "System Language", respecting your device settings.
Here is a simple app that shows "Hello, World!" text.
struct ContentView: View {
    var body: some View {
        Text("Hello, world!")
            .font(.largeTitle)
            .bold()
            .padding()
    }
}
Running the app with App Langauge set to Thai will yield the same result as changing the device language to Thai.

You can easily support sarunw.com by checking out this sponsor.

Offline Transcription: Fast, privacy-focus way to transcribe audio, video, and podcast files. No data leaves your Mac.
Create a dedicated scheme for a language
Changing an app language with the scheme option is easier than changing it from a device, but it still requires some steps. If you need to change this back and forth, these simple steps will add up and take your valuable time.
What I normally do is create a new scheme for each language. This might require some initial setup, but it would benefit you in the long run.
To create a new scheme, open the Manage Schemes window either by choosing "Product menu > Scheme > Manage Scheme" or clicking on "Scheme Menu" and choose "Manage Scheme..."
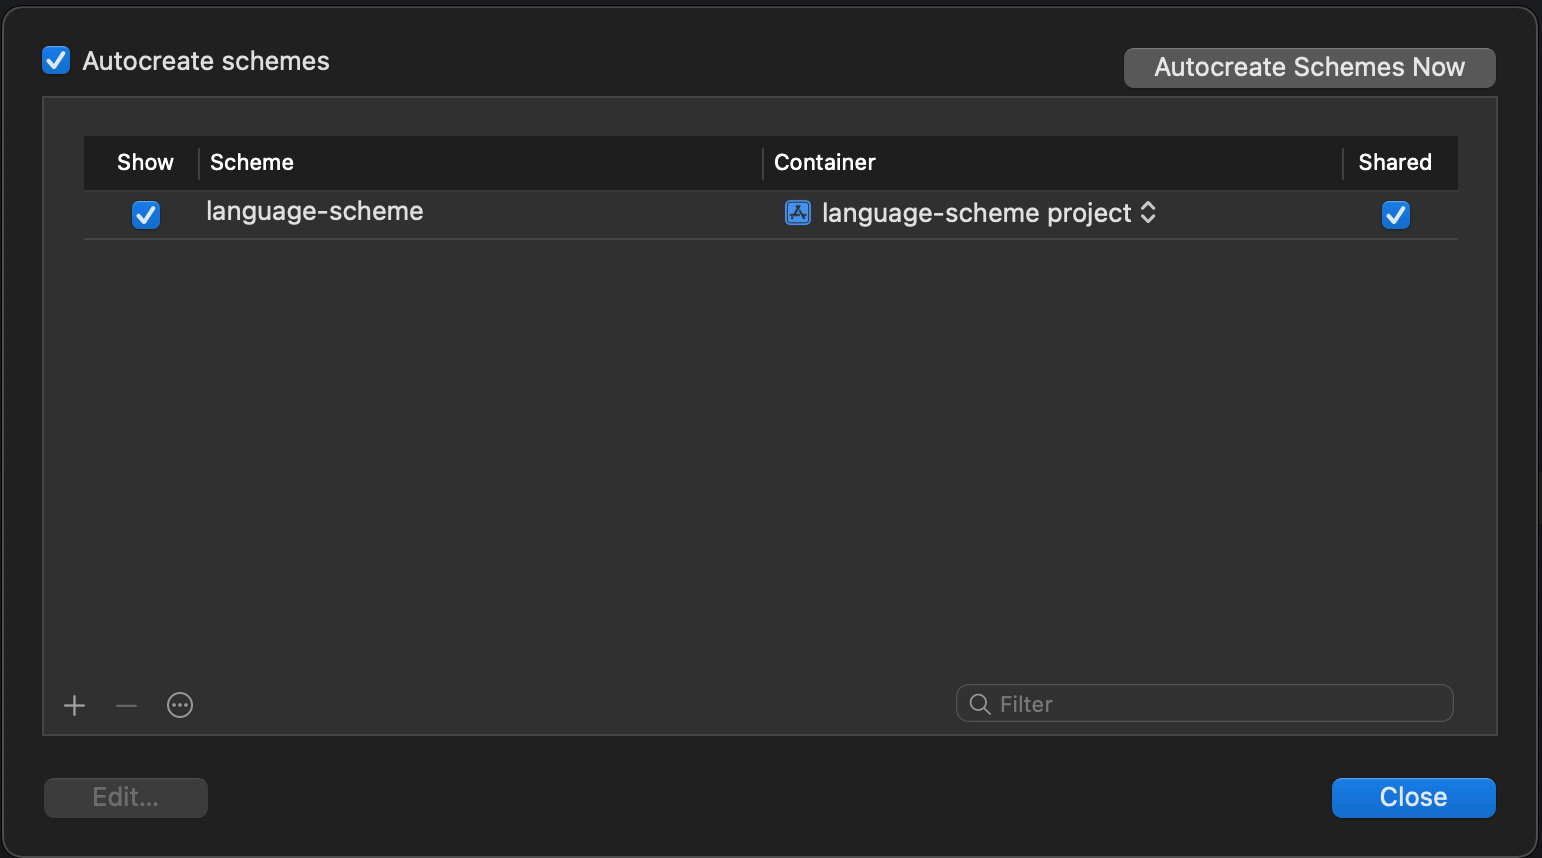
Click on the scheme you want to duplicate, then click on the ellipsis icon and choose "Duplicate".
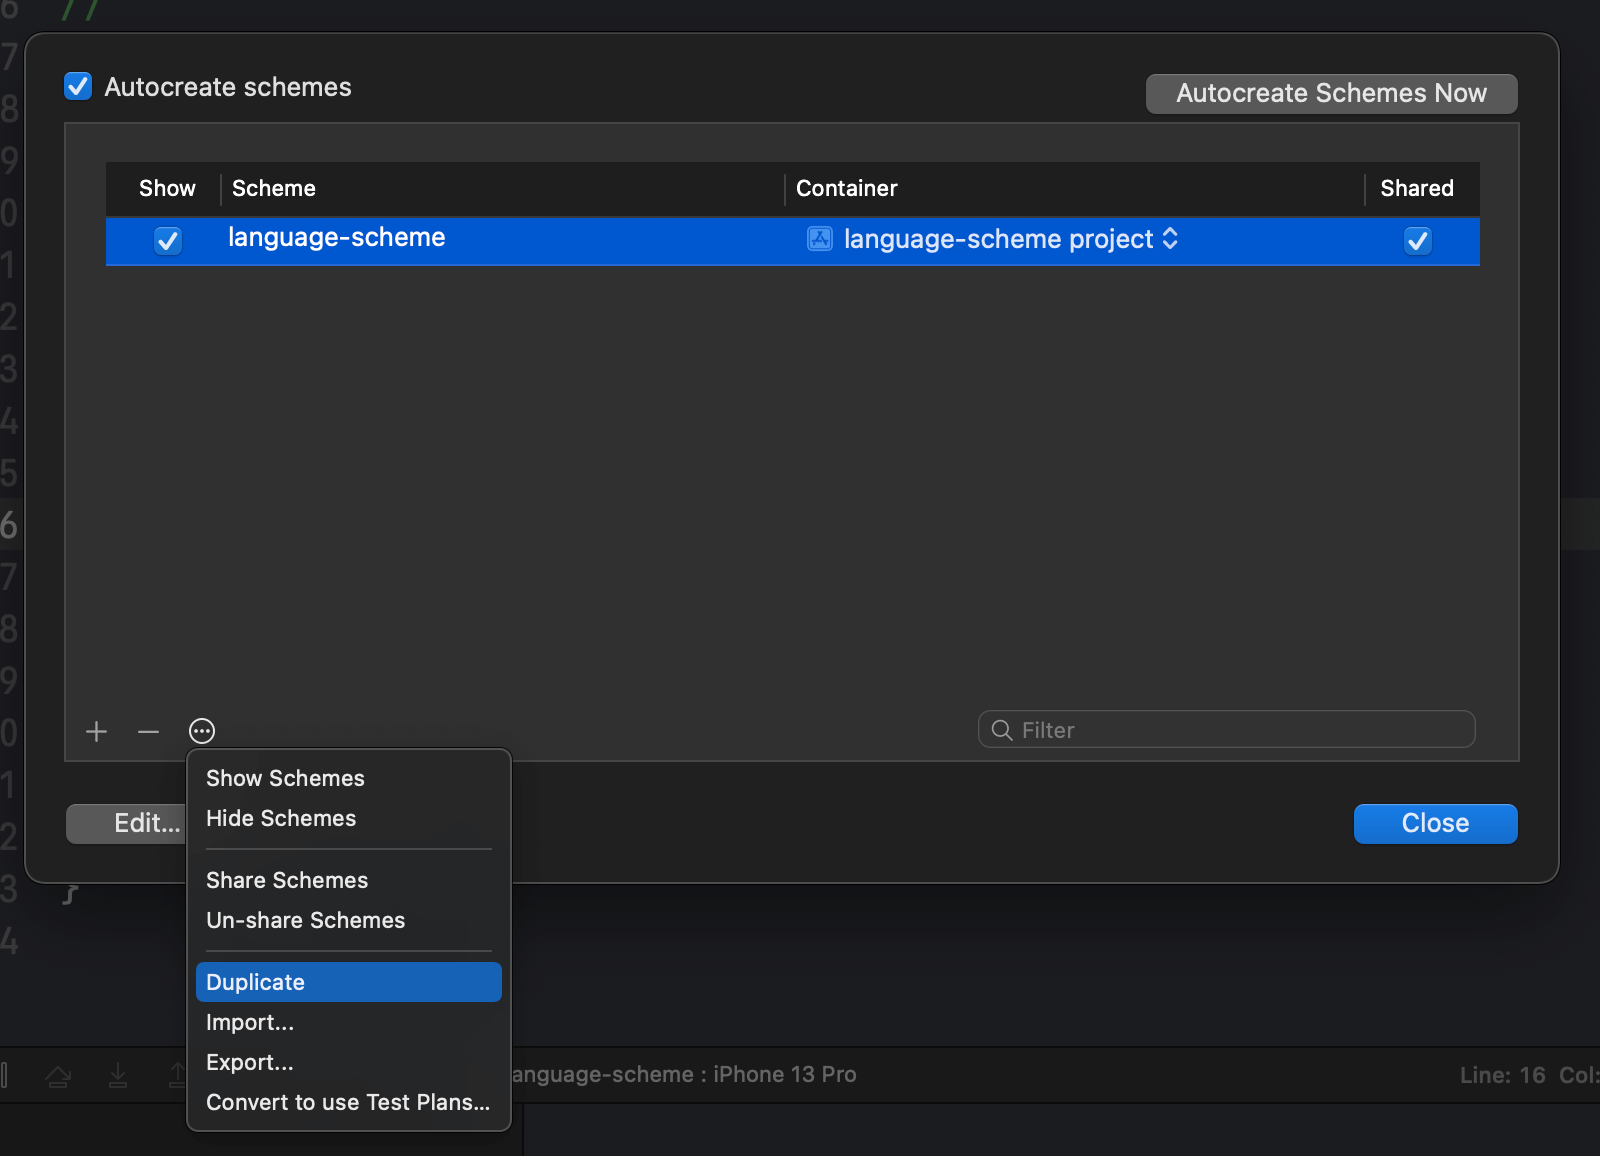
This will duplicate the scheme and prompt you to edit the name of the new scheme. I put a suffix of "Thai" to clarify that this will run the app in Thai.
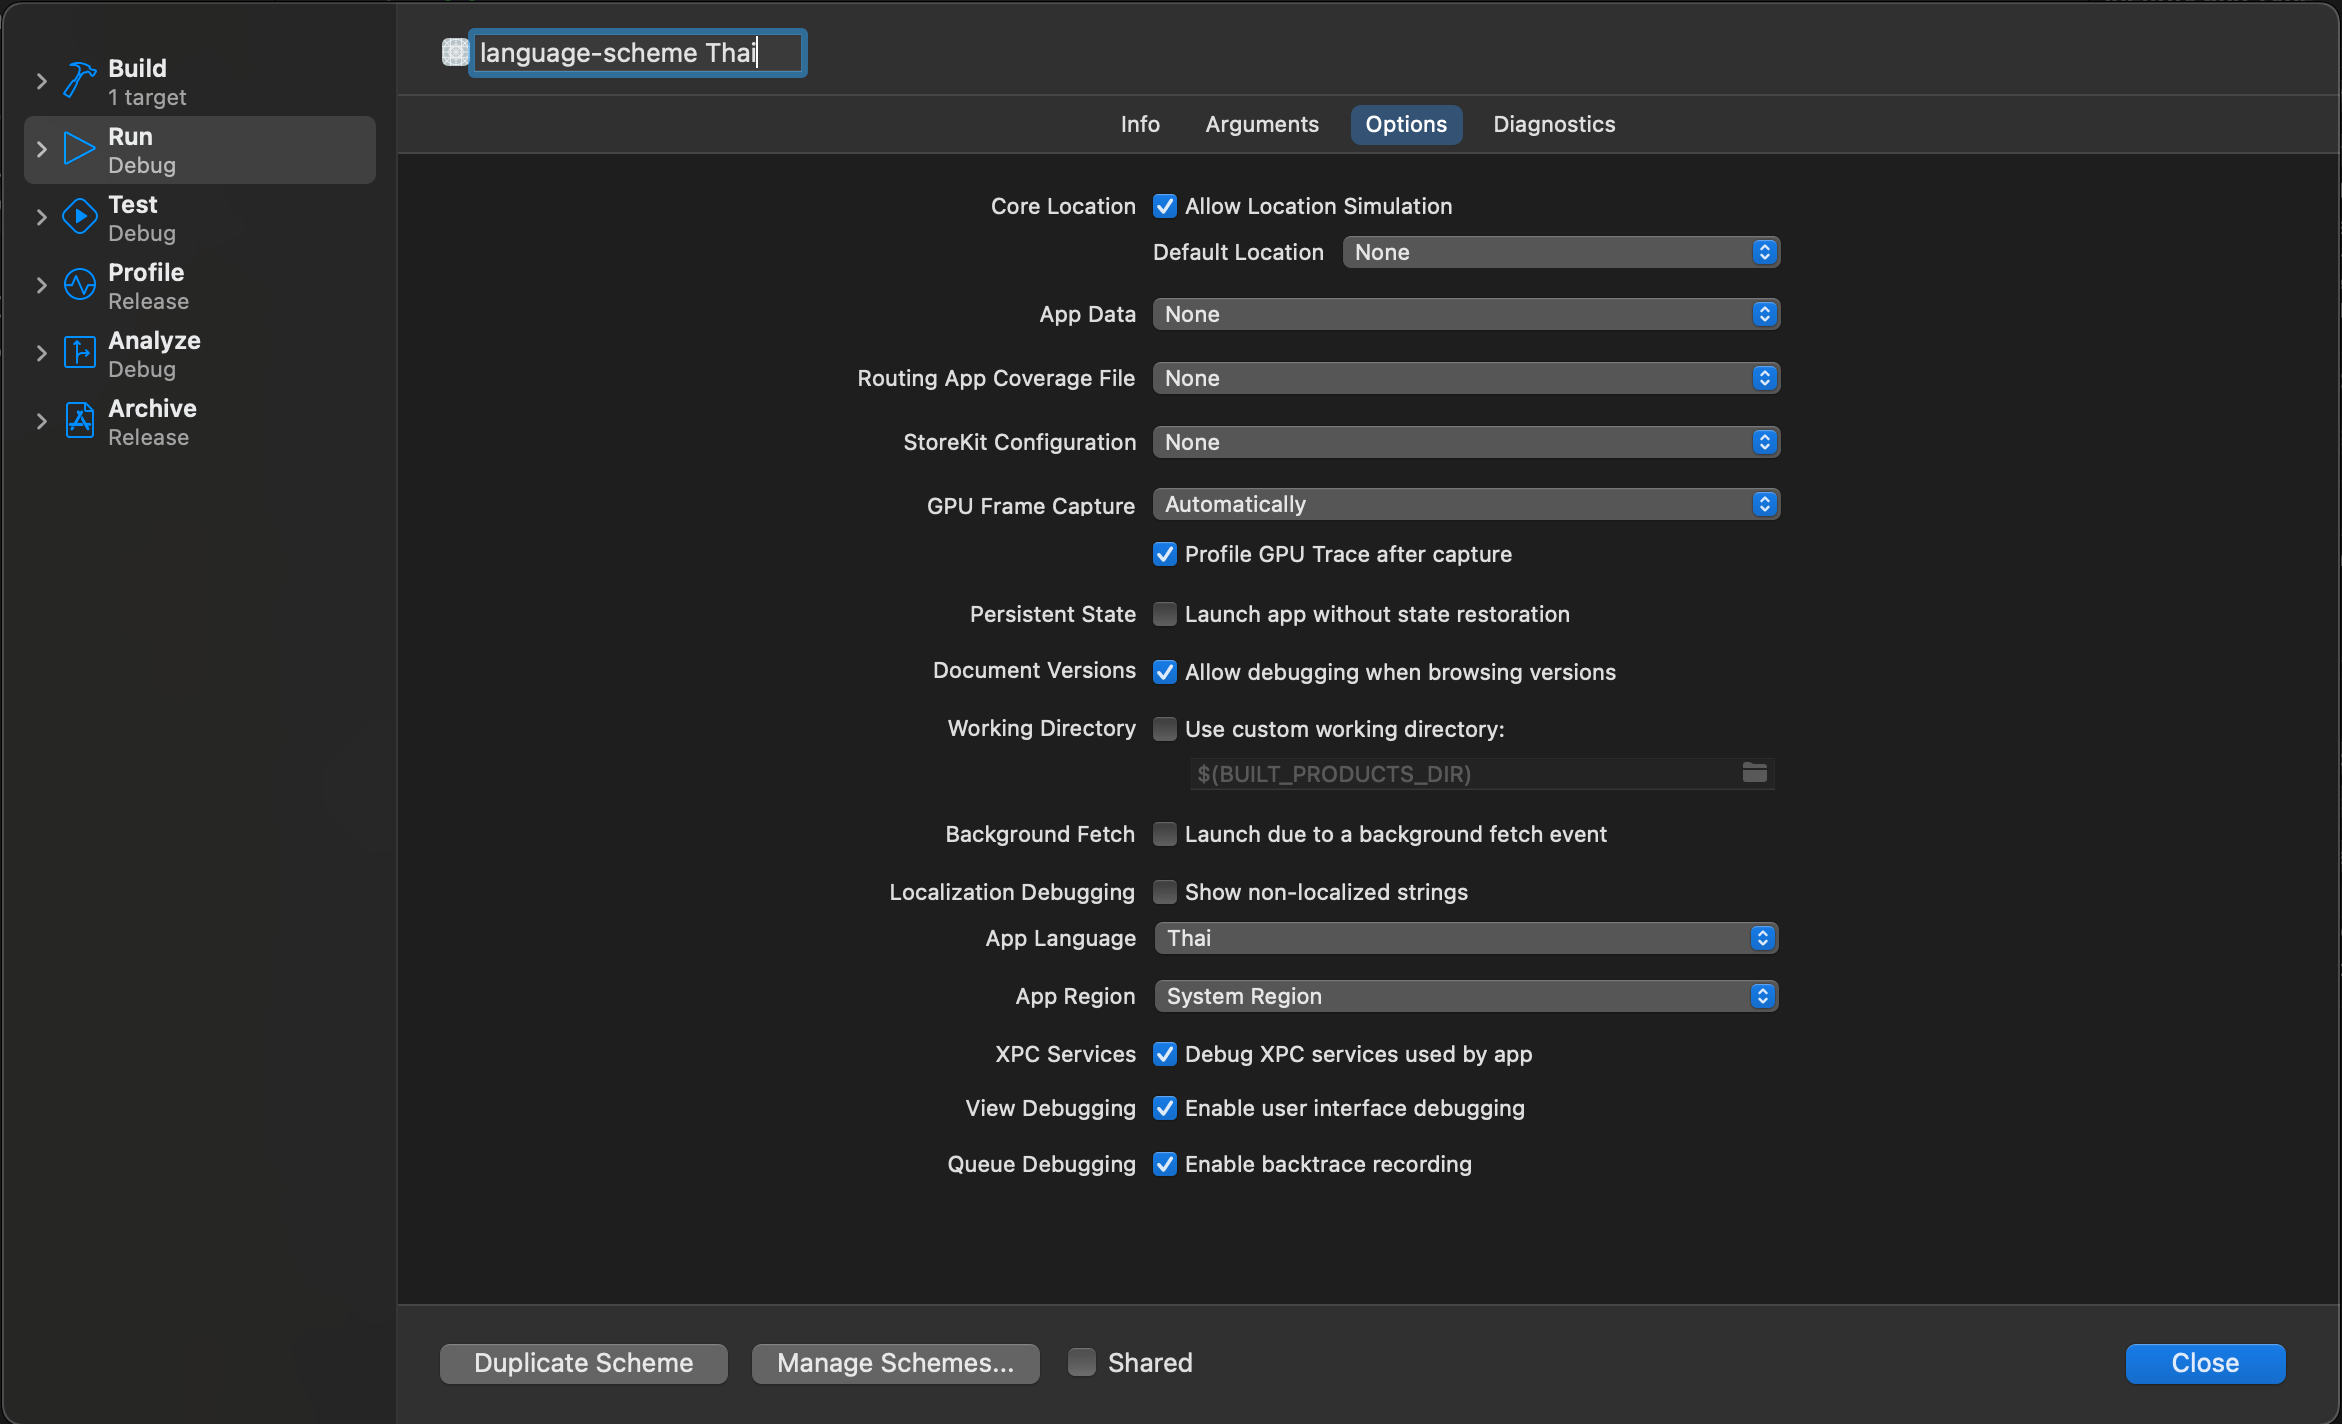
Change the App Language of this scheme to the language of your choice. In my case, I set it to Thai.
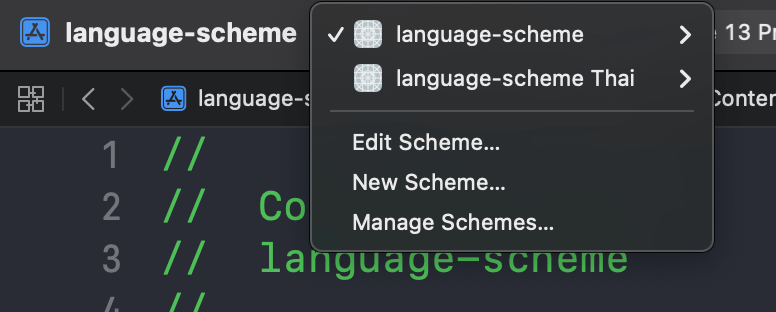
That's all! Now, you can easily switch between Thai and English by changing the active scheme in Scheme Menu.
Read more article about Xcode or see all available topic
Enjoy the read?
If you enjoy this article, you can subscribe to the weekly newsletter.
Every Friday, you'll get a quick recap of all articles and tips posted on this site. No strings attached. Unsubscribe anytime.
Feel free to follow me on Twitter and ask your questions related to this post. Thanks for reading and see you next time.
If you enjoy my writing, please check out my Patreon https://www.patreon.com/sarunw and become my supporter. Sharing the article is also greatly appreciated.
Become a patron Buy me a coffee Tweet ShareSwiftUI Label: A standard way to label user interface items
A label might seem trivial, but it plays an important role in SwiftUI. Let's learn about this simple view.
How to customize automatic synthesizing Codable for enums with associated values
Learn what we can customize when relying on automatic synthesizing Codable for enums with associated values.