How to add Launch Screen in SwiftUI
Table of Contents
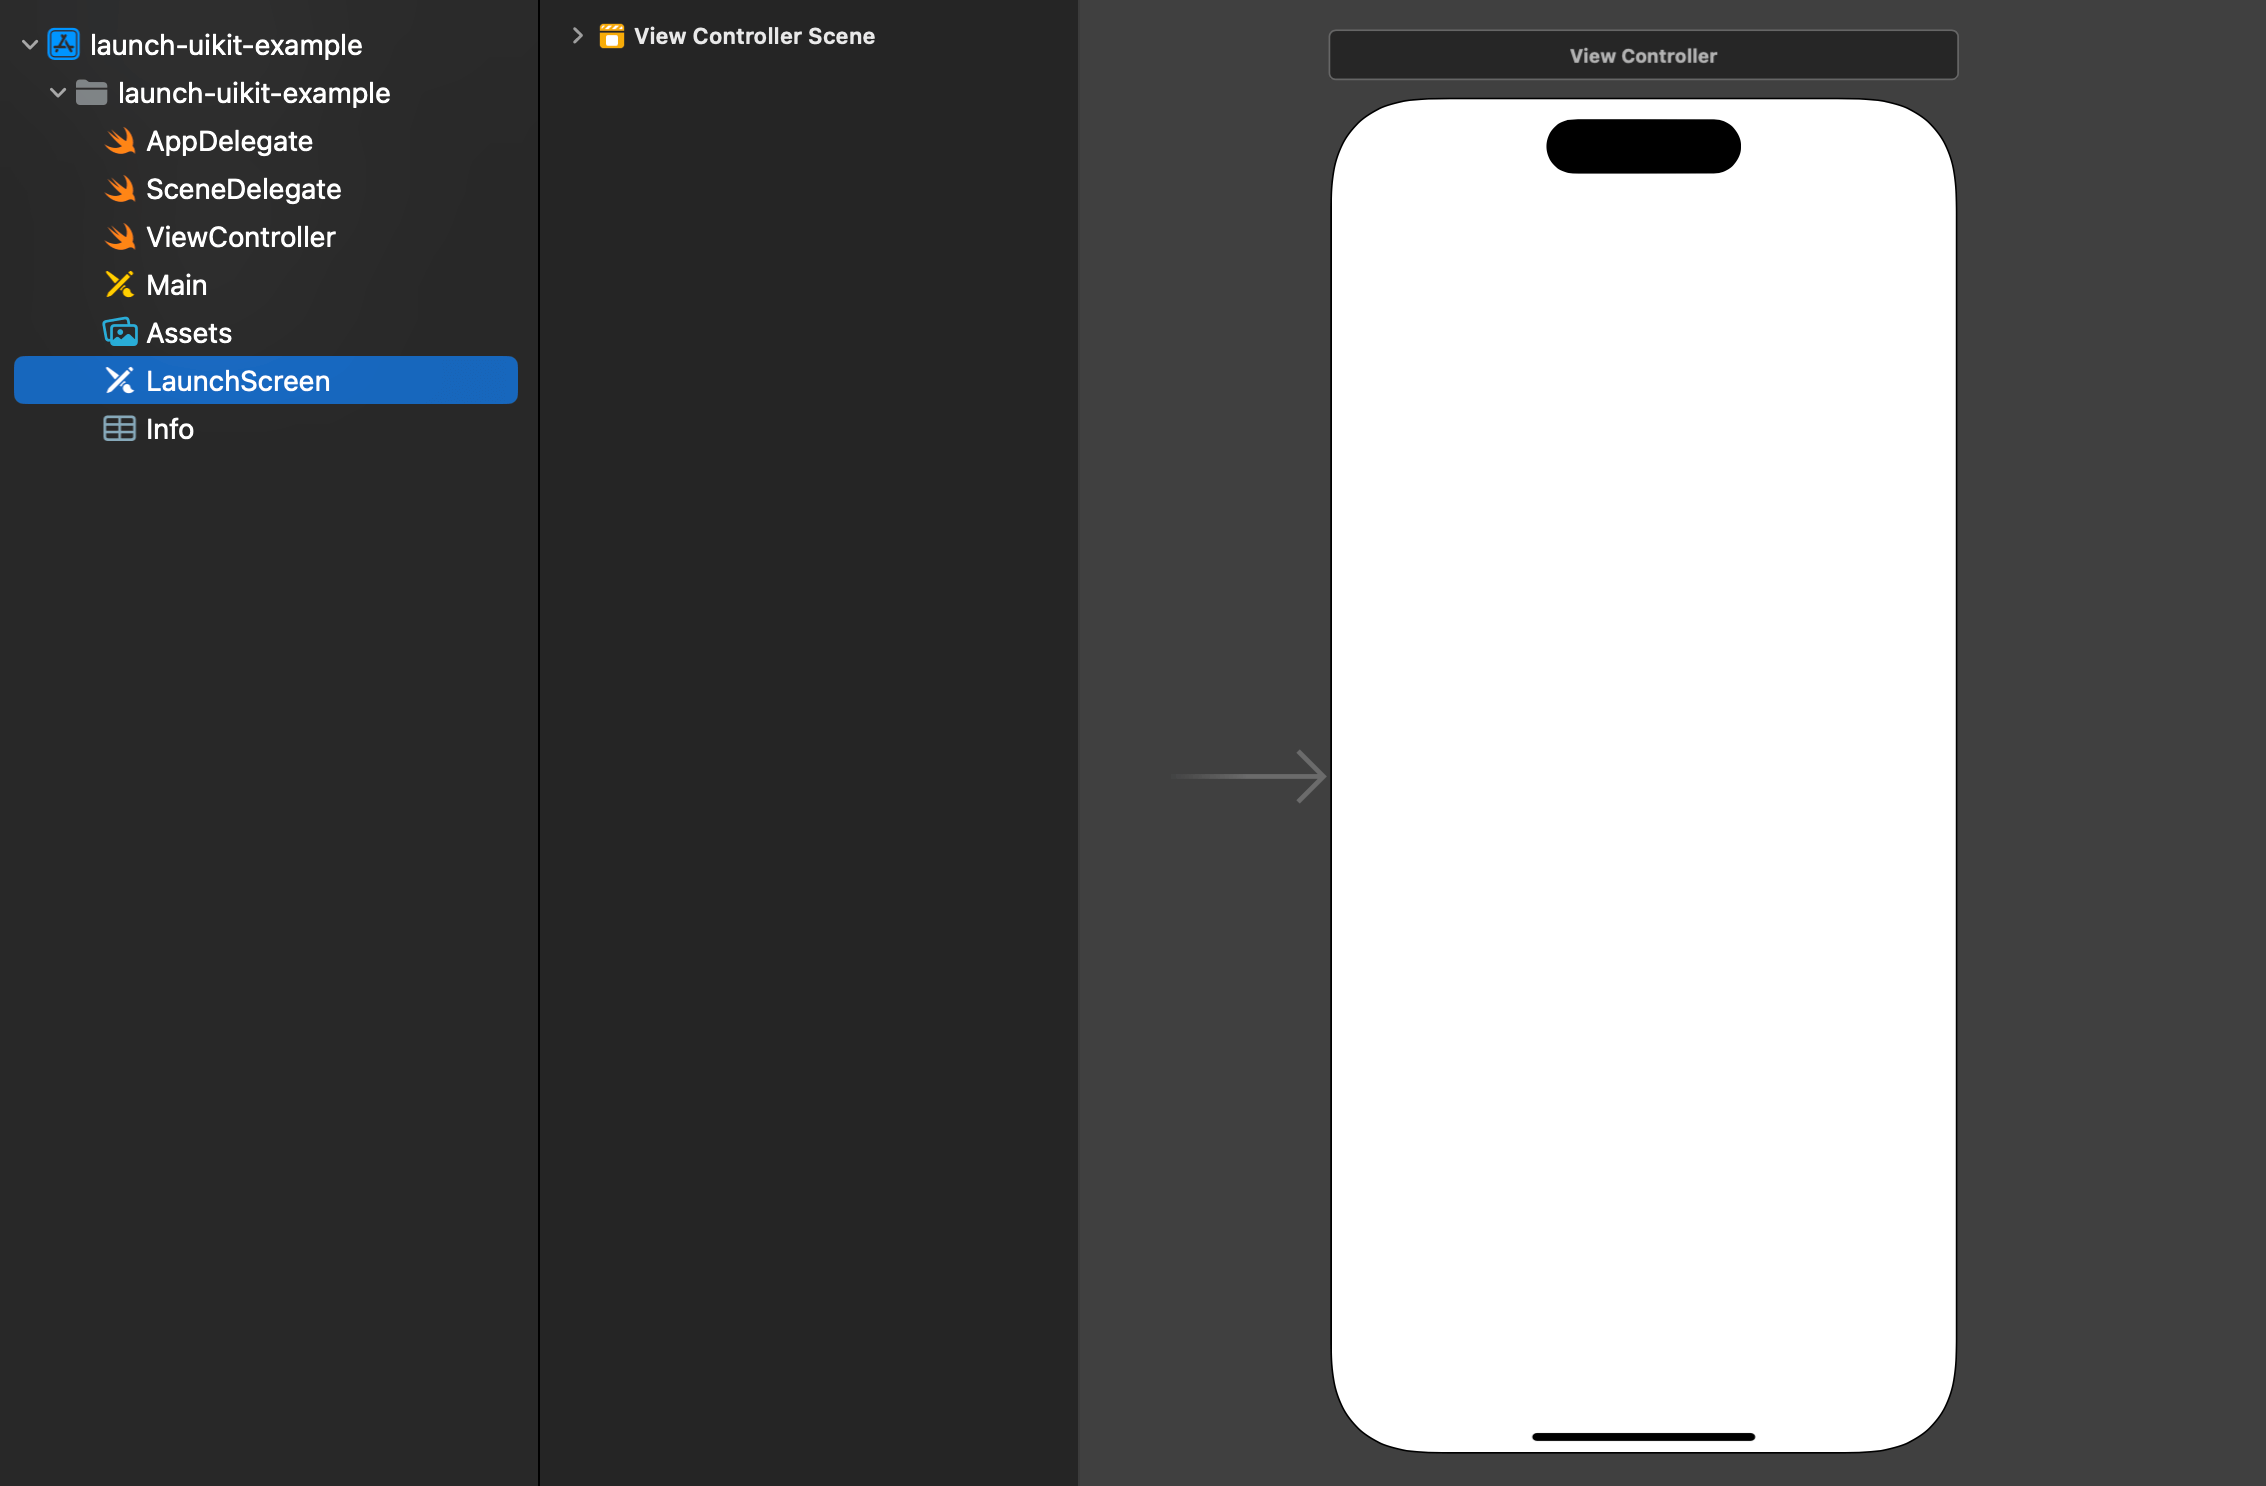
Before Xcode 12 and iOS 14, the only way to create a Launch screen is by configure a launch screen via a Storyboard.
When you create a new Xcode project, you will get a dedicated storyboard named "LaunchScreen". This is where you configure your launch screen.
In iOS 14 (Xcode 12), SwiftUI got a new application life cycle that doesn't rely on UIKit (AppDelegate) and Storyboard anymore.
Apple introduces a new way to configure a launch screen via an app's Info.plist.
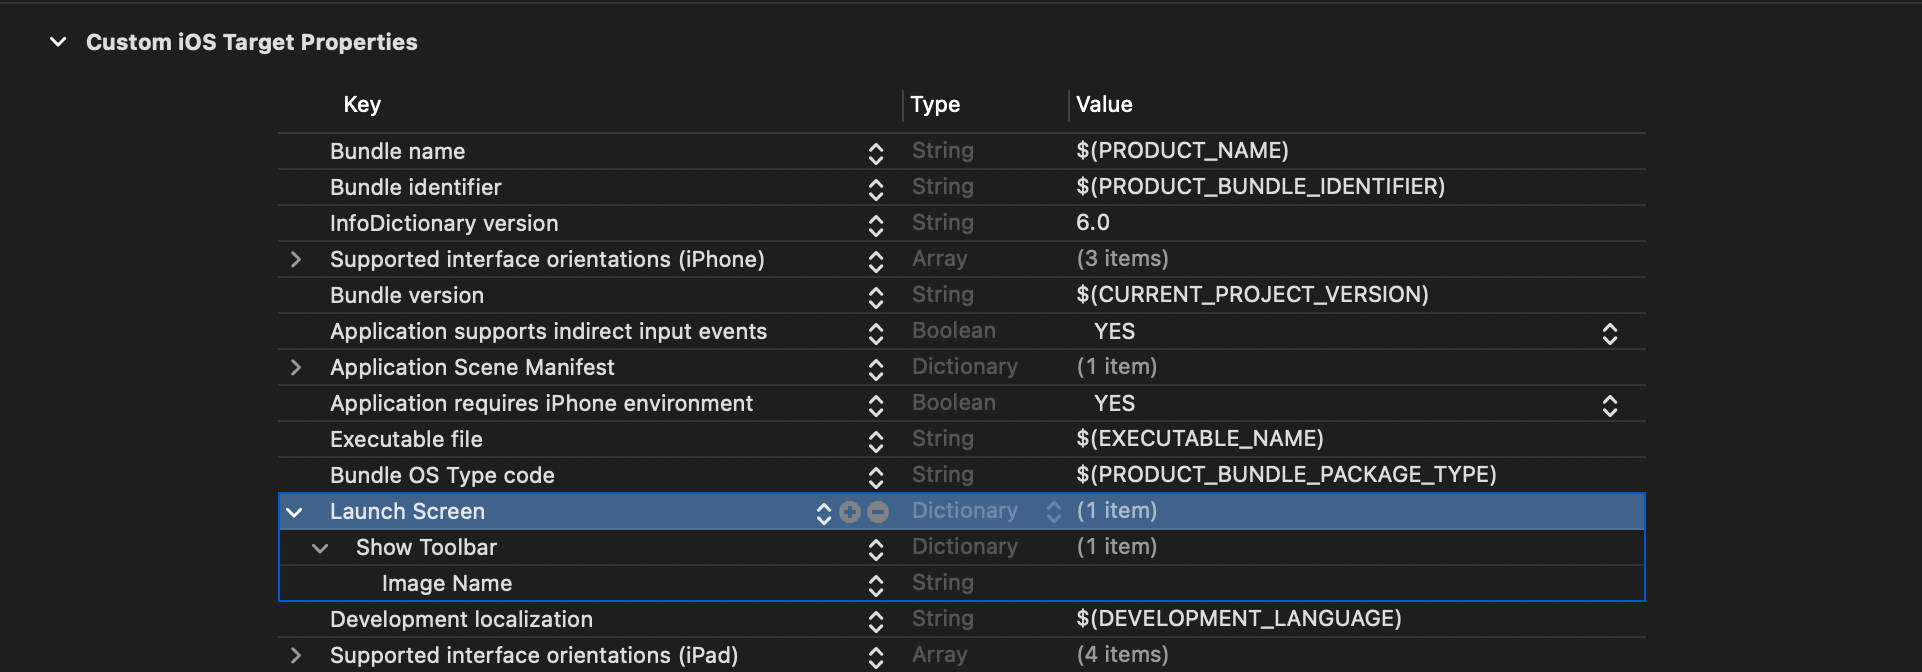
How to configure a Launch screen in an Info.plist
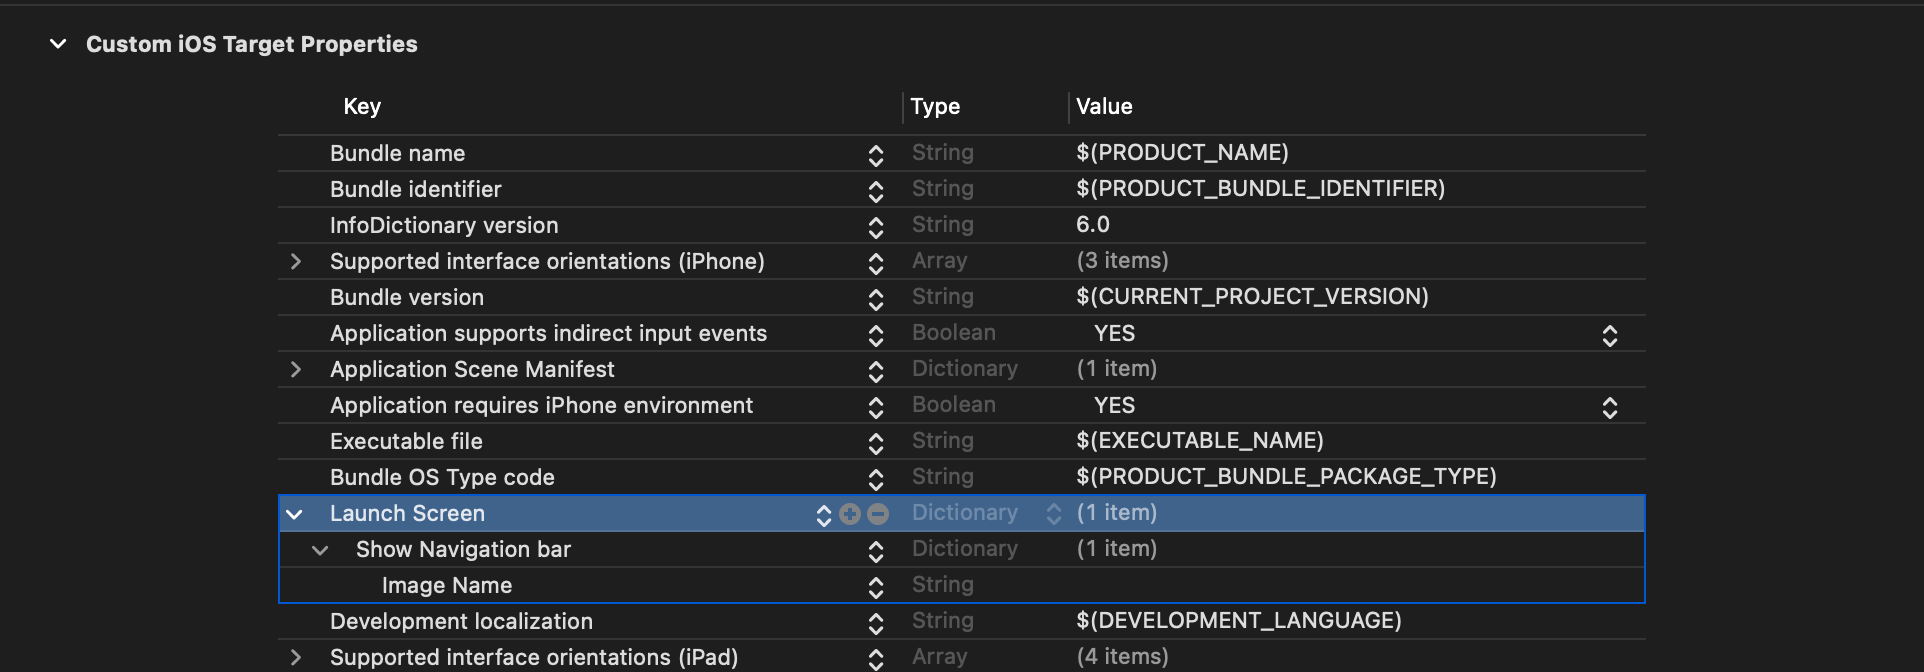
In Xcode 12, we can configure an appearance of a launch screen via a new key in Info.plist, UILaunchScreen.
Xcode automatically adds this for you when you create a new SwiftUI project.
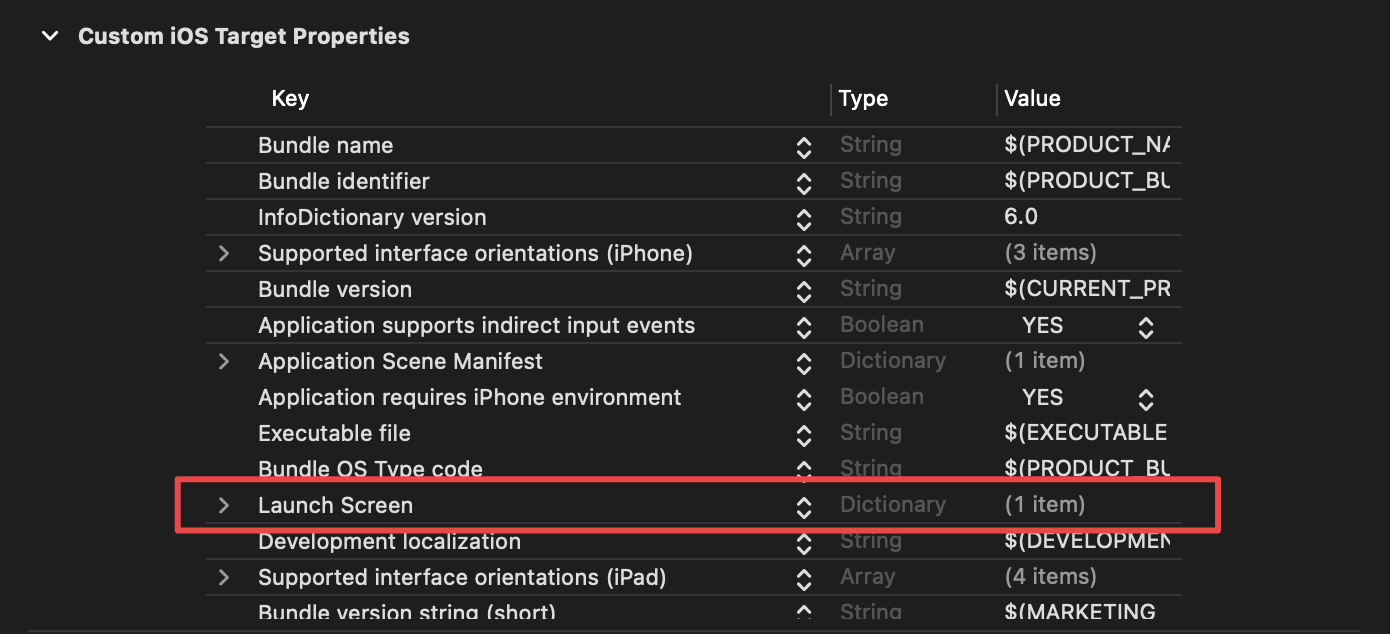
UILaunchScreen is a dictionary that support six keys.
Each key represents one aspect of a UI element. You can use a combination of these keys to create a launch screen.
- Background color (
UIColorName): The name of a color to use as the background color on the launch screen. - Image name (
UIImageName): The name of an image to display during the app launch. - Image respects safe area insets (
UIImageRespectsSafeAreaInsets): A Boolean that specifies whether the launch image should respect the safe area insets. - Show navigation bar (
UINavigationBar): A dictionary that represents a Navigation bar. - Show Tab bar (
UITabBar): A dictionary representing a Tab bar. - Show Toolbar (
UIToolbar): A dictionary representing a Toolbar.
Background color
Background color (UIColorName) accepts a string of a color name. You use the same value that you use for init(named:) parameter of UIColor.
For example, I created a new color set named "LaunchScreenBackgroundColor" in the asset catalog.

Then I put it as UIColorName's value.
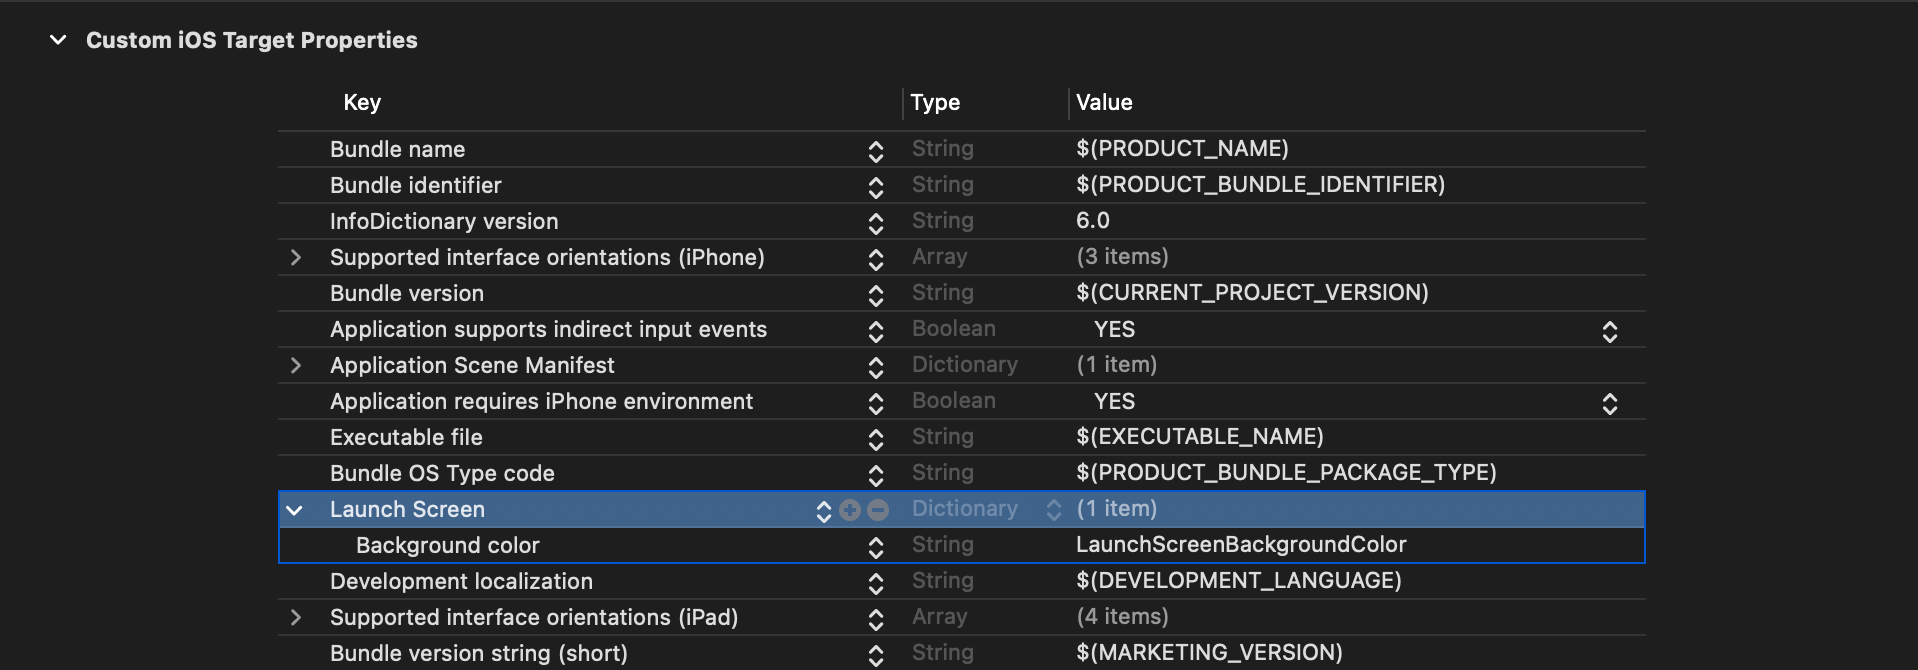
Here is the result of the launch screen.
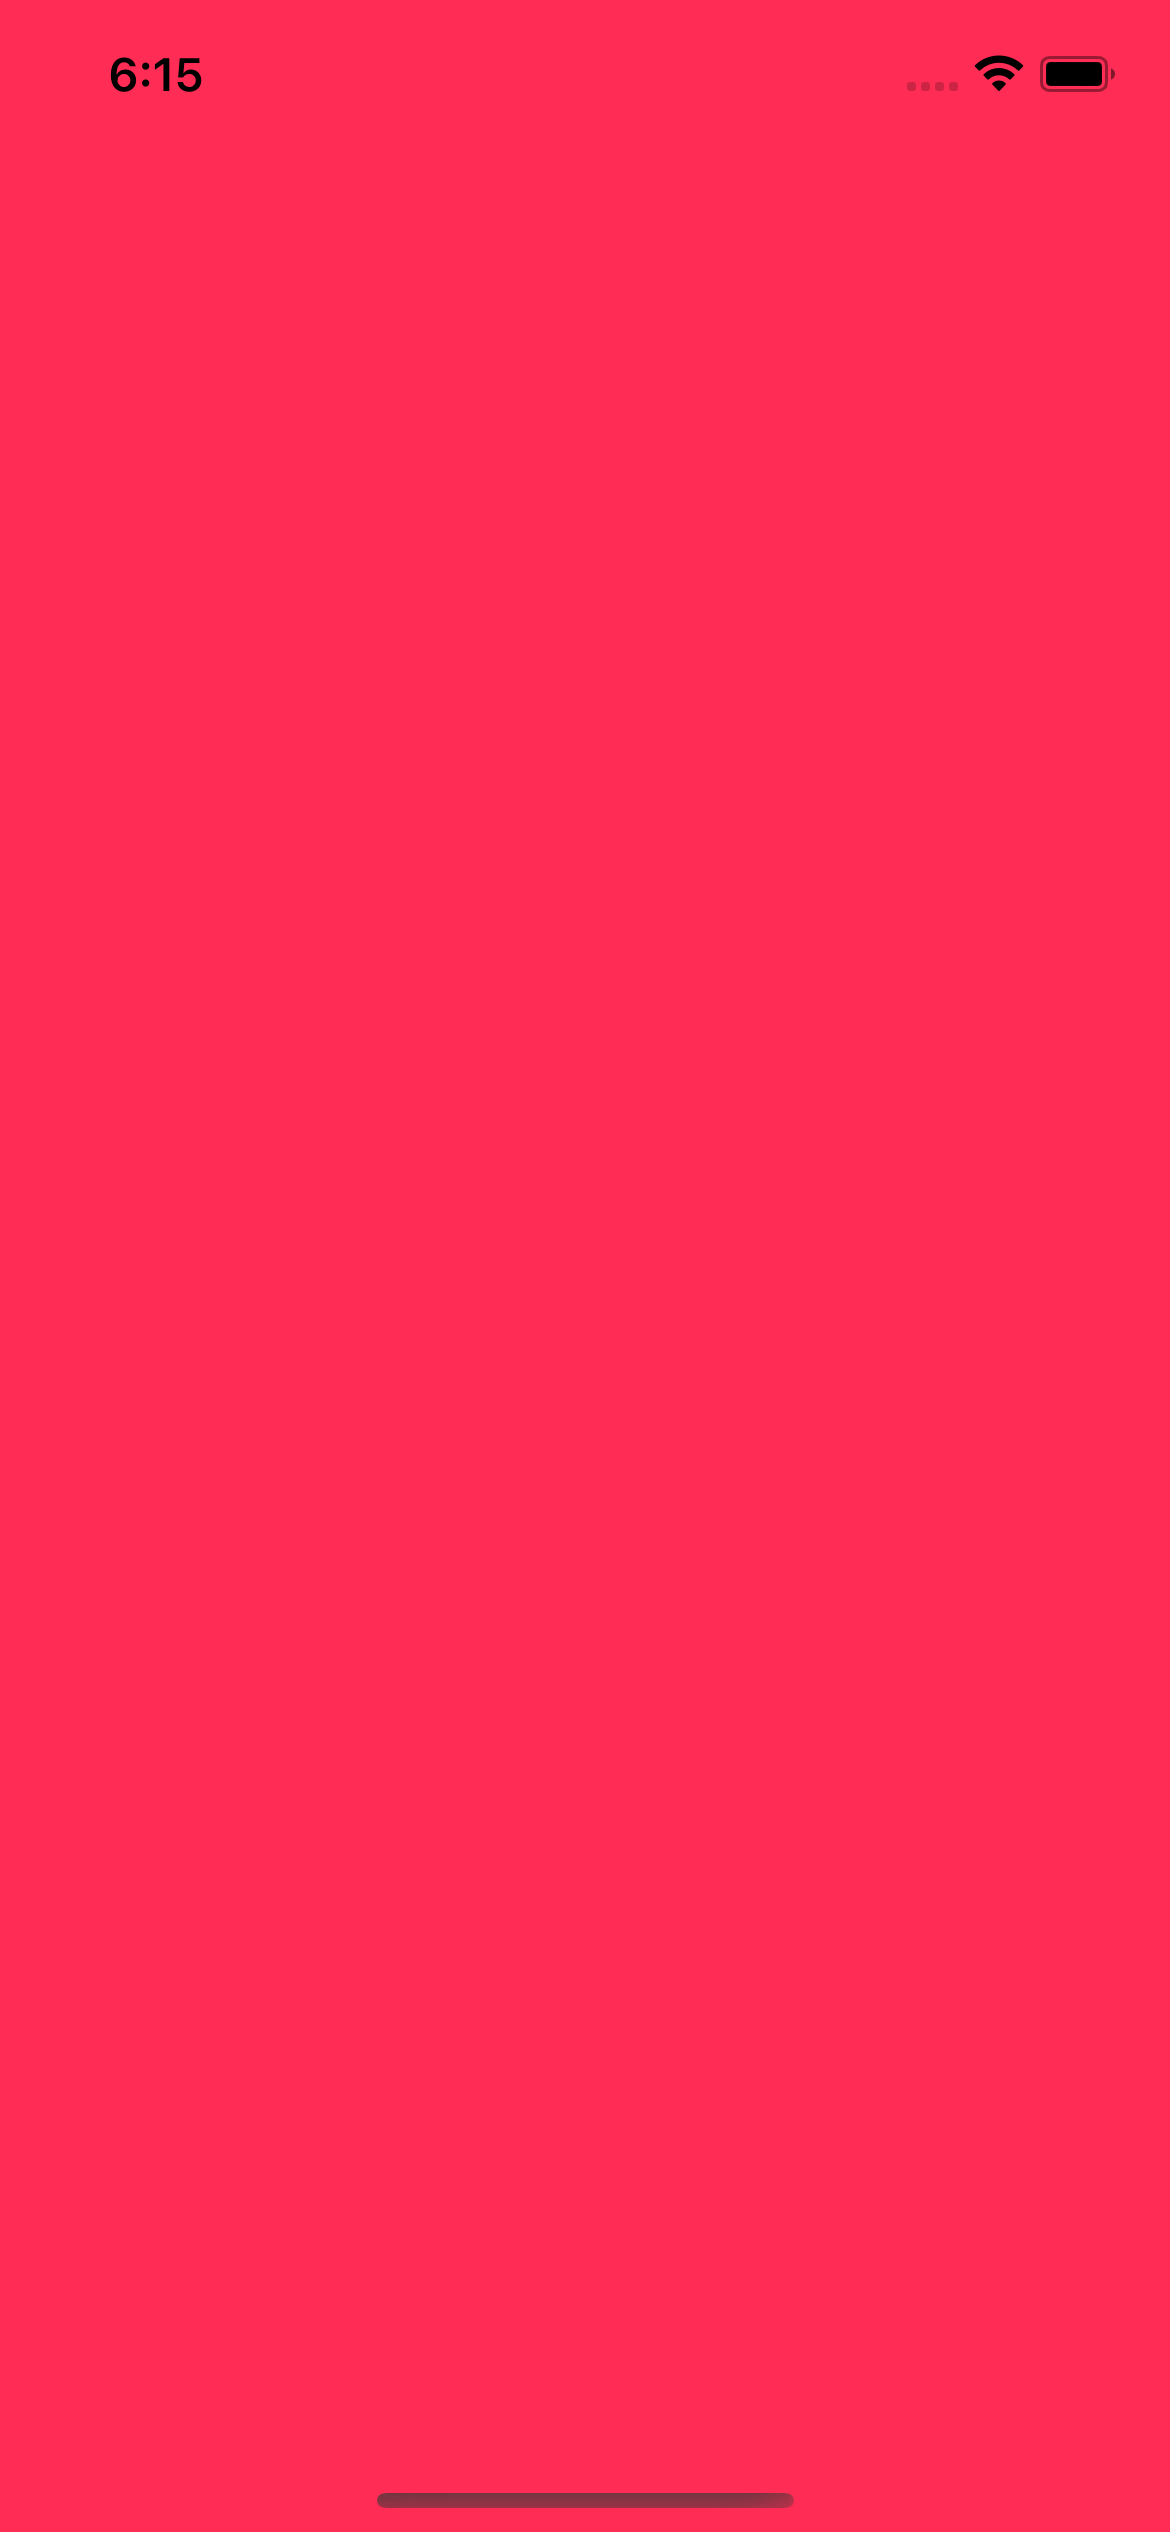
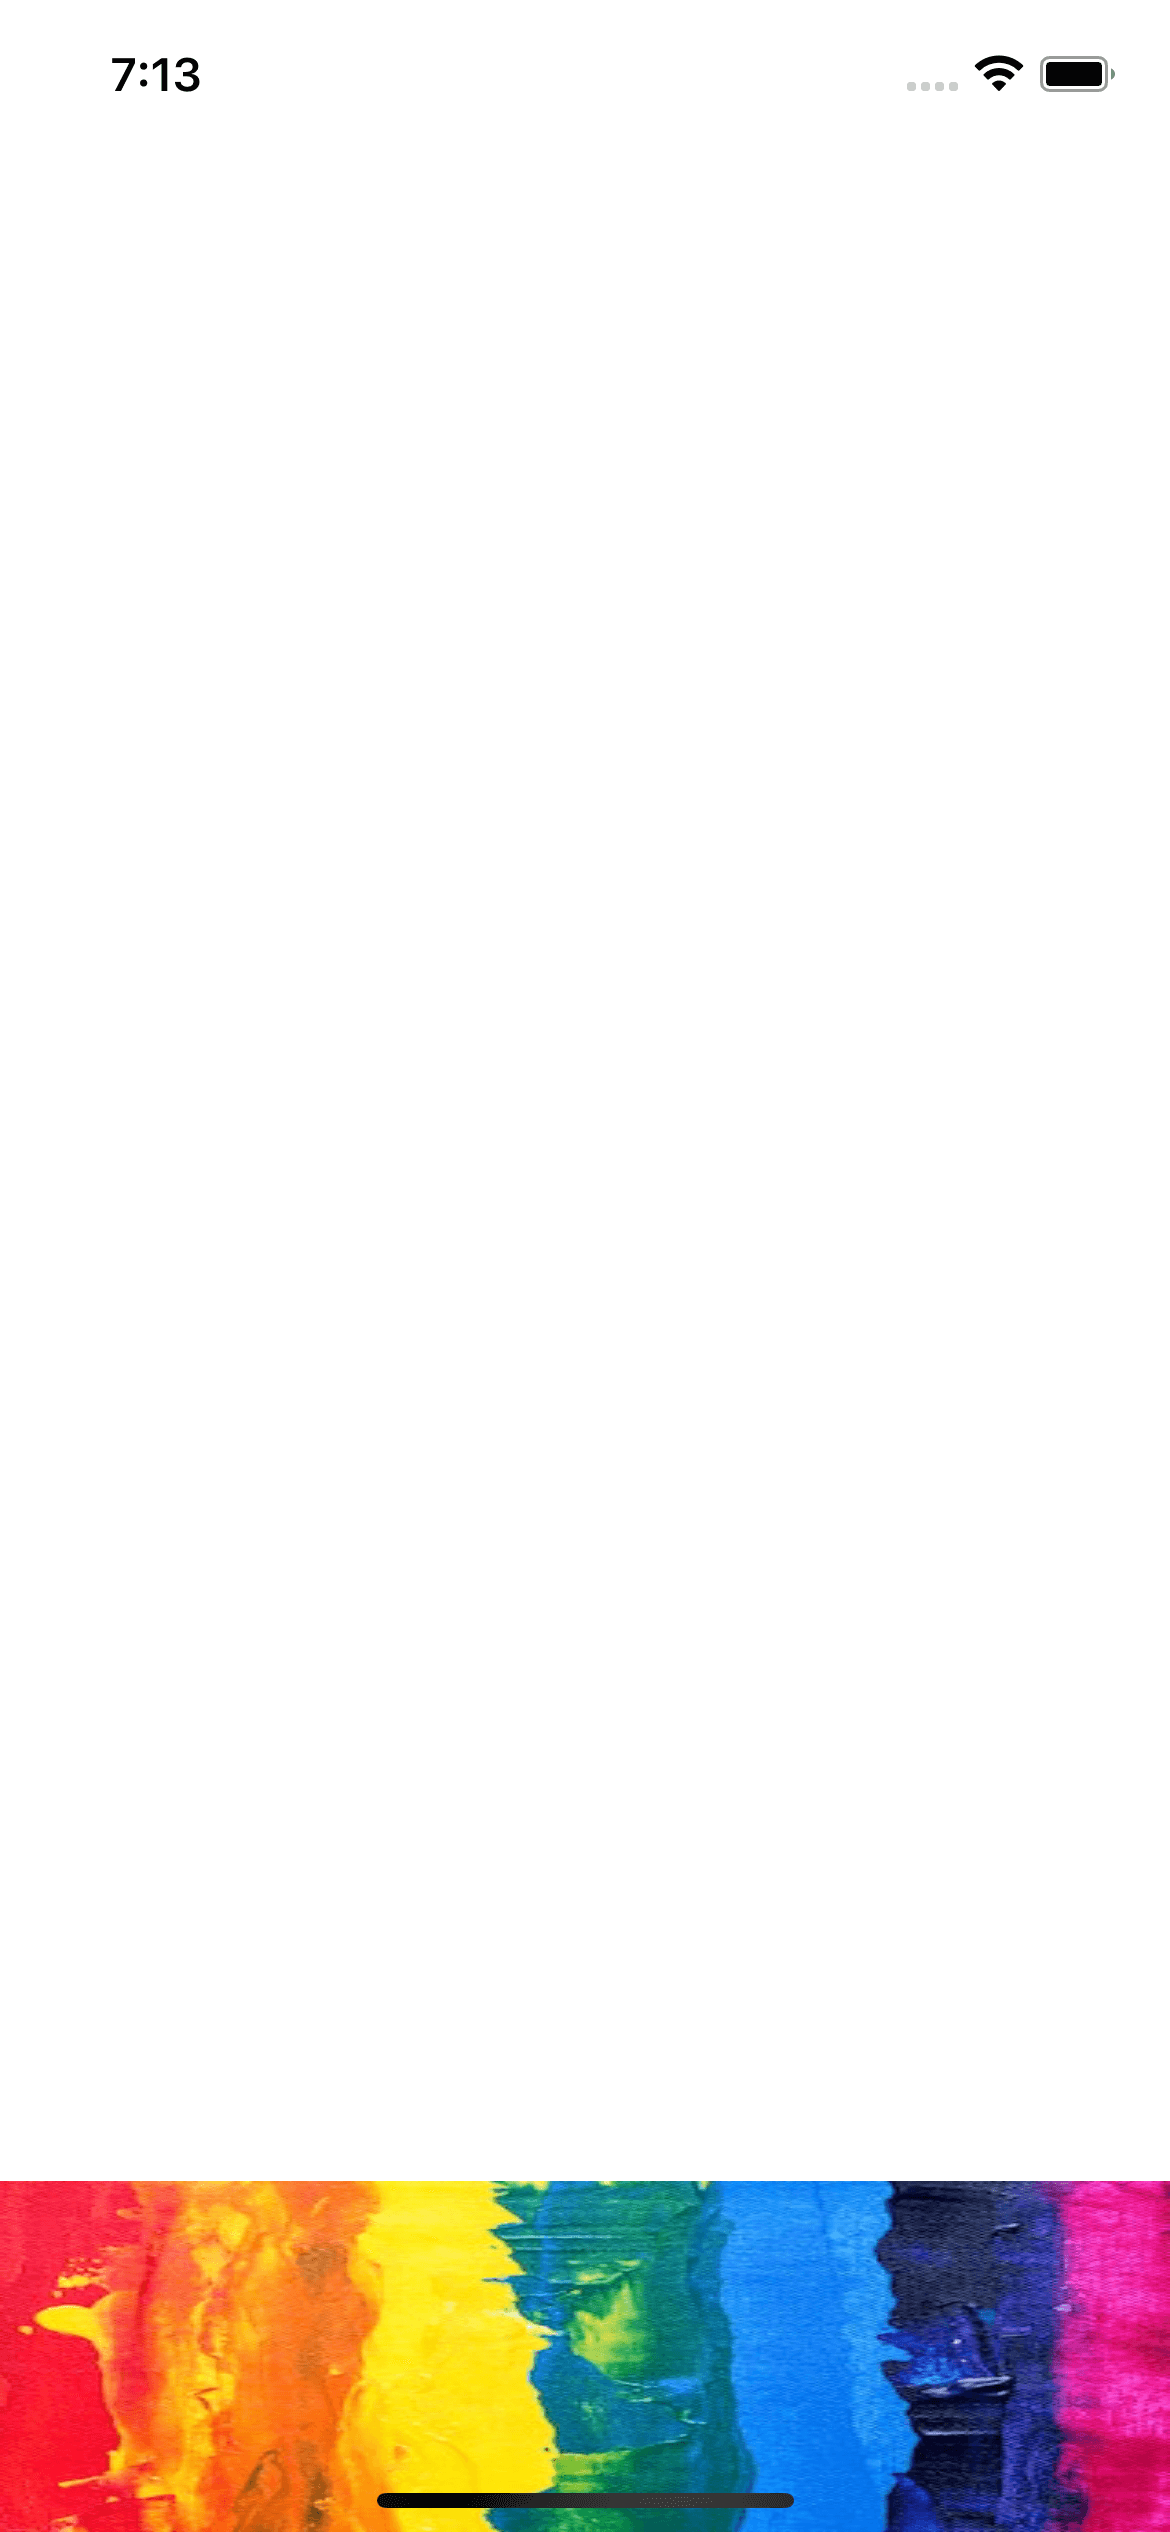
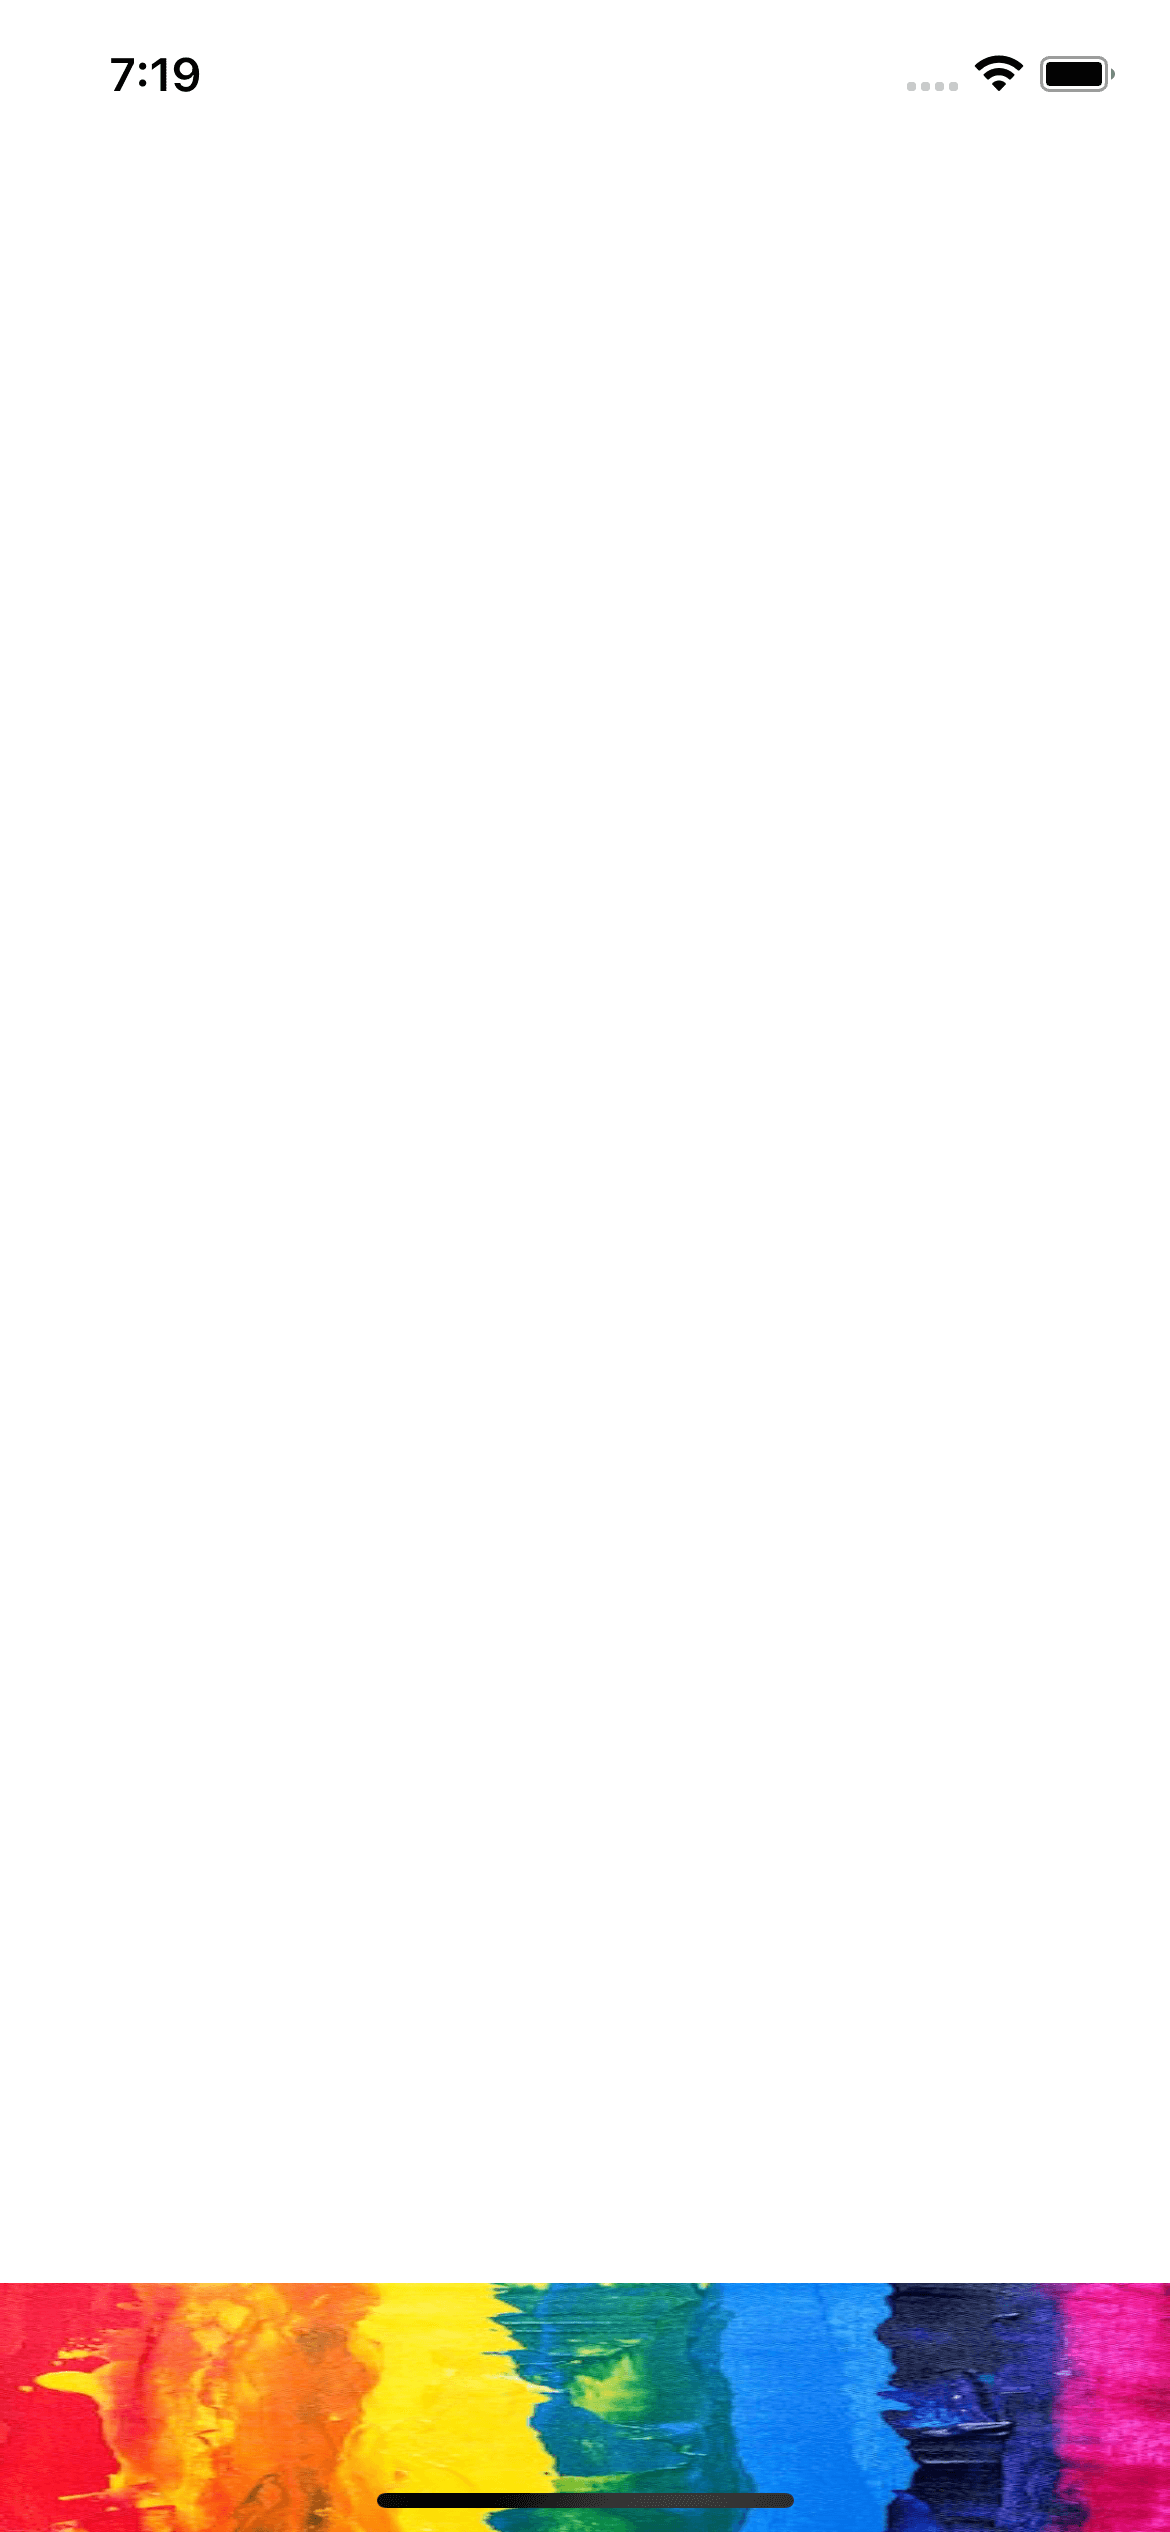
Image name
Image Name (UIImageName) accepts an image name. The image will be put at the center of the launch screen.
You use the same value that you use for init(named:) initializer of UIImage.
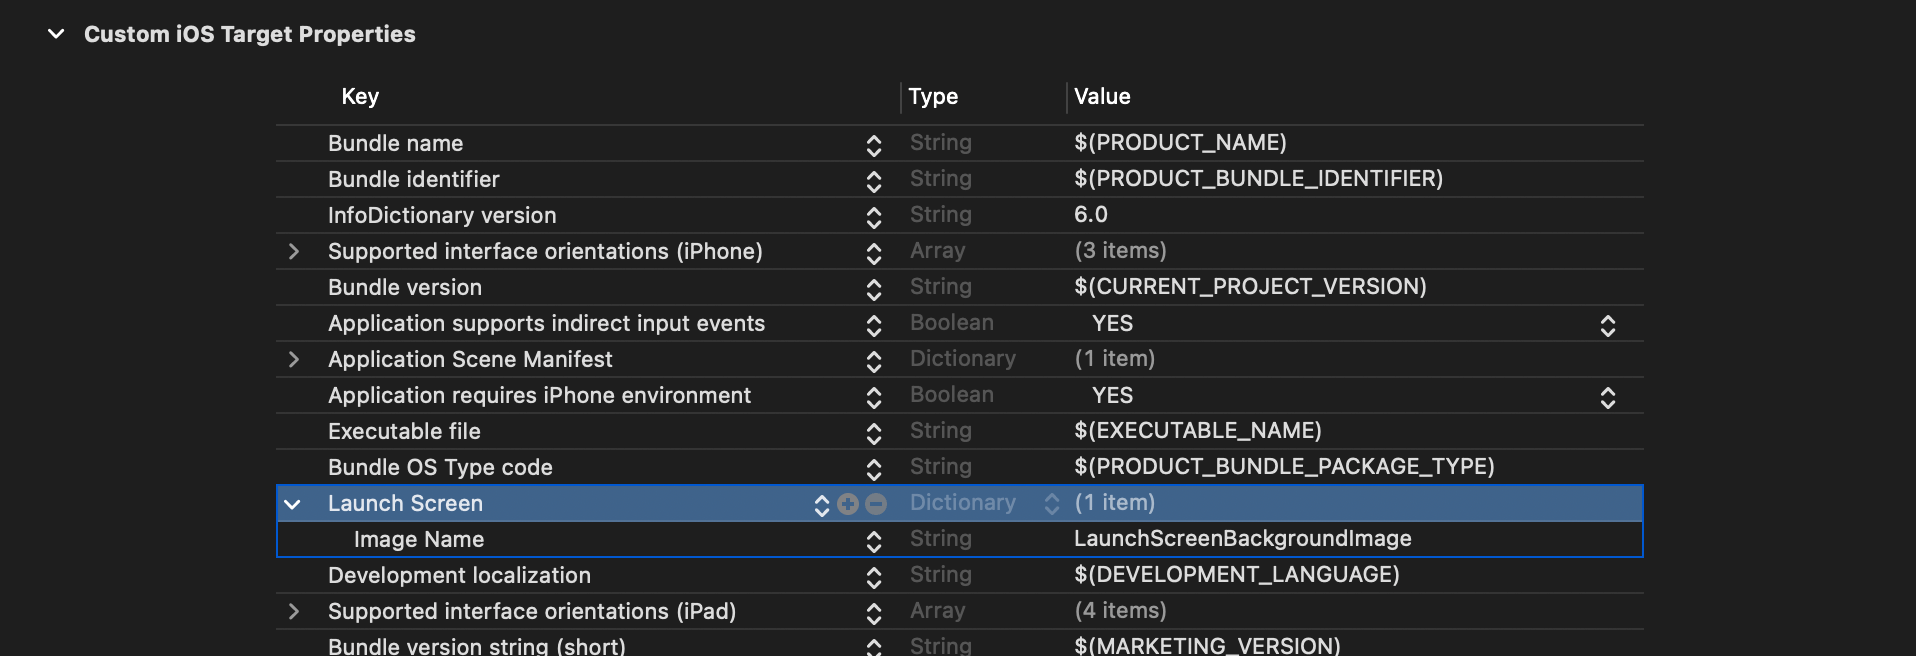
Here is the result of the launch screen[1].
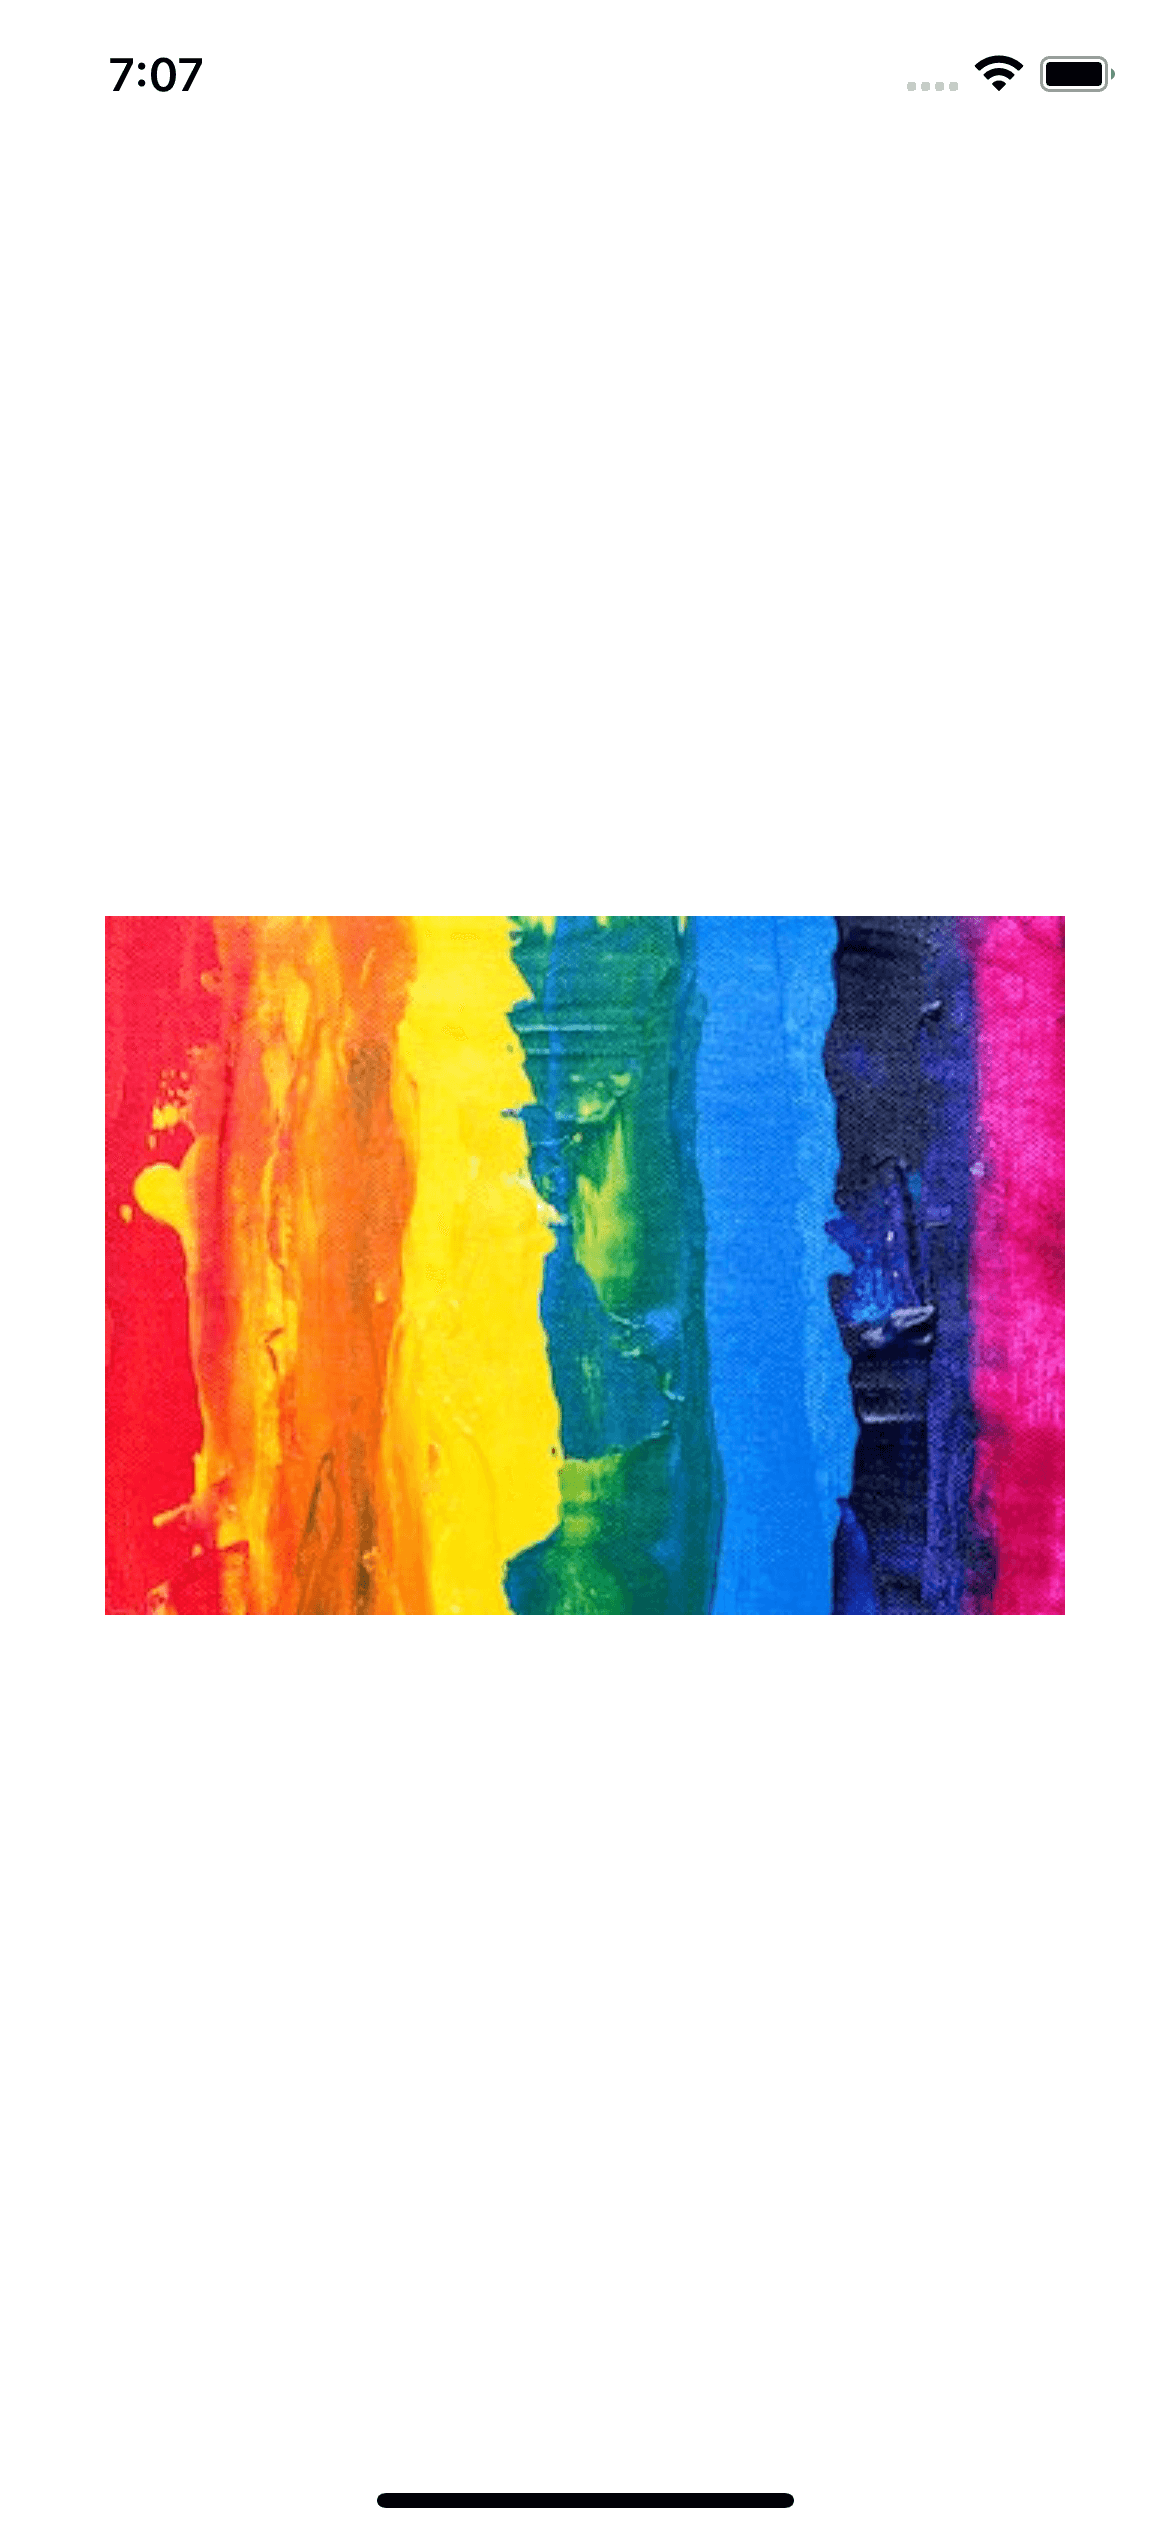
Image respects safe area insets
Image respects safe area insets (UIImageRespectsSafeAreaInsets) is a Boolean that specifies whether the launch image should respect the safe area insets.
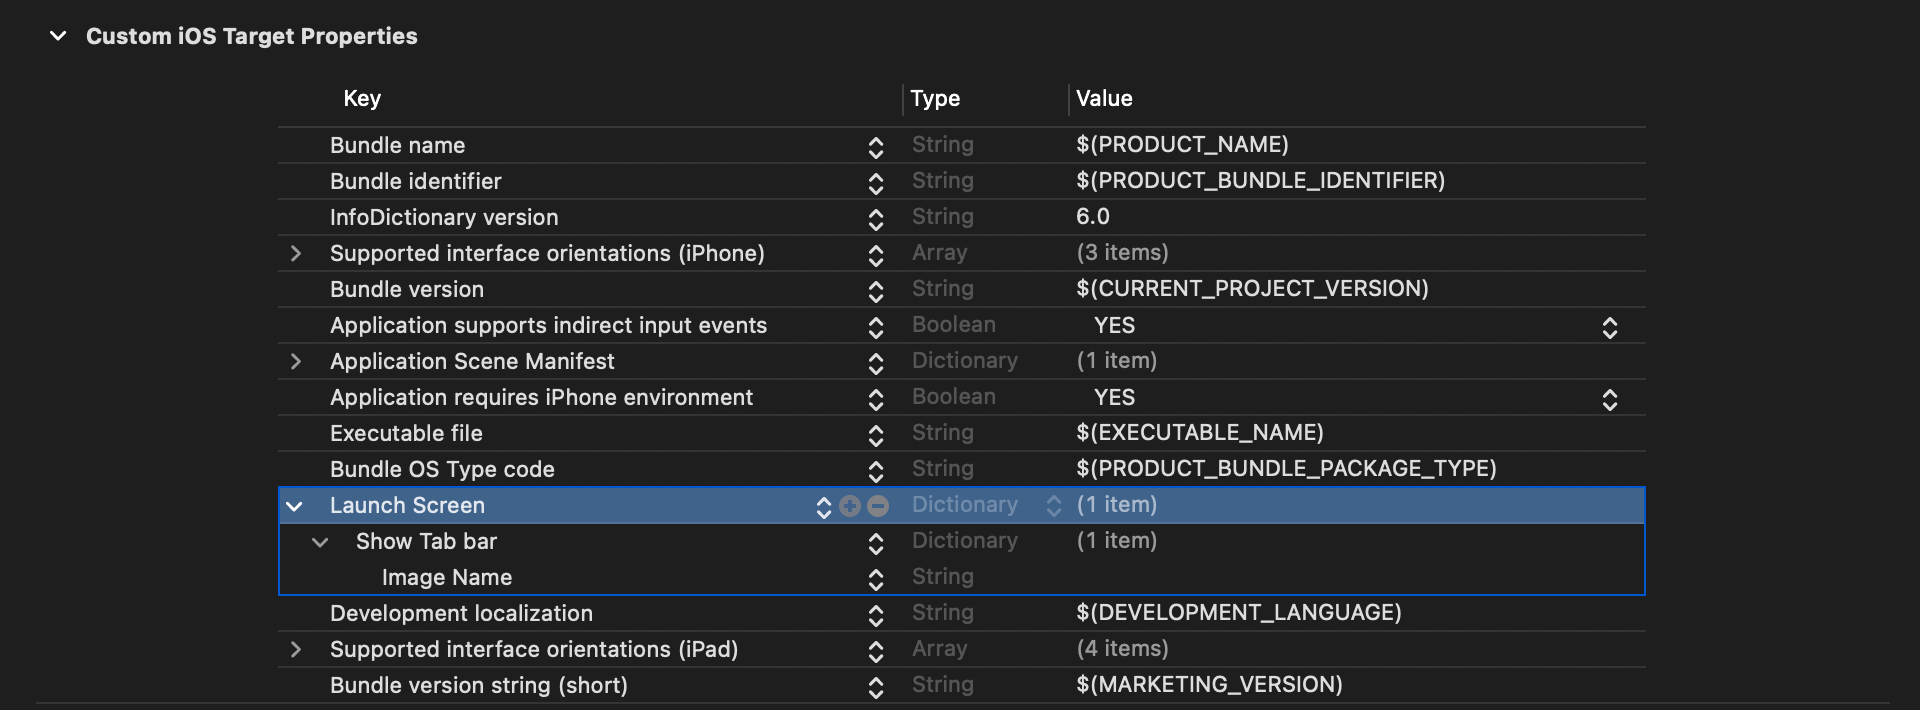
Show Tab Bar
Show Tab bar (UITabBar) is a dictionary that represents a Tab bar.
Adding this key will also add a tab bar to the launch screen.
Here is the result.

You can optionally specify Image Name (UIImageName) key to fill the tab bar with an image. The image stretches to fill the tab bar space.
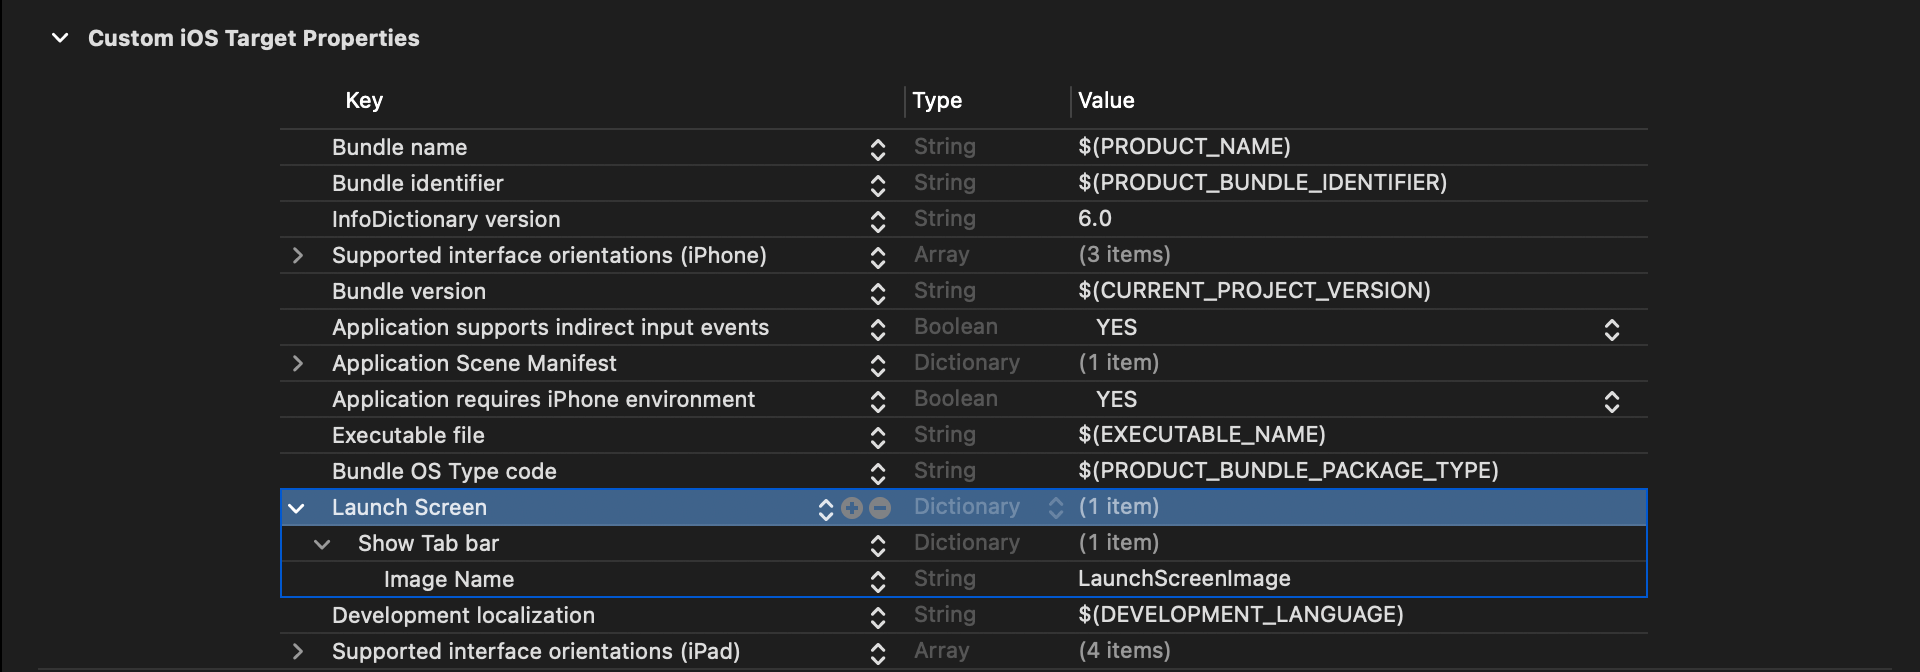
Here is the result.
Show Toolbar
Show Toolbar (UIToolbar) is a dictionary that represents a Toolbar.
Adding this key will also add a toolbar to the launch screen.
Here is the result.
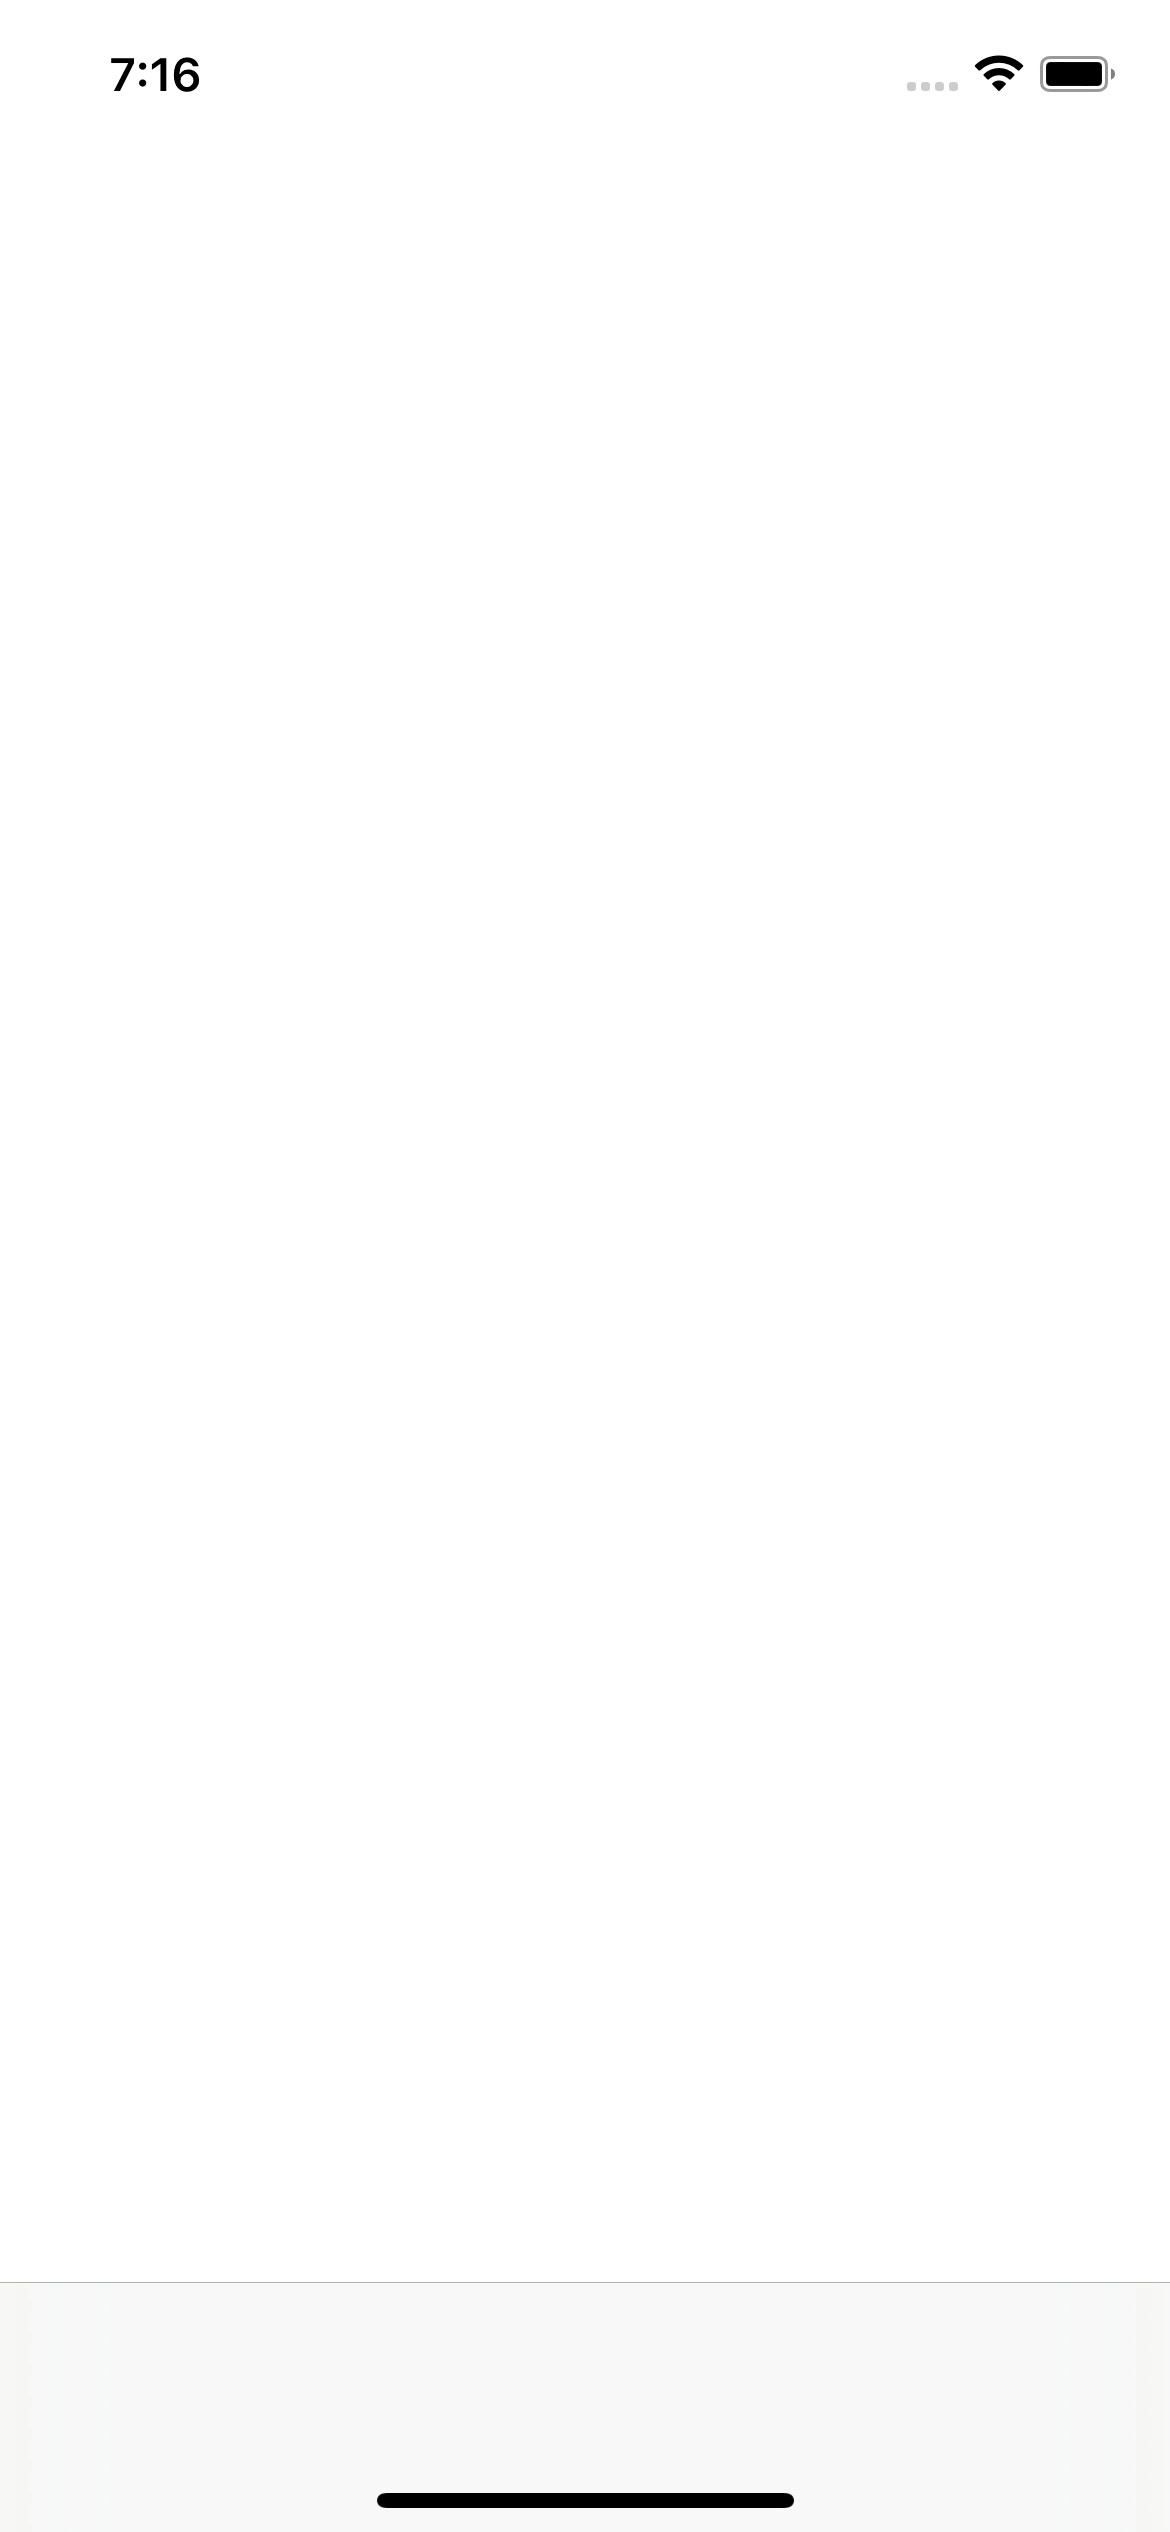
Like a tab bar, you can optionally specify Image Name (UIImageName) key to filling the toolbar with an image.
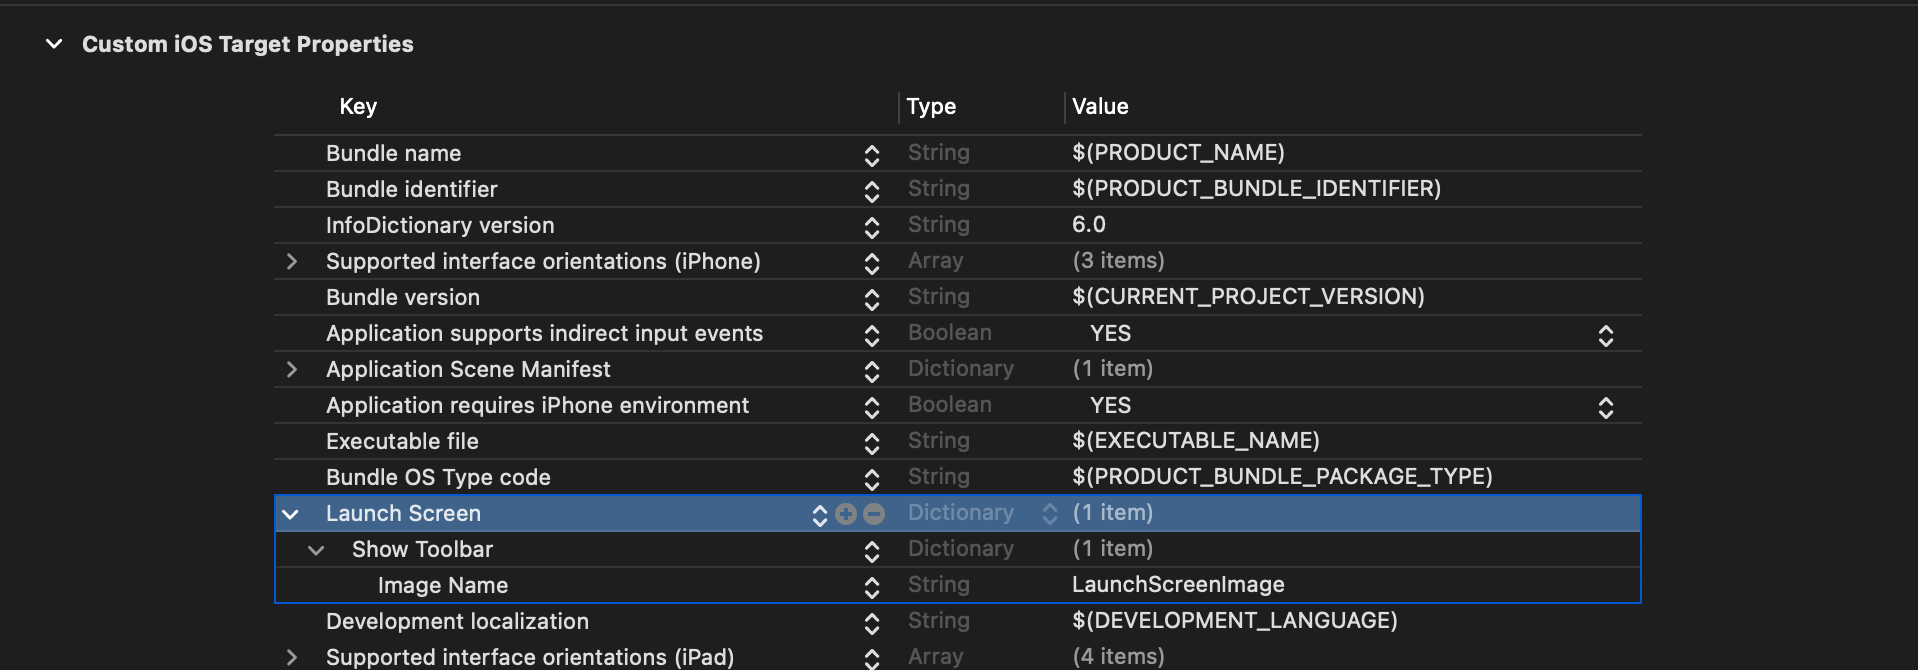
The image stretches to fill the toolbar space.
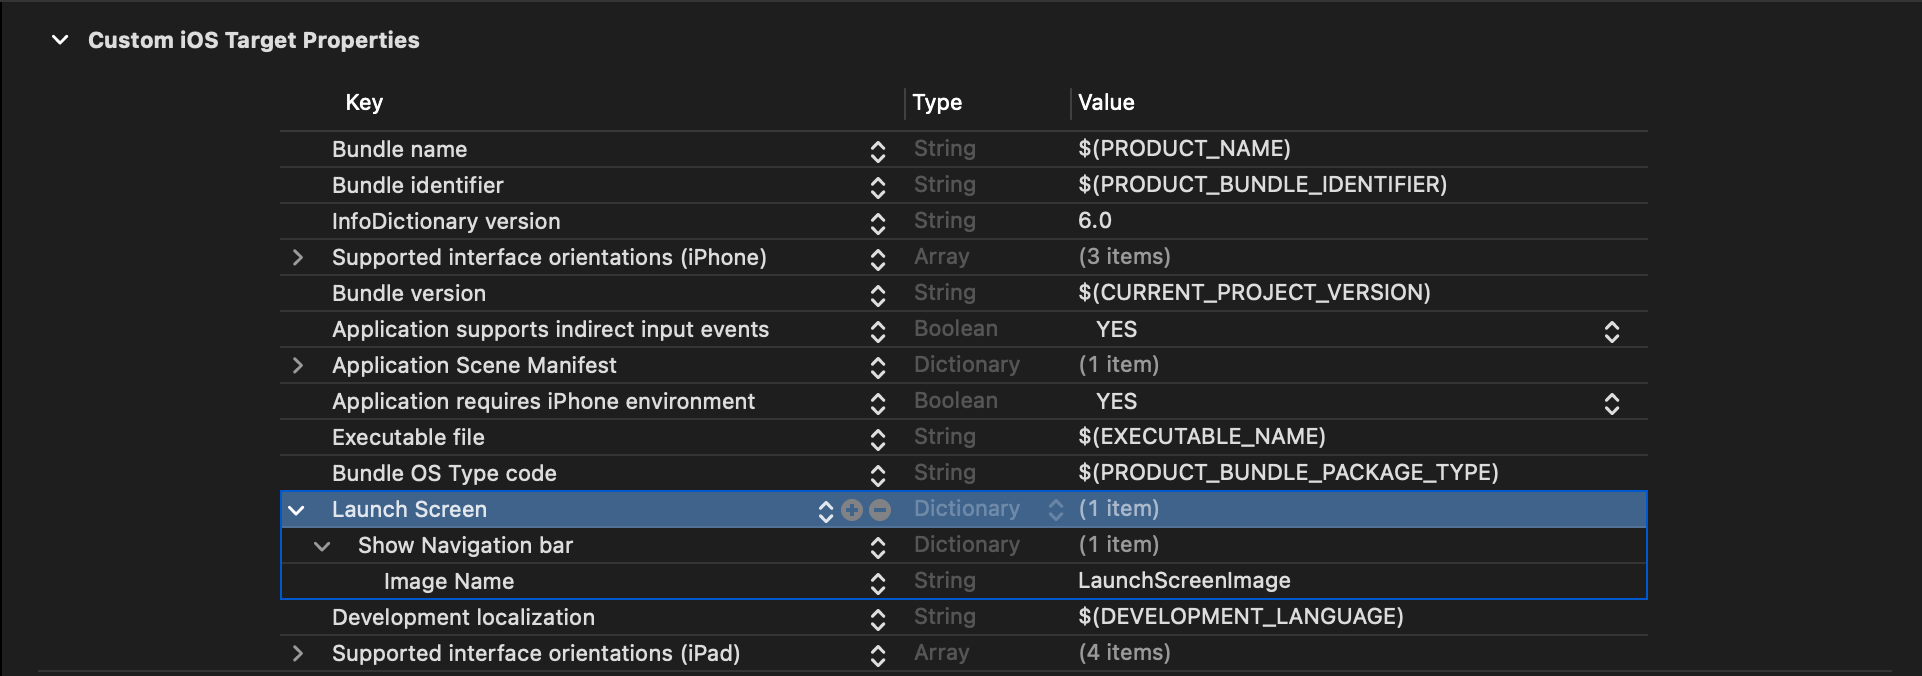
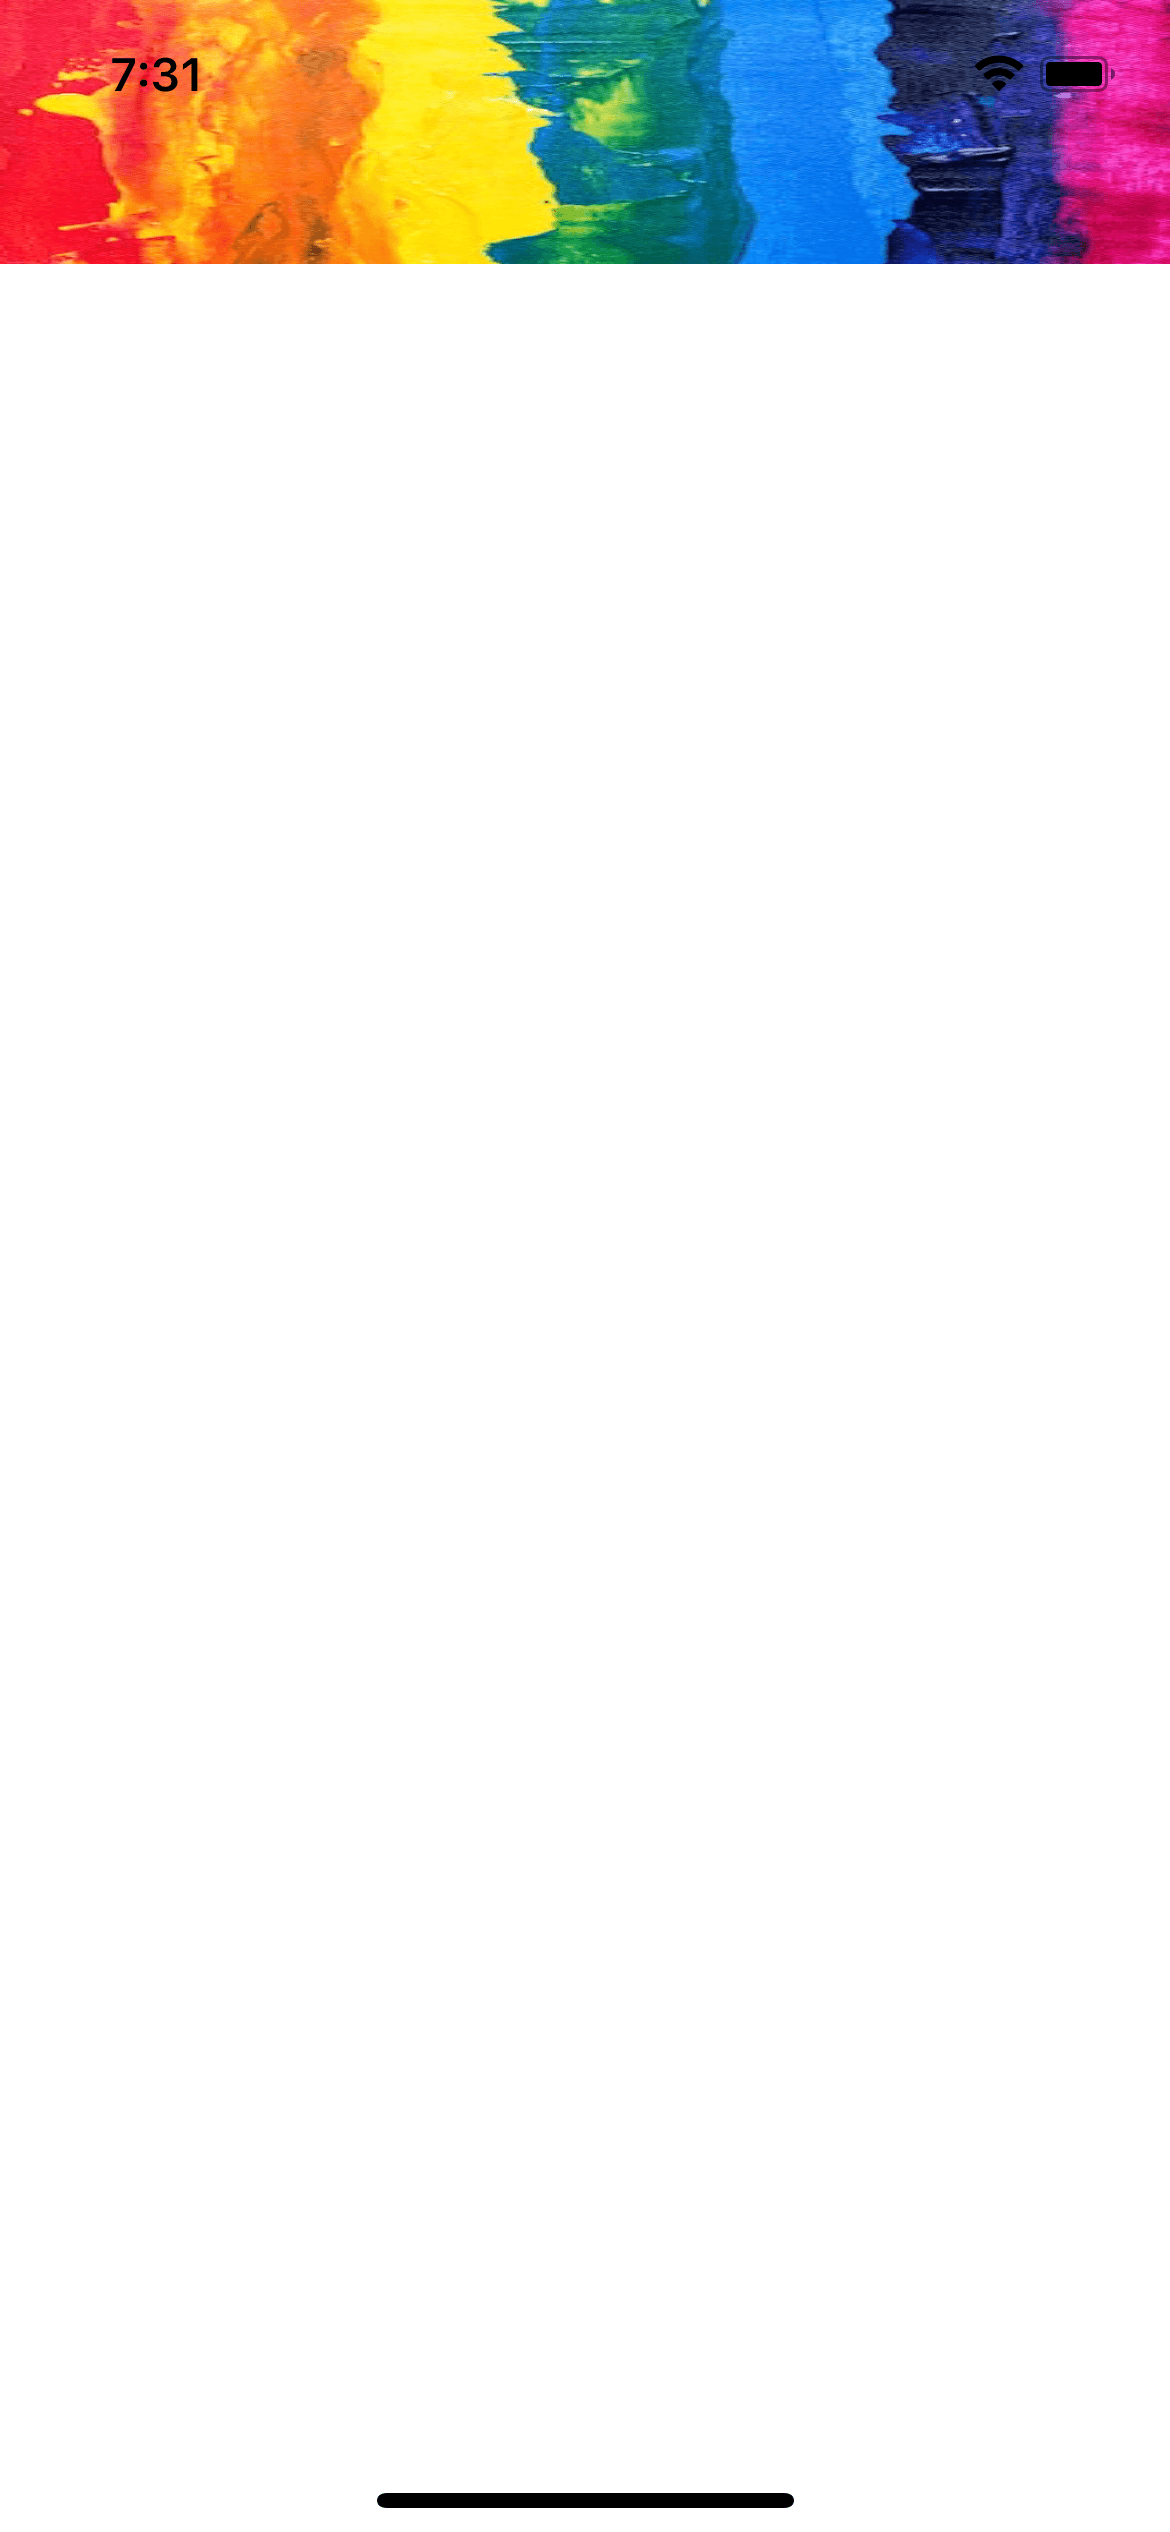
Navigation bar
Show navigation bar (UINavigationBar) is a dictionary representing a Navigation bar.
This doesn't work in my test, though.
You won't see a navigation bar even with this flag.

It only works when you specify an image using Image Name (UIImageName) key.
You can easily support sarunw.com by checking out this sponsor.
Localization Buddy: Easiest way to localize and update App Store metadata.
Conclusion
I love the idea of configuring a launch screen with Info.plist, but it is quite limited in function.
You can't specify a background color for your navigation bar. You can't populate a tab and toolbar with items, etc.
Even thing that we can configure still has some bugs and misbehavior.
And the fact that we didn't get any improvement all this year makes me question the future of it. We may get an update or an alternative way in the future.
If your app is simple, you might get away with this approach, but once your app gets more complicated, you might need to go back to the old way of using the Launch Screen storyboard.
Photo by Steve Johnson on Unsplash. ↩︎
Read more article about SwiftUI or see all available topic
Enjoy the read?
If you enjoy this article, you can subscribe to the weekly newsletter.
Every Friday, you'll get a quick recap of all articles and tips posted on this site. No strings attached. Unsubscribe anytime.
Feel free to follow me on Twitter and ask your questions related to this post. Thanks for reading and see you next time.
If you enjoy my writing, please check out my Patreon https://www.patreon.com/sarunw and become my supporter. Sharing the article is also greatly appreciated.
Become a patron Buy me a coffee Tweet ShareHow to whitelist files in .gitignore
Learn how to re-include an ignored file in .gitignore.
Swift fileprivate vs private
Learn the difference between two similar access levels in Swift, private and fileprivate.