Building Static List in SwiftUI
Table of Contents
What is a Static List
Static List is a list with a fixed number of rows.
This is the simplest form of a list. You can create a static list view without any data backed.
A static List is suitable for representing a list of items
- You know the number of rows and
- You know that it won't change.
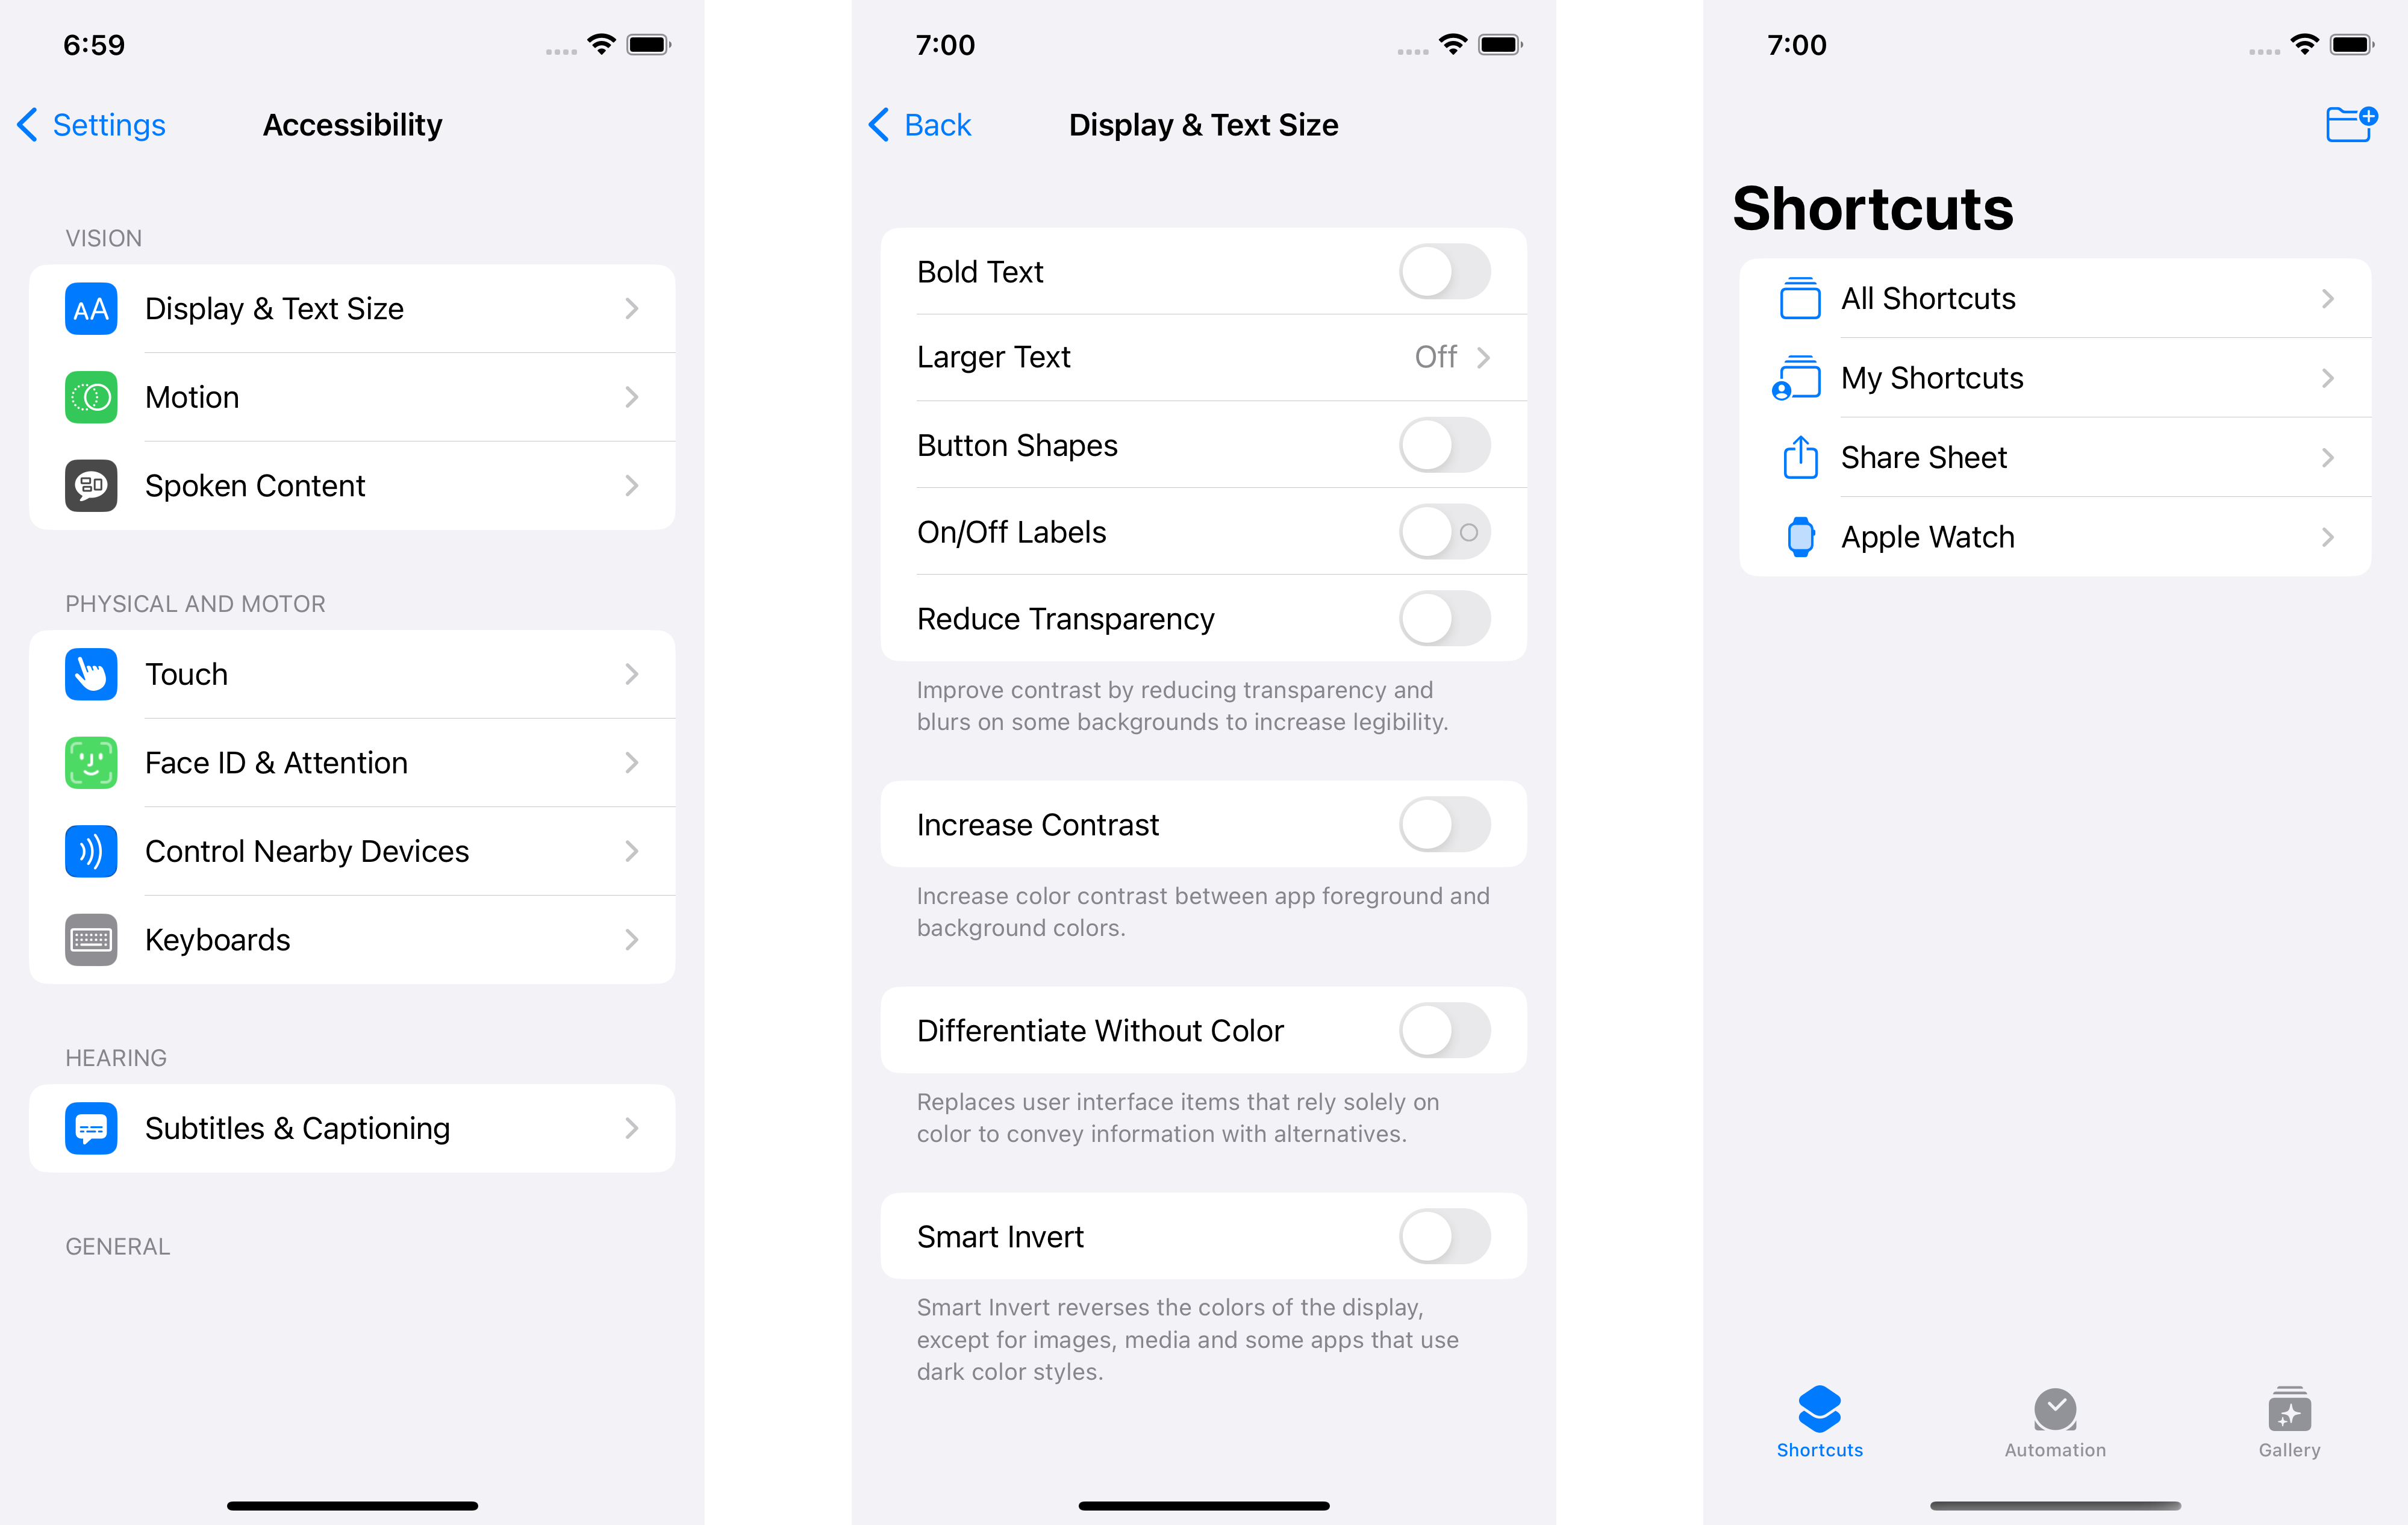
Examples of static Lists are Menus or Settings screens.
Here are examples of the Settings app and Shortcuts app. You can replicate this UI using a static List view.
You can easily support sarunw.com by checking out this sponsor.
Offline Transcription: Fast, privacy-focus way to transcribe audio, video, and podcast files. No data leaves your Mac.
How to Create a Static SwiftUI List
List is a container view that presents its children as a row of data.
You can think of it like VStack and HStack but with some special styling and functions.
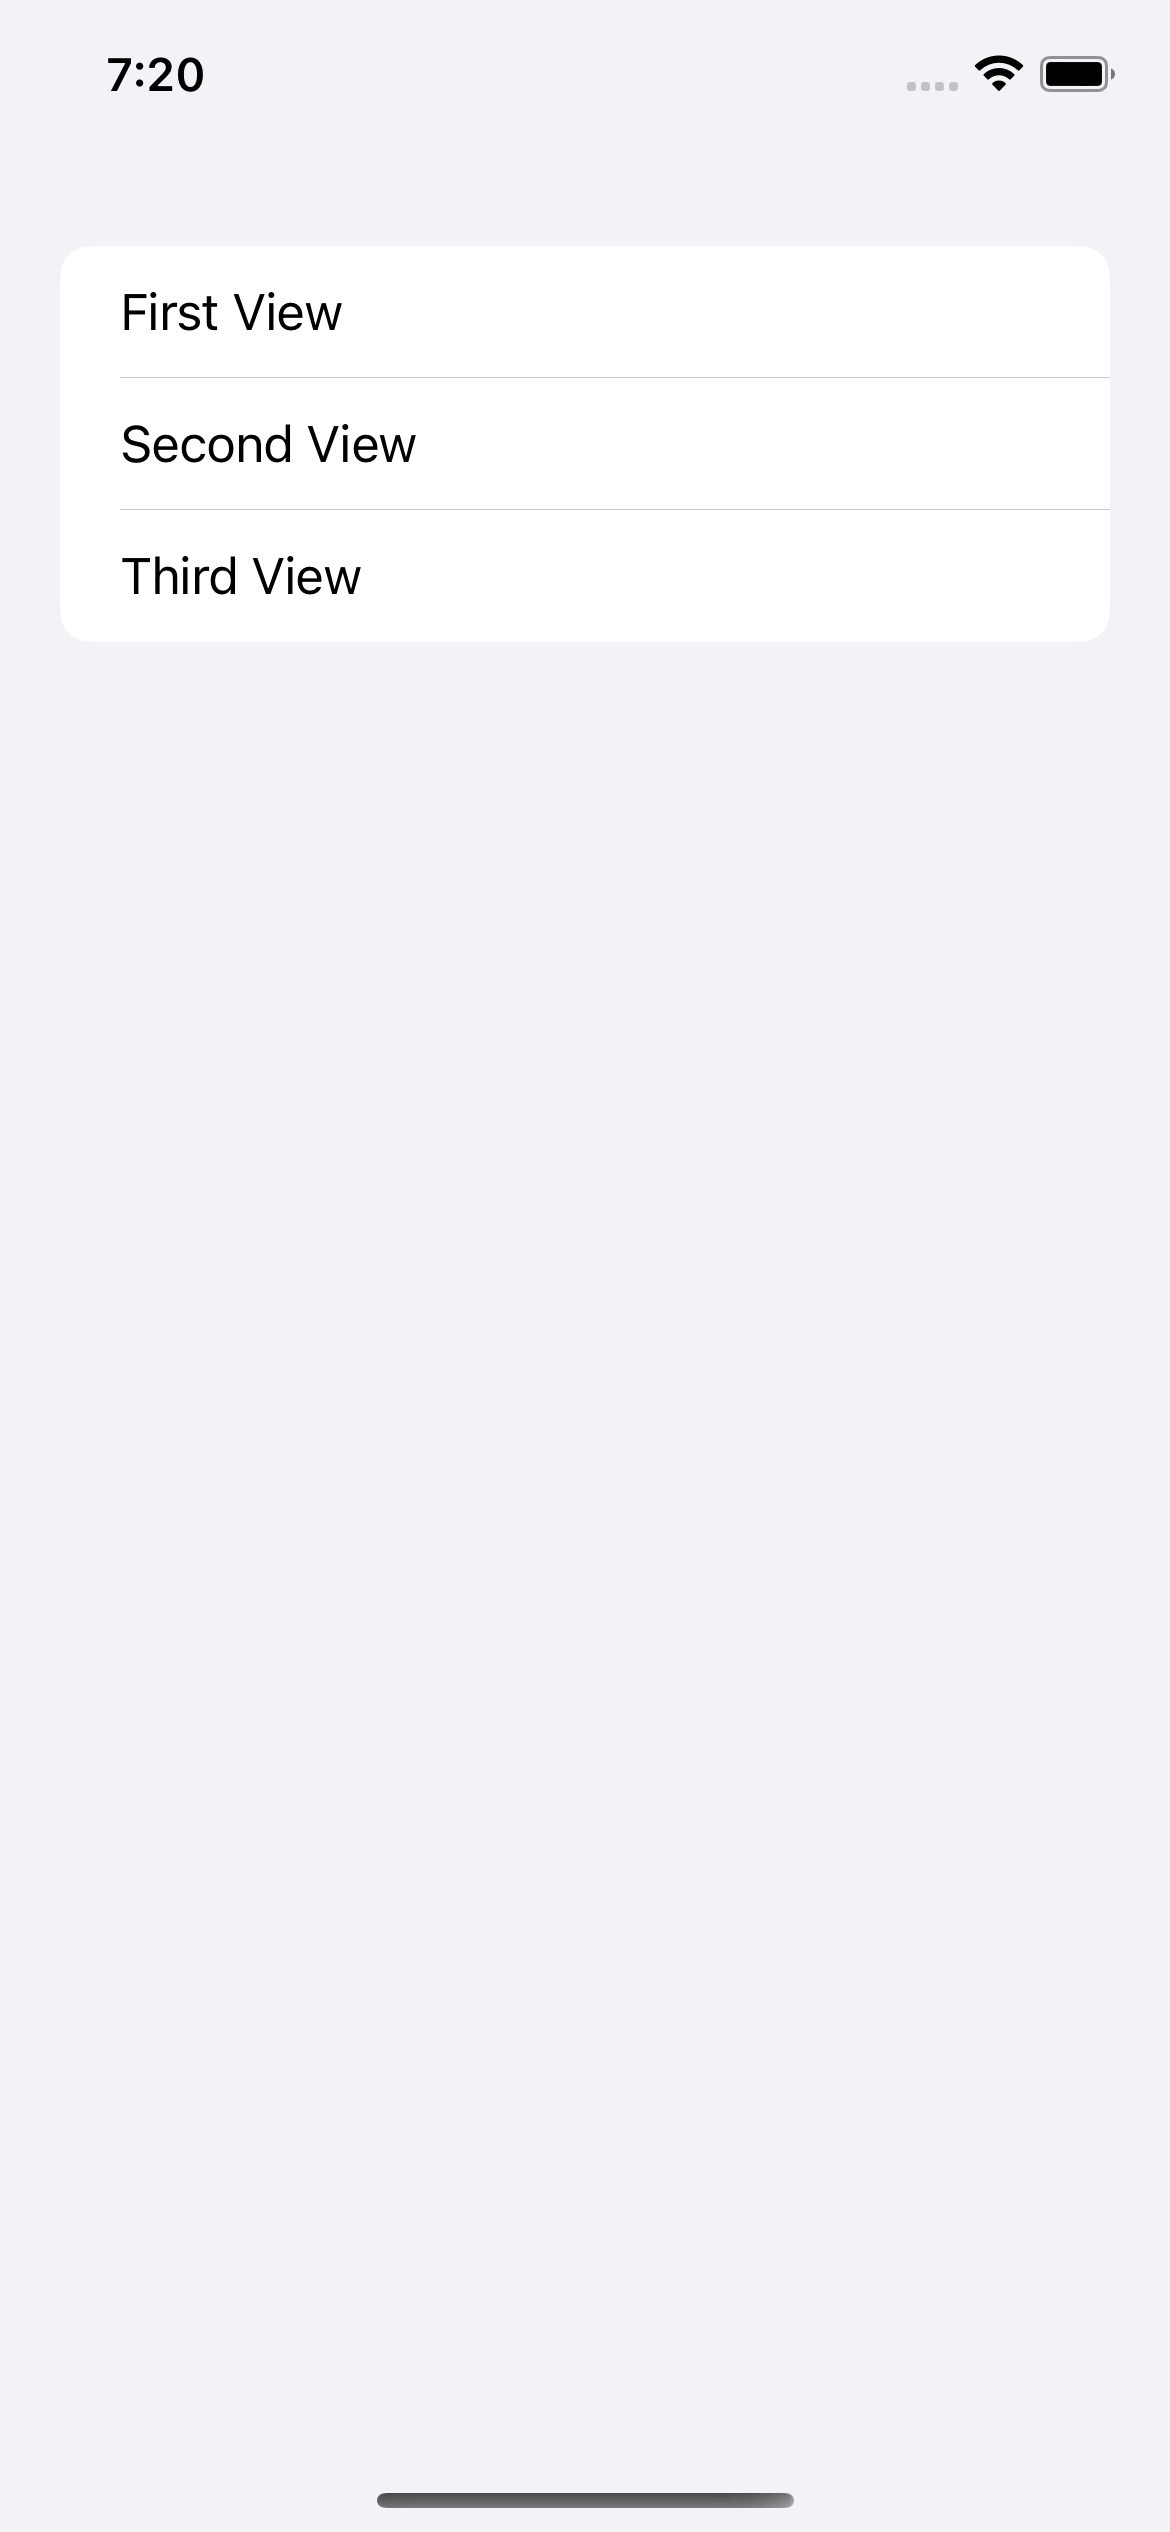
To create a static list, you put any view in a List, and each view will present as a separate row.
struct ContentView: View {
    var body: some View {
        List {
            Text("First View")
            Text("Second View")
            Text("Third View")
        }
    }
}
Each text view will become a list row.
SwiftUI List Section
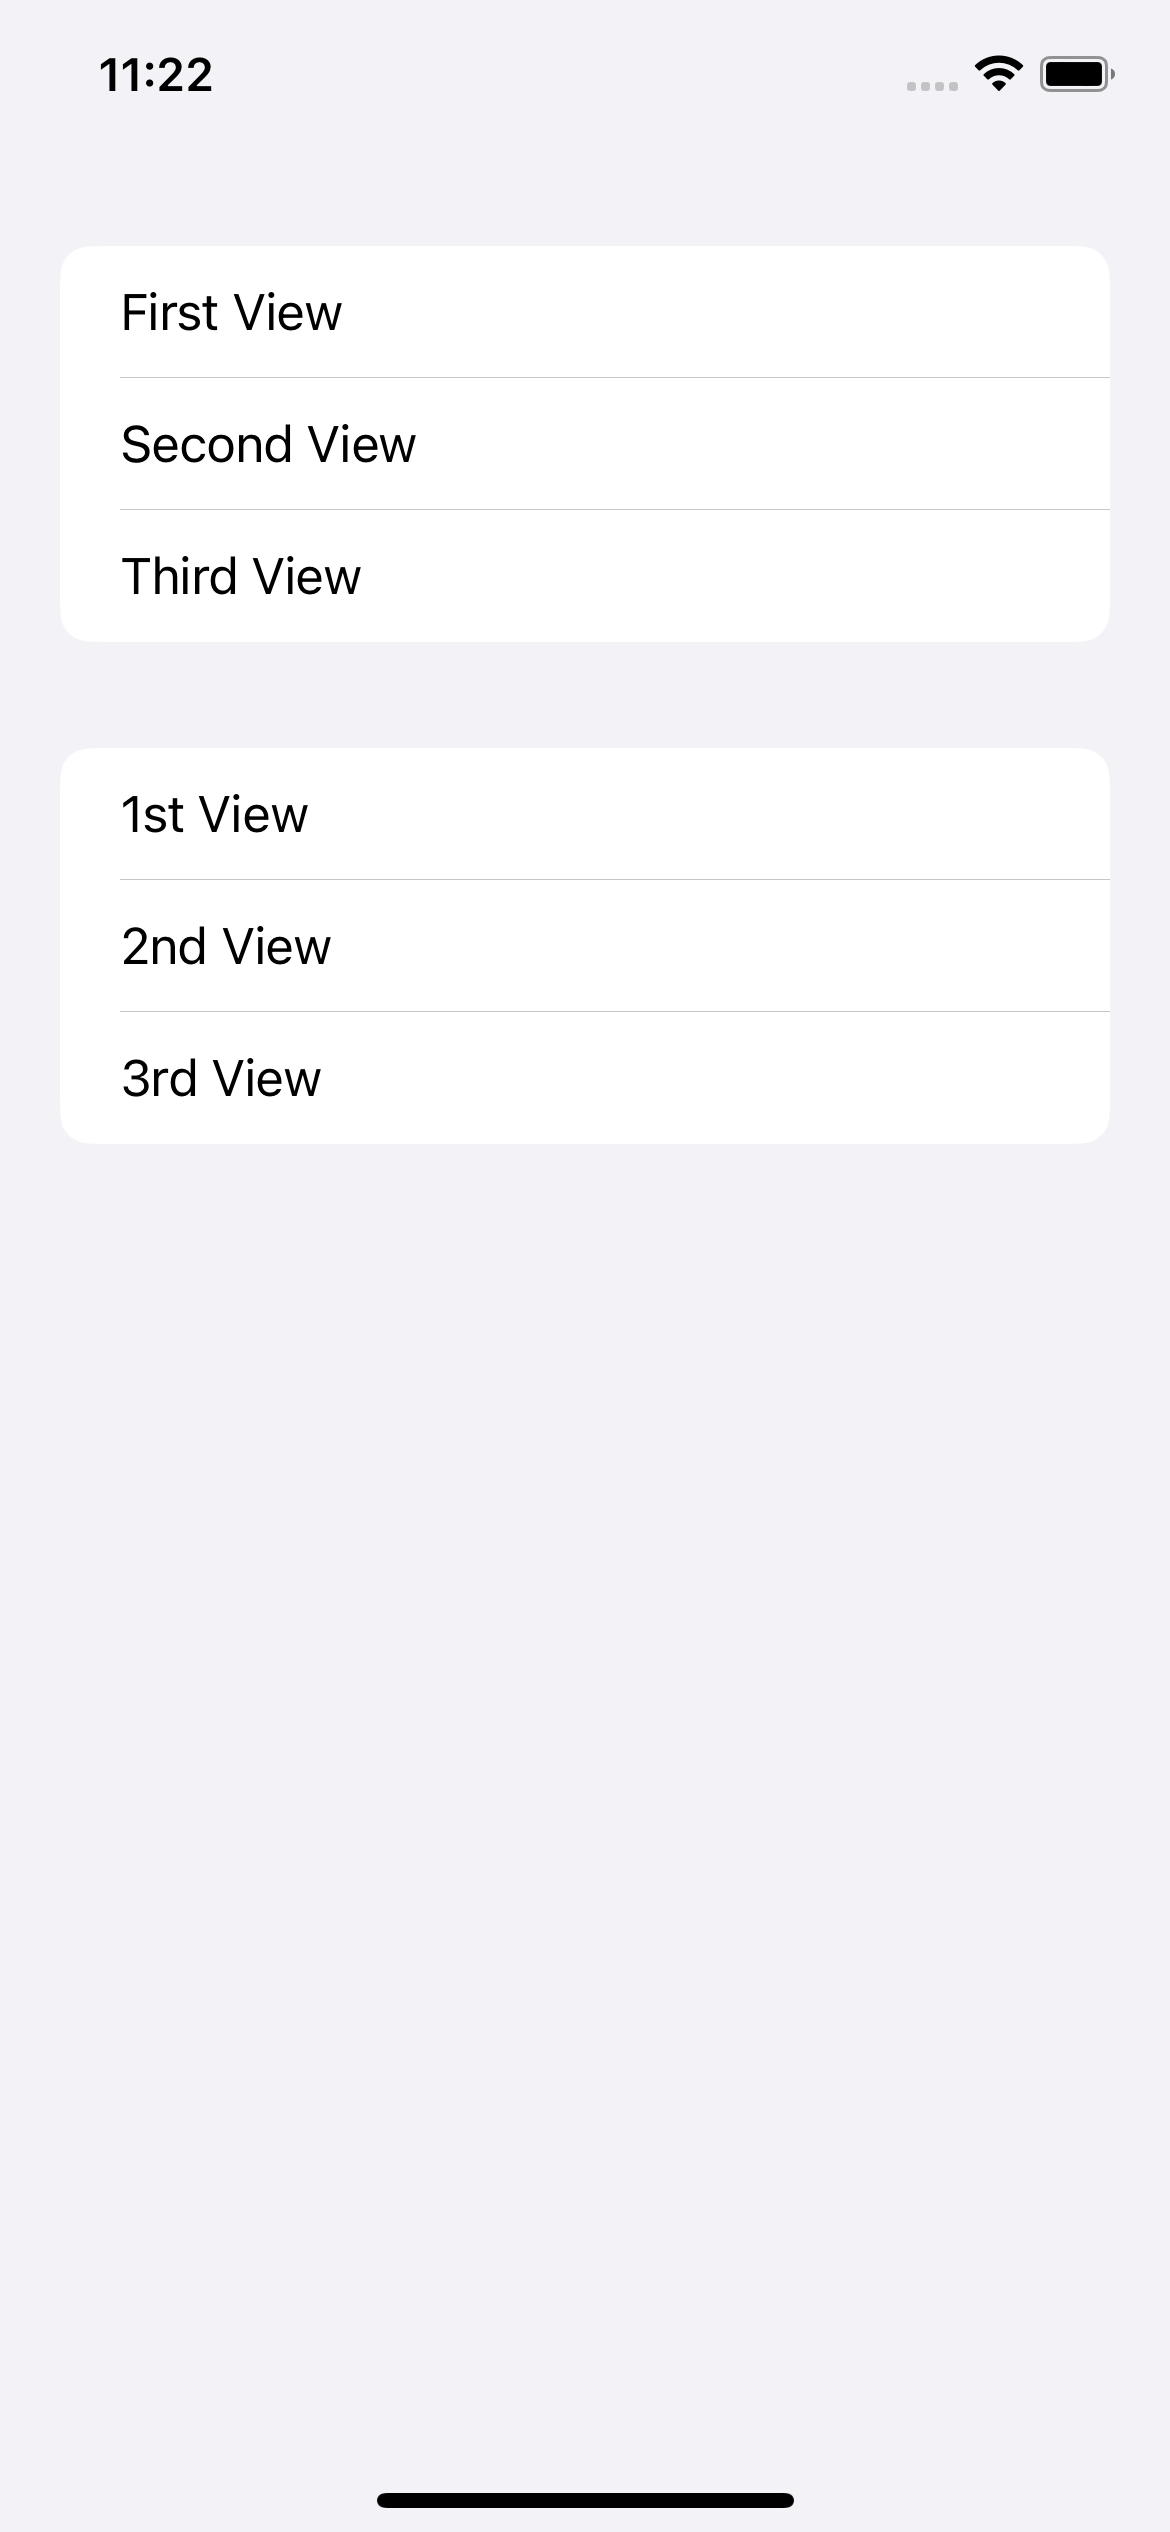
You can group one or more list rows into a section by putting them in a Section view.
This will create a visual separation between each section.
struct StaticListExample: View {
    var body: some View {
        List {
            Section {
                Text("First View")
                Text("Second View")
                Text("Third View")
            }
            Section {
                Text("1st View")
                Text("2nd View")
                Text("3rd View")
            }
        }
    }
}
SwiftUI Section Headers and Footers
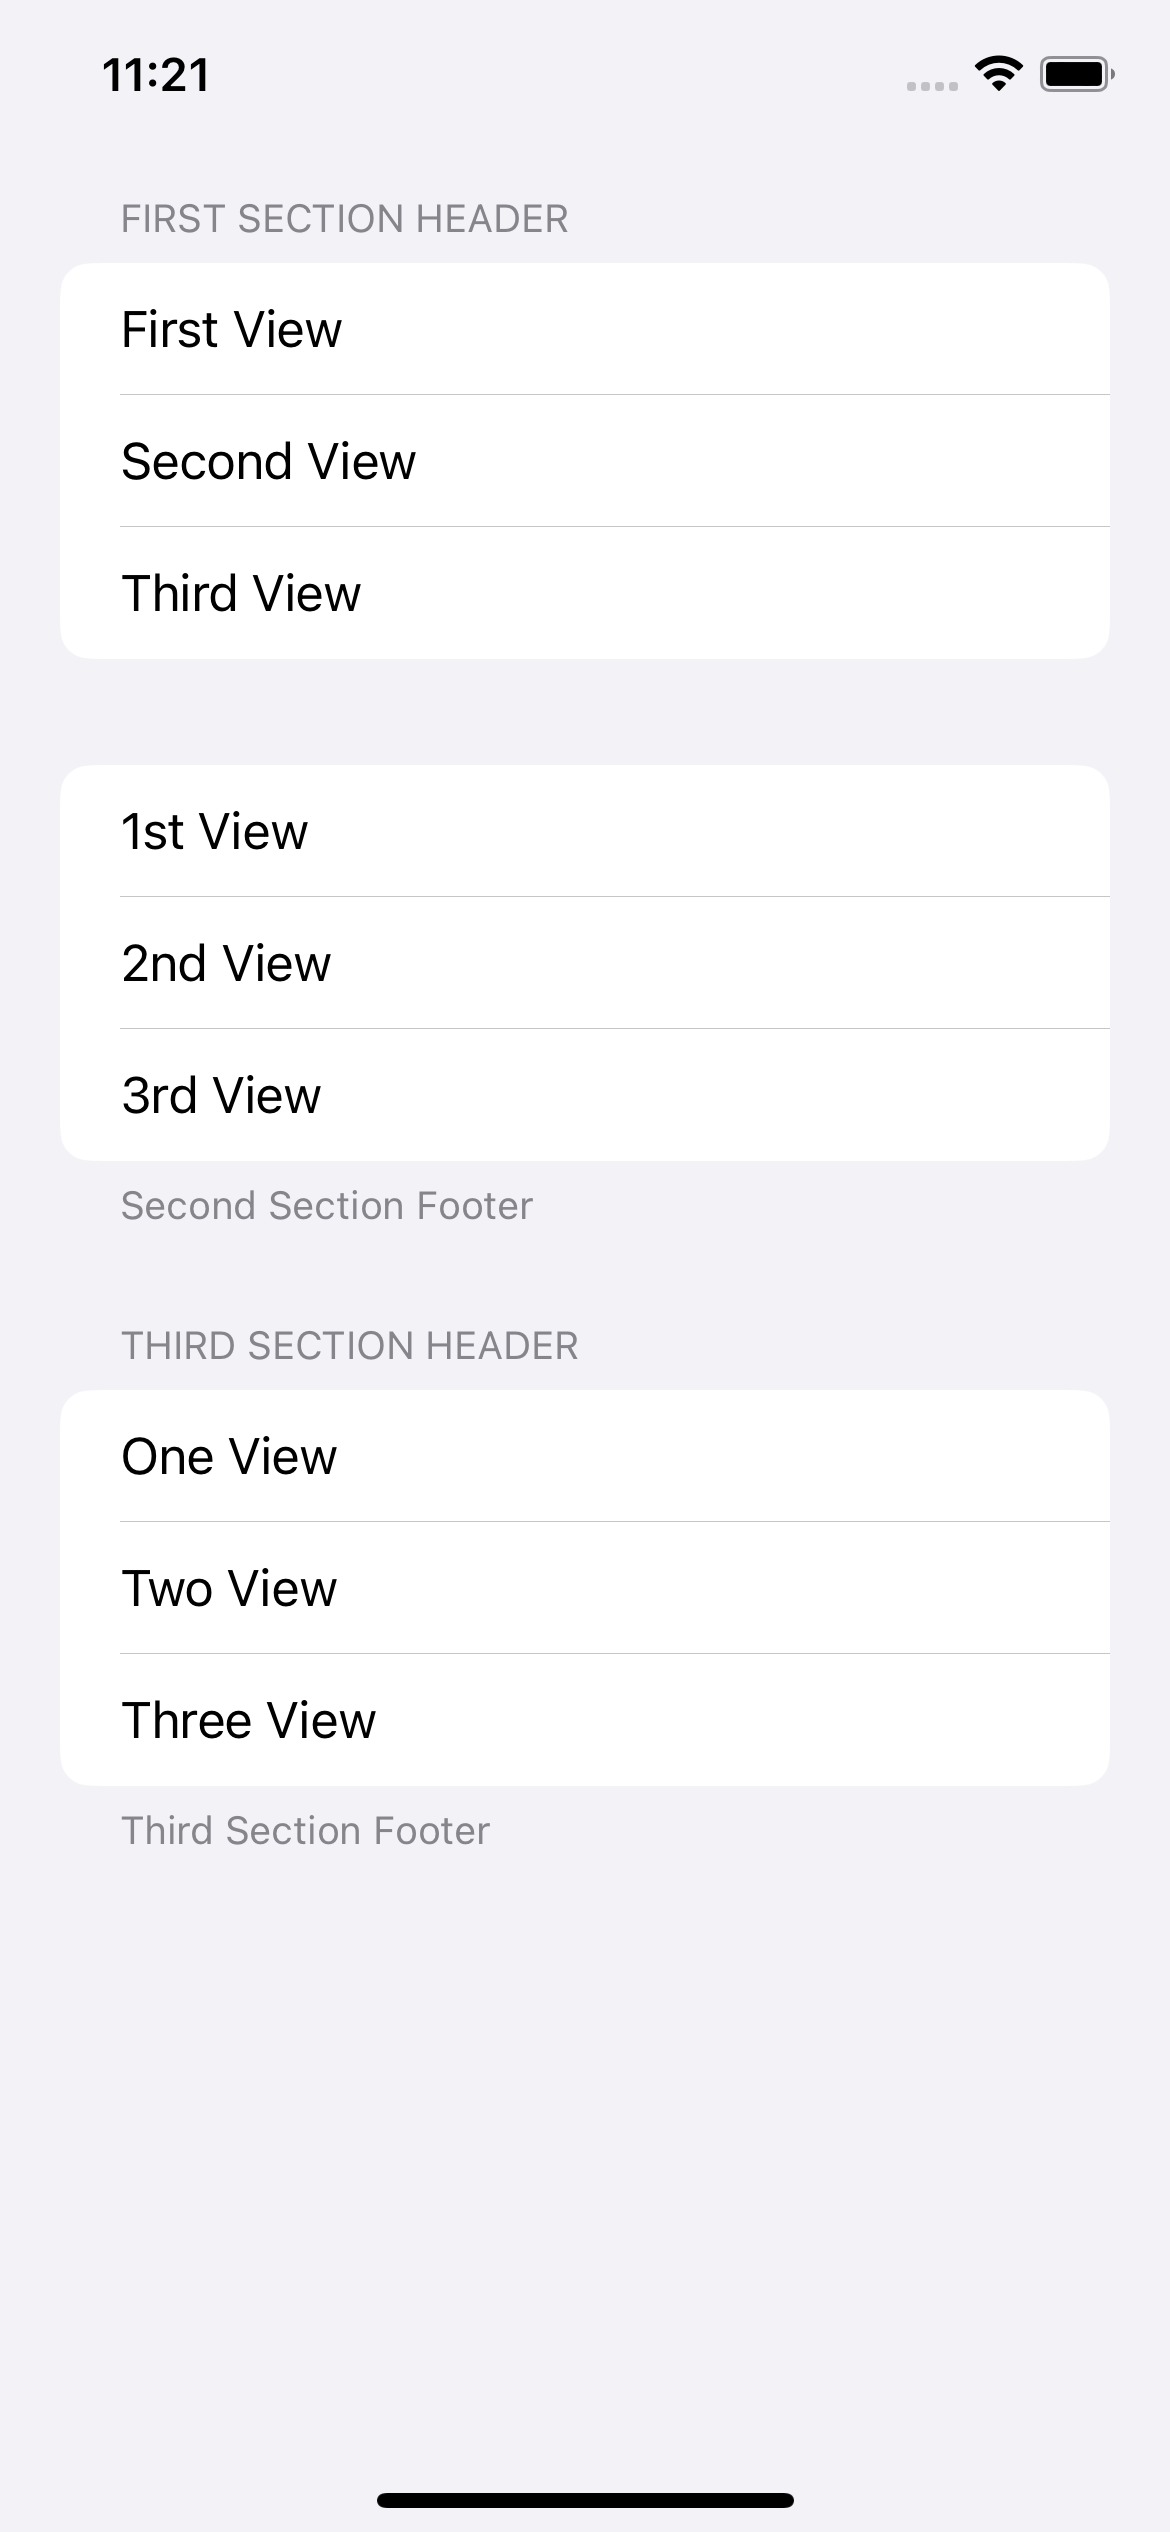
If you have a list section, you can also add section headers and footers.
We can add a section header and footer in the Section initializers.
In the following example, I have three sections with different section headers and footers. I created
- One with a header
- One with a footer
- And one with both header and footer
struct ContentView: View {
    var body: some View {
        List {
            Section {
                Text("First View")
                Text("Second View")
                Text("Third View")
            } header: {
                Text("First Section Header")
            }
            Section {
                Text("1st View")
                Text("2nd View")
                Text("3rd View")
            } footer: {
                Text("Second Section Footer")
            }
            Section {
                Text("One View")
                Text("Two View")
                Text("Three View")
            } header: {
                Text("Third Section Header")
            } footer: {
                Text("Third Section Footer")
            }
        }
    }
}
SwiftUI List Rows
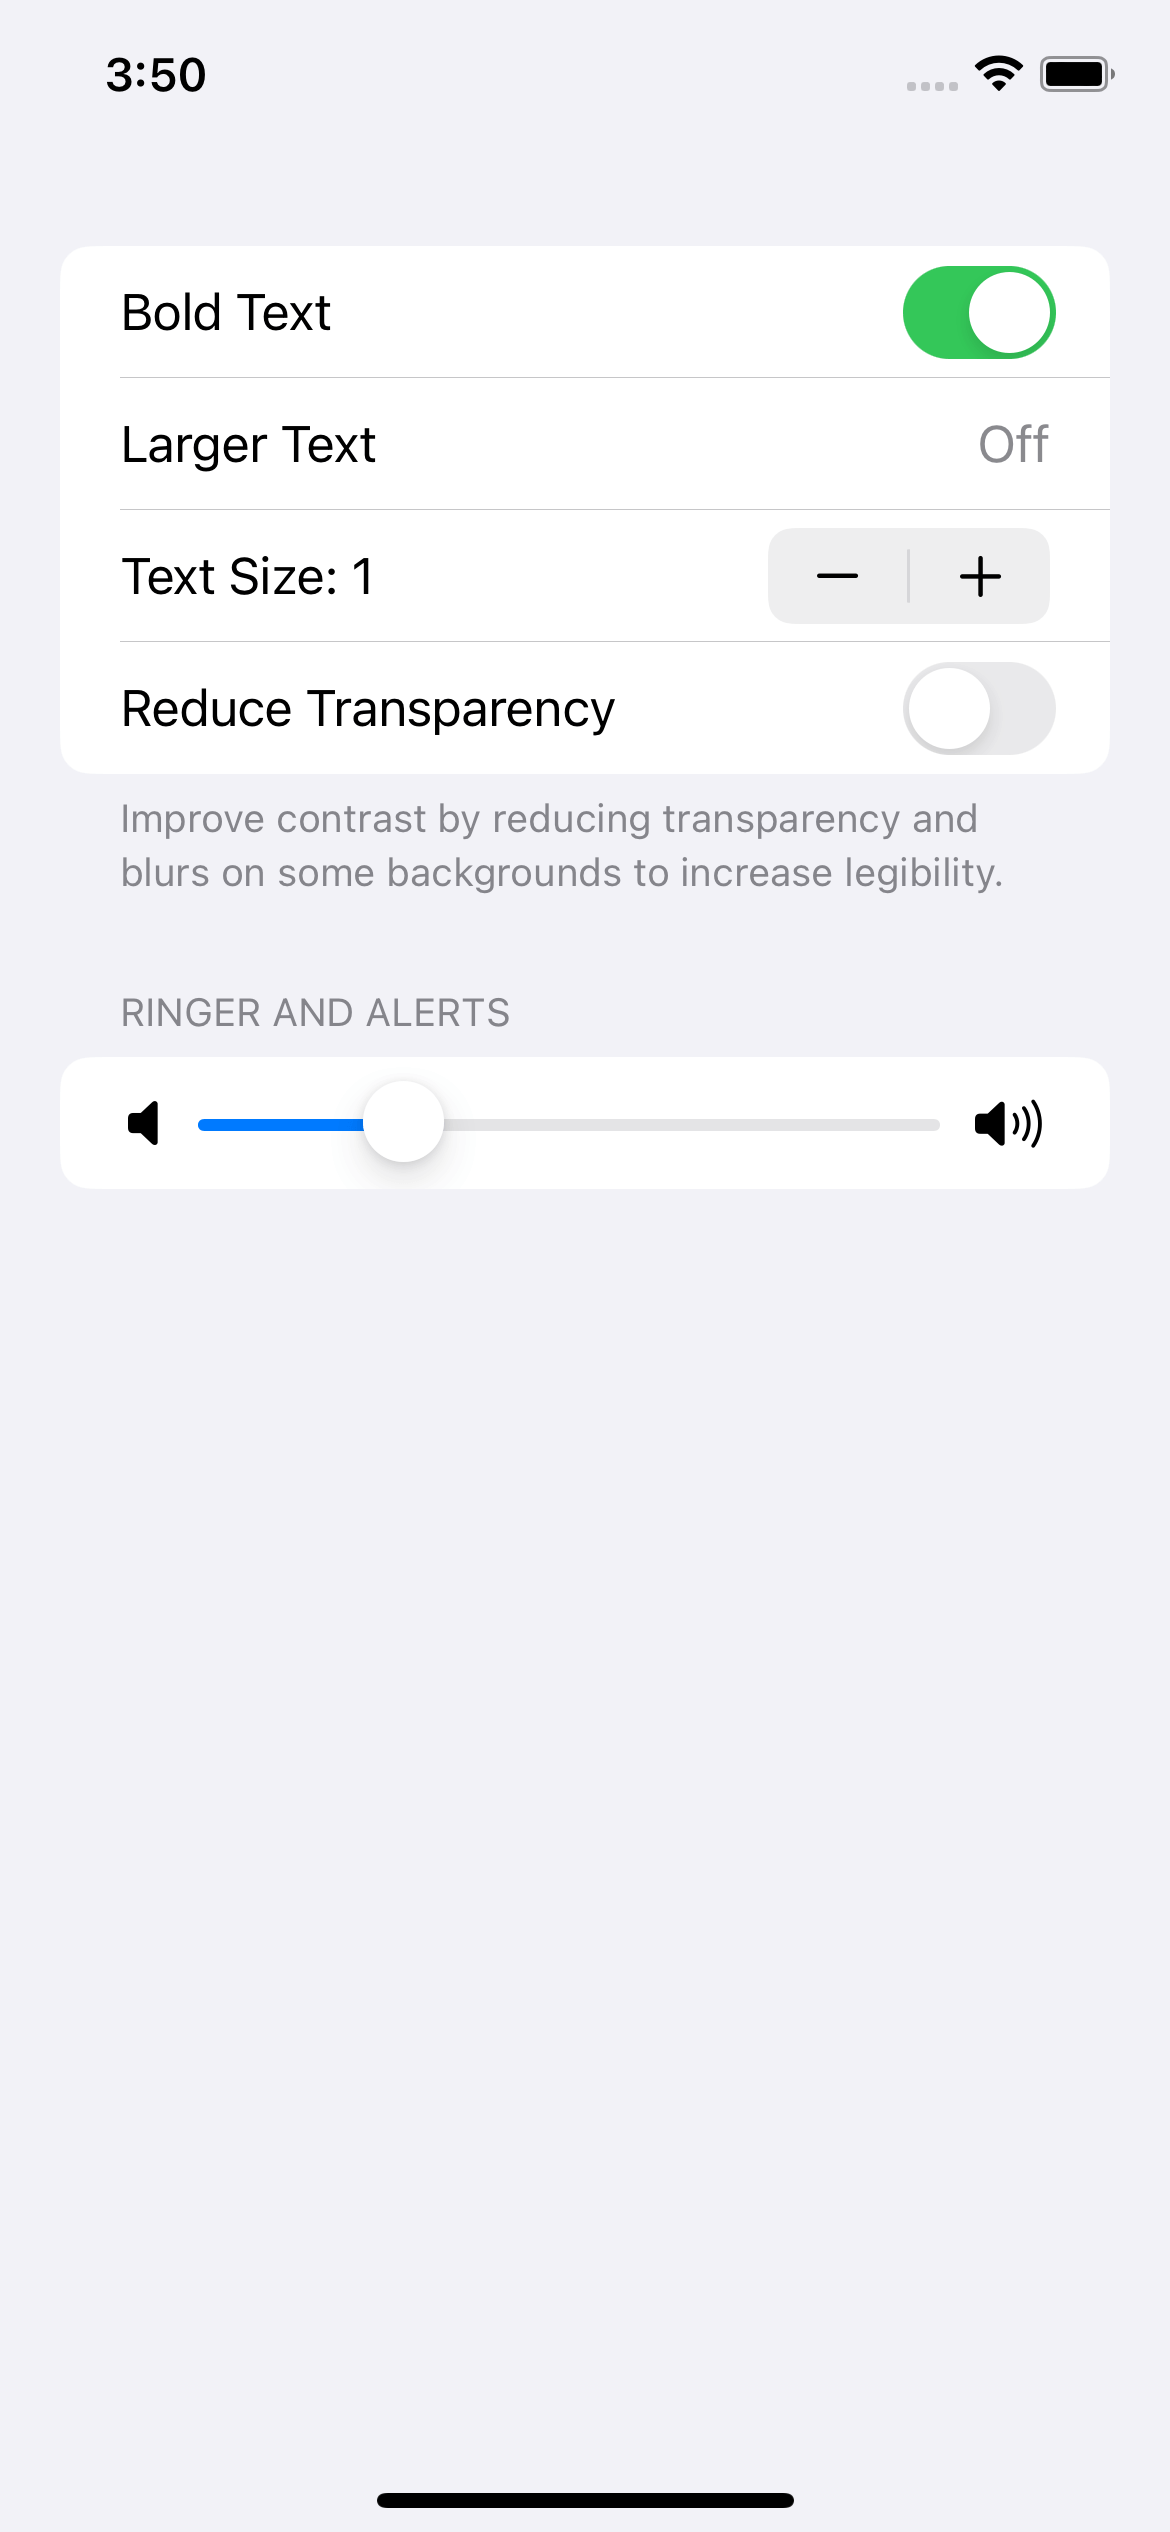
In the previous example, we use a simple Text view as a list row. But any view can work as a list row.
It can be any view, e.g., Toggle, TextField, Stepper, and Slider.
Here is an example of using non-text views as a list row.
struct StaticListExample: View {
    @State var isBold = true
    @State var isReduceTransparency = false
    @State var volume = 0.25
    @State var textSize = 1

    var body: some View {
        List {
            Section {
                Toggle(isOn: $isBold) {
                    Text("Bold Text")
                }
                LabeledContent("Larger Text", value: "Off")
                Stepper(value: $textSize, in: 0...10) {
                    Text("Text Size: \(textSize)")
                }
                Toggle(isOn:  $isReduceTransparency) {
                    Text("Reduce Transparency")
                }
            } footer: {
                Text("Improve contrast by reducing transparency and blurs on some backgrounds to increase legibility.")
            }

            Section {
                Slider(value: $volume, in: 0...1) {
                    Text("Volume")
                } minimumValueLabel: {
                    Image(systemName: "speaker.fill")
                } maximumValueLabel: {
                    Image(systemName: "speaker.wave.3.fill")
                }
            } header: {
                Text("Ringer and Alerts")
            }
        }
    }
}
As you can see, we can create a setting or preference screen using just built-in SwiftUI views.
Most built-in views got a label and value. List view does an excellent job presenting them in a list row format.
You can easily support sarunw.com by checking out this sponsor.
Offline Transcription: Fast, privacy-focus way to transcribe audio, video, and podcast files. No data leaves your Mac.
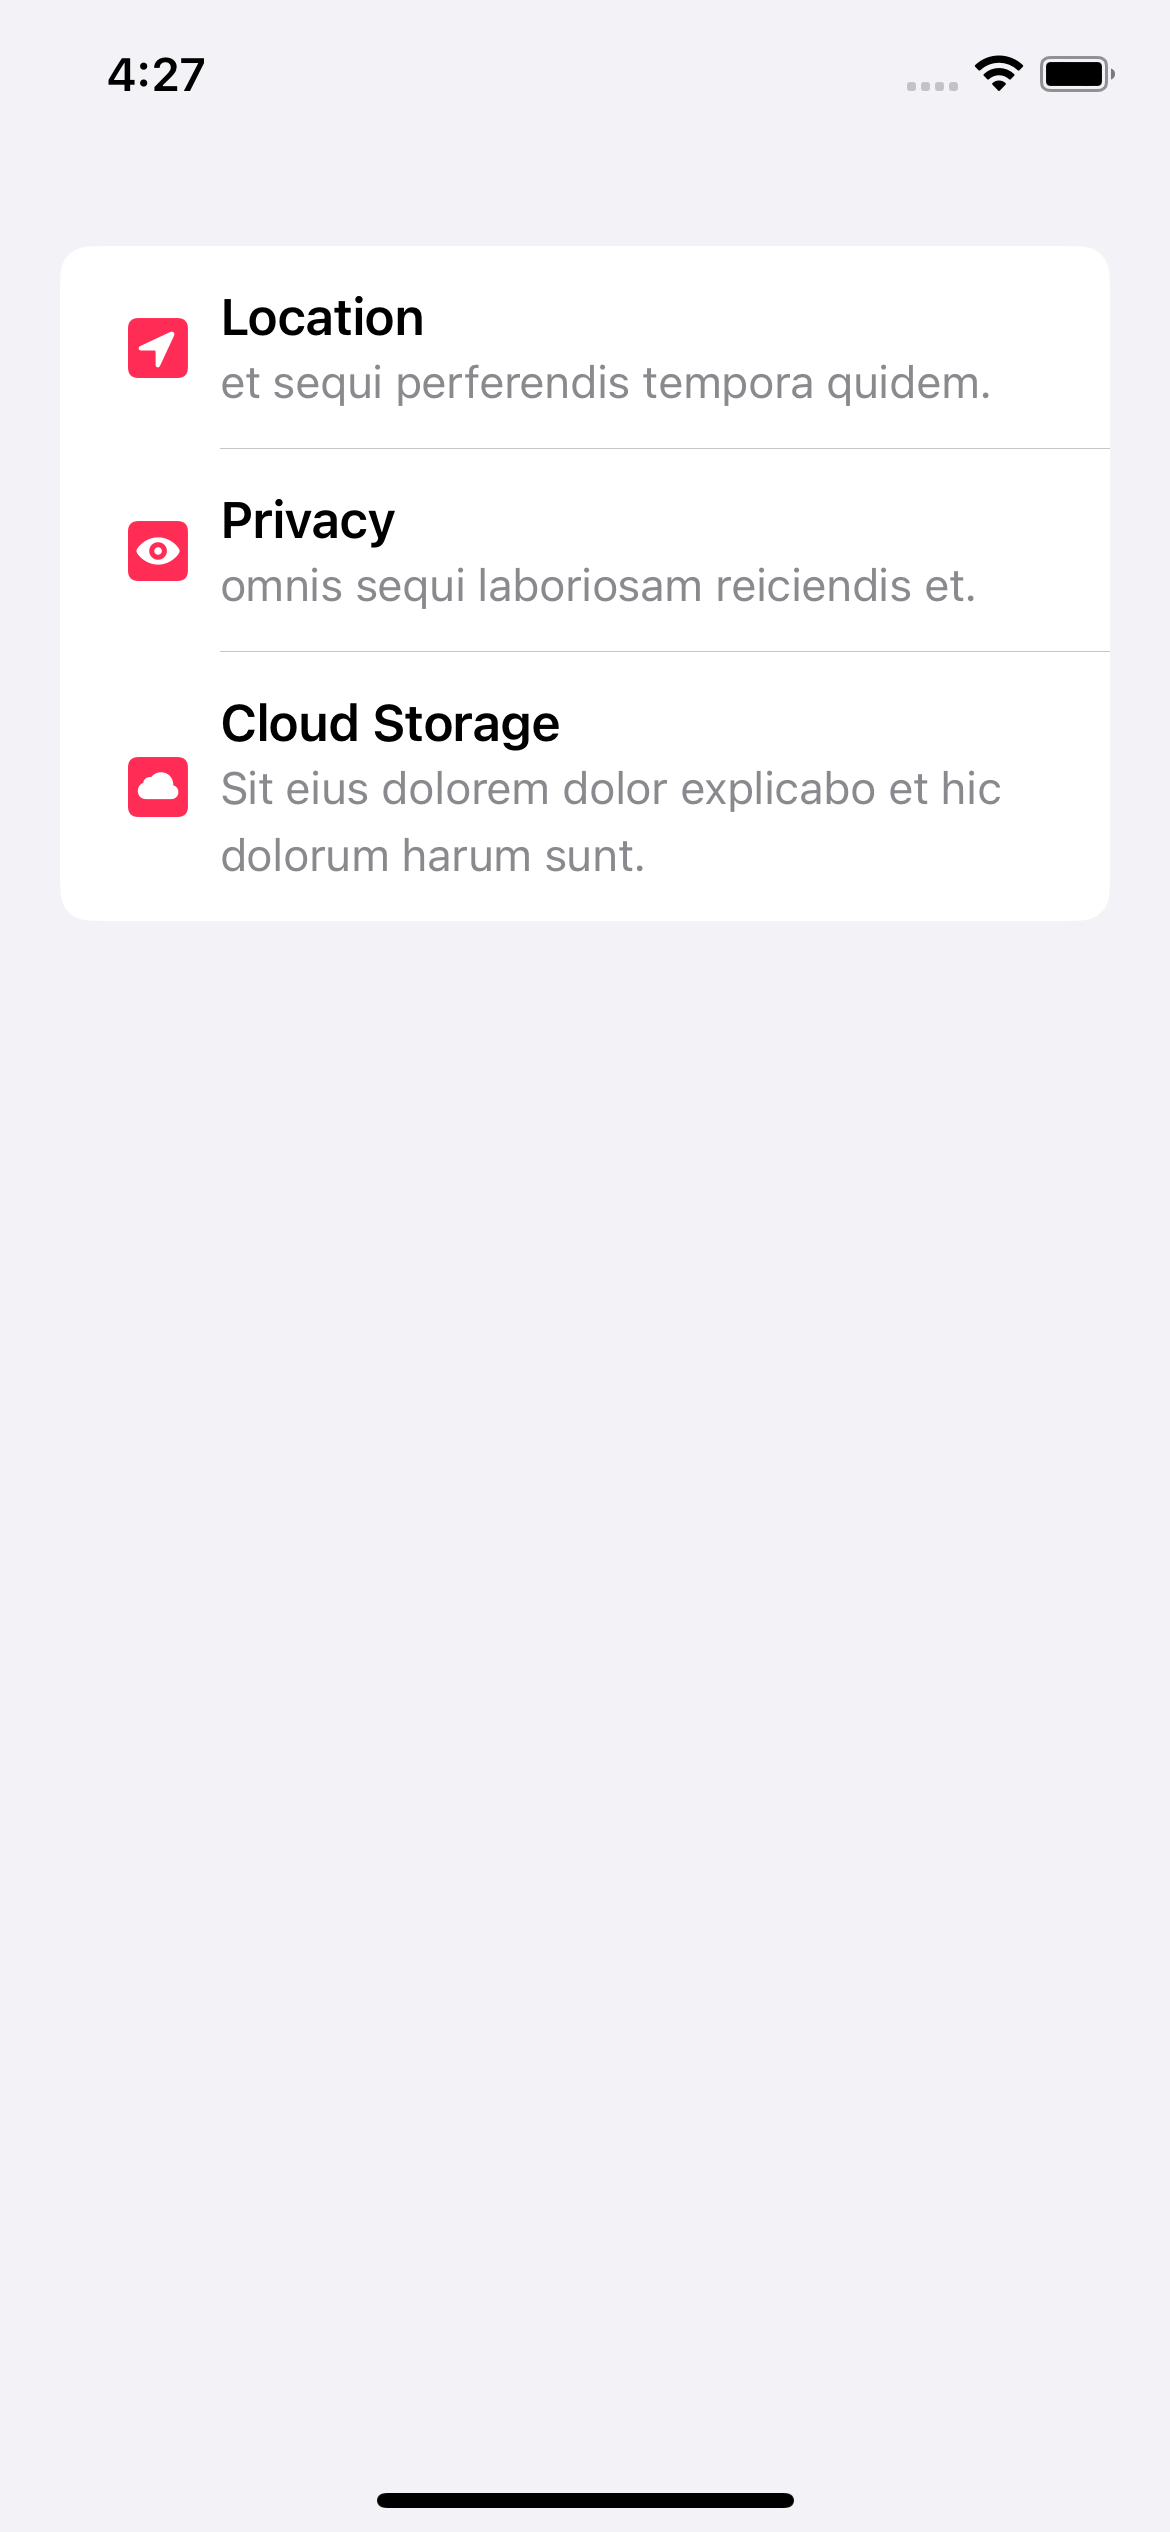
Custom SwiftUI List Rows
The List row isn't limited to just built-in views. You can use create a custom view as a list cell.
In the following example, we create a cell that contains
- Image
- Title
- Subtitle
struct MyCell: View {
    let systemName: String
    let title: String
    let subtitle: String

    var body: some View {
        HStack {
            Image(systemName: systemName)
                .font(.headline)
                .imageScale(.large)
                .foregroundColor(.pink)
            VStack(alignment: .leading) {
                Text(title)
                    .font(.headline)
                Text(subtitle)
                    .font(.subheadline)
                    .foregroundColor(.secondary)
            }
        }
    }
}
Then we can use our custom view as a list cell.
struct StaticListExample: View {
    var body: some View {
        List {
            MyCell(
                systemName: "location.square.fill",
                title: "Location",
                subtitle: "et sequi perferendis tempora quidem.")
            MyCell(
                systemName: "eye.square.fill",
                title: "Privacy",
                subtitle: "omnis sequi laboriosam reiciendis et.")
            MyCell(
                systemName: "icloud.square.fill",
                title: "Cloud Storage",
                subtitle: "Sit eius dolorem dolor explicabo et hic dolorum harum sunt.")
        }
    }
}
Read more article about SwiftUI, List, or see all available topic
Enjoy the read?
If you enjoy this article, you can subscribe to the weekly newsletter.
Every Friday, you'll get a quick recap of all articles and tips posted on this site. No strings attached. Unsubscribe anytime.
Feel free to follow me on Twitter and ask your questions related to this post. Thanks for reading and see you next time.
If you enjoy my writing, please check out my Patreon https://www.patreon.com/sarunw and become my supporter. Sharing the article is also greatly appreciated.
Become a patron Buy me a coffee Tweet ShareHow to use Non Uppercase in SwiftUI List section header
Most of those styles use uppercase text for the section header. In this article, we will learn how to opt-out of this behavior.
Missing dSYM download link in App Store Connect
You can no longer download dSYM from the App Store Connect.