@State variable initialization in SwiftUI
Table of Contents
There might be a time when you want to initialize the value of a @State variable in an initializer.
Here is an example where we initialize an initial value of a CounterView.
struct CounterView: View {
    @State private var count: Int

    init(count: Int) {
        // Use count to initialize self.count
    }
    ...
}
The bigger question is not how we can do it. But should we do it?
Let's learn how to do it and then judge for yourselves whether you want to do it or not.
Example of @State
Here is an example of CounterView, which has its own count state property.
struct CounterView: View {
    @State private var count = 0

    var body: some View {
        VStack {
            Text("Counter: \(count)")
            Button("+1") {
                count += 1
            }
        }
    }
}
We can use it like this.
struct ContentView: View {
    var body: some View {
        CounterView()
            .font(.title)
    }
}
If we want other views to set the initial count value of the CounterView, we need to create an initializer that sets the count property.
You can easily support sarunw.com by checking out this sponsor.

AI Grammar: Correct grammar, spell check, check punctuation, and parphrase.
How to initialize @State variable in an initializer
The @State variable is a property wrapper. Property wrapper has a unique way of initializing. You can read more about property wrapper here.
In summary, you can initialize @State private var count = 10 like this _count = State(initialValue: 10).
This is what the compiler synthesizes behind the scene.
struct CounterView: View {
    @State private var count: Int

    init(count: Int) {
        _count = State(initialValue: count)
    }

    var body: some View {
        VStack {
            Text("Counter: \(count)")
            Button("+1") {
                count += 1
            }
        }
    }
}
Then we can use it like this.
struct ContentView: View {
    var body: some View {
        CounterView(count: 5)
            .font(.title)
    }
}
We initialize CounterView(count: 5) with the count variable set to five. When we run the app, this is what we got.

Should we initialize @State variable in an initializer
As you can see, our previous example works very well. We can control the @State variable from the call site.
But there is a behavior that you should be aware of.
Setting a @State variable like this will only work for the very First time. After the @State variable is create and initialize, SwiftUI will make sure it persisted through the lifetime of the view.
That means the subsequence change of count value from the initializer won't take any effect.
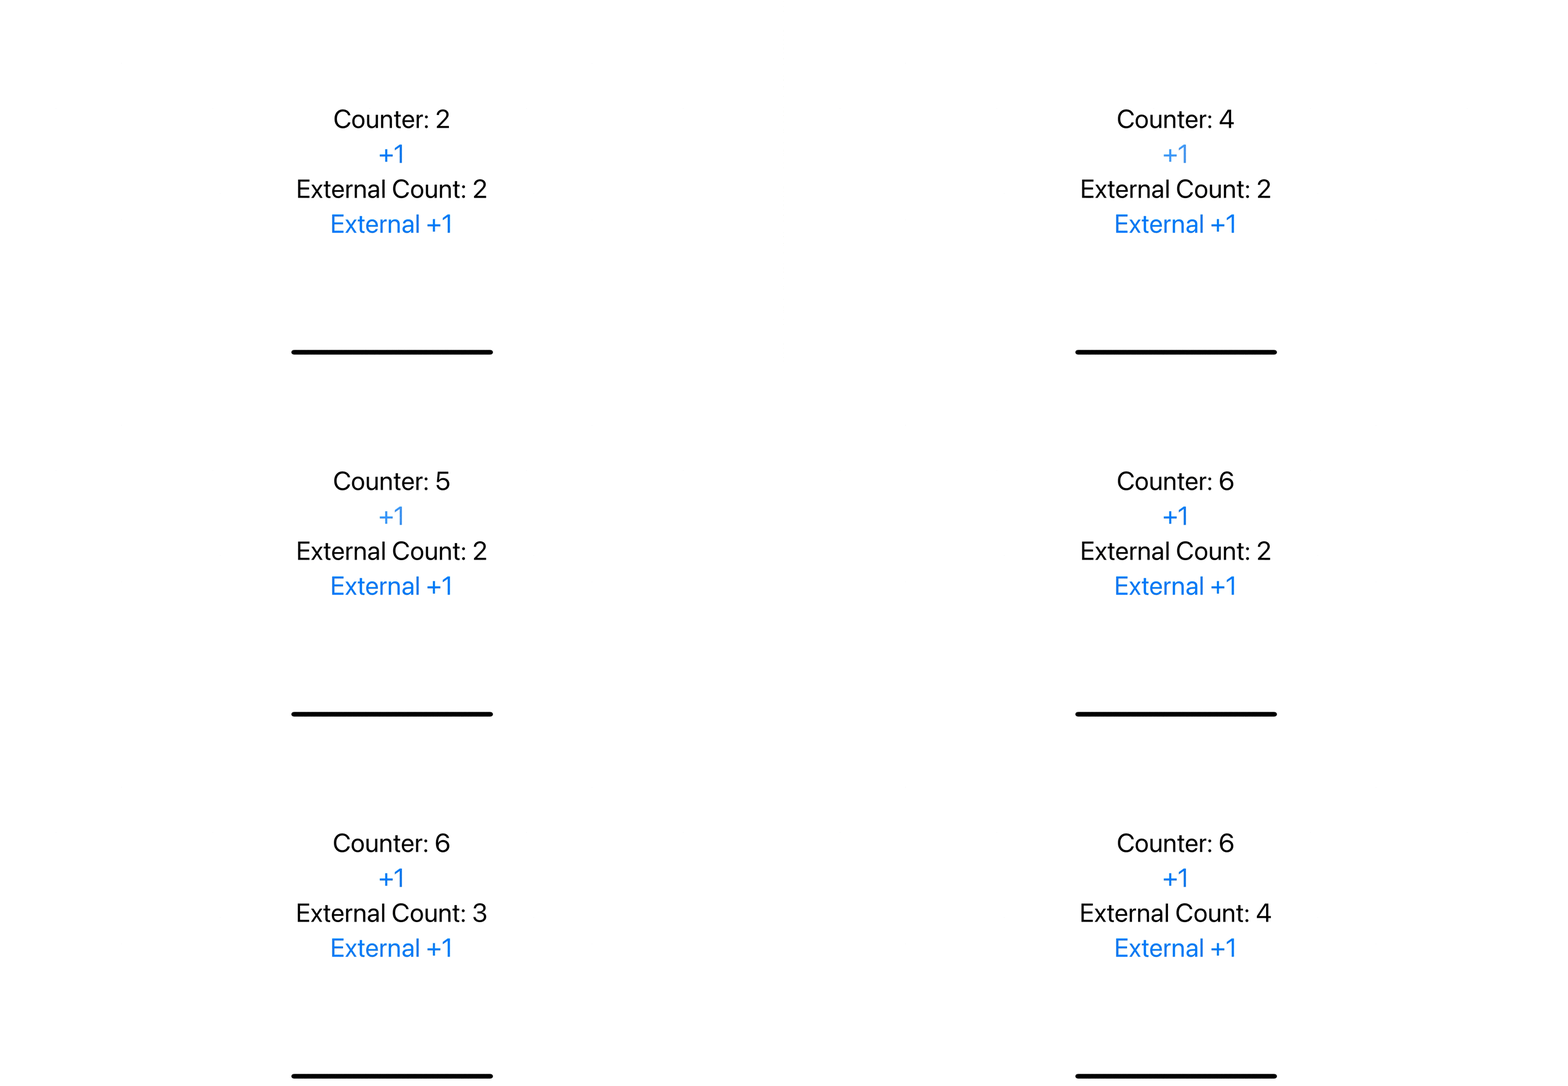
It might be easier to understand this with an example.
In this example, instead of hard-coded count value to five, CounterView(count: 5), we make it changeable using @State private var externalCount = 2.
struct ContentView: View {
    // 1
    @State private var externalCount = 2

    var body: some View {
        VStack {
            // 2
            CounterView(count: externalCount)

            Text("External Count: \(externalCount)")
            Button("External +1") {
                // 3
                externalCount += 1
            }
        }
        .font(.title)
    }
}
1 We create a @State variable to represent an initial value for our CounterView.
2 We use the @State variable, externalCount, to initialize CounterView.
3 We create a button to increase the value of externalCount.
On the first launch, CounterView was initialized with externalCount, which had an initial value of two.
And that's it, CounterView.count is created and persisted.
Even if we change the value of externalCount later, it no longer affects the value of the CounterView.

You can easily support sarunw.com by checking out this sponsor.

AI Grammar: Correct grammar, spell check, check punctuation, and parphrase.
Conclusion
A @State variable means to use internally within a view. Apple suggested we always declare state variables as private.
As you can see, Apple suggested that with a good reason. Exposing a state variable as we did might cause confusion to a newcomer or even your future self since the state variable can only initialize once.
If you need to initialize a state property like this, it might be a good time to reorganize your view. Maybe some data is sitting in the wrong places.
Read more article about SwiftUI, Property Wrapper, or see all available topic
Enjoy the read?
If you enjoy this article, you can subscribe to the weekly newsletter.
Every Friday, you'll get a quick recap of all articles and tips posted on this site. No strings attached. Unsubscribe anytime.
Feel free to follow me on Twitter and ask your questions related to this post. Thanks for reading and see you next time.
If you enjoy my writing, please check out my Patreon https://www.patreon.com/sarunw and become my supporter. Sharing the article is also greatly appreciated.
Become a patron Buy me a coffee Tweet ShareHow to change List Row separator color in SwiftUI
Learn how to colorize a list row separator.
Should we manually call @StateObject initializer
Is it OK to manually initialize @StateObject? Let's find out.