Swift Documentation
Table of Contents
Any code of your own that you haven't looked at for six or more months might as well have been written by someone else.
– Eagleson's Law
When we work with Apple's class and not sure how to use it, we have many ways to find out that information. You can find it in an online document like Apple Developer Documentation or you can find in within Xcode.
It comes in many shapes and forms.
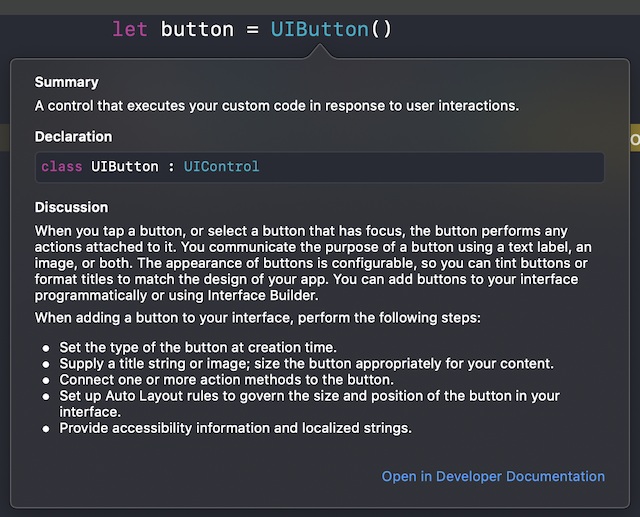
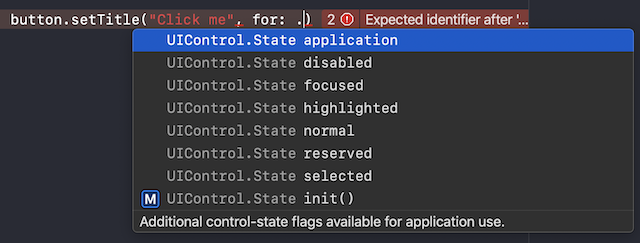
Quick help popover
You can ⌥ – Option + click on any class to open up quick help like this:
You can easily support sarunw.com by checking out this sponsor.
Offline Transcription: Fast, privacy-focus way to transcribe audio, video, and podcast files. No data leaves your Mac.
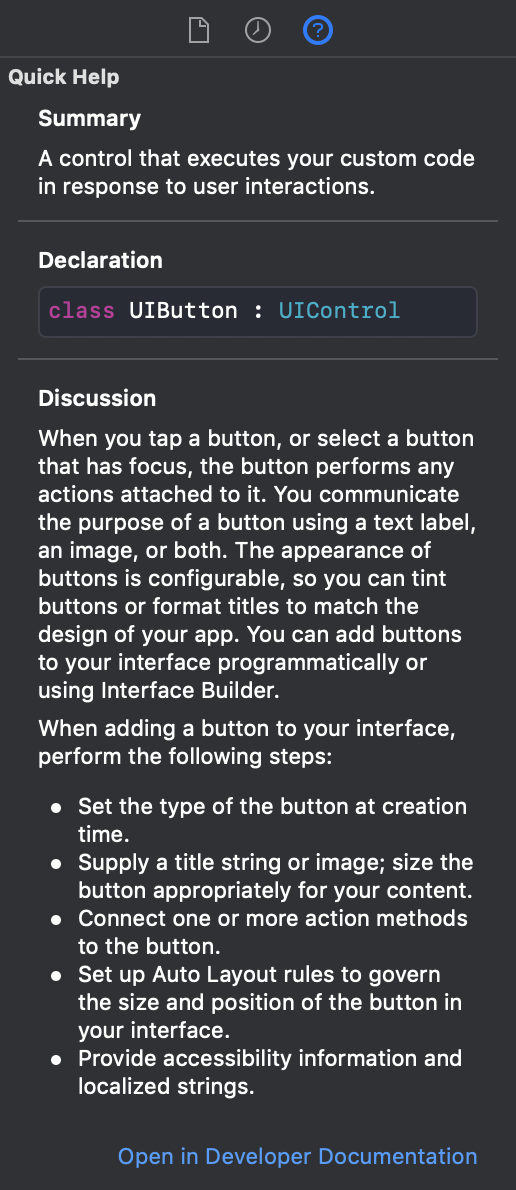
Symbol inspector Quick Help
Quick help also shows under the Quick Help inspector panel.
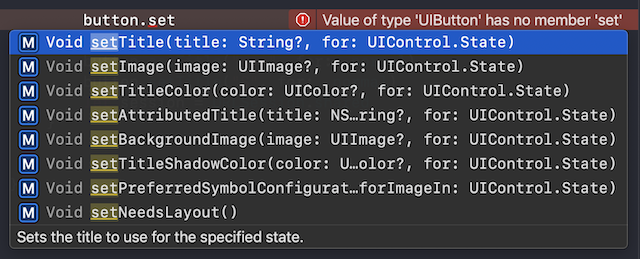
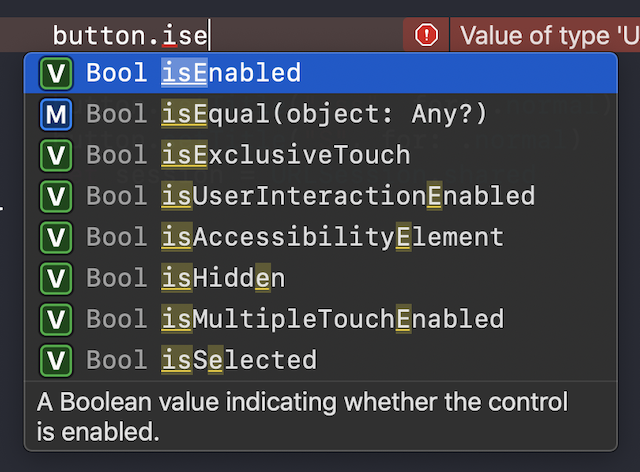
Code completion hint
When you start typing, Xcode will help you by suggesting a list of a function/property/enum of that class, along with a hint of what they do at the very bottom.
Do you know that we can have these comments for our code too? This article will tell you how.
Syntax
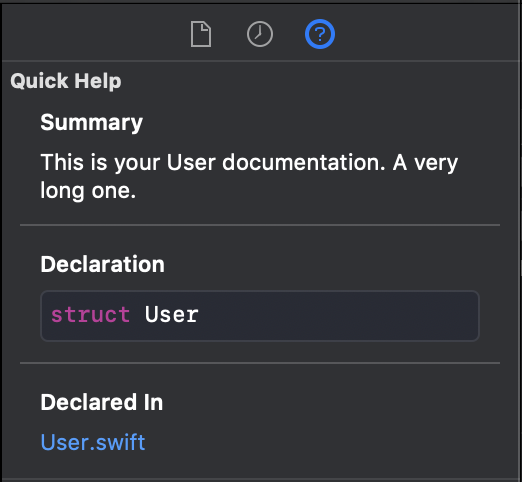
Writing documentation for your code is like writing a comment, but with a small syntax change. You need an extra slash for single-line documentation, so instead of two, you need three slashes (///).
/// This is your User documentation.
struct User {
    let firstName: String
    let lastName: String
}
For multi-line documentation, you need extra asterisk (*) in the opening delimiter (/** ... */).
/**
    This is your User documentation.
    A very long one.
*/
struct User {
    let firstName: String
    let lastName: String
}
Summary and Discussion
The above documentation comment will produce a document with a summary part.
To add a discussion section, what you need to do is write another paragraph. Anything other than the first paragraph will belong in the discussion section.
So the example above is a paragraph with two sentences. Which makes them belong in the summary section.
/**
    This is your User documentation.
    A very long one.
*/
If you want the second sentence in the discussion section, make it into another paragraph by adding a new line between those sentences.
/**
    This is your User documentation (This is summary).

    A very long one (This will be shown in the discussion section).
*/
You can also use standard markdown in your documentation.
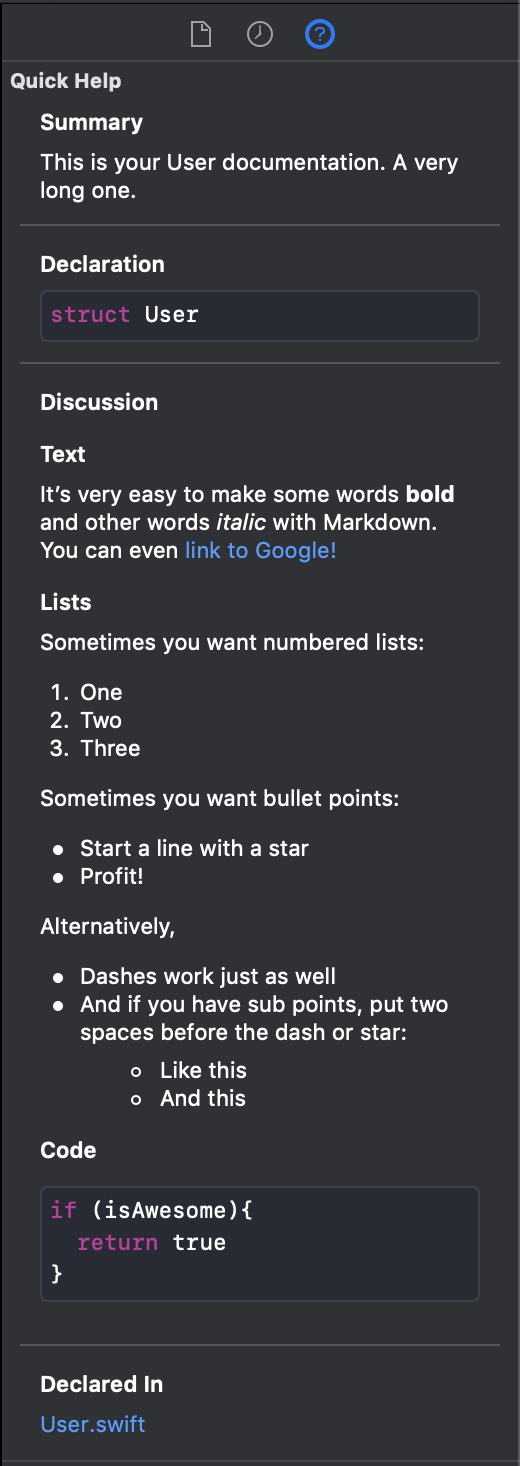
/**
 This is your User documentation.
 A very long one.

 # Text
 It's very easy to make some words **bold** and other words *italic* with Markdown. You can even [link to Google!](http://google.com)

 # Lists
 Sometimes you want numbered lists:

 1. One
 2. Two
 3. Three

 Sometimes you want bullet points:

 * Start a line with a star
 * Profit!

 Alternatively,

 - Dashes work just as well
 - And if you have sub points, put two spaces before the dash or star:
   - Like this
   - And this

 # Code
 ```
 if (isAwesome){
   return true
 }
 ```
*/
struct User {
    let firstName: String
    let lastName: String
}
The above example is valid documentation, which will produce the following quick help.
Summary and discussion would be enough for documenting a class, property, or simple function. For a complex function, we have a few more sections that we can add.
Parameters
For a function with parameters, you can add the parameter section to Quick Help. There are two methods of documenting parameters. A Parameters Section and separate Parameter Fields.
Separate Parameter Fields
- Parameter x: ...
- Parameter y: ...
Parameters Section
This declaration style suit for function with many parameters. Using separate Parameter Fields might be a bit repetitive if you have many parameters.
- Parameters:
  - x: ...
  - y: ...
  - z: ...
Returns
For a function with a return value, you can add the return section, like the one you did with parameters.
- Returns: ...Throws
The last and the most important one. Since you can't specify error type that will be throw when you declare a function with throws keyword, it is handy to have this information sit right next to that function.
- Throws: ...Functions that are marked as Throws should contain the following describing what kind of errors are thrown and in what situations.
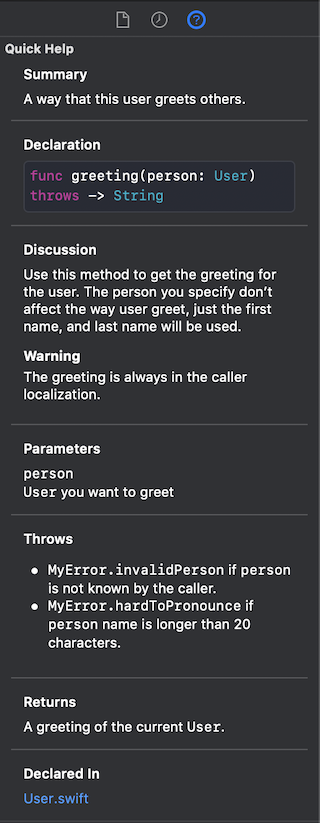
/// A way that this user greets others.
///
/// Use this method to get the greeting for the user. The person you specify don't affect the way user greet, just the first name, and last name will be used.
/// - Warning: The greeting is always in the caller localization.
/// - Throws:
///     - `MyError.invalidPerson`
///     if `person` is not known by the caller.
///     - `MyError.hardToPronounce`
///     if `person` name is longer than 20 characters.
/// - Parameter person: `User` you want to greet
/// - Returns: A greeting of the current `User`.
func greeting(person: User) throws -> String {
  return "Hello \(person.firstName) \(person.lastName)"
}
Auto-generate Quick Help documentation
Xcode provides an easy way to generate documentation. To use this feature, click on any class, property, function, or part you want to add a document. Then press ⌥ – Option + ⌘ - command + / or Editor > Structure > Add documentation from Xcode's menu. Xcode will generate a document template for you.
/// <#Description#>
/// - Parameter person: <#person description#>Extra Fields
There are many more Callout [1] that you can add to the documentation. You add Callout with the following syntax:
- Callout: descriptionFollowing are all Callout that you can use:
- Attention: ...
- Author: ...
- Authors: ...
- Bug: ...
- Complexity: ...
- Copyright: ...
- Date: ...
- Experiment: ...
- Important: ...
- Invariant: ...
- Note: ...
- Postcondition: ...
- Precondition: ...
- Remark: ...
- Remarks: ...
- Requires: ...
- See: ...
- Since: ...
- Todo: ...
- Version: ...
- Warning: ...
The Callout will render in Quick Help under the discussion section as a bold header followed by a block of text.
Here is an example of our User documentation with Warning callout.
/// A way that this user greets others.
///
/// Use this method to get the greeting for the user. The person you specify don't affect the way user greet, just the first name, and last name will be used.
/// - Warning: The greeting is always in the caller localization.
/// - Parameter person: `User` you want to greet
/// - Returns: A greeting of the current `User`.
func greeting(person: User) -> String {
  return "Hello \(person.firstName) \(person.lastName)"
}
Conclusion
It is only a matter of time before your code that once obvious, turns into someone else code. We all know it is not easy and quite a time-consuming task to come up with a good document, but having good documentation will pay off in the long run.
You can easily support sarunw.com by checking out this sponsor.
Offline Transcription: Fast, privacy-focus way to transcribe audio, video, and podcast files. No data leaves your Mac.
Related Resources
Read more article about Swift, Documentation, or see all available topic
Enjoy the read?
If you enjoy this article, you can subscribe to the weekly newsletter.
Every Friday, you'll get a quick recap of all articles and tips posted on this site. No strings attached. Unsubscribe anytime.
Feel free to follow me on Twitter and ask your questions related to this post. Thanks for reading and see you next time.
If you enjoy my writing, please check out my Patreon https://www.patreon.com/sarunw and become my supporter. Sharing the article is also greatly appreciated.
Become a patron Buy me a coffee Tweet ShareUnwrap optional values in XCTest with XCTUnwrap
No more manual if let and guard let in your tests.
Manually symbolicate crash reports
A guide to decode a gibberish crash report to a human readable format.