How to change TabView color in SwiftUI
Table of Contents
In iOS 16, SwiftUI got a way to change the bottom tab bar (TabView) background color with the new modifier, .toolbarBackground
Basic usage
To change a tab bar background color in SwiftUI, you apply toolbarBackground modifier to the child view of TabView.
toolbarBackground accepts two parameters.
ShapeStyle: The style to display as the background of the bar.ToolbarPlacement: The bars to place the style in. Since we want to change the color for a tab bar, we will set this to.tabBar.
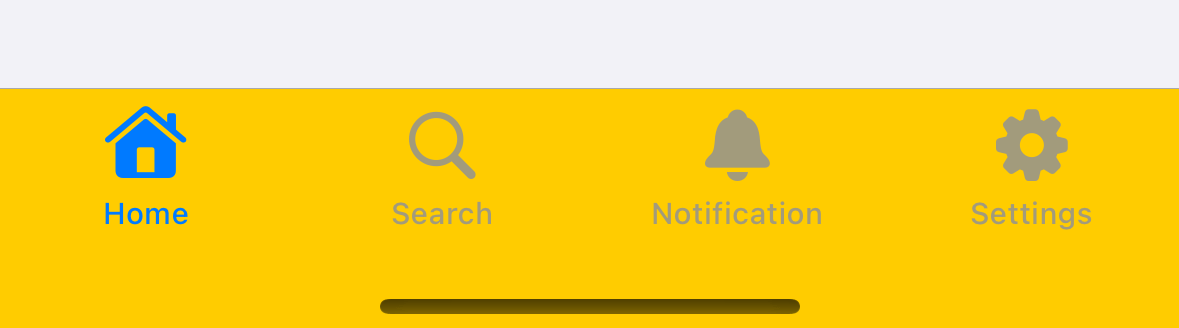
In this example, we set the tab bar background color of the first tab ("Home") to pink.
TabView {
    NavigationStack {
        List {
            Text("Home Content")
                .frame(height: 500)
        }
        .navigationTitle("Home Title")
    }
    .tabItem {
        Label("Home", systemImage: "house")
    }
    .toolbarBackground(
        // 1
        Color.yellow,
        // 2
        for: .tabBar)

    Text("Search")
        .tabItem {
            Label("Search", systemImage: "magnifyingglass")
        }
    Text("Notification")
        .tabItem {
            Label("Notification", systemImage: "bell")
        }
    Text("Settings")
        .tabItem {
            Label("Settings", systemImage: "gearshape")
        }
}
1 Color is one of the shape styles, so we can use it as an argument.
2 We set .tabBar for ToolbarPlacement to apply background color to the tab bar item.
As you can see, we apply .toolbarBackground to the child view, the same place we set a .tabItem.
Here is the result:
There are two things that you should be aware of.
- The background can be invisible even we set a color to it
- The background only applied to the modified tab when it is active
We will learn how to overcome these caveats in the following sections.
First, let's see what the problems look like.
The background can be invisible
By default, a tab bar background color will show/hide automatically based on the content of a child view, e.g., the tab bar background will show when the child content goes behind the tab view.
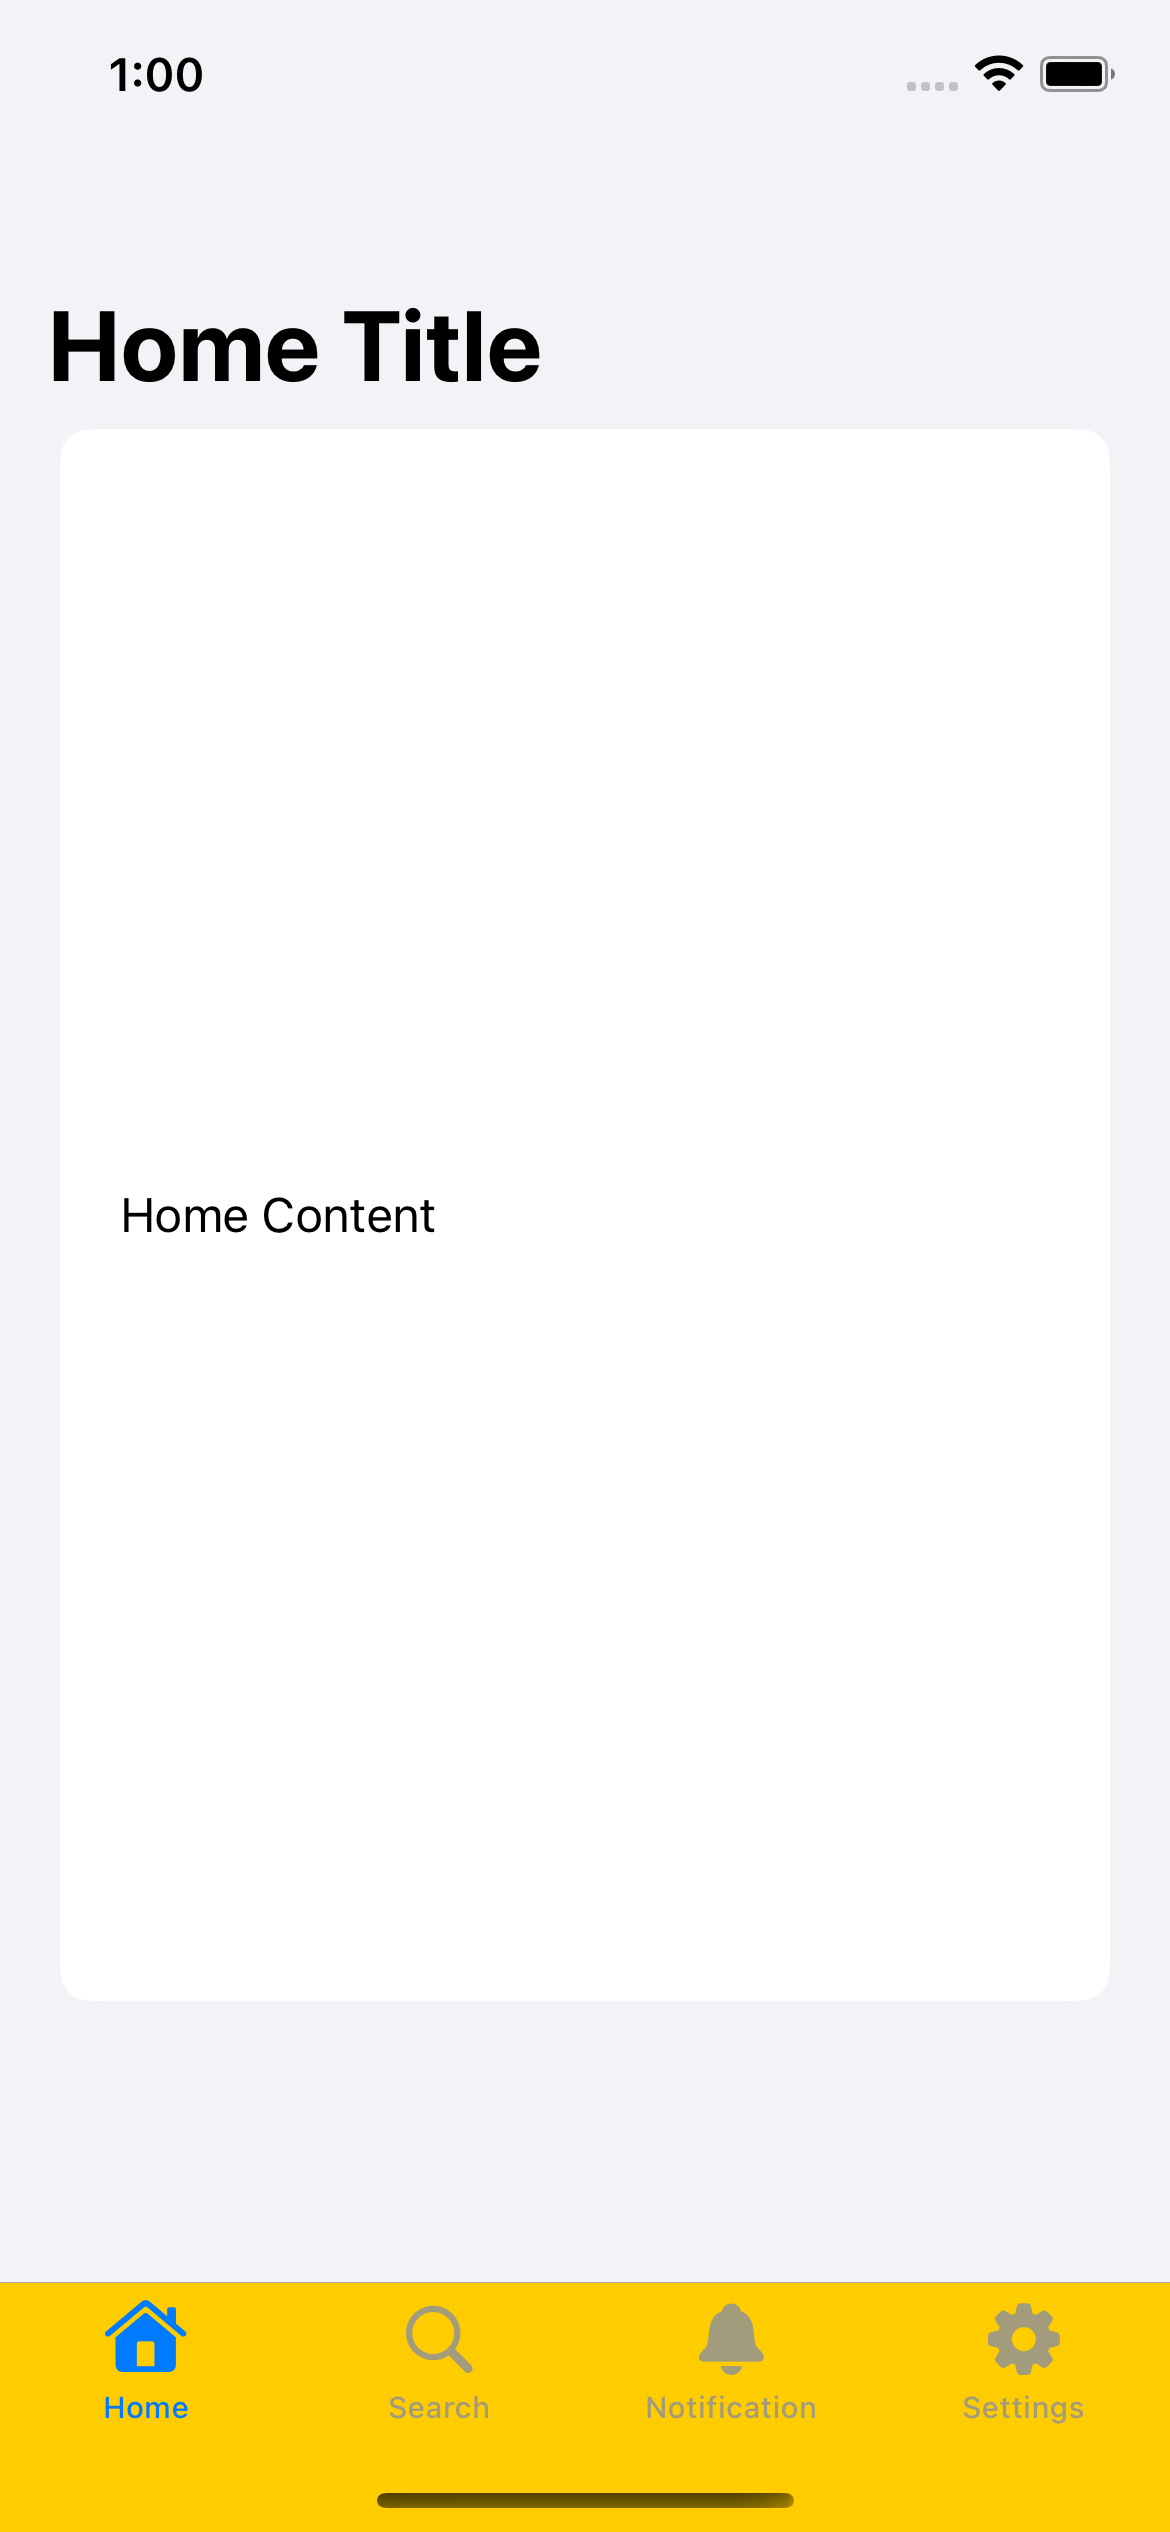
As you can see from the previous result,
- The background of a tab view is invisible in an initial launch.
- Once we move the content down, the tab view becomes visible and shows the color that we set (pink).
We can override this behavior with the .toolbar modifier.
The background only applied to the modified tab
The second thing you need to know is that the toolbarBackground modifier only changes the tab's color while it is active.
That means if you apply toolbarBackground to the first tab, the second tab will still be the same.
In this example, the second tab still has the default background color.
You can easily support sarunw.com by checking out this sponsor.
Screenshot Studio: Create App Store screenshots in seconds not minutes.
Control TabView background visibility
If you want the tab bar background to always show regardless of the system behavior, you have to set it explicitly.
To control a tab view background color visibility, we need help from another modifier, .toolbar. Using this modifier, you can force a tab view to always be visible.
In this example, we force a tab bar to always visible by set Visibility to .visible, .toolbar(.visible, for: .tabBar).
TabView {
    NavigationStack {
        List {
            Text("Home Content")
                .frame(height: 500)
        }
        .navigationTitle("Home Title")
    }
    .tabItem {
        Label("Home", systemImage: "house")
    }
    .toolbar(.visible, for: .tabBar)
    .toolbarBackground(
        Color.yellow,
        for: .tabBar)

    Text("Search")
        .tabItem {
            Label("Search", systemImage: "magnifyingglass")
        }
    Text("Notification")
        .tabItem {
            Label("Notification", systemImage: "bell")
        }
    Text("Settings")
        .tabItem {
            Label("Settings", systemImage: "gearshape")
        }
}
With this change, the tab bar background color will always be present.
You can easily support sarunw.com by checking out this sponsor.
Screenshot Studio: Create App Store screenshots in seconds not minutes.
Apply background color for all tabs
As we learn from the beginning, toolbarBackground only changes the background of the tab when it currently active. To apply background color for all tabs, you can choose either one of these two methods.
- Apply
toolbarBackgroundto all child views. - Use
Group.
Apply toolbarBackground to all child views
The first approach is straightforward. You apply toolbarBackground to all child views.
TabView {
    Text("Home")
        .tabItem {
            Label("Home", systemImage: "house")
        }
        .toolbar(.visible, for: .tabBar)
        .toolbarBackground(Color.yellow, for: .tabBar)
    Text("Search")
        .tabItem {
            Label("Search", systemImage: "magnifyingglass")
        }
        .toolbar(.visible, for: .tabBar)
        .toolbarBackground(Color.yellow, for: .tabBar)
    Text("Notification")
        .tabItem {
            Label("Notification", systemImage: "bell")
        }
        .toolbar(.visible, for: .tabBar)
        .toolbarBackground(Color.yellow, for: .tabBar)
    Text("Settings")
        .tabItem {
            Label("Settings", systemImage: "gearshape")
        }
        .toolbar(.visible, for: .tabBar)
        .toolbarBackground(Color.yellow, for: .tabBar)
}
Use Group to specify the same preferred background for every tab
Apply toolbarBackground to all child views is quite repetitive and error-prone. If you want to apply the same background color to every tab, you can group all tabs under Group and apply toolbarBackground on that Group.
This would produce the same result as apply toolbarBackground to all child views.
TabView {
    Group {
        Text("Home")
            .tabItem {
                Label("Home", systemImage: "house")
            }
        Text("Search")
            .tabItem {
                Label("Search", systemImage: "magnifyingglass")
            }
        Text("Notification")
            .tabItem {
                Label("Notification", systemImage: "bell")
            }
        Text("Settings")
            .tabItem {
                Label("Settings", systemImage: "gearshape")
            }
    }
    .toolbar(.visible, for: .tabBar)
    .toolbarBackground(Color.yellow, for: .tabBar)
}Read more article about SwiftUI, WWDC22, iOS 16, TabView, or see all available topic
Enjoy the read?
If you enjoy this article, you can subscribe to the weekly newsletter.
Every Friday, you'll get a quick recap of all articles and tips posted on this site. No strings attached. Unsubscribe anytime.
Feel free to follow me on Twitter and ask your questions related to this post. Thanks for reading and see you next time.
If you enjoy my writing, please check out my Patreon https://www.patreon.com/sarunw and become my supporter. Sharing the article is also greatly appreciated.
Become a patron Buy me a coffee Tweet ShareHow to show badge on Tab Bar Item in SwiftUI
Learn how to add and remove a badge on Tab Bars.
How to remove nil elements from an array in Swift
Learn how to filter out nil values from a Swift array.