New way to control number of lines of SwiftUI Text in iOS 16
Table of Contents
Before iOS 16, there was not much we could do to control the number of lines of a SwiftUI text view.
The only modifier we have is .lineLimit(_:), which sets the maximum number of lines that text can occupy.
In iOS 16, we got everything we are waiting for. We got four new variation for lineLimit modifier.
This opens up four ways to control the number of lines of a SwiftUI text view.
- Set a maximum number of lines.
- Fixed number of lines.
- Sets a minimum number of lines.
- Sets a minimum and a maximum number of lines.
Set a maximum number of lines
To set the maximum number of lines that a text view can occupy, we specify the number of lines to the .lineLimit(_:) modifier.
A text will occupy least amount of lines that suffice for the content, and not exceed the number of lines you specified.
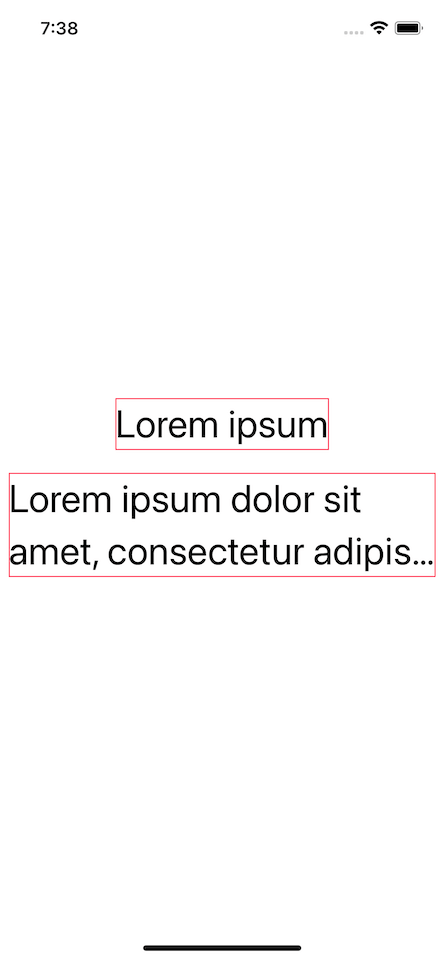
In the following example, we set the maximum number of lines both text view to two (.lineLimit(2)).
VStack(spacing: 20) {
    Text("Lorem ipsum")
        .lineLimit(2)
        .font(.largeTitle)
        .border(.pink)
    Text("Lorem ipsum dolor sit amet, consectetur adipiscing elit, sed do eiusmod tempor incididunt ut labore et dolore magna aliqua.")
        .lineLimit(2)
        .font(.largeTitle)
        .border(.pink)
}- The first text view only needs one line for its content, so it occupies only one line (dictated by the pink border).
- The second text view's content is longer than two lines but is restricted by the maximum number of lines we set, which is two. The rest of the text got truncated.
Alternative
You can also set maximum line numbers using a new form of lineLimit that accepts PartialRangeThrough, e.g., .lineLimit(...2).
VStack(spacing: 20) {
    Text("Lorem ipsum")
        .lineLimit(...2)
        .font(.largeTitle)
        .border(.pink)
    Text("Lorem ipsum dolor sit amet, consectetur adipiscing elit, sed do eiusmod tempor incididunt ut labore et dolore magna aliqua.")
        .lineLimit(...2)
        .font(.largeTitle)
        .border(.pink)
}Set no limit
You can set lineLimit to nil for a text to grow indefinitely (no limit).
.lineLimit(nil)You can easily support sarunw.com by checking out this sponsor.
Offline Transcription: Fast, privacy-focus way to transcribe audio, video, and podcast files. No data leaves your Mac.
Fixed number of lines
You can set a text to have a fixed number of lines regardless of the content using lineLimit(_:reservesSpace:).
You set the number of lines you want and set reservesSpace to true.
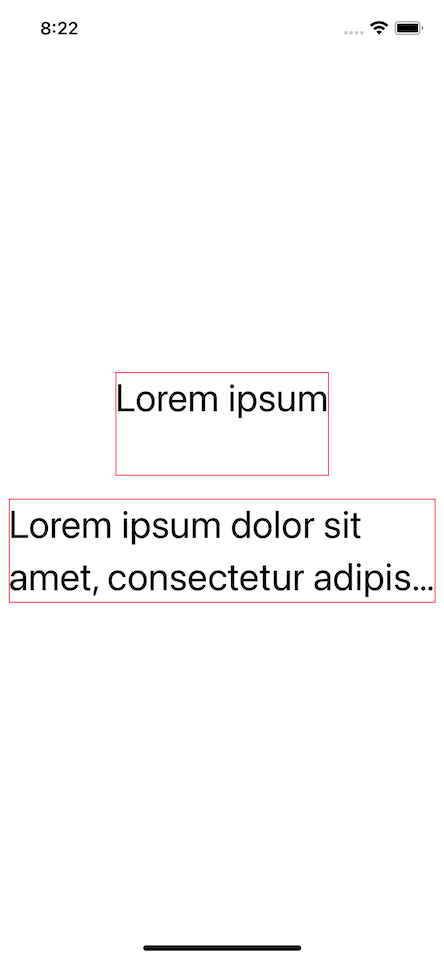
In this case, a set a text view to have a fixed height of two lines (.lineLimit(2, reservesSpace: true)).
VStack(spacing: 20) {
    Text("Lorem ipsum")
        .lineLimit(2, reservesSpace: true)
        .font(.largeTitle)
        .border(.pink)
    Text("Lorem ipsum dolor sit amet, consectetur adipiscing elit, sed do eiusmod tempor incididunt ut labore et dolore magna aliqua.")
        .lineLimit(2, reservesSpace: true)
        .font(.largeTitle)
        .border(.pink)
}
Set a minimum number of lines
You can set a minimum number of lines by specifying a lineLimit that accepts PartialRangeFrom, e.g. .lineLimit(2...).
A text view will occupy at least the number of lines you specified and then grow enough for the content.
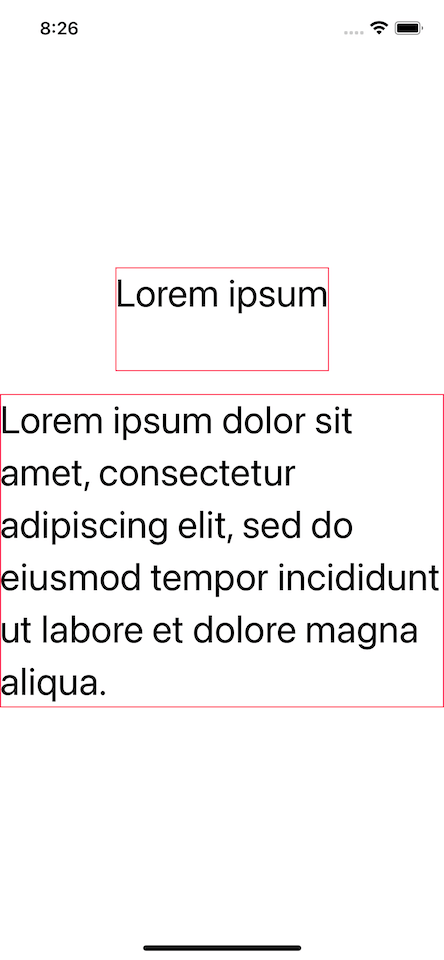
In the following example, we set the minimum number of lines for both text view to two (.lineLimit(2...)).
VStack(spacing: 20) {
    Text("Lorem ipsum")
        .lineLimit(2...)
        .font(.largeTitle)
        .border(.pink)
    Text("Lorem ipsum dolor sit amet, consectetur adipiscing elit, sed do eiusmod tempor incididunt ut labore et dolore magna aliqua.")
        .lineLimit(2...)
        .font(.largeTitle)
        .border(.pink)
}- The first text view only needs one line for its content, but it will occupy two lines as we specified.
- The second text content is longer than two lines, so it takes a number of lines that are enough for its content.
You can easily support sarunw.com by checking out this sponsor.
Offline Transcription: Fast, privacy-focus way to transcribe audio, video, and podcast files. No data leaves your Mac.
Set a minimum and maximum number of lines
You can control both the minimum and the maximum number of lines by using lineLimit that accepts a ClosedRange, e.g., .lineLimit(2...4).
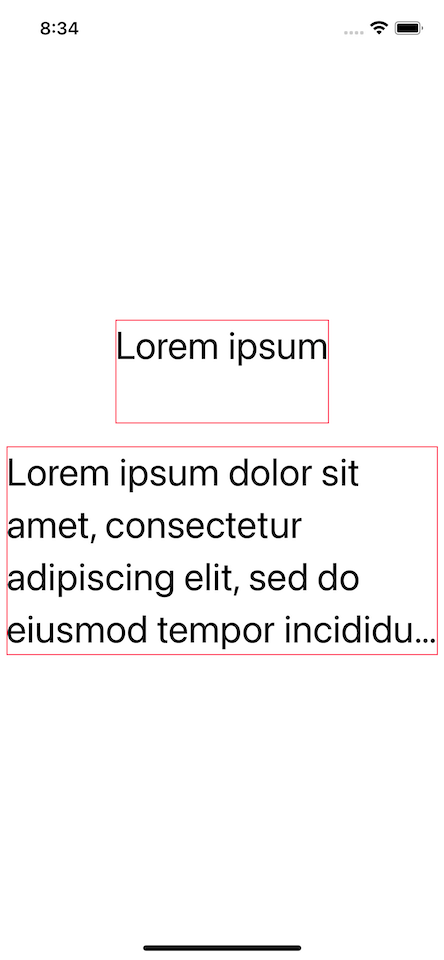
In the following example, we set the both text view to show number of lines between two and four(.lineLimit(2...4)).
VStack(spacing: 20) {
    Text("Lorem ipsum")
        .lineLimit(2...4)
        .font(.largeTitle)
        .border(.pink)
    Text("Lorem ipsum dolor sit amet, consectetur adipiscing elit, sed do eiusmod tempor incididunt ut labore et dolore magna aliqua.")
        .lineLimit(2...4)
        .font(.largeTitle)
        .border(.pink)
}
The text view has a minimum of two lines then grow as content grows, but not exceed four.
Read more article about SwiftUI, Text, iOS 16, or see all available topic
Enjoy the read?
If you enjoy this article, you can subscribe to the weekly newsletter.
Every Friday, you'll get a quick recap of all articles and tips posted on this site. No strings attached. Unsubscribe anytime.
Feel free to follow me on Twitter and ask your questions related to this post. Thanks for reading and see you next time.
If you enjoy my writing, please check out my Patreon https://www.patreon.com/sarunw and become my supporter. Sharing the article is also greatly appreciated.
Become a patron Buy me a coffee Tweet ShareUIPasteBoard's privacy change in iOS 16
In iOS 16, Apple allows users to grant or deny pasteboard reading permission before it happens. Let's see what that means to users.
Bottom Sheet in SwiftUI on iOS 16 with presentationDetents modifier
In iOS 16, we got a native way to present a bottom sheet in SwiftUI. Let's explore its behavior and limitation.