WebView in SwiftUI
Table of Contents
There will be a time when you want to open up web content in your apps. For example, you might want to open up your terms and conditions, privacy policy, or direct users to your home page.
When we want to open web content in UIKit, we can do it in three ways.
- Open the Safari app. This will direct users out of your app to the Safari app.
- Using
SFSafariViewController. This is a built-in browser that gives you the same experience as the Safari app, but you can open it within your app. - Using
WKWebView. This is the most flexible one. You can create your own in-app browser with custom controls usingWKWebView.
The bad news is SwiftUI doesn't support all of that.
It only supports the first case, which is open up web content in the Safari app.
In this article, we will learn what SwiftUI supported and how to overcome the limitation with UIViewRepresentable.
How to open a URL in Safari
SwiftUI has a Link control that opens a web page from the specified URL.
You can think of it as a button where the action opens up the destination URL on the Safari app.
struct ContentView: View {
    var body: some View {
        Link("Sarunw", destination: URL(string: "https://sarunw.com")!)
    }
}
Here is how it looks.

It will open up an external browser when tapped.

Customization
Link is just a normal control. You can use it like other controls.
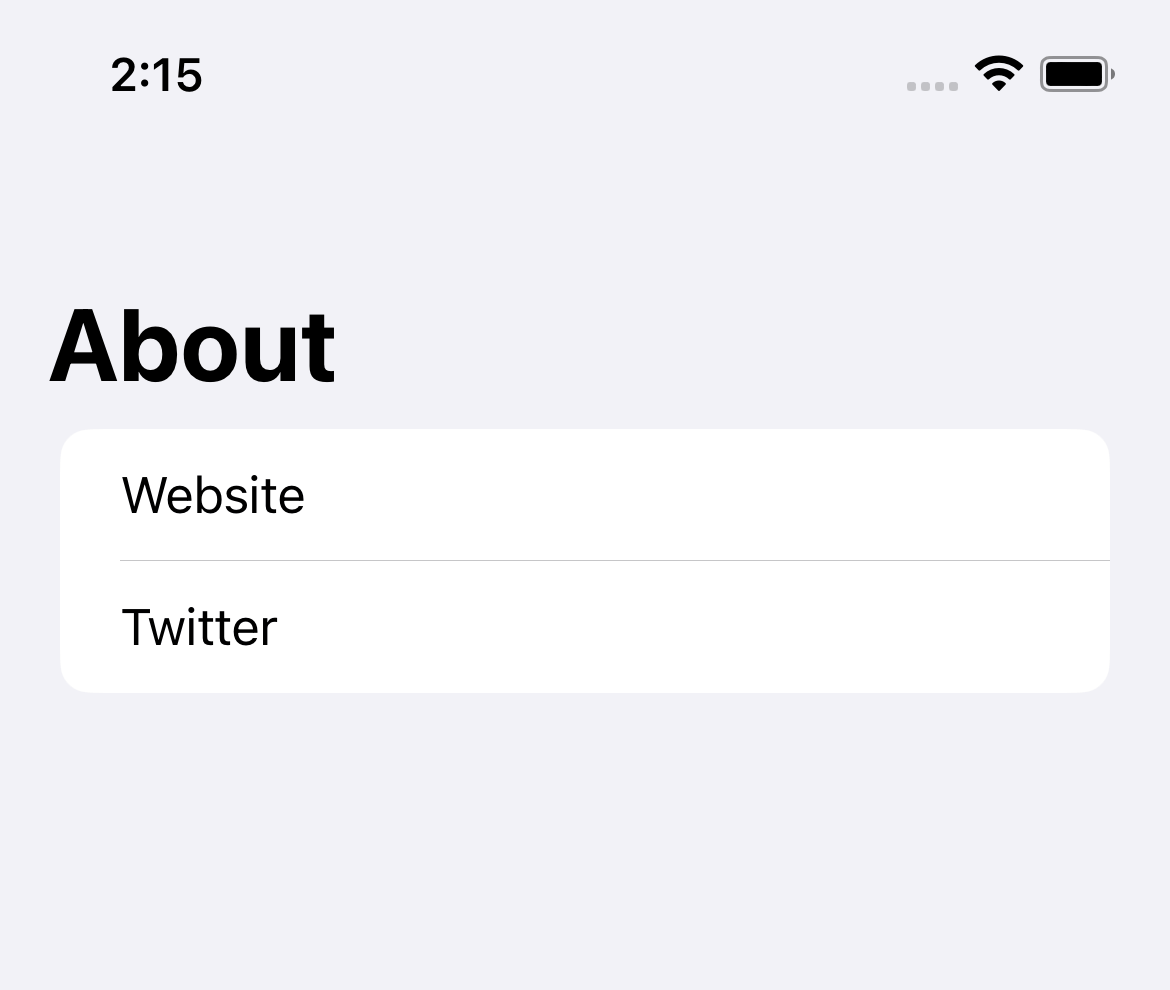
In the following example, we use it inside a list view and change its color to black with .foregroundColor(.black).
NavigationStack {
    List {
        Link("Website", destination: URL(string: "https://sarunw.com")!)
        Link("Twitter", destination: URL(string: "https://twitter.com/sarunw")!)
    }
    .foregroundColor(.black)
    .navigationTitle("About")
}
Link got the same treatment when presenting inside a list view, just like a Button.

A link label doesn't need to be text.
You can use any view to represent your link by using another form of initializer that accepts a view builder.
Here is an example where I use an image as a link label.
struct ContentView: View {
    var body: some View {
        Link(destination: URL(string: "https://sarunw.com")!) {
            Image(systemName: "swift")
                .font(.largeTitle)
                .foregroundColor(.pink)
        }
    }
}
You can easily support sarunw.com by checking out this sponsor.

Offline Transcription: Fast, privacy-focus way to transcribe audio, video, and podcast files. No data leaves your Mac.
How to open a WebView in SwiftUI
As mentioned earlier, the current version of SwiftUI (iOS 16) doesn't have native support of WKWebView or SFSafariViewController, so we don't have a native way to present an in-app browser in SwiftUI.
To present an in-app web view in your app, you need help from UIKit and UIViewRepresentable.
There are many ways to do this, and there is no right or wrong. I will give you an easy implementation to integrate WKWebView into a SwiftUI app.
Here is how to do it.
Bridging WKWebView to SwiftUI using UIViewRepresentable
First, we need to change WKWebView into the format that SwiftUI understands.
We can do this by using UIViewRepresentable. If you are not familiar with this protocol, you can read more about it in How to use UIView in SwiftUI.
We create a new SwiftUI View, WebView, which uses WKWebView under the hood.
import SwiftUI
import WebKit

struct WebView: UIViewRepresentable {
    // 1
    let url: URL

    // 2
    func makeUIView(context: Context) -> WKWebView {
        return WKWebView()
    }

    // 3
    func updateUIView(_ webView: WKWebView, context: Context) {
        let request = URLRequest(url: url)
        webView.load(request)
    }
}
1 We declare a url property to store a URL we want to open.
2 makeUIView() is a required method from UIViewRepresentable. We return UIView that we want to bridge from the method. In this case, it is WKWebView.
3 updateUIView() is another requred method. This method gets called when there is a state change. In this case, we load a new URL if there is a change.
With this simple implementation, we can use WKWebView in our SwiftUI app.
Use WKWebView in SwiftUI
After you create UIViewRepresentable, you can use it like a normal SwiftUI view.
As an example, we will present a web view using a sheet presentation.
struct ContentView: View {
    // 1
    @State private var isPresentWebView = false

    var body: some View {
        Button("Open WebView") {
            // 2
            isPresentWebView = true
        }
        .sheet(isPresented: $isPresentWebView) {
            NavigationStack {
                // 3
                WebView(url: URL(string: "https://sarunw.com")!)
                    .ignoresSafeArea()
                    .navigationTitle("Sarunw")
                    .navigationBarTitleDisplayMode(.inline)
            }
        }
    }
}
1 Declare isPresentWebView to control the presentation of the sheet.
2 Present the sheet when the button is tapped.
3 Present WebView with the URL that you want. In this case, I wrap it inside a NavigationStack and add a navigation title, but you don't need to do this.
Here is the result.

Read more article about SwiftUI, WebView, or see all available topic
Enjoy the read?
If you enjoy this article, you can subscribe to the weekly newsletter.
Every Friday, you'll get a quick recap of all articles and tips posted on this site. No strings attached. Unsubscribe anytime.
Feel free to follow me on Twitter and ask your questions related to this post. Thanks for reading and see you next time.
If you enjoy my writing, please check out my Patreon https://www.patreon.com/sarunw and become my supporter. Sharing the article is also greatly appreciated.
Become a patron Buy me a coffee Tweet ShareGetting All cases of Enum with Swift CaseIterable
There will be a time when you want to get an array of all enum cases, such as when you want to present them in a list or picker. CaseIterable protocol is what you are looking for.