How to open URL in Safari in SwiftUI
Table of Contents
In SwiftUI, there are two ways to open a URL in Safari.
Linkview.openURLenvironment value.
Open URL with Link view
We can use a Link view to open a URL in Safari.
Link view is similar to a button, but instead of providing an action, we provide a destination URL that we want to open.
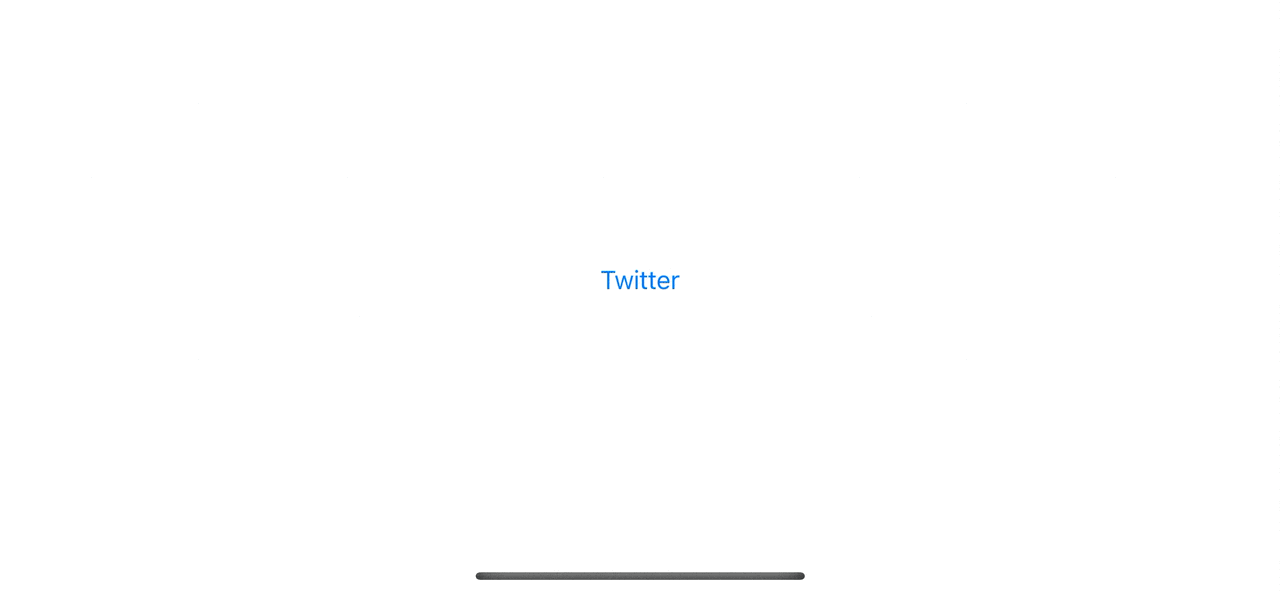
The example below creates a link to my Twitter profile https://twitter.com/sarunw.
struct ContentView: View {
    var body: some View {
        Link("Twitter", destination: URL(string: "https://twitter.com/sarunw")!)
    }
}
The result of a Link view looks like a normal button, but it navigates you to the destination URL when tapped.
Just like other views, you can style link appearance in many ways.
- Modifiers, e.g.,
font,foregroundColor. - Use custom view as a label.
- Or put it in other container views, e.g.,
List,Form.
Customize Link with Modifiers
By default, a Link contains text in its label, so it can be customized using standard view modifiers for text.
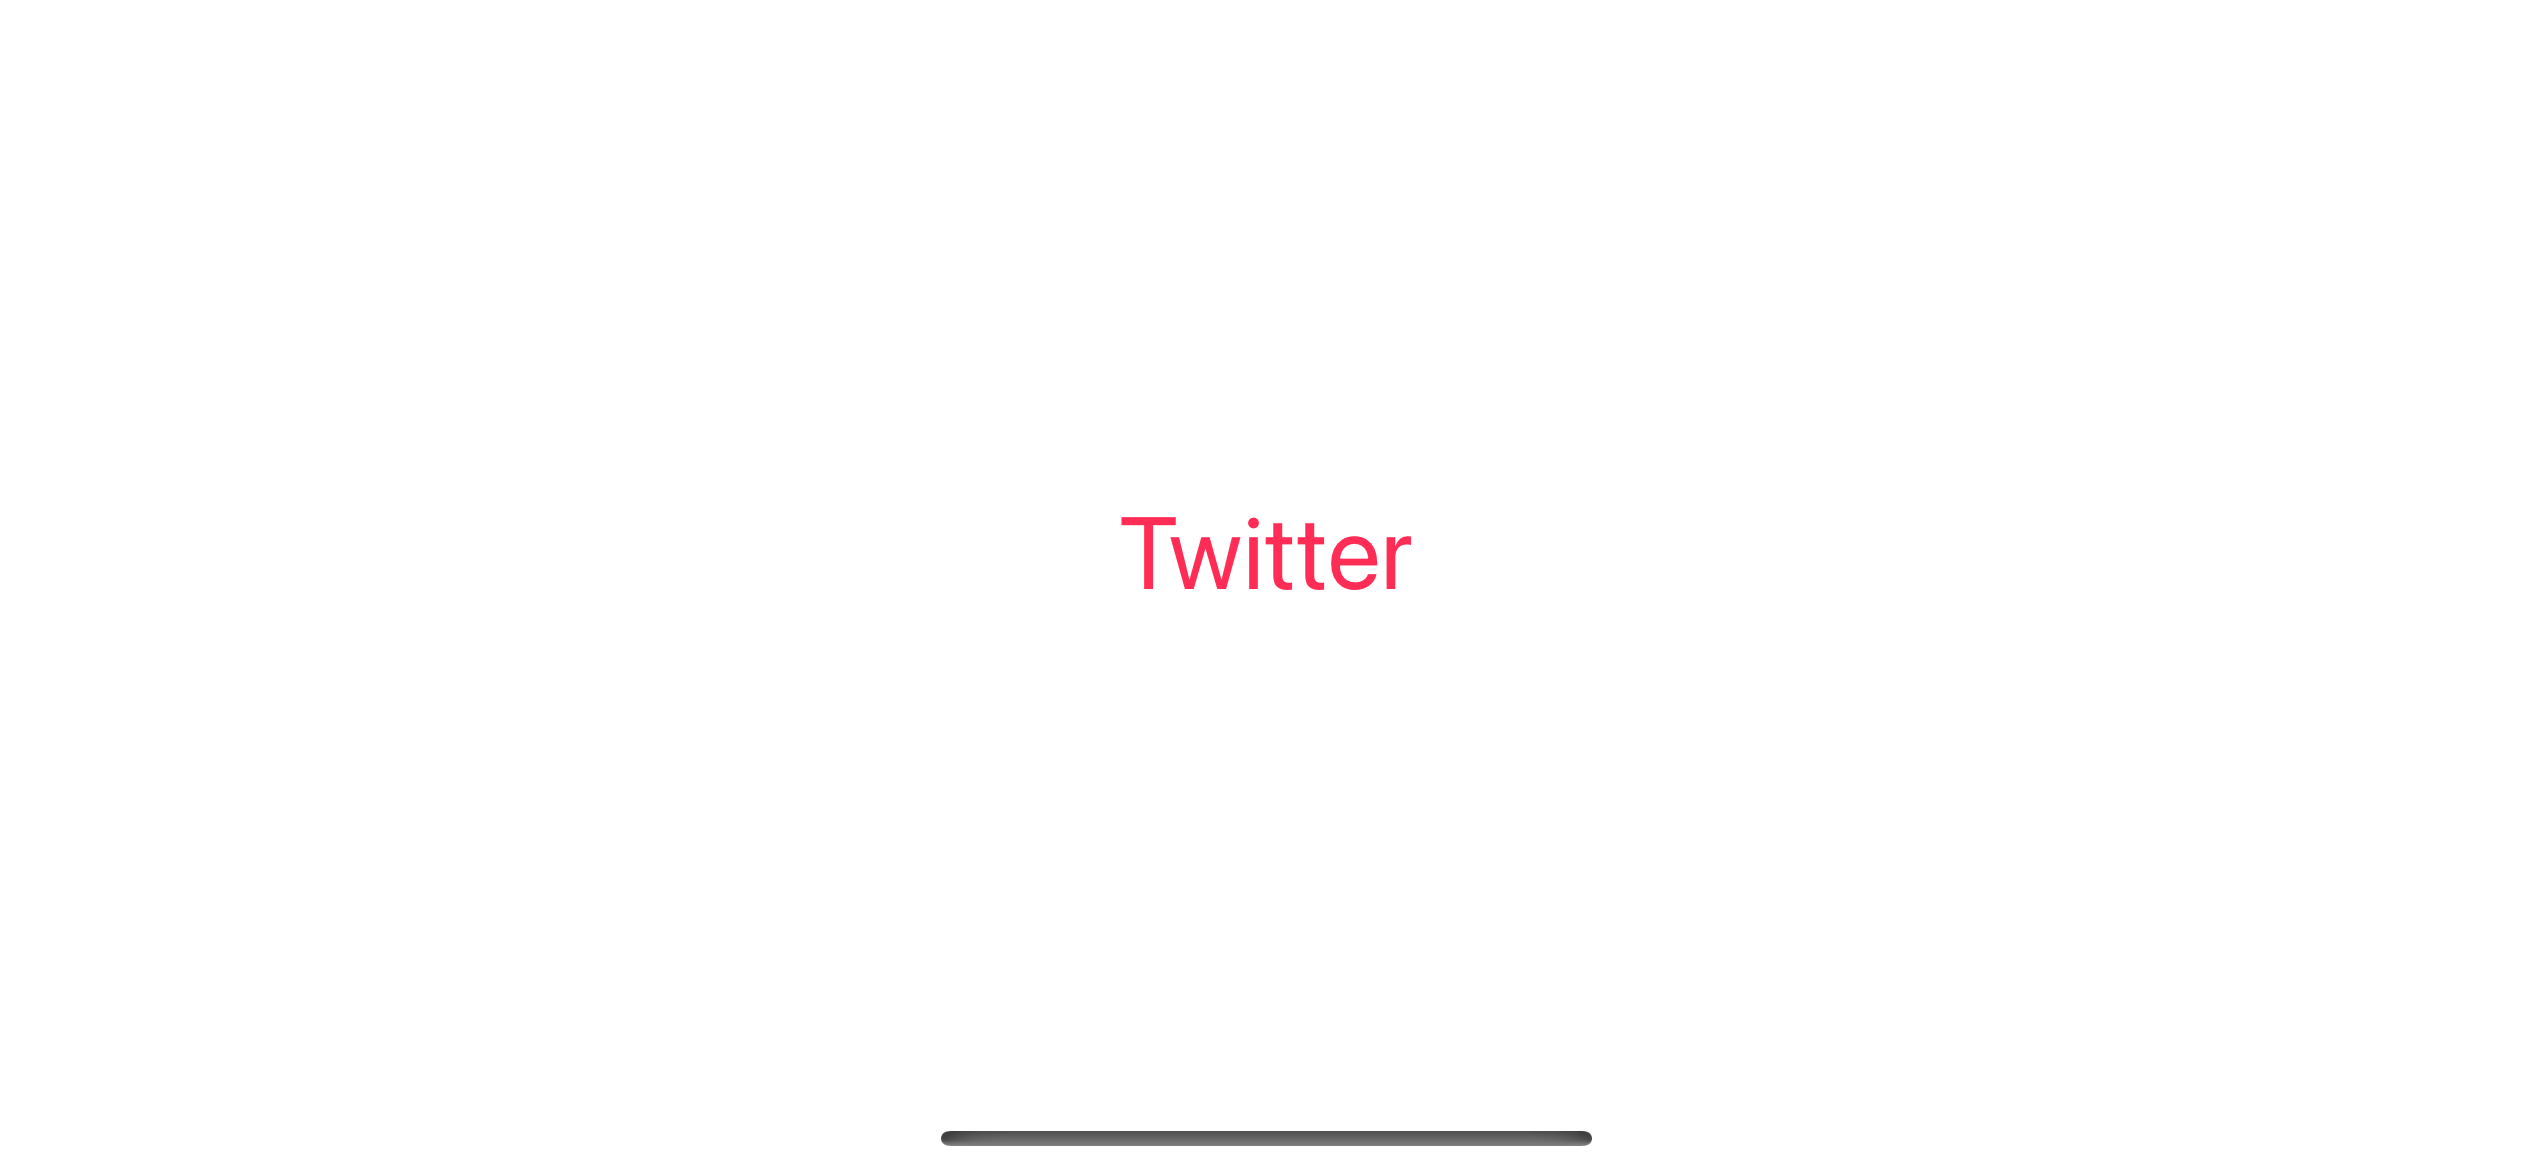
Here is an example where we modify the font and its color.
struct ContentView: View {
    var body: some View {
        Link("Twitter", destination: URL(string: "https://twitter.com/sarunw")!)
            .font(.largeTitle)
            .foregroundColor(.pink)
    }
}
The modifiers you can apply to a Link view depend on the link's label.
It seems like a Link view uses something similar to a button. So you might find some modifiers take no effect, e.g., .underline. (Underline is neither work on a button).
You can overcome this constraint by providing a custom view for a link's label.
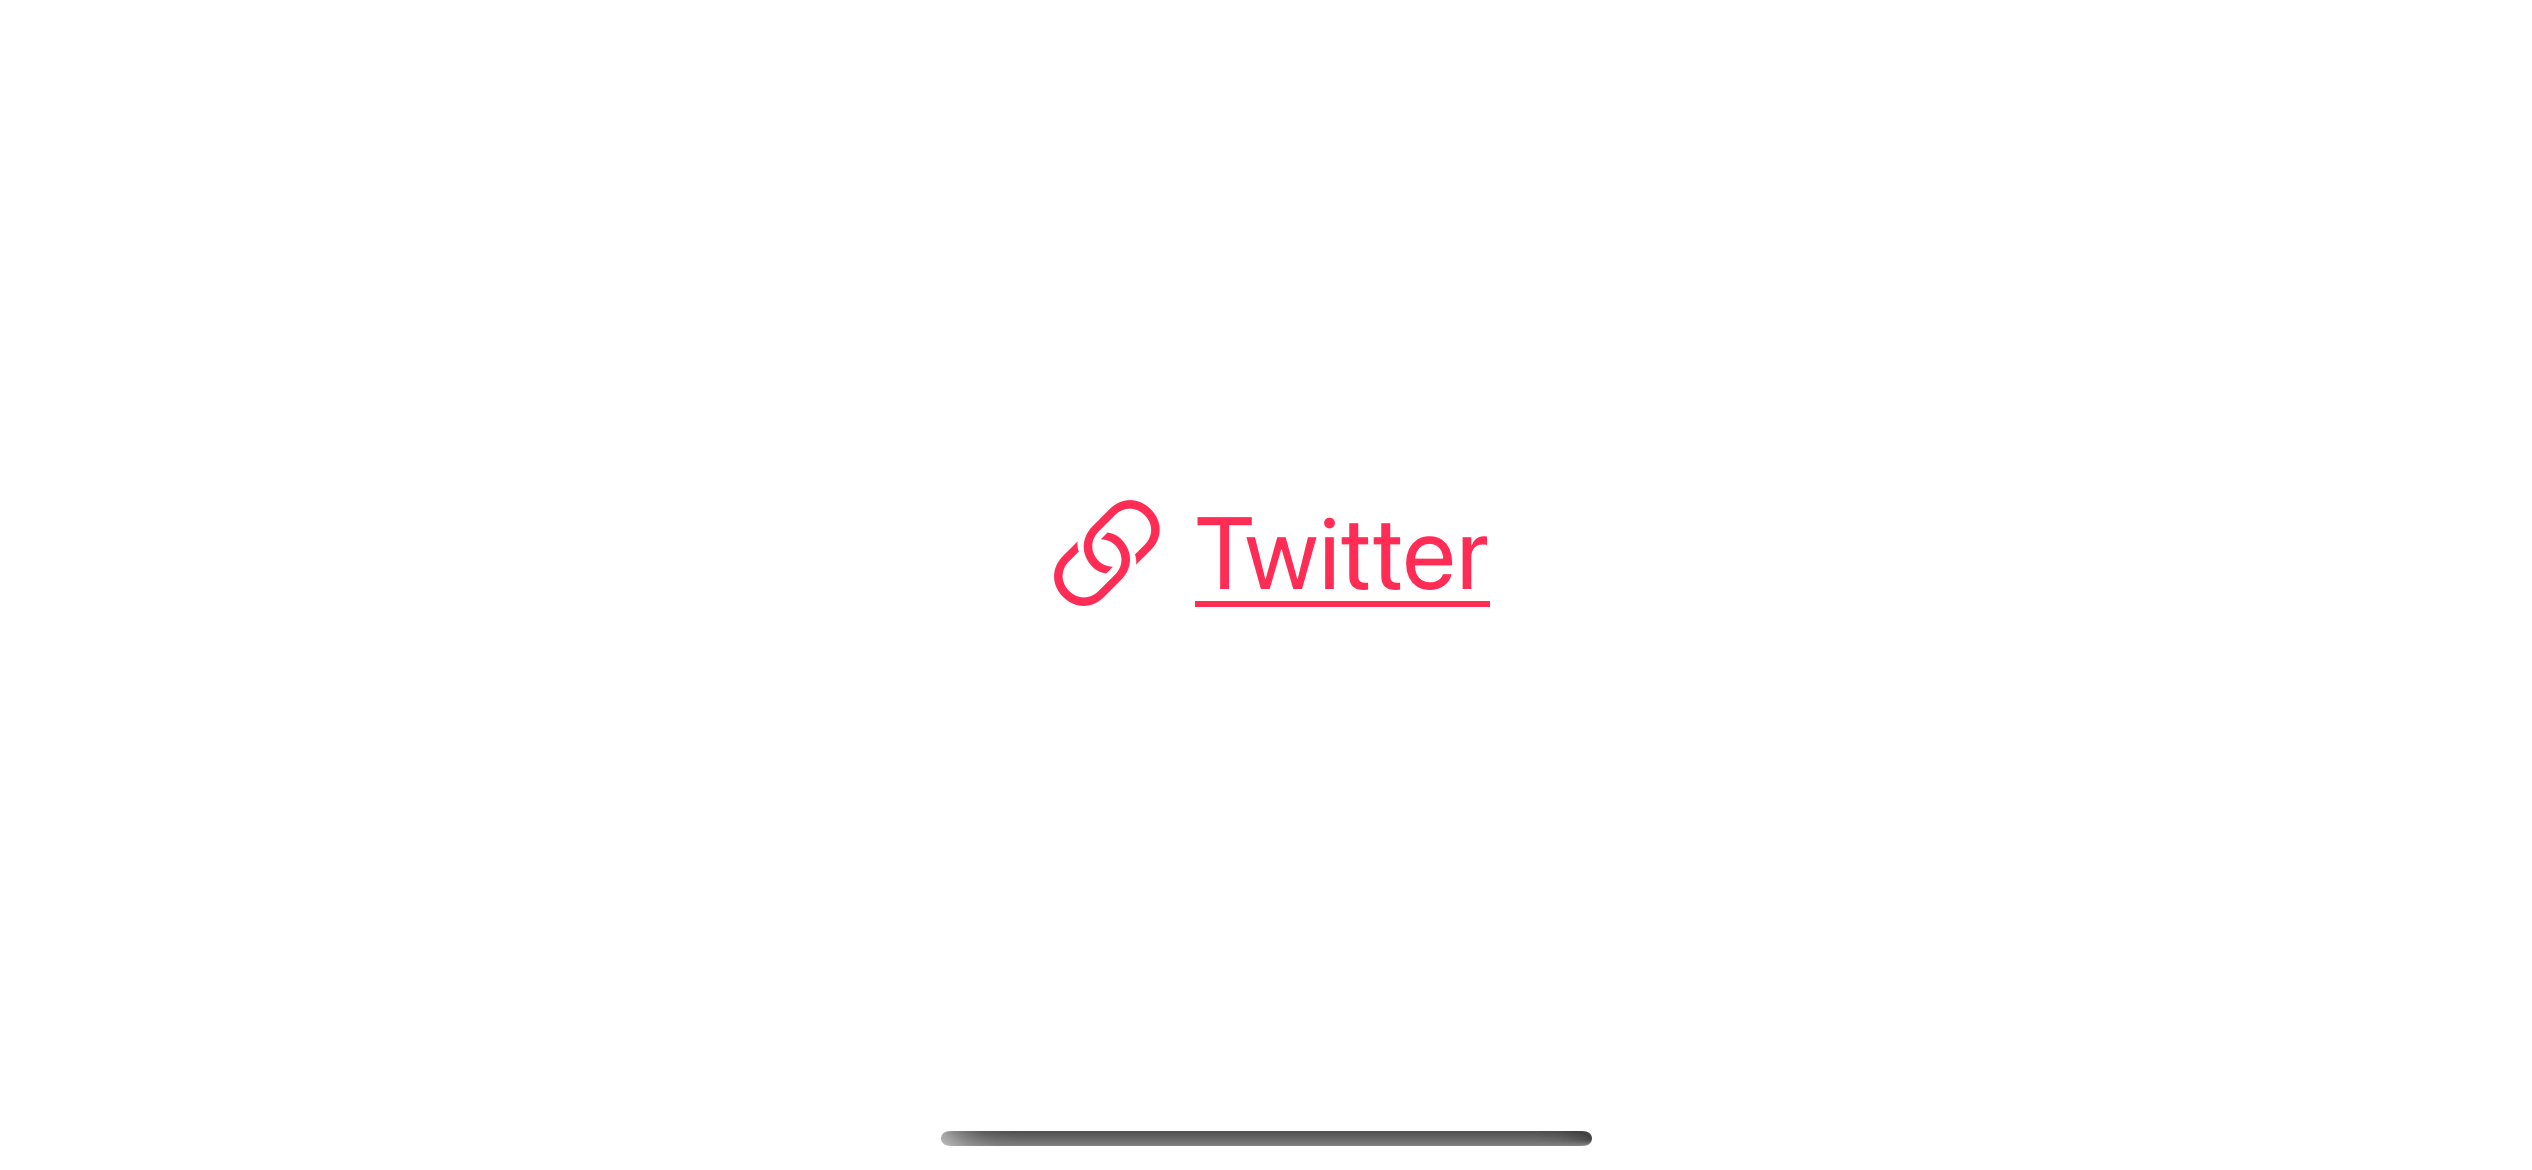
Create Link using a custom view as a label
You can provide a custom view for a link's label if you want more control over the appearance.
In this example, we user create a link with an image along side an underline text.
Link(destination: URL(string: "https://twitter.com/sarunw")!) {
    Label("Twitter", systemImage: "link")
        .font(.largeTitle)
        .foregroundColor(.pink)
        .underline(true, color: .pink)
}
Link in a container view
Some container views can apply a unique style to their child views and controls.
Link view is also a control, so it gets the same treatment.
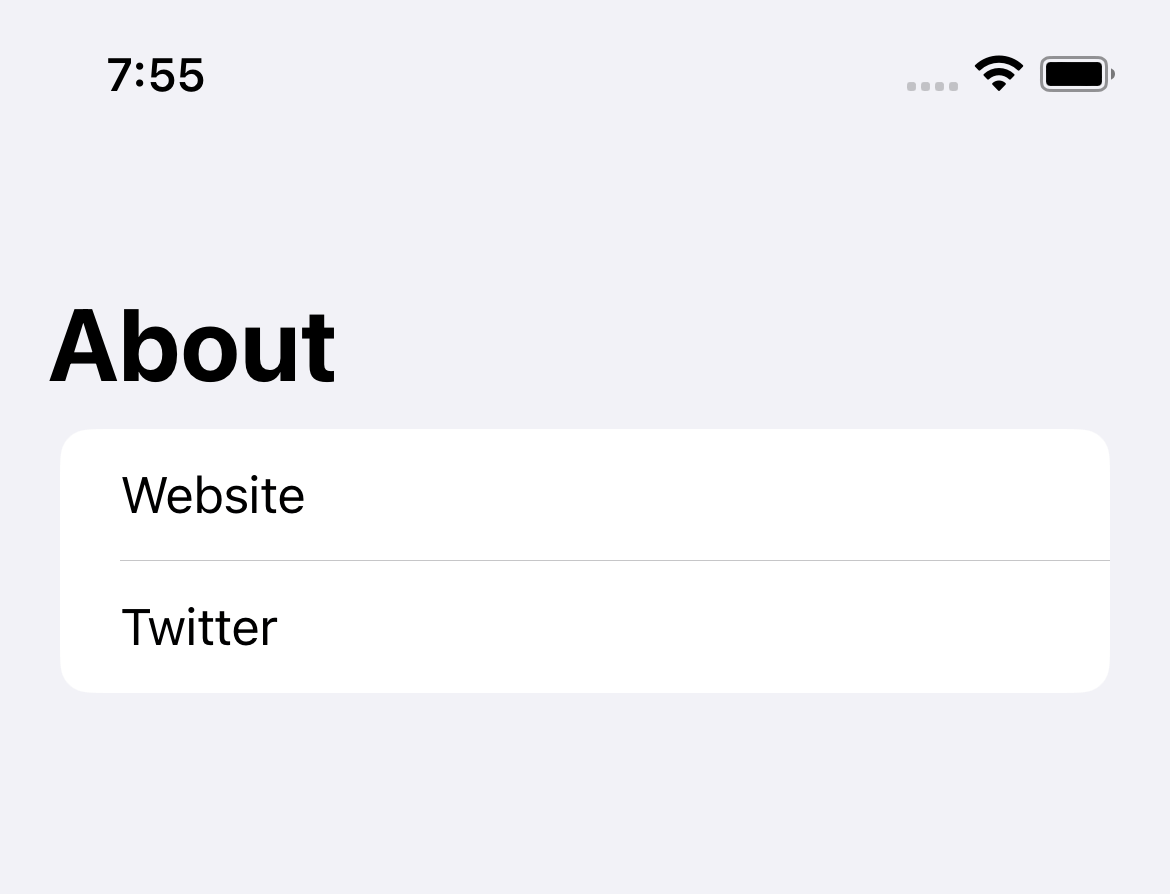
Here is an example of using Link inside a List view.
struct ContentView: View {
    var body: some View {
        NavigationStack {
            List {
                Link("Website", destination: URL(string: "https://sarunw.com")!)
                Link("Twitter", destination: URL(string: "https://twitter.com/sarunw")!)
            }
            .foregroundColor(.black)
            .navigationTitle("About")
        }
    }
}
Link gets the same style as a list row when putting it inside a List view.
You can easily support sarunw.com by checking out this sponsor.
Screenshot Studio: Create App Store screenshots in seconds not minutes.
Open URL with openURL environment value
Another way to open a URL is by using the openURL environment value.
To open a URL, you specify a destination URL into an openURL, which is OpenURLAction type.
Here is an example where I manually open a URL using openURL when the button is tapped.
struct ContentView: View {
    // 1
    @Environment(\.openURL) private var openURL

    var body: some View {
        Button("Open Website") {
            // 2
            openURL(URL(string: "https://sarunw.com")!)
        }
    }
}
1 We declare an openURL environment value.
2 Then, we can call this wherever we want to open a URL.
Check whether the URL can be open
URL that we can use in openURL isn't limited to website URLs. You can use this to open a custom URL scheme, e.g., open the Google map app (comgooglemaps://).
So, there is a chance that the provided URL isn't valid and the system can't open the specified URL, e.g., the Google Map app doesn't install or a wrong URL scheme.
If you want to know the result of the action, whether it was a success or not, you can specify a completion handler when calling openURL.
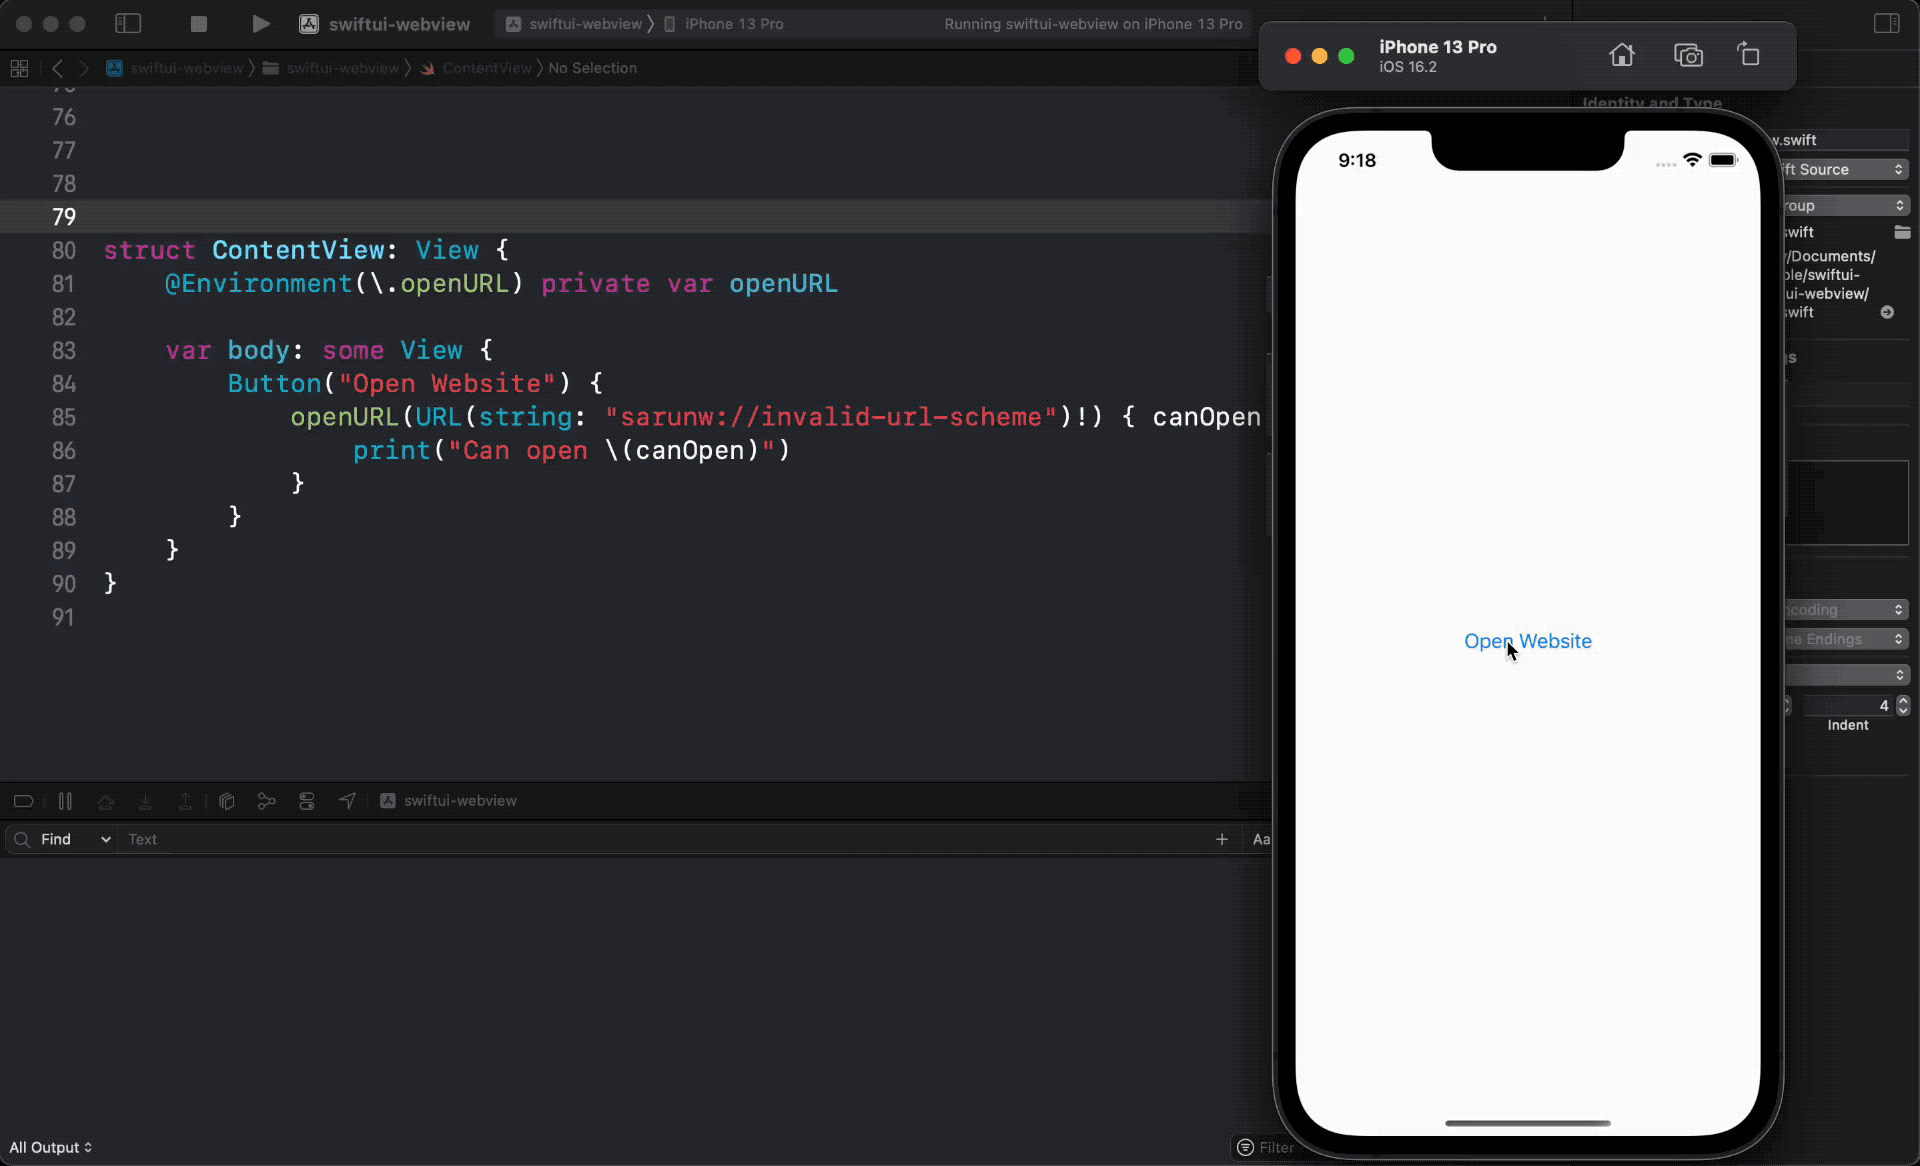
In the following example, we open a non-existent URL scheme, sarunw://invalid-url-scheme.
struct ContentView: View {
    @Environment(\.openURL) private var openURL

    var body: some View {
        Button("Open Website") {
            openURL(URL(string: "sarunw://invalid-url-scheme")!) { canOpen in
                print("Can open \(canOpen)")
            }
        }
    }
}
If you tap the button, you will see the "Can open false" printout in the debug console.
This indicates that the system can't handle the provided URL.
Can open falseSet Custom URL Handler
By default, the system provides a default open URL action (OpenURLAction) that depends on the passing URL.
It has the following behaviors:
- Open the associated app for a custom URL scheme or Universal Link.
- Open the user's default web browser for a normal URL.
We can opt out of the default behavior by providing a custom handler.
You can do that by setting a new OpenURLAction via environment(_:_:) modifier.
In this example, I am looking for a URL with a sarunw:// scheme and open https://sarunw.com instead.
struct ExampleApp: App {
    var body: some Scene {
        WindowGroup {
            ContentView()
                .environment(\.openURL, OpenURLAction(handler: { url in
                    // 1
                    if url.scheme == "sarunw" {
                        return .systemAction(URL(string: "https://sarunw.com")!)
                    }
                    // 2
                    return .systemAction
                }))
        }
    }
}
1 If the open URL has a "sarunw" scheme, I return .systemAction(URL(string: "https://sarunw.com")!) which asks the system to open "https://sarunw.com" URL instead.
2 For other URLs, I rely on the default behavior by returning .systemAction.
With this new URL handler, the same code we used in the previous example is now working.
struct ContentView: View {
    @Environment(\.openURL) private var openURL

    var body: some View {
        Button("Open Website") {
            openURL(URL(string: "sarunw://invalid-url-scheme")!) { canOpen in
                print("Can open \(canOpen)")
            }
        }
    }
}
sarunw://invalid-url-scheme is now handled by our custom handle, which opens the https://sarunw.com URL instead when tapped.
And since the URL can now be opened, the openURL completion handler now returns true.
Read more article about SwiftUI, WebView, or see all available topic
Enjoy the read?
If you enjoy this article, you can subscribe to the weekly newsletter.
Every Friday, you'll get a quick recap of all articles and tips posted on this site. No strings attached. Unsubscribe anytime.
Feel free to follow me on Twitter and ask your questions related to this post. Thanks for reading and see you next time.
If you enjoy my writing, please check out my Patreon https://www.patreon.com/sarunw and become my supporter. Sharing the article is also greatly appreciated.
Become a patron Buy me a coffee Tweet ShareConditional compilation for Attributes in Swift 5.8
Let's learn about the new conditional directive, hasAttribute.
Configure Launch screen in UIKit without Storyboard
In Xcode 12 and iOS 14, we got a new way to configure an app launch screen without a Storyboard. Let's learn how to do it.