UINavigationBar changes in iOS13
Table of Contents
Apple brings a lot of appearance changes in iOS13 and the navigation bar is one of them.
What's changed
In iOS13 the default appearance of the large title style navigation bar has changed from translucent to transparent.

Nothing changes much in a plain style table view, the navigation bar will show the color of a table view, in this case, white. For grouped style, there is also some offsetting change.
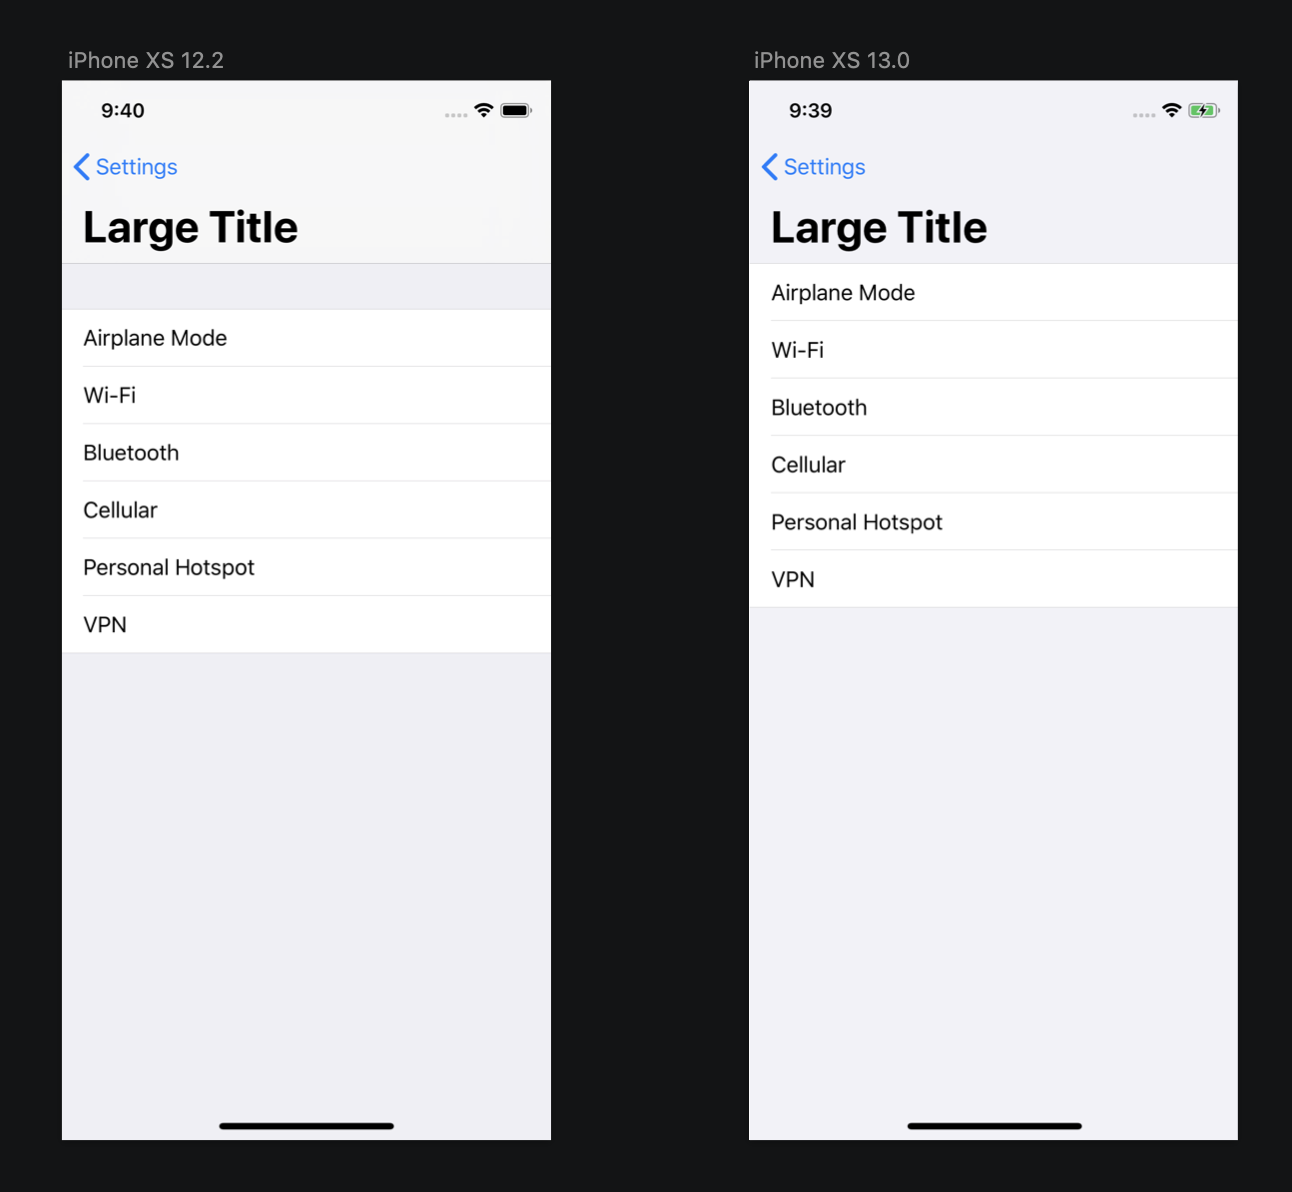
These are not that big of a change, but if your design relies on this colored bar you might need to tweak your design or add some code to going back to old appearance style.
You can easily support sarunw.com by checking out this sponsor.
AI Grammar: Correct grammar, spell check, check punctuation, and parphrase.
Requirements
You get this for free (even you might not want it) when you build your app against iOS13 (Xcode11).
Going back to old-style
If you want translucent style back put following code in application(_:didFinishLaunchingWithOptions:).
let appearance = UINavigationBarAppearance()
appearance.configureWithDefaultBackground()
UINavigationBar.appearance().scrollEdgeAppearance = appearance
Or if you have colored navigation bar you have to set appearance for both scrollEdgeAppearance and standardAppearance.
let coloredAppearance = UINavigationBarAppearance()
coloredAppearance.configureWithOpaqueBackground()
coloredAppearance.backgroundColor = .systemPink
coloredAppearance.titleTextAttributes = [.foregroundColor: UIColor.white]
coloredAppearance.largeTitleTextAttributes = [.foregroundColor: UIColor.white]

UINavigationBar.appearance().standardAppearance = coloredAppearance
UINavigationBar.appearance().scrollEdgeAppearance = coloredAppearance
Note that bar color that set with backgroundColor in iOS13 will result in true color, just like when you set barTintColor with isTranslucent = false. I still can't figure out how to make it be a translucent color, luckily that I always hate that translucent color. It hard to make it matched the design I get from a designer.
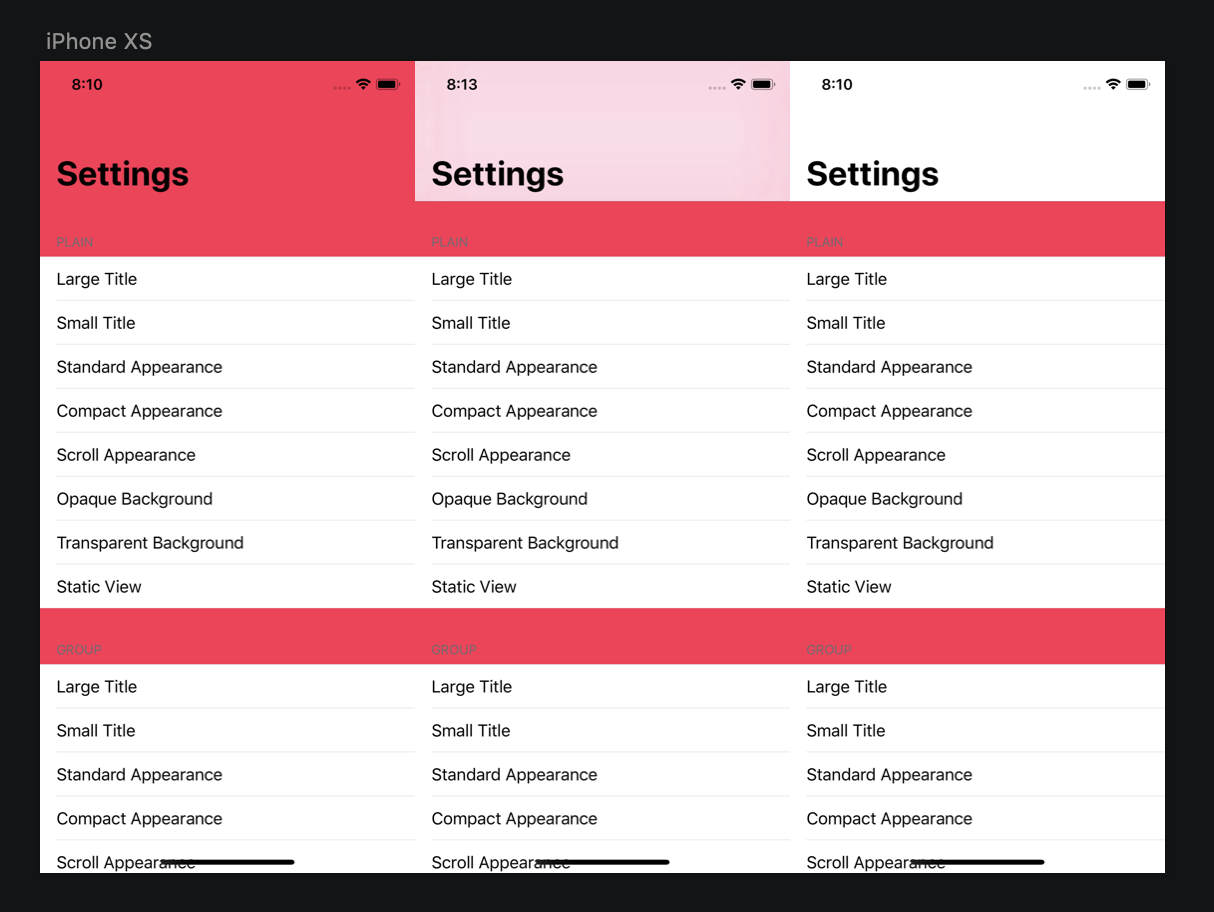
![]()
On the left is bar color with isTranslucent equal to false, on the right the one with isTranslucent equal to true which is the one used in iOS13.
If you want to embrace this change you need to know a new set of API that comes with it, Appearance Customization API.
Appearance Customization API
There is a new class that represents an appearance which encapsulates all customization options for a navigation bar, UINavigationBarAppearance.
Note that UINavigationBarAppearance is a subclass of UIBarAppearance, which is a base class for other bar appearance, UIToolbarAppearance, UITabBarAppearance. I this article we will focus only navigation bar.
You configure this UINavigationBarAppearance and assign it to new properties in UINavigationBar, standardAppearance, compactAppearance, and scrollEdgeAppearance.
What are standard/compact/scroll edge appearance?
These 3 appearances represent each presentation style of the navigation bar.
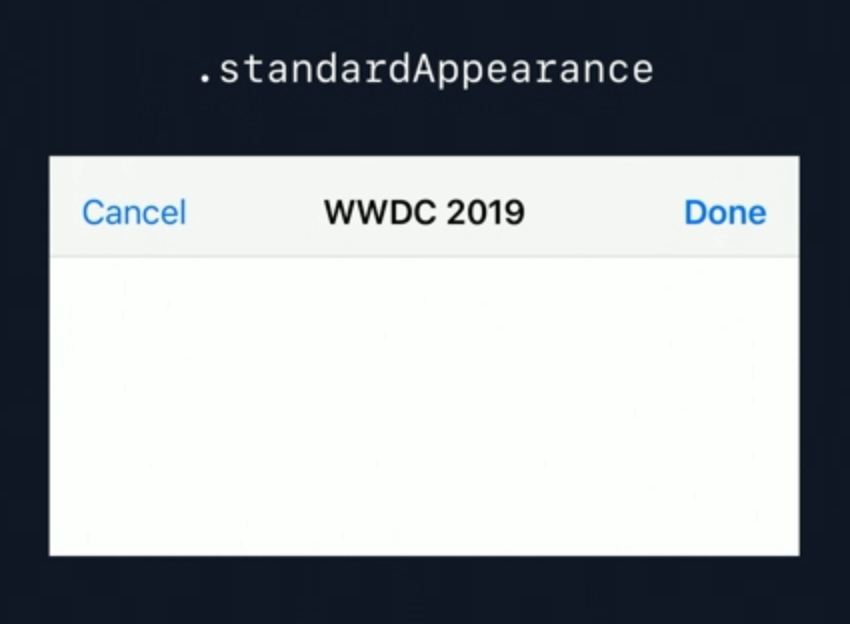
Standard appearance represents a navigation bar in regular height without a large title. This appearance will use to form default for other two, compactAppearance and scrollEdgeAppearance, if you don't specify them.
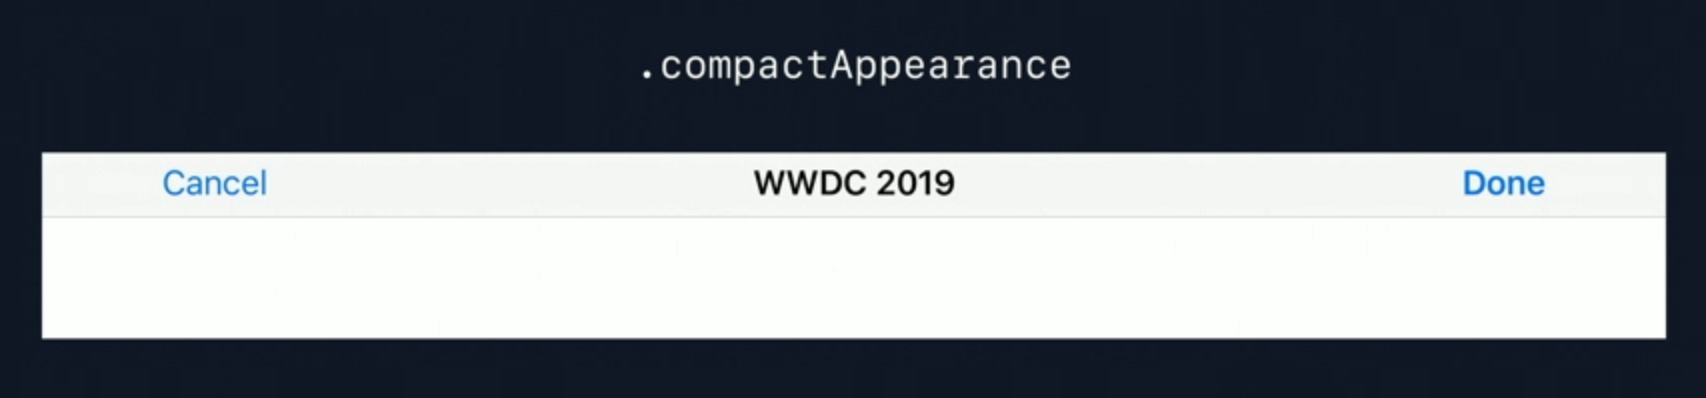
Compact appearance represents a navigation bar in compact height.
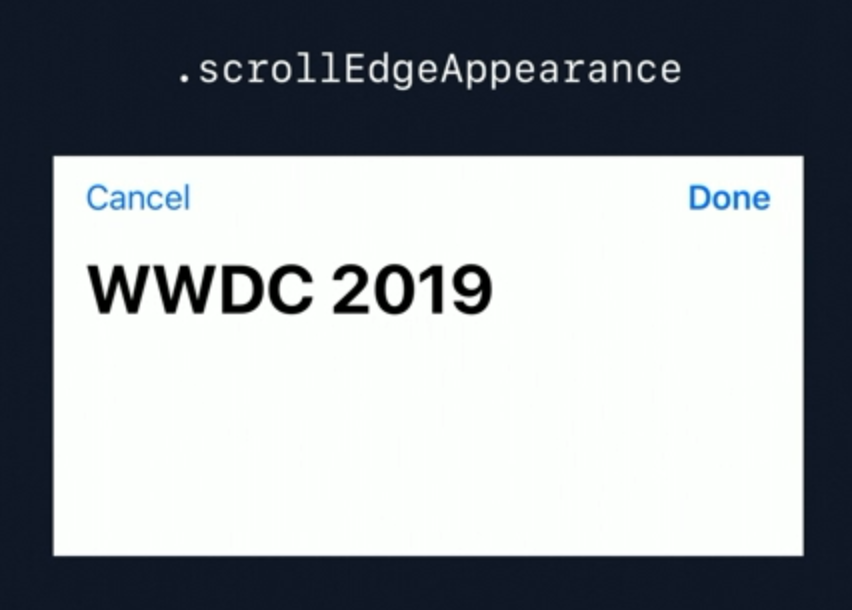
The last one is Scroll edge appearance, based on WWDC session, Modernizing Your UI for iOS 13, this one will be used when navigation associated with a scroll view, but in my test, this one will be used for large title navigation bar even it does not have scroll view.
Customization
So to customize your navigation bar what you need to do is create UINavigationBarAppearance and customize it how you want your bar to be and apply it to any of 3 navigation bar appearances. There are many properties you can set I encourage you to check the UINavigationBarApperance's document to find out what properties you can set.
Here is an example of property and the result you would get.
let standard = UINavigationBarAppearance()

standard.configureWithOpaqueBackground()

standard.backgroundColor = .systemPink
standard.titlePositionAdjustment = UIOffset(horizontal: -30, vertical: 0)
standard.titleTextAttributes = [.foregroundColor: UIColor.white]

let button = UIBarButtonItemAppearance(style: .plain)
button.normal.titleTextAttributes = [.foregroundColor: UIColor.systemYellow]
standard.buttonAppearance = button

let done = UIBarButtonItemAppearance(style: .done)
done.normal.titleTextAttributes = [.foregroundColor: UIColor.systemGreen]
standard.doneButtonAppearance = done

UINavigationBar.appearance().standardAppearance = standard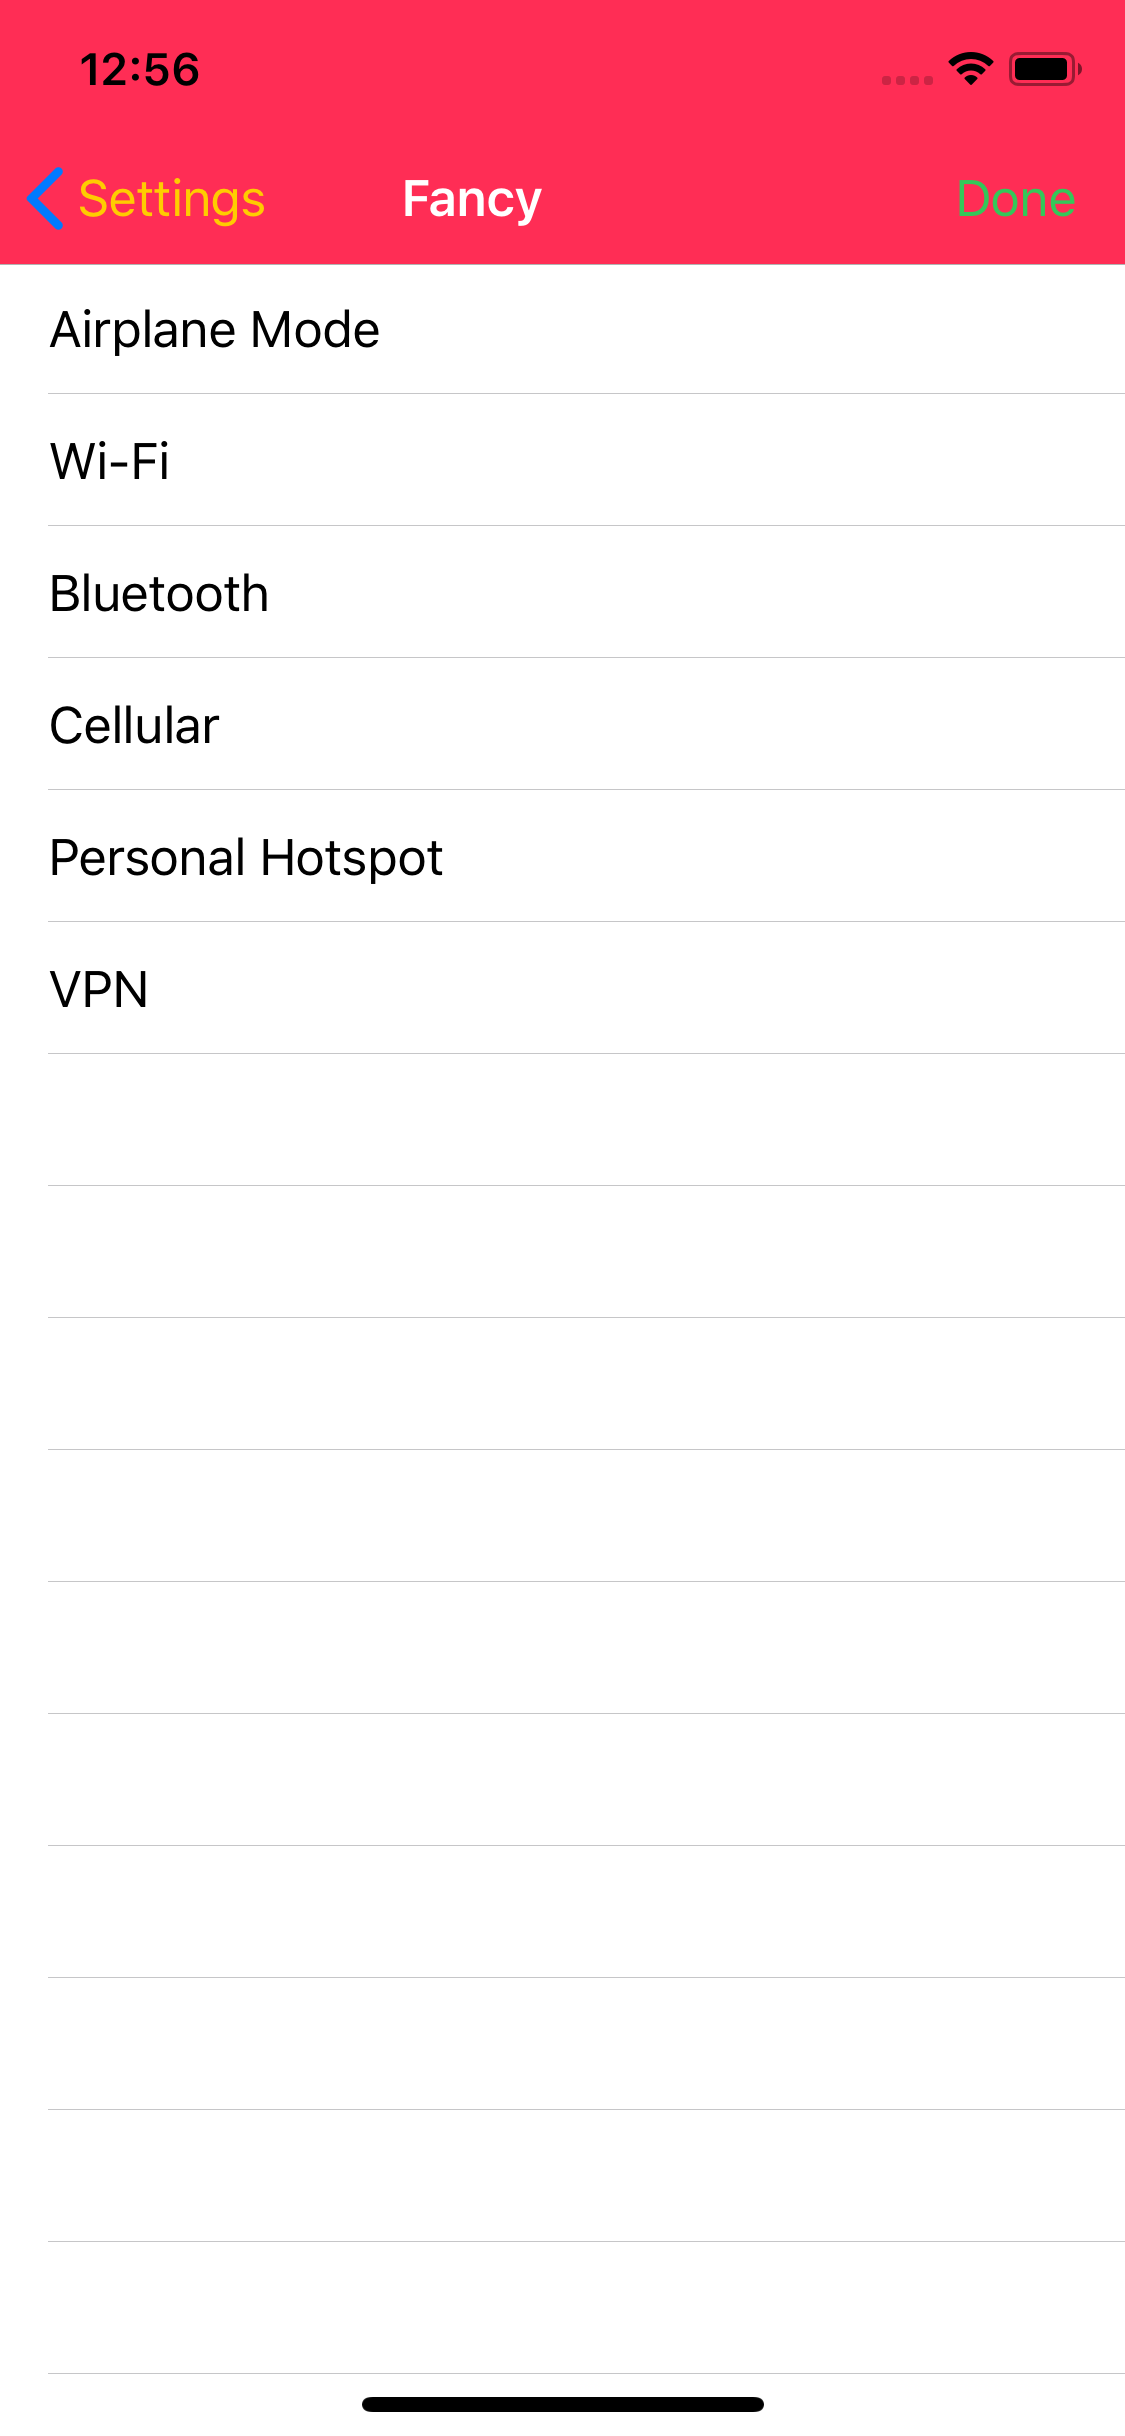
One thing I want to highlight here is .configureWithOpaqueBackground method. UIBarAppearance provided 3 methods to configure appearance.
/// Reset background and shadow properties to their defaults.
open func configureWithDefaultBackground()


/// Reset background and shadow properties to display theme-appropriate opaque colors.
open func configureWithOpaqueBackground()


/// Reset background and shadow properties to be transparent.
open func configureWithTransparentBackground()
The description is quite confusing, but in short, these will set styles based on whether you want your bar to be translucent, opaque, or transparent.
Here is the example of what it looks like for configureWithTransparentBackground, configureWithDefaultBackground, and configureWithOpaqueBackground (I set table view background to pink to make translucent more obvious).
Applying appearance to UINavigationBar.appearance() or instance of UINavigationBar will affect every view if you want per view bar appearance you can set UINavigationBarAppearance to UINavigationItem.
let appearance = navigationController?.navigationBar.standardAppearance.copy()
// Configure appearance
navigationItem.standardAppearance = appearance
And once you've done that, whenever the view controller and navigation item is current, that appearance will be used instead of the navigationBar's base appearance.
Conclusion
This new way of customizing our navigation bar is more flexible and consistent across components. With these changes, I think we can ditch out all the hack we put in all these years to make transparent navigation bar, remove the shadow, etc.
Feel free to follow me on Twitter and ask your questions related to this post. Thanks for reading and see you next time.
You can easily support sarunw.com by checking out this sponsor.
AI Grammar: Correct grammar, spell check, check punctuation, and parphrase.
References
Read more article about iOS13, UINavigationBar, Navigation Bar, or see all available topic
Enjoy the read?
If you enjoy this article, you can subscribe to the weekly newsletter.
Every Friday, you'll get a quick recap of all articles and tips posted on this site. No strings attached. Unsubscribe anytime.
Feel free to follow me on Twitter and ask your questions related to this post. Thanks for reading and see you next time.
If you enjoy my writing, please check out my Patreon https://www.patreon.com/sarunw and become my supporter. Sharing the article is also greatly appreciated.
Become a patron Buy me a coffee Tweet ShareAdopting iOS Dark Mode
A long-awaited feature has finally come to iOS. Join it or not is your choice to make. This article will guide you through it.
Create a new iOS12 project in Xcode11
Required modifications to make your newly created project work in iOS 12 or lower.