UIStackView padding
Table of Contents
Since iOS 9, stack view has got a way to add padding to its content. Today we will explore it and compare it to other methods that can achieve the same effect.
Using constraints
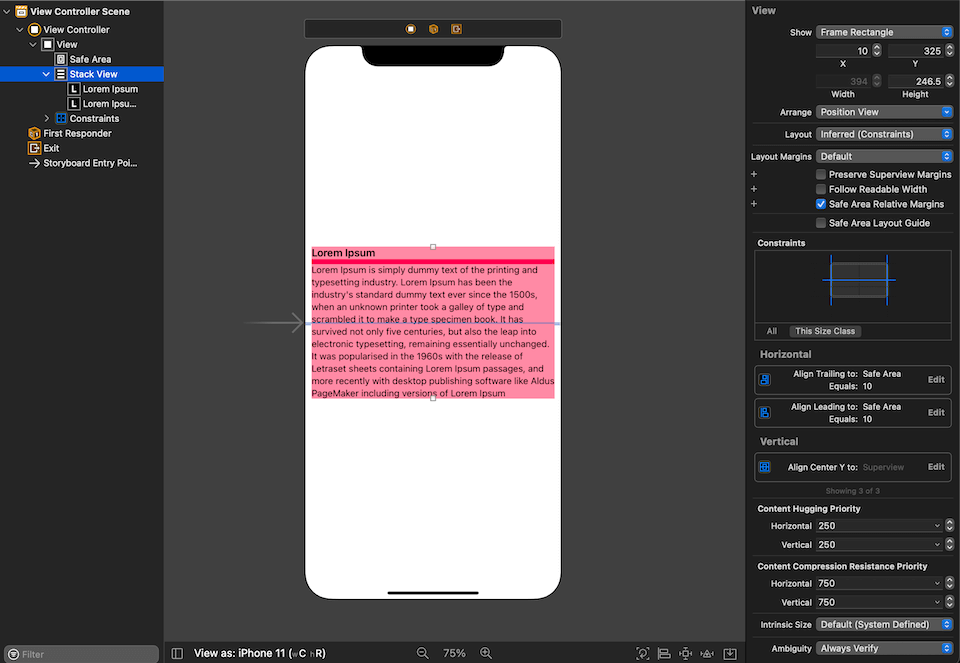
The most basic approach of adding padding between content and a container is to set a constraint's constant. This is not precisely padding but a margin of our stack view—nothing fancy here. You define a constraint with a constant equals to the space that you want for your padding.
Here is how it looks like in the storyboard. We define leading and trailing constraint with a constant of 10, which becomes our content padding.
The following snippet would match what we did in the storyboard.
stackView.addArrangedSubview(titleLabel)
stackView.addArrangedSubview(subtitleLabel)

view.addSubview(stackView)

NSLayoutConstraint.activate([
    stackView.leadingAnchor.constraint(equalTo: view.leadingAnchor, constant: 10),
    view.trailingAnchor.constraint(equalTo: stackView.trailingAnchor, constant: 10),
    stackView.centerYAnchor.constraint(equalTo: view.centerYAnchor)
])
Using constraints as padding for content is more than enough most of the time, but you might want a way to define real padding for more complex stuff. Since we get a dedicated property for this job now, let's visit a (not so) new property, isLayoutMarginsRelativeArrangement.
You can easily support sarunw.com by checking out this sponsor.
AI Grammar: Correct grammar, spell check, check punctuation, and parphrase.
Using isLayoutMarginsRelativeArrangement
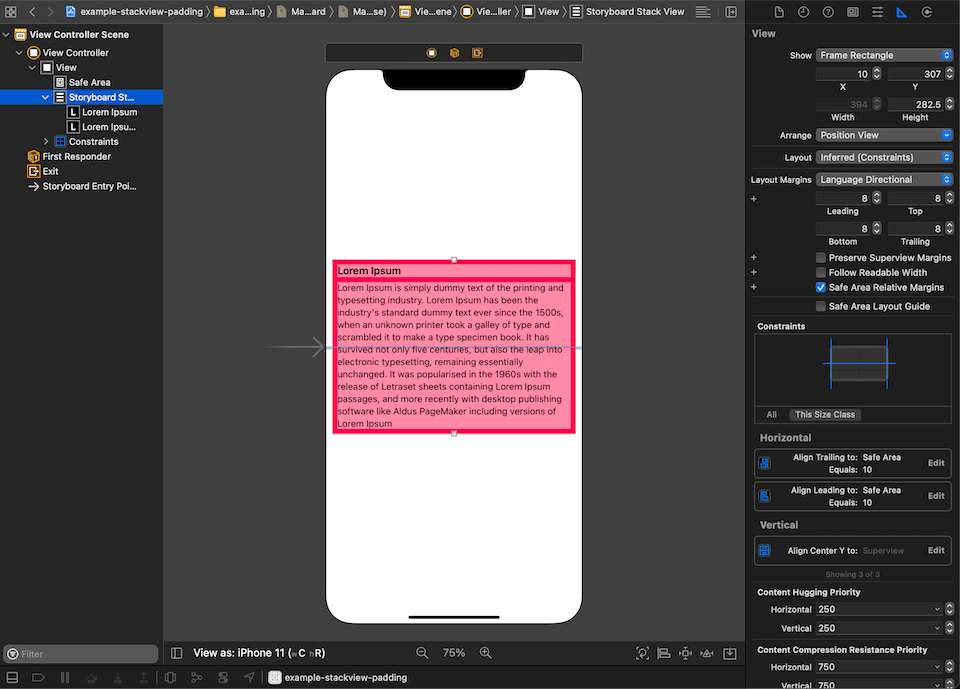
Typically, when you add an arranged subview to a stack view, its edges are pinned to the stack view's edges. If you set the stack view's isLayoutMarginsRelativeArrangement property to true, the stack view pins its content to the relevant margin instead of its edge. This layout margin will use as our padding. There are two ways to define the layout margin.
In storyboard
- Select a stack view and go to Size inspector panel (View > Inspectors > Size or ⌘ - command + ⌥ – option + 6).
- Change layout margins to Language Directional or Fixed.
- Layout margins for each edge will show up. You can put your desired margins there. You can notice padding (show in bright pink) around the content.
Programmatically
To do this in code, you need to set an isLayoutMarginsRelativeArrangement property to true. isLayoutMarginsRelativeArrangement is a Boolean value that determines whether the stack view lays out its arranged views relative to its layout margins or its edges. Then set either layoutMargins (Fixed layout margins type in storyboard) or directionalLayoutMargins (Language Directional type in storyboard).
stackView.isLayoutMarginsRelativeArrangement = true
stackView.directionalLayoutMargins = NSDirectionalEdgeInsets(top: 20, leading: 20, bottom: 20, trailing: 20)

stackView.addArrangedSubview(titleLabel)
stackView.addArrangedSubview(subtitleLabel)

view.addSubview(stackView)

NSLayoutConstraint.activate([
    stackView.leadingAnchor.constraint(equalTo: view.leadingAnchor, constant: 10),
    view.trailingAnchor.constraint(equalTo: stackView.trailingAnchor, constant: 10),
    stackView.centerYAnchor.constraint(equalTo: view.centerYAnchor)
])
When should I use this?
One area that I can see this shine is in a nested stack view. Let's say you want to add another horizontal stack view at the end of our previous example.
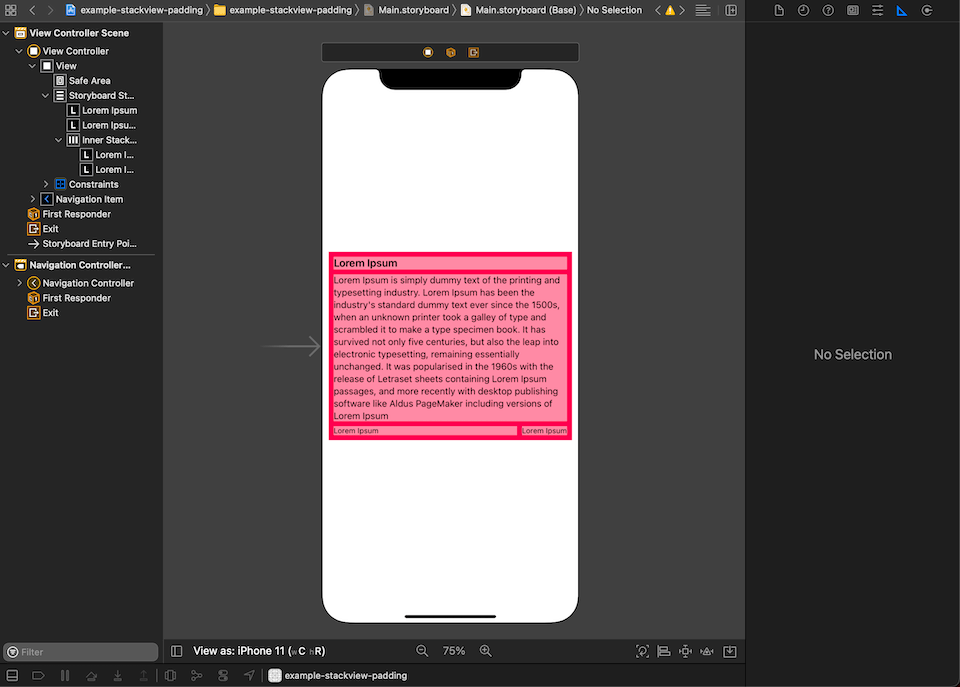
And you need a custom padding for this newly added section. You can easily do it with the help of padding.
Here is the layout that we want.
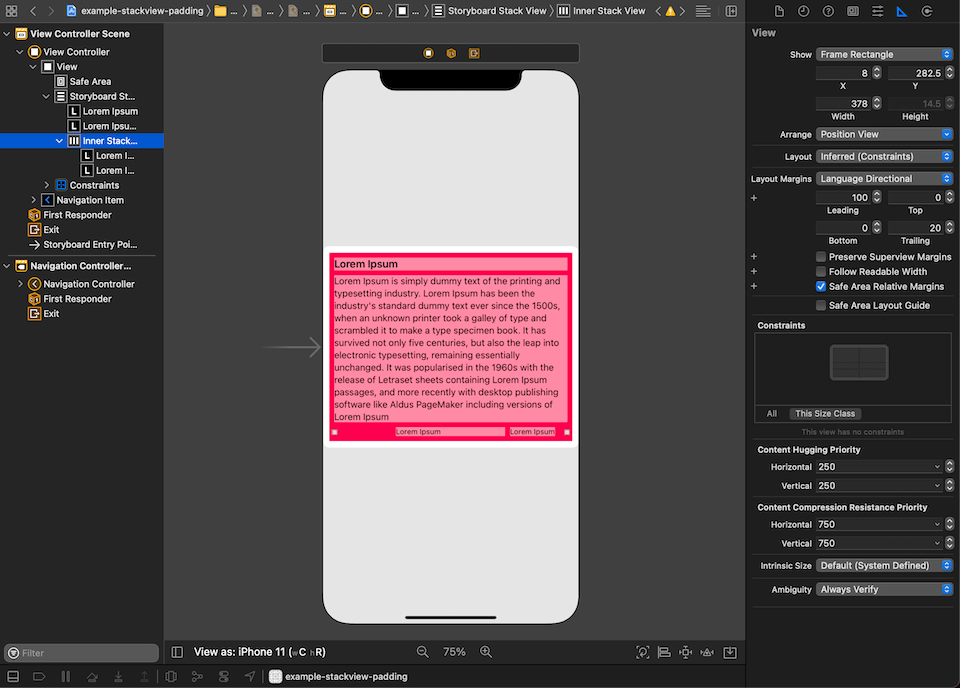
We can achieve this by defining a leading layout margin of 100 and a trailing layout margin of 20 for our inner stack view.
What is the benefit of adding padding with isLayoutMarginsRelativeArrangement?
You can achieve the above layout in a variety of ways. Here are some ways I can think of.
- Use fixed-width views as a spacer by inserting them before and after the horizontal stack view.
- Embed horizontal stack view in another container view and define constraints there.
- Use custom UIStackView spacing for vertical padding.
For me, the above solutions are far more complicated than using isLayoutMarginsRelativeArrangement. You have to create another view and insert them here and there to get the design you want.
Another benefit that you get from using isLayoutMarginsRelativeArrangement is an animation. You can easily animate padding with an animation block.
Change to a new layout margin.
stackView.directionalLayoutMargins = NSDirectionalEdgeInsets.zero

UIView.animate(withDuration: 0.3) {
    stackView.layoutIfNeeded()
}
Change only one edge.
stackView.directionalLayoutMargins.leading = 0

UIView.animate(withDuration: 0.3) {
    stackView.layoutIfNeeded()
}
This is a lot easier than other solutions where you have to keep references to constraints and spacer views for managing them later (change constraint's constant, show/hide spacer views).
Conclusion
I introduced you to a stack view property that helps you quickly add padding to your content. It is not the only way to add padding, but I think it is one of the easiest ones. I hope this would make reduce time and code for your custom UI design.
You can easily support sarunw.com by checking out this sponsor.
AI Grammar: Correct grammar, spell check, check punctuation, and parphrase.
Related Resources
Read more article about UIStackView, UIKit, or see all available topic
Enjoy the read?
If you enjoy this article, you can subscribe to the weekly newsletter.
Every Friday, you'll get a quick recap of all articles and tips posted on this site. No strings attached. Unsubscribe anytime.
Feel free to follow me on Twitter and ask your questions related to this post. Thanks for reading and see you next time.
If you enjoy my writing, please check out my Patreon https://www.patreon.com/sarunw and become my supporter. Sharing the article is also greatly appreciated.
Become a patron Buy me a coffee Tweet ShareCustom UIStackView spacing
Learn a lesser-known API to create a custom UIStackView spacing without nested them together.
How to get the first N elements of array in Swift
Learn a few ways to do it and things you should know when using them.