Github Actions for iOS projects
Table of Contents
It has been a year since Github introduced Github Action[1]. I always want to try it, but I can't find a time to do it. Finally, I got a chance to do it, and here is my hands-on experience with it.
My purpose is to gauge its ease of use and speed. You can compare it with your current CI and judge it for yourself.
In the following example, I will set up Github Actions to build and run tests, record failing UI tests, and release the app to TestFlight.
Configuration file
First thing you have to do is create a .yml file, which is a configuration file that Github Action can understand.
You must store workflow files in the .github/workflows/ directory in your repository. You can name the file whatever you want.
.github/workflows/your-ga-file.ymlYou can easily support sarunw.com by checking out this sponsor.

AI Grammar: Correct grammar, spell check, check punctuation, and parphrase.
on
Github Action will execute the workflow following the events under on key. In this example, we want to run it only when we push to develop and feature branches.
name: CI
# This workflow is triggered on pushes to the repository.
on:
  push:
    branches:
    - develop
    - feature/*
job
A workflow run is made up of one or more jobs. For our simple example, we need only one job.
runs-on
The type of virtual host machine to run the job on. For our case, we need macOS-latest.
Each macOS contain different installed software. You can check a list of supported software, tools, and packages in each virtual environment here.
jobs:
  test:
    # Job name is test
    name: Test
    # This job runs on macOS
    runs-on: macOS-latest
strategy and matrix
A strategy creates a build matrix for your jobs. You can define different variations of an environment to run each job in. A build matrix is a set of different configurations of the virtual environment.
It is easier to understand with an example. In the following example, we create a matrix of two jobs, setting the destination for our test target. As a result, two jobs will be running with a different test destination (iPhone 8 and 9).
strategy:
  matrix:
    destination: ['platform=iOS Simulator,OS=13.1,name=iPhone 8', 'platform=iOS Simulator,OS=13.1,name=iPhone 9']
steps:
  - name: Build and test
    run: bundle exec fastlane scan --destination "${destination}" --scheme "YOUR-SCHEME"
    env:
      destination: $
You can define as many matrices as you want. The total jobs are all the possible cases among those matrices. If you wish to test English and Japanese locale on iPhone 8 and 9, you can declare two matrices like this, which will create a total of 4 jobs (2 destinations x 2 schemes).
strategy:
  matrix:
    destination: ['platform=iOS Simulator,OS=13.1,name=iPhone 8', 'platform=iOS Simulator,OS=13.1,name=iPhone 9']
	  scheme: ['YOU-SCHEME', 'YOU-SCHEME-WITH-JAPANESE-SYSTEM-LANGUAGE']
steps:
  - name: Build and test
    run: bundle exec fastlane scan --destination "${destination}" --scheme "${scheme}"
    env:
      scheme: $
      destination: $
steps
A job contains a sequence of tasks called steps.
You can have a granular step that runs only one command or a multi-line with a sequence of tasks pack together.
A single-line command.
- name: Bundle Install
  run: bundle install
You pipe (|) for a multi-line command.
- name: Dependencies
  run: |
    carthage bootstrap --no-use-binaries --platform iOS --cache-builds
    bundle exec pod install
Environment variables
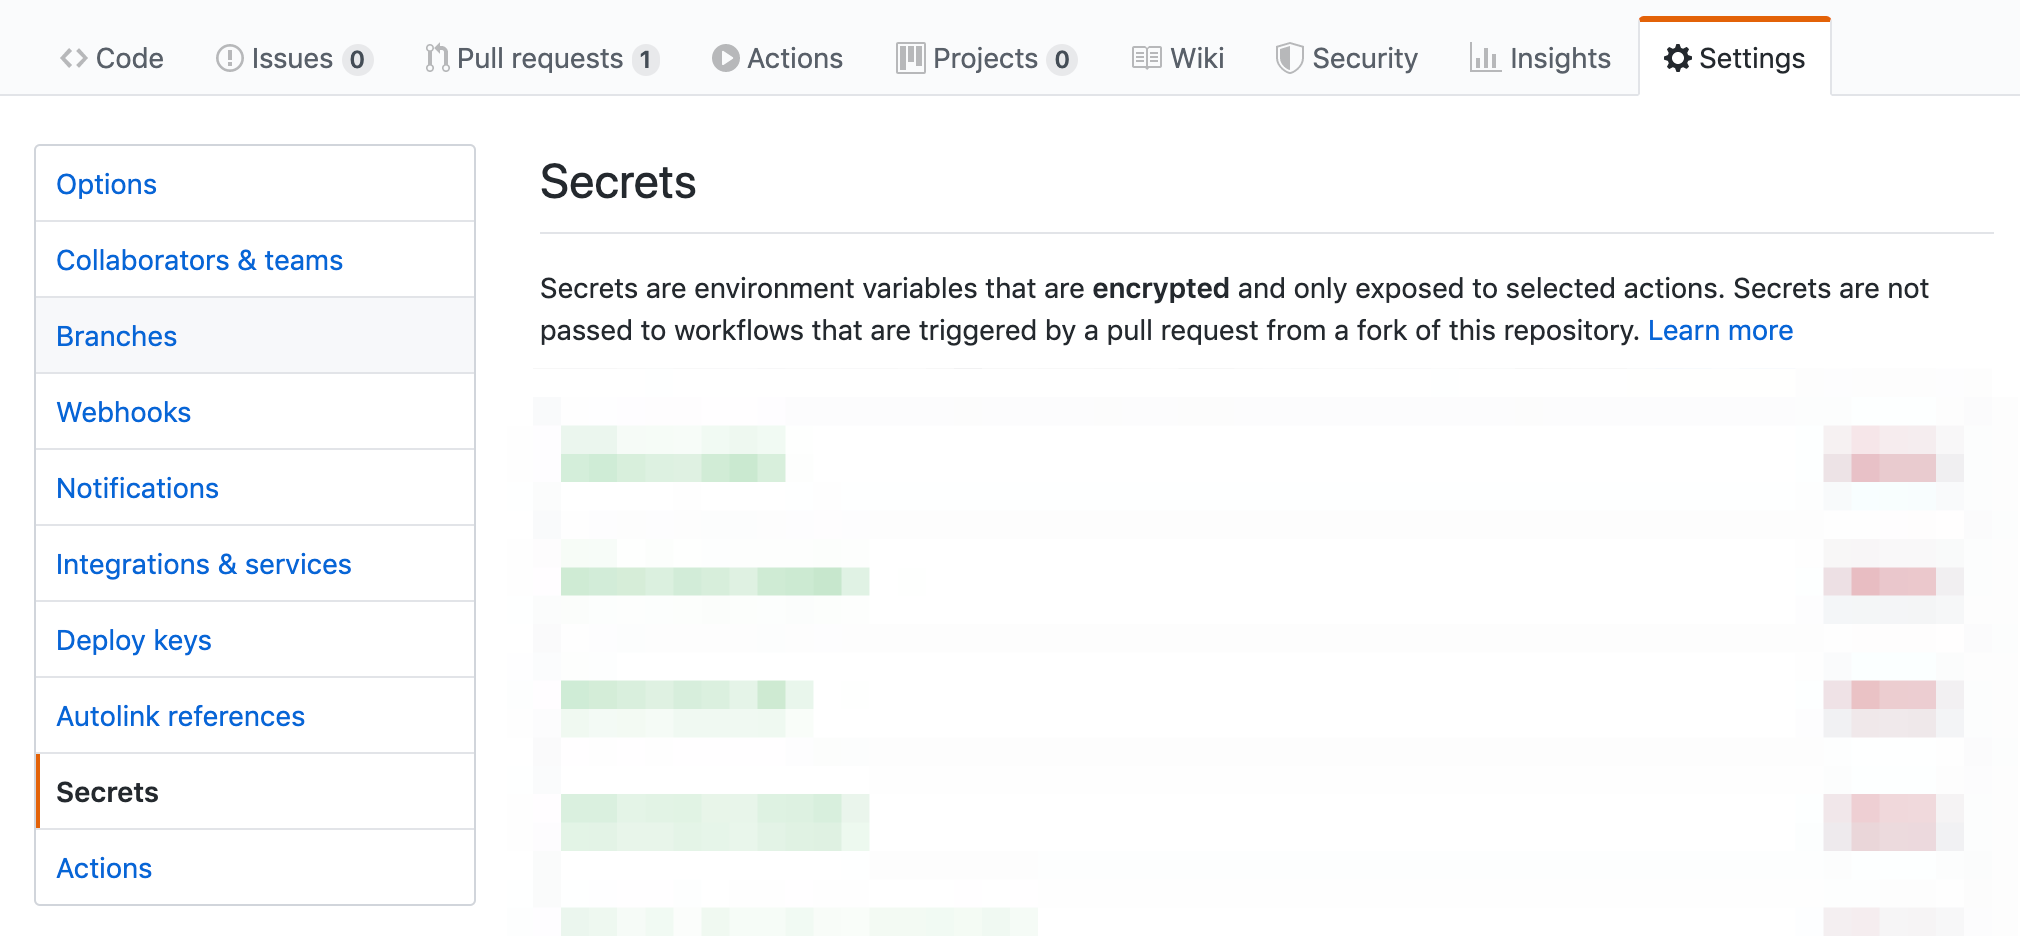
To add/remove new variables.
- Navigate to the main page of the repository.
- Under your repository name, click Settings.
- In the left sidebar, click Secrets.

Adding secrets doesn't mean it available to an action. To pass a secret to an action, set the secret as an input or environment variable in your workflow.
steps:
  - name: My first action
    env:
      SUPER_SECRET: ${{ secrets.SUPER_SECRET }}
      FIRST_NAME: Mona
      LAST_NAME: Octocat
Then you can use ENV['SUPER_SECRET'] in your scripts or actions.
I think these are everything you need to know to run a basic workflow.
Final yml
Here is the workflow which installs Cocoapods and Carthage dependencies, running a test with fastlane scan, upload failing UI tests if needed, and upload it to Testflight.
name: CI
# This workflow is triggered on pushes to the repository.
on:
  push:
    branches:
    - develop
    - feature/*

jobs:
  test:
    # Job name is Test
    name: Test
    # This job runs on macOS
    runs-on: macOS-latest
    strategy:
      matrix:
        destination: ['platform=iOS Simulator,OS=13.1,name=iPhone 8']
        xcode: ['/Applications/Xcode_11.1.app/Contents/Developer']
    steps:
      - name: Checkout
        uses: actions/checkout@v1
      - name: Bundle Install
        run: bundle install
        env:
          BUNDLE_GITHUB__COM: x-access-token:${{ secrets.GITHUB_PERSONAL_ACCESS_TOKEN }}
      - name: Dependencies
        run: |
          carthage bootstrap --no-use-binaries --platform iOS --cache-builds
          bundle exec pod install
        env:
          DEVELOPER_DIR: ${{ matrix.xcode }}
      - name: Build and test
        run: bundle exec fastlane scan --destination "${destination}" --scheme "YOUR_APP_SCHEME"
        env:
          destination: ${{ matrix.destination }}
          DEVELOPER_DIR: ${{ matrix.xcode }}
      - name: Archive Failed Tests artifacts
        if: failure()
        uses: actions/upload-artifact@v1
        with:
          name: FailureDiff
          path: YouAppTests/FailureDiffs
      - name: Releasing
        run: bundle exec fastlane release
        env:
          DEVELOPER_DIR: ${{ matrix.xcode }}
          ...
          YOUR_ENVIRONMENT_VARIABLES_HERE: ${{ secret.XXX }}
          ...
Most of this is quite self explain, I won't go through the detail here, but I have will point out some obstrucle and important note I found.
Hard to access private resources
If your projects need access to other private resources, this isn't a straight forward as other CI. Most CI out there allow us to add ssh key to let CI run on behalf of that ssh. But this isn't a case for Github Actions.
GitHub automatically creates a GITHUB_TOKEN secret[2] to use in your workflow.
When you enable GitHub Actions, GitHub installs a GitHub App on your repository. The GITHUB_TOKEN secret is a GitHub App installation access token used to authenticate on behalf of the GitHub App installed on your repository. The token's permissions are limited to the repository that contains your workflow. So if you need to access private gems or repositories, there might be some workaround involved.
No running build number
I always use CI build number as my Build number (CFBundleVersion). It is easy to trace back to exact commit where the app is running against when you have a build number. Lack of this feature is quite surprising for me. There are some 3rd party actions out there, but this is not straight forward.
BUNDLE_GITHUB__COM for private gem
Due to the reason above. If you have a private gem in your Gemfile, you might need to add BUNDLE_GITHUB__COM[3] to env.
- name: Bundle Install
  run: bundle install
  env:
    BUNDLE_GITHUB__COM: x-access-token:${{ secrets.YOUR_PERSONAL_ACCESS_TOKEN }}
Use DEVELOPER_DIR to select Xcode version
Each environment has many versions of Xcode[4] installed. Set DEVELOPER_DIR in your env to make sure you get the right iOS SDK to work on.
- name: Build and test
  run: bundle exec fastlane scan --destination "${destination}" --scheme "YOUR_APP_SCHEME"
  env:
    destination: $
    DEVELOPER_DIR: '/Applications/Xcode_11.1.app/Contents/Developer'
Use git_basic_authorization in your fastlane match
If you use fastlane match[5], you need to access private repository which isn't possible with GITHUB_TOKEN secret. In this case you need to specify git_basic_authorization in your match command. The value of this key needed to be base64 encoded of username:access_token.
match(git_basic_authorization: base64encoded(username:github_personal-access-token))Result
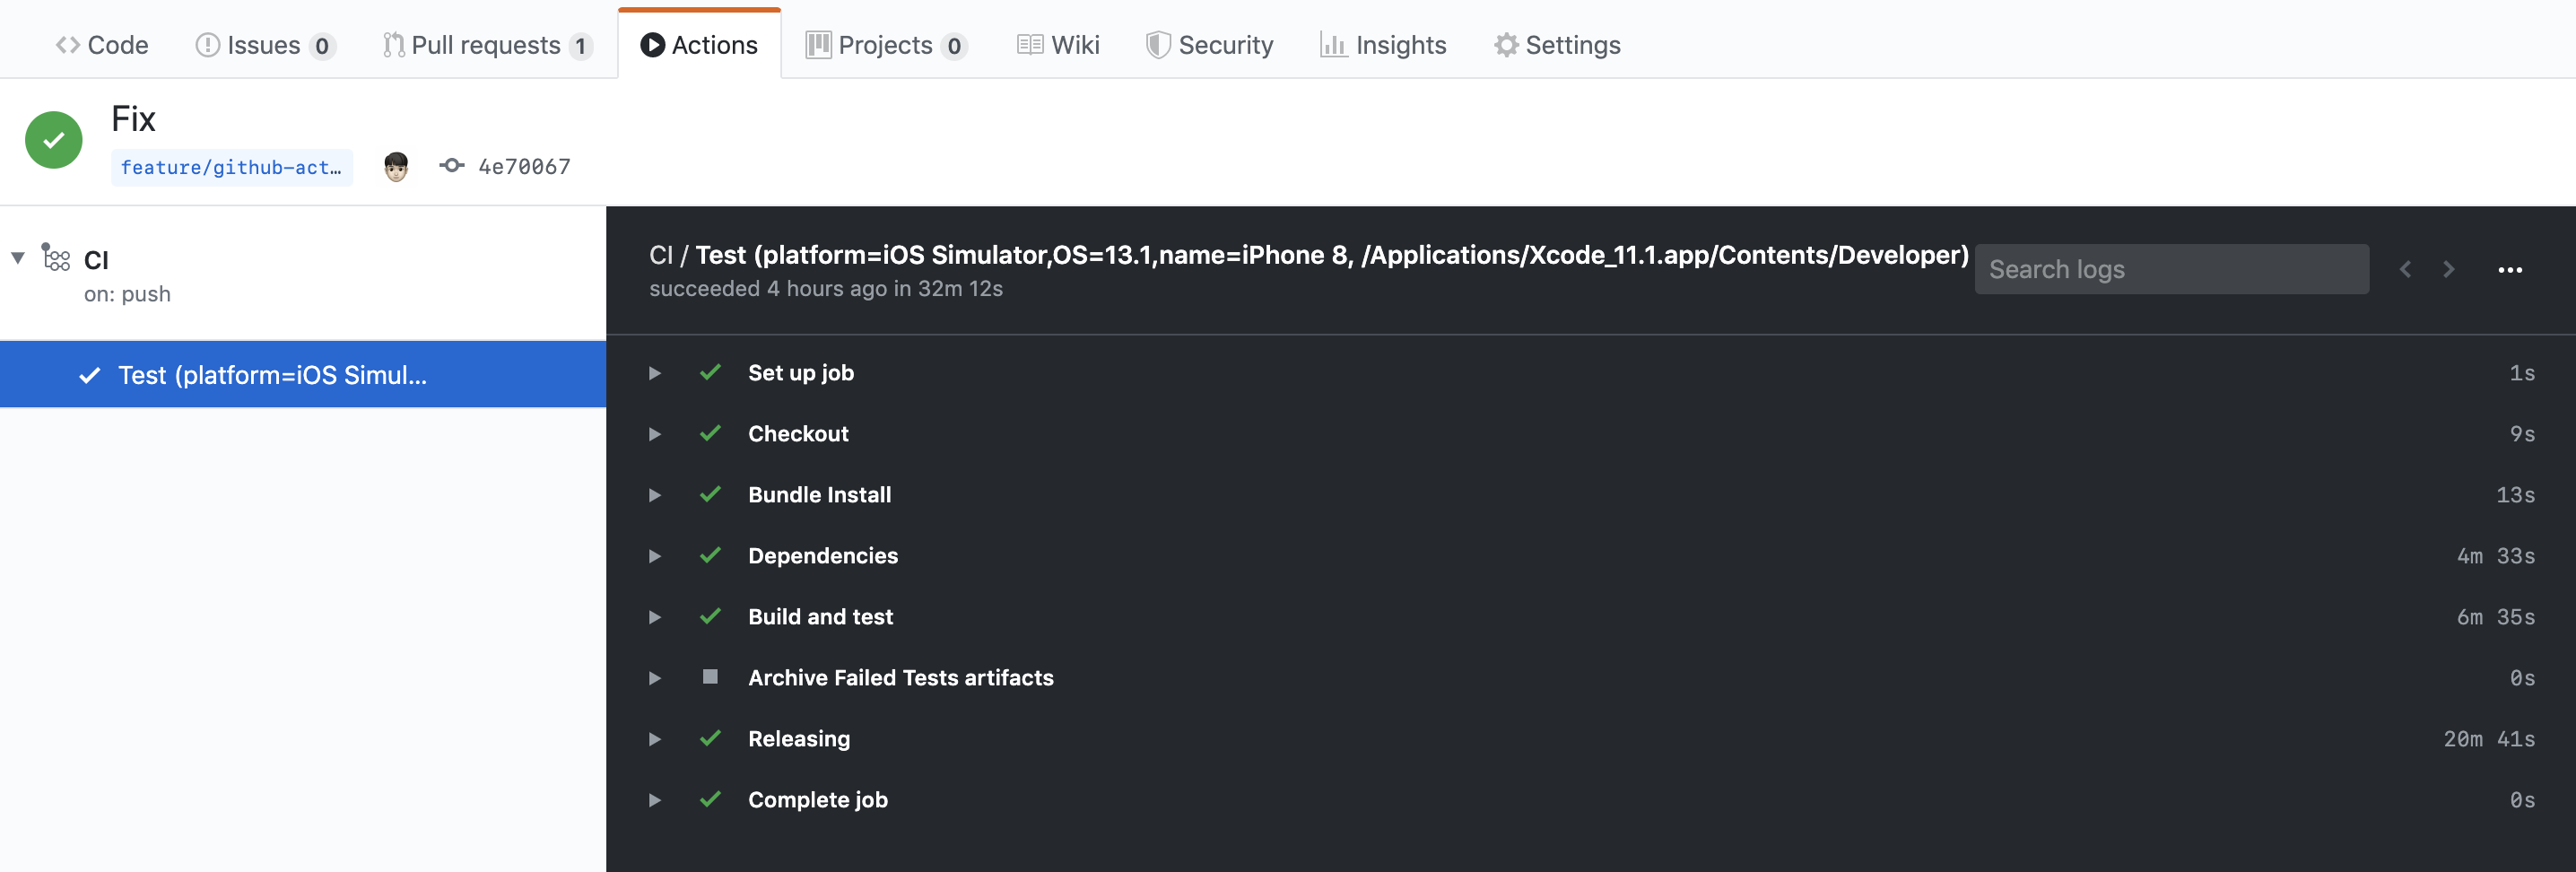
To check the result, go to Actions tab under the main page of the repository.

Following is just one sample I pick up as an example. It might not reflect overall performance.
| Travis | Github Actions | |
|---|---|---|
| fastlane scan | 12m 38.31s | 6m 35s |
| fastlane match/gym/pilot | 26m 32.20s | 20m 41s |
| The whole process of building and testing | ~20m | ~10m |
| The whole process of building, testing, and deploy | ~45m | ~32m |
Conclusion
Github Actions contains most features that other CI have. The only cons I see is the lack of building number and complication of access to private resources.
The speed is on par. For the price, it might vary based on the number of tasks and how often do you run the CI. I think you have to try and see for yourself.
You can easily support sarunw.com by checking out this sponsor.

AI Grammar: Correct grammar, spell check, check punctuation, and parphrase.
Related Resources
Caching dependencies in Github Actions – How to cache Pods, Ruby gem, and Carthage in your iOS project.
Github Action Help page – Table of contents of Github Actions.
Workflow syntax for Github Actions – All available keys for yml.
Development tools for Github Actions – Tools to help you create actions quicker.
Github Actions is a CI from Github introduced on October 17, 2018 https://github.blog/2018-10-17-action-demos/ ↩︎
https://help.github.com/en/github/automating-your-workflow-with-github-actions/virtual-environments-for-github-actions#github_token-secret ↩︎
Xcode versions available https://github.com/actions/virtual-environments/blob/main/images/macos/macos-10.15-Readme.md#xcode ↩︎
Read more article about iOS, CI, Workflow, or see all available topic
Enjoy the read?
If you enjoy this article, you can subscribe to the weekly newsletter.
Every Friday, you'll get a quick recap of all articles and tips posted on this site. No strings attached. Unsubscribe anytime.
Feel free to follow me on Twitter and ask your questions related to this post. Thanks for reading and see you next time.
If you enjoy my writing, please check out my Patreon https://www.patreon.com/sarunw and become my supporter. Sharing the article is also greatly appreciated.
Become a patron Buy me a coffee Tweet Shareif let: How not to use it
Learn how you should write a code that shows your true intention.
Dark color cheat sheet
A cheat sheet that tells you what colors to use to support dark mode. This is a guide for those who want to adopt dark mode, but too lazy to figure out which color to use.