NSAttributedString in SwiftUI
Table of Contents
NSAttributedString is a class in UIKit representing a string with associated attributes such as bold, underscore, or color for portions of its text.
In SwiftUI, we don't have an equivalent view that matched the power of NSAttributedString, but we got something similar. SwiftUI offers a simple and easy way to build text with different attributes. We do it by concatenates the different text views together.
Combining Text Views
We can combine text views in SwiftUI using the following methods.
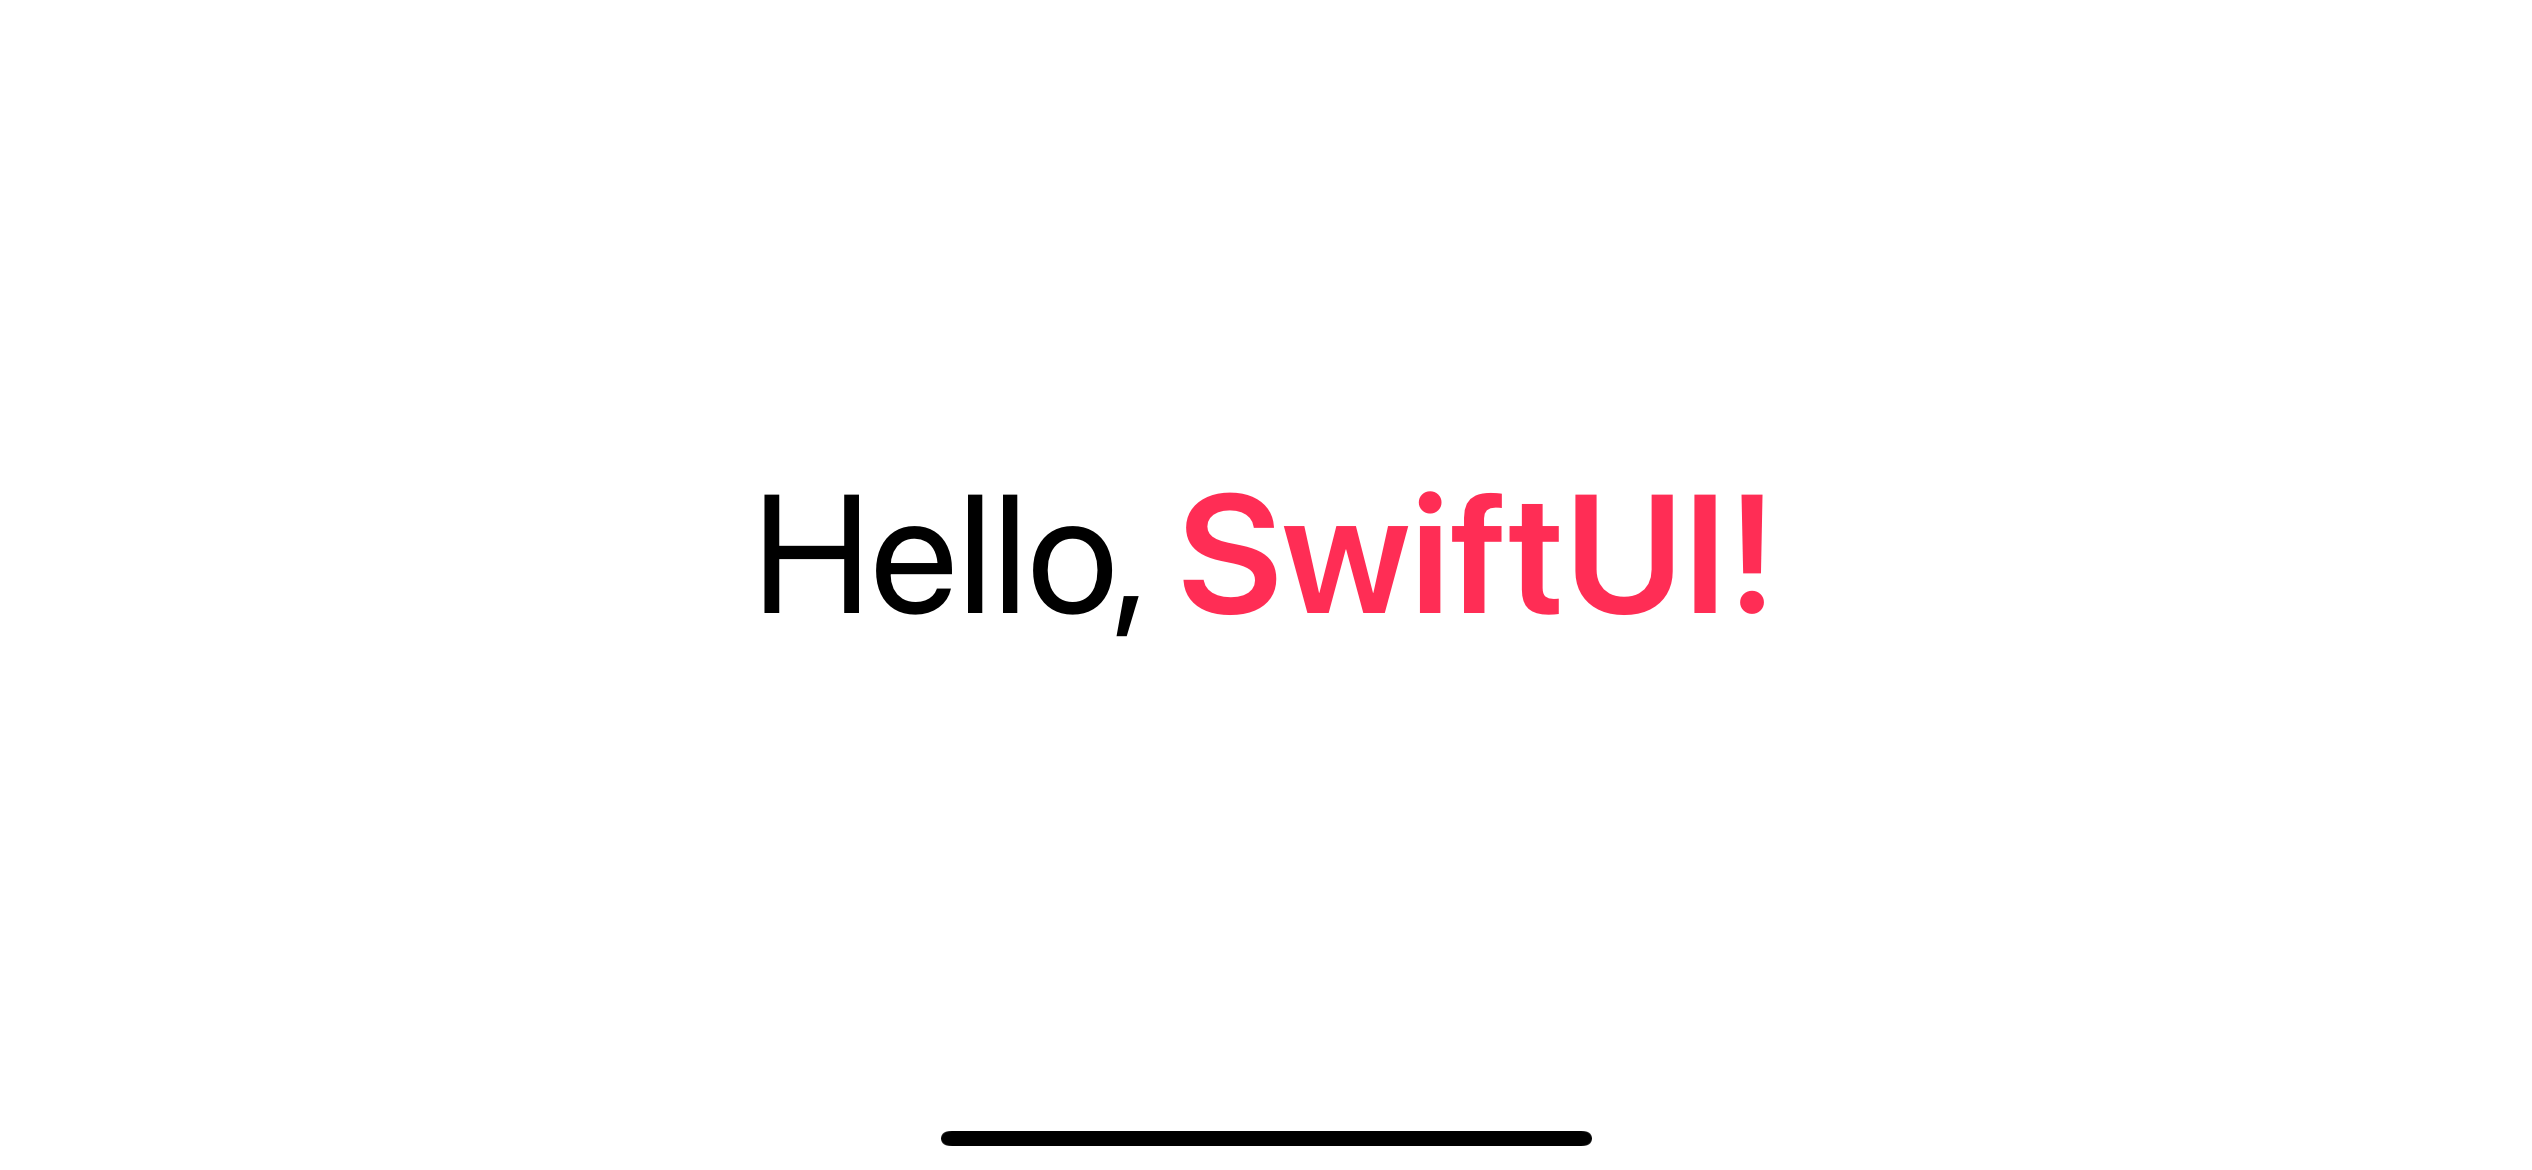
static func + (Text, Text) -> TextFor example, this combines two text views, where the latter is bold and colored with pink, into a multiple style text view.
struct ContentView: View {

    var body: some View {
        Text("Hello, ")
            .italic()
        + Text("SwiftUI!")
            .bold()
            .foregroundColor(.pink)
    }
}
Result:
As you can see, the way we build attributed string in SwiftUI is straightforward. You can easily guess the outcome right away from the code.
There are some behaviors that I want to highlight when you construct your text view using this method.
The result of combining multiple Text views is a single Text view.
You can easily support sarunw.com by checking out this sponsor.
AI Paraphrase:Are you tired of staring at your screen, struggling to rephrase sentences, or trying to find the perfect words for your text?
The result of combining multiple Text views is a single Text view
If you open Debug View Hierarchy, you will see our two Text views render as one.
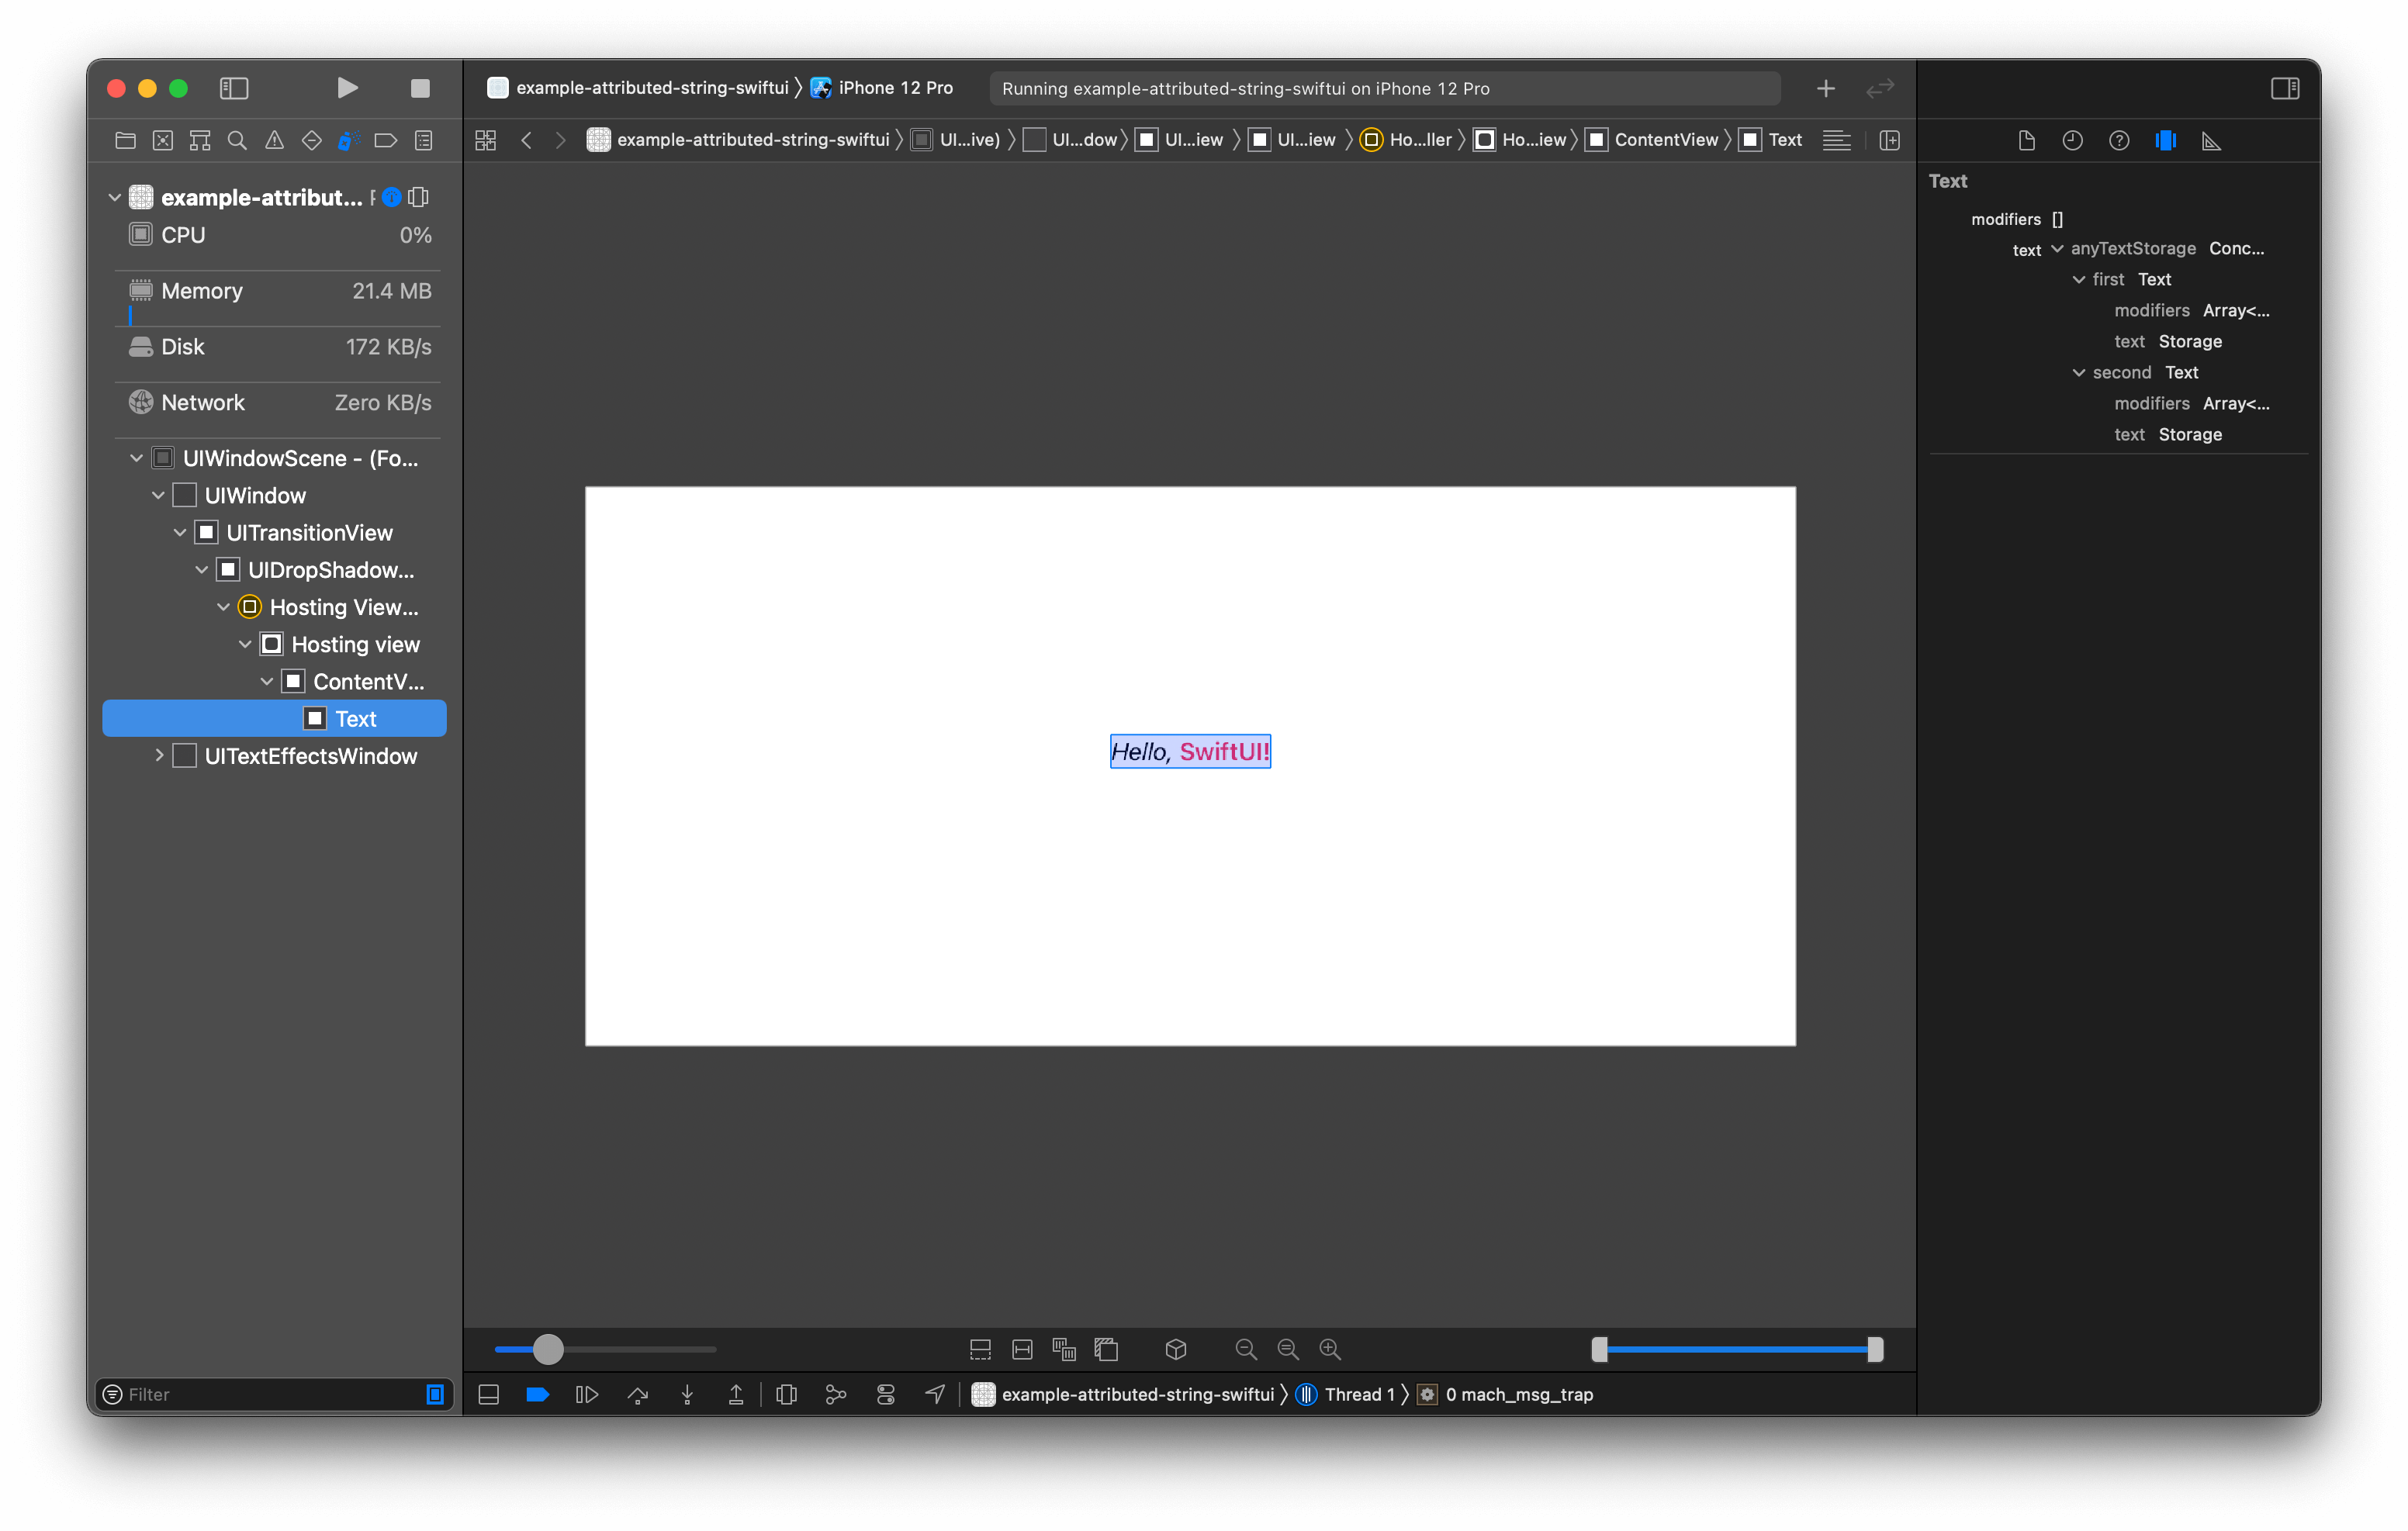
You can set modifier to the combined Text view, which applies to all inner Text views.
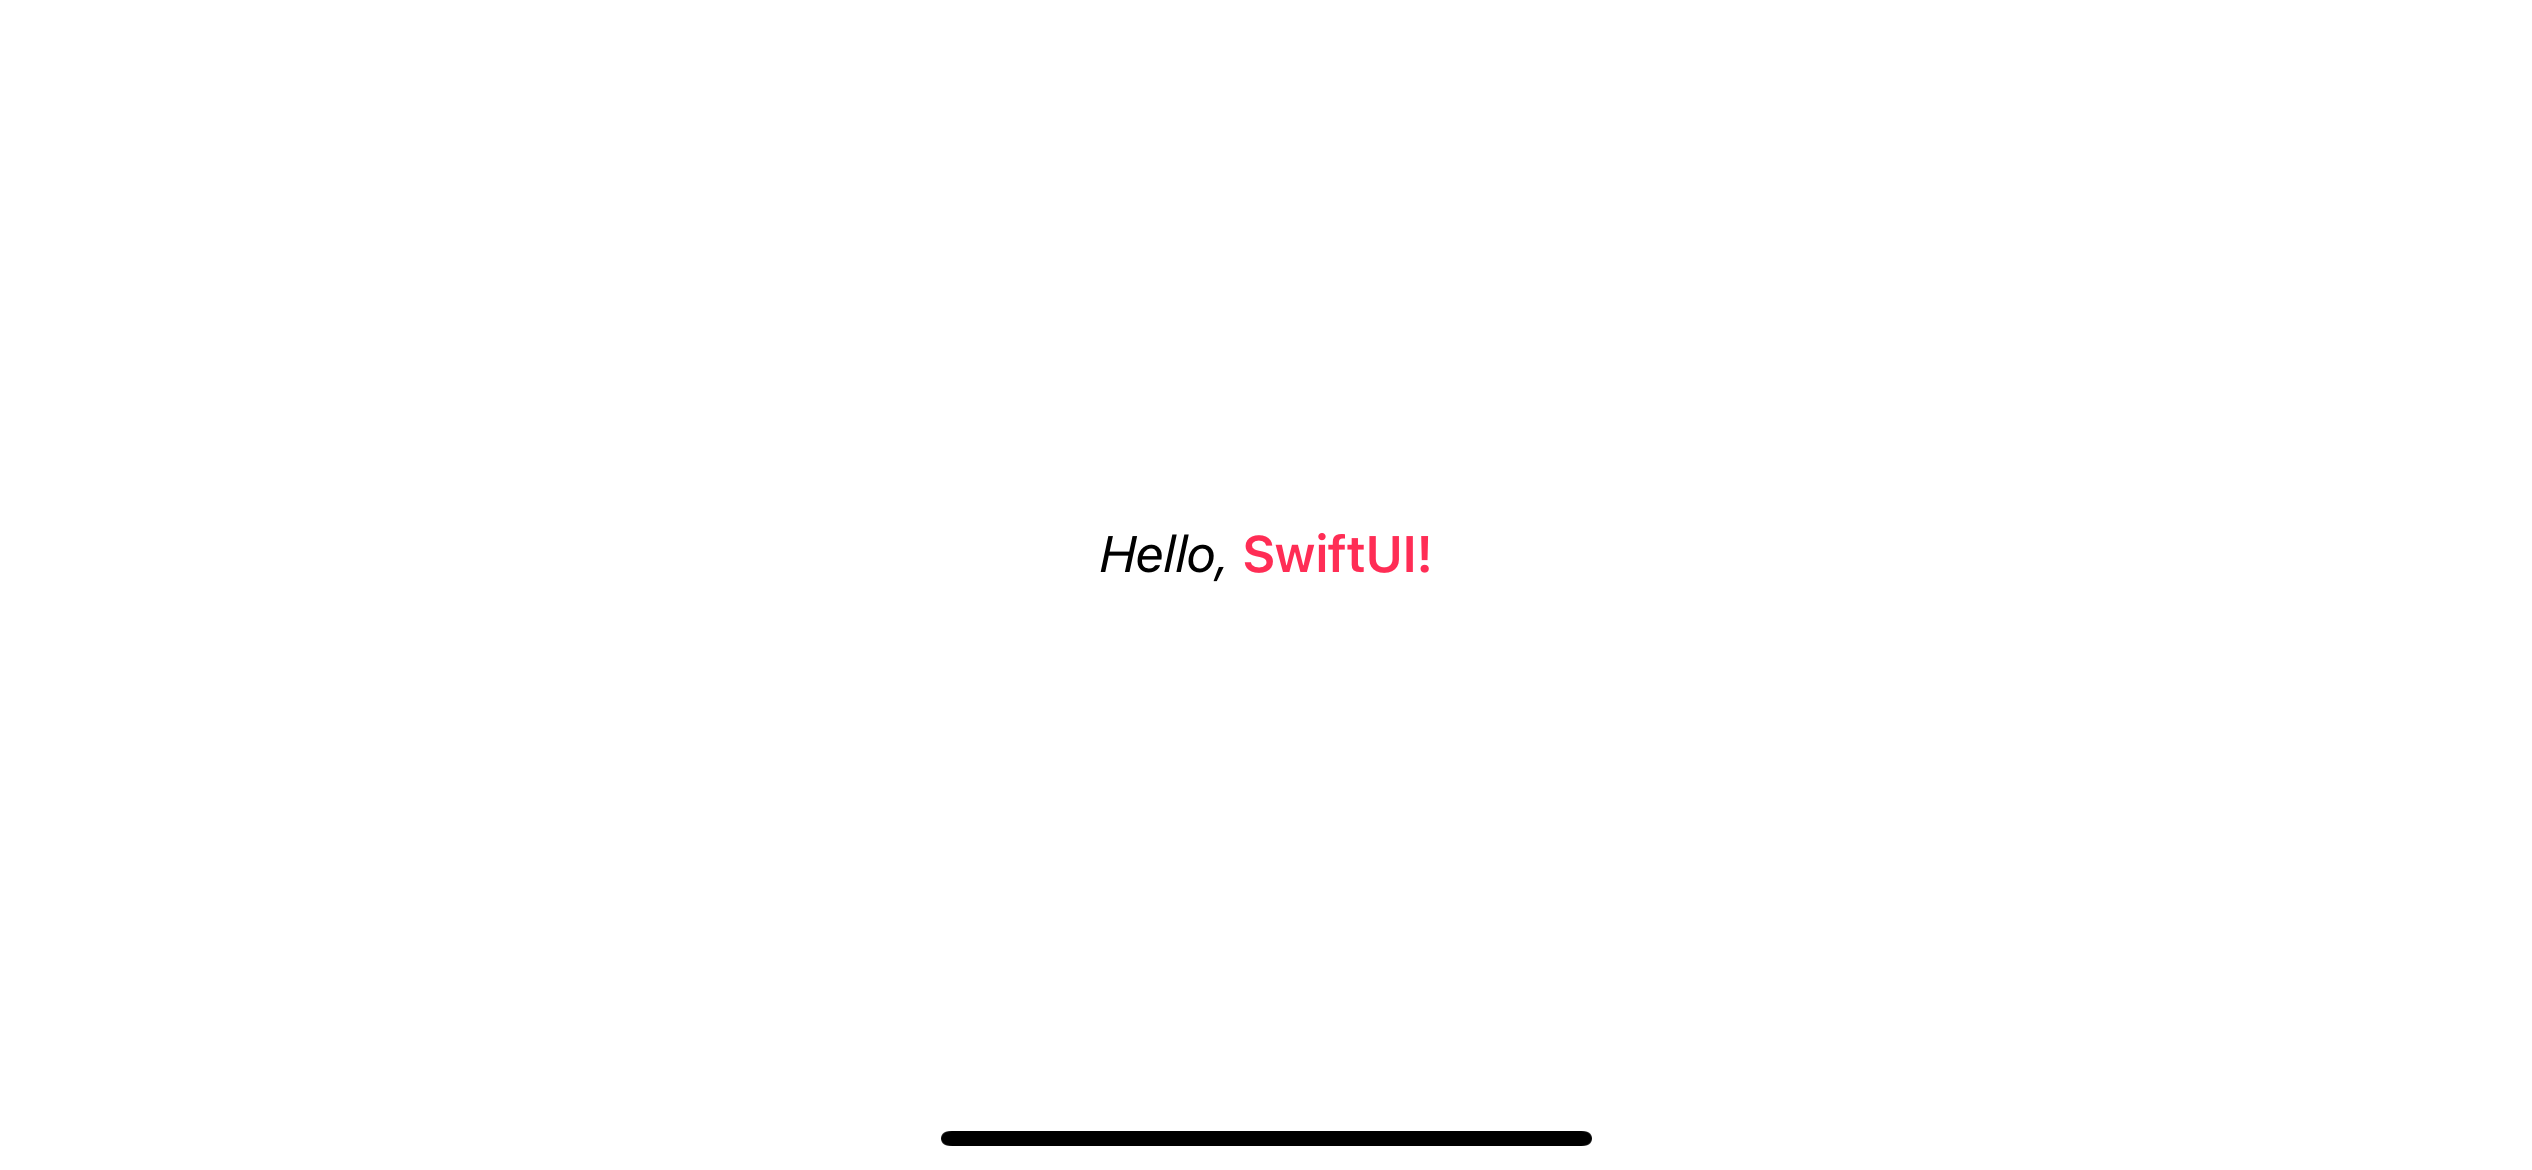
Based on this fact, you can treat the result of two Text views as a Text view. For example, I set the font to the resulting Text view to 56.
struct ContentView: View {

    var body: some View {
        (
      Text("Hello, ")
        .italic()
      + Text("world!")
        .bold()
        .foregroundColor(.pink)
    )
    .font(.system(size: 56))
    }
}
Result:

Modifiers on the inner Text view won't get override by the modifier of the resulting Text view.
Even though the result is a single Text view, the way modifiers apply still use the same rules. The Text view picks the closest modifier and won't get override by the resulting Text view.
In the following example, the "Hello" text already has a font size of 30, which won't get override by the outer font size of 56. The "world!" text has a pink foreground color, which won't get override by the outer purple color.
(
      Text("Hello, ")
        .italic()
        .font(.system(size: 30))
      + Text("world!")
        .bold()
        .foregroundColor(.pink)
    )
    .foregroundColor(.purple)
    .font(.system(size: 56))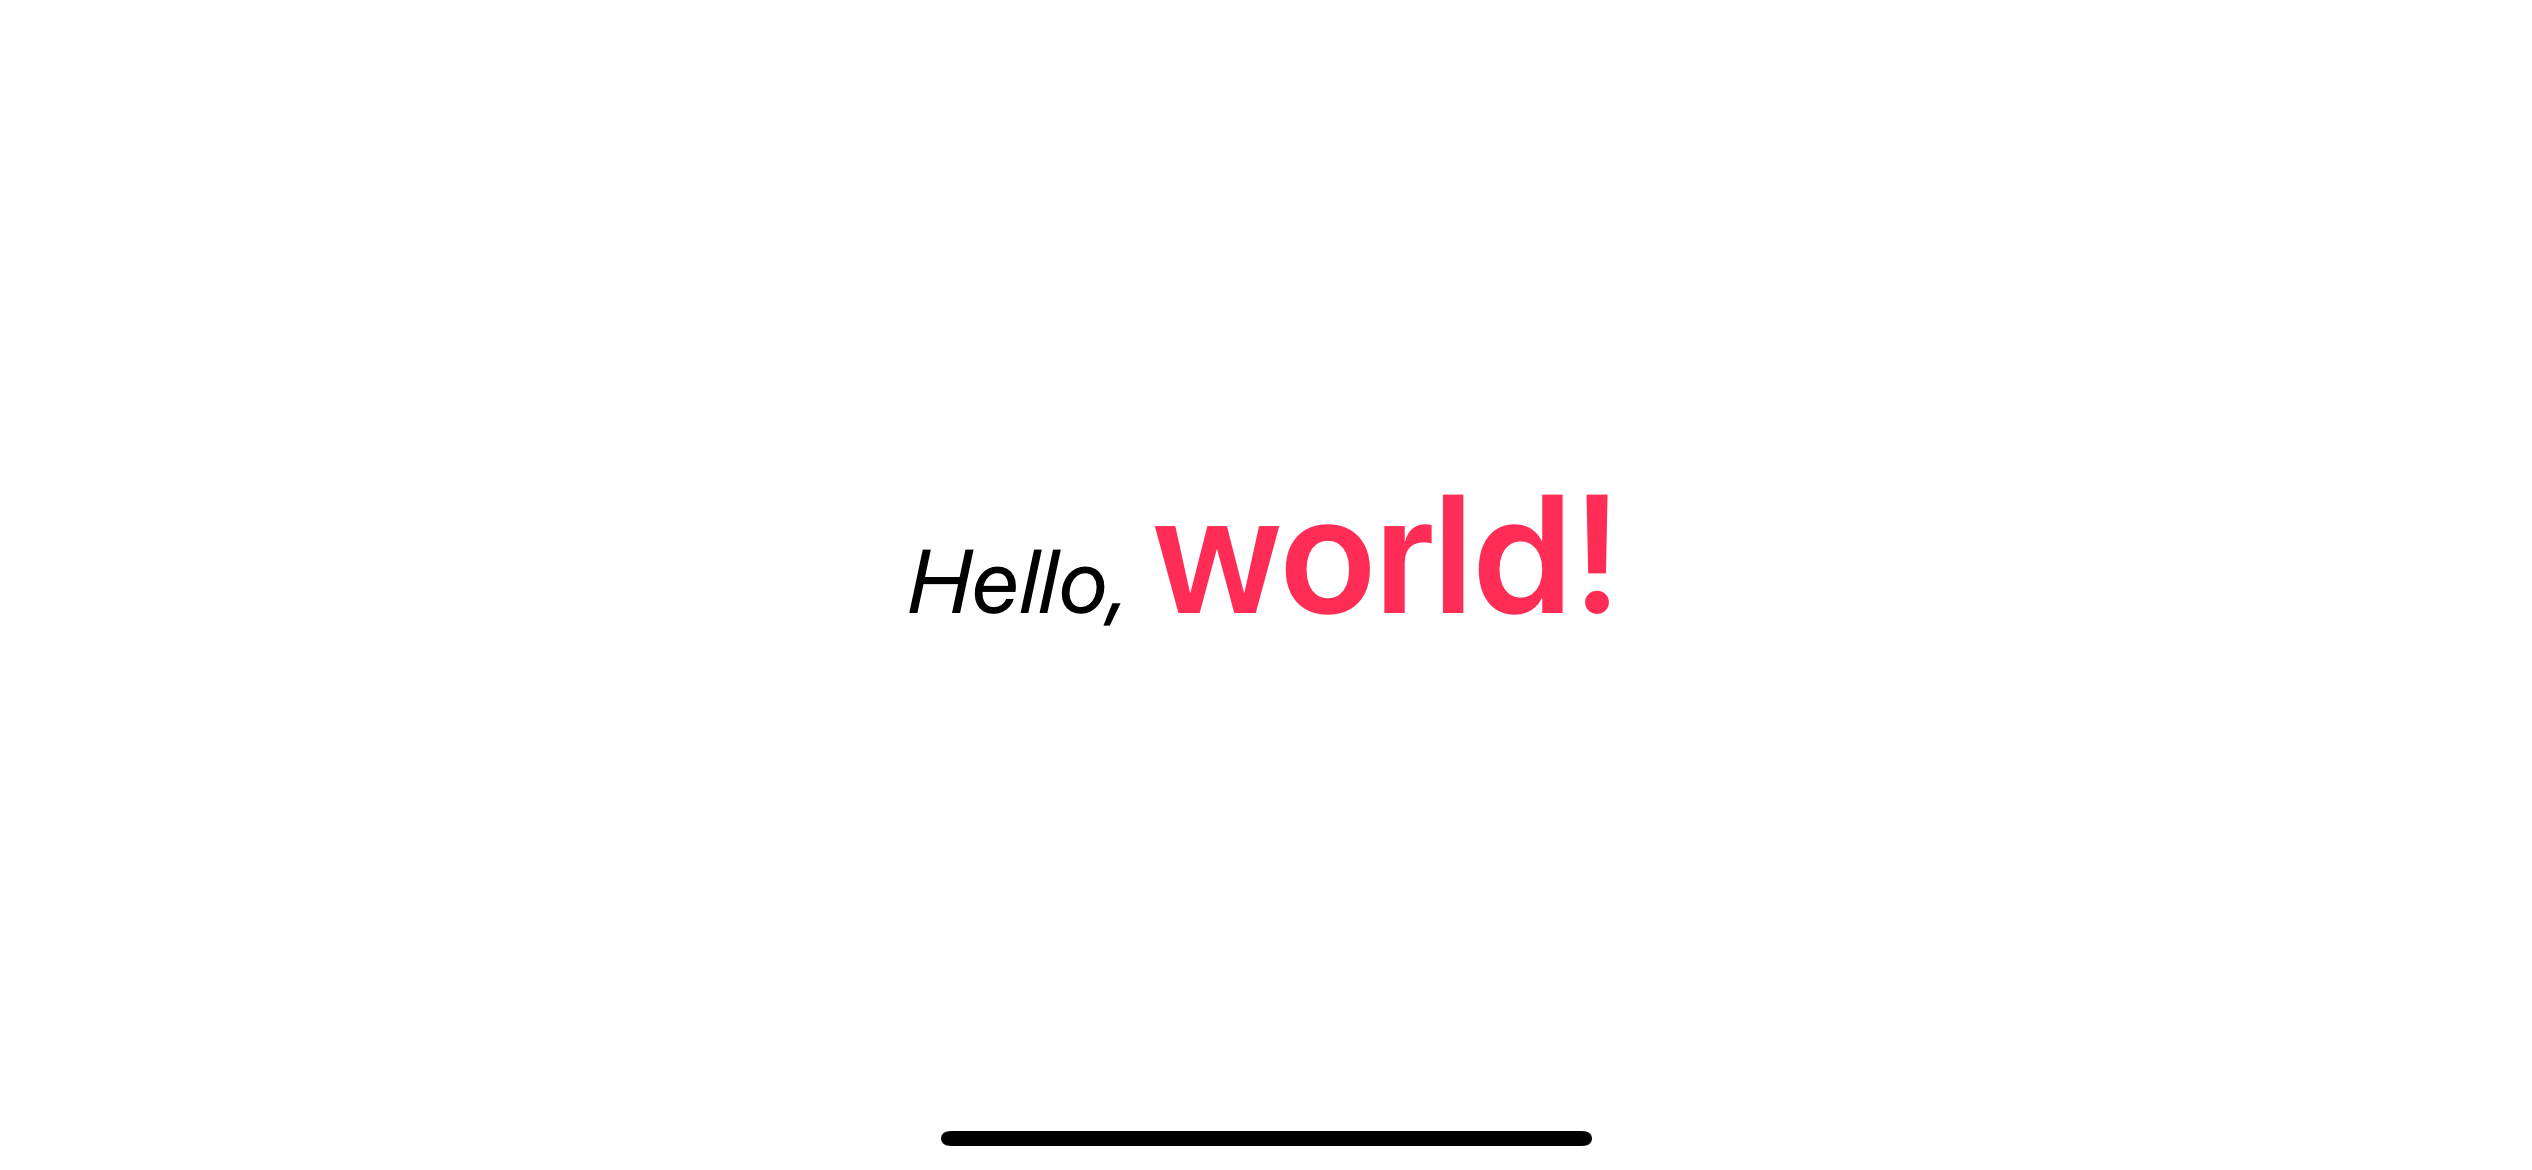
Localization key is not combine
One thing you should aware of is localization. LocalizedStringKey, which is the key used to look up a string in a strings file or strings dictionary file, does not concatenate. Each Text view treats as a separate LocalizedStringKey.
We need to put two localization keys in the Localizable.strings to make it work from the following example.
struct ContentView: View {

    var body: some View {
        Text("Hello, ") + Text("world!")
    }
}
We need this:
Localizable.strings
"Hello, " = "สวัสดี, ";
"world!" = "ชาวโลก!";
Not this:
Localizable.strings
"Hello, world!" = "สวัสดี ชาวโลก!";You can easily support sarunw.com by checking out this sponsor.
AI Paraphrase:Are you tired of staring at your screen, struggling to rephrase sentences, or trying to find the perfect words for your text?
Accessibility Label showing as one
Even though we have to translate two text views separately, the result is a text with one accessibility label. That's means VoiceOver automatically recognizes them as a single piece of text.
Read more article about SwiftUI, String, AttributedString, or see all available topic
Enjoy the read?
If you enjoy this article, you can subscribe to the weekly newsletter.
Every Friday, you'll get a quick recap of all articles and tips posted on this site. No strings attached. Unsubscribe anytime.
Feel free to follow me on Twitter and ask your questions related to this post. Thanks for reading and see you next time.
If you enjoy my writing, please check out my Patreon https://www.patreon.com/sarunw and become my supporter. Sharing the article is also greatly appreciated.
Become a patron Buy me a coffee Tweet ShareHow to resize and position an image in UIImageView using contentMode
Learn thirteen ways to position and resize UIImage in UIImageView.
How to preview a device in landscape orientation with SwiftUI Previews
SwiftUI doesn't have a built-in way to preview for a device in landscape orientation at the moment, but we can simulate that with a few modifiers.