Move your view around with Drag Gesture in SwiftUI
SwiftUI's UIPanGestureRecognizer equivalent.
Table of Contents
Just like UIPanGestureRecognizer in UIKit, SwiftUI provides a way to trace the movement of fingers around the screen, and apply it to your content. Let's see how easy it is to implement this in SwiftUI. In this article, we will try to add drag functionality to a rectangle view and learn its options along the way.
Setup
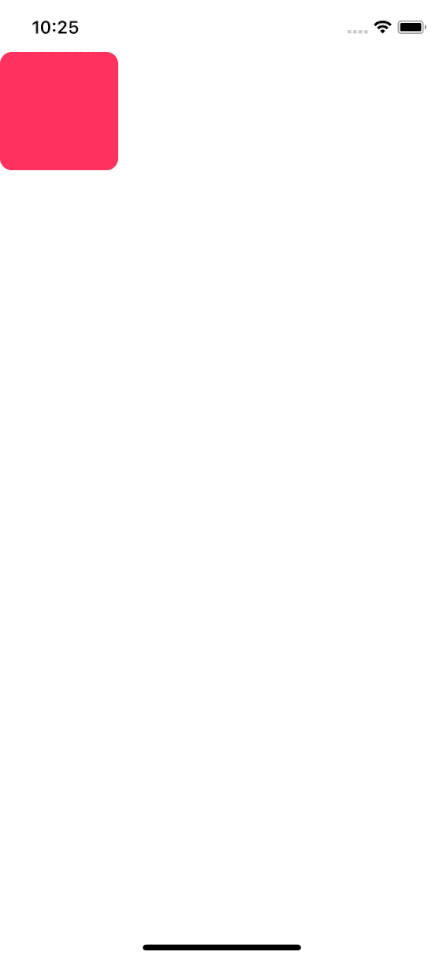
In this article, we will create a simple rectangle and try to move that around.
struct ContentView: View {
    @State private var location: CGPoint = CGPoint(x: 50, y: 50) // 1

    var body: some View {
        RoundedRectangle(cornerRadius: 10)
            .foregroundColor(.pink)
            .frame(width: 100, height: 100)
            .position(location) // 2
    }
}
<1> To make our view movable, we declare a new @State variable, location, so we can change this value later and make our view change the position accordingly.
<2> We set the position with the value from the @State variable.

You can easily support sarunw.com by checking out this sponsor.
AI Grammar: Correct grammar, spell check, check punctuation, and parphrase.
Drag Gesture
A drag gesture in SwiftUI is just a simple struct like most thing in SwiftUI world.
var simpleDrag: some Gesture {
    DragGesture()
}
This is a valid gesture, but we won't get anything out of it unless we listen to some of its events. There are three methods that we can observe the gesture's value changes. I will introduce all of them as we progress.
Let's start with the first one, .onChanged.
.onChanged
onChanged(_:) adds an action to perform when the gesture’s value changes. It will pass a DragGesture.Value
, which contains the attributes of a drag gesture. You probably rely on this .onChanged most of the time.
In this case, we use location value, which contains the position of the drag gesture (finger position) and set it to our @State variable.
var simpleDrag: some Gesture {
    DragGesture()
        .onChanged { value in
            self.location = value.location
        }
}
This gesture should make our view move along our finger. The final step is to attach this gesture to our view.
Add a gesture to a view
We can add a gesture to any view with .gesture modifier. Call the modifier on a view that you want to add a gesture and pass the gesture to it.
struct ContentView: View {
    @State private var location: CGPoint = CGPoint(x: 50, y: 50)

    var simpleDrag: some Gesture {
        DragGesture()
            .onChanged { value in
                self.location = value.location
            }
    }

    var body: some View {
        RoundedRectangle(cornerRadius: 10)
            .foregroundColor(.pink)
            .frame(width: 100, height: 100)
            .position(location)
            .gesture(
                simpleDrag
            )

    }
}
Run it, and you have a working drag functionality.

Caveat
If you look closely, you will see a little jump when we start dragging the rectangle. That's because value.location is the value of the current position of drag gesture. In simple words, a finger position. Set this value as .position(location), which is the center point of the view, causing a jump of the view's center to our finger position.
Let's add some visual clues on this one by adding a green circle around the finger position.
struct ContentView: View {
    @State private var location: CGPoint = CGPoint(x: 50, y: 50)
    @State private var fingerLocation: CGPoint? // 1

    var simpleDrag: some Gesture {
        DragGesture()
            .onChanged { value in
                self.location = value.location
            }
    }

    var fingerDrag: some Gesture { // 2
        DragGesture()
            .onChanged { value in
                self.fingerLocation = value.location
            }
            .onEnded { value in
                self.fingerLocation = nil
            }
    }

    var body: some View {
        ZStack { // 3
            RoundedRectangle(cornerRadius: 10)
                .foregroundColor(.pink)
                .frame(width: 100, height: 100)
                .position(location)
                .gesture(
                    simpleDrag.simultaneously(with: fingerDrag) // 4
                )
            if let fingerLocation = fingerLocation { // 5
                Circle()
                    .stroke(Color.green, lineWidth: 2)
                    .frame(width: 44, height: 44)
                    .position(fingerLocation)
            }
        }
    }
}
<1> Adding another @State variable, fingerLocation, for our finger position.
<2> Declare another drag gesture for our finger. This is like our previous gesture with one difference; we set it to nil after the drag ended.
<3> We wrap our view inside ZStack since we want to drag another circle on top of the rectangle view.
<4> We add our newly created fingerDrag gesture to the existing one. We make it work at the same time with .simultaneously modifier.
<5> We draw a circle around fingerLocation if the value presented, showing a visual clue of our finger.
Run the code and try dragging again. The problem should be clearer now.
.onEnded
We use .onEnded to adds an action to perform when the gesture ends. We use it to reset fingerLocation back to nil in our previous example.
.onEnded { value in
    self.fingerLocation = nil
}
.updating
We can make our fingerDrag gesture cleaner with the help of updating(_:body:). This is not as straight forward as onChanged and .onEnded. Let's see how to use it and how it can help make our fingerDrag cleaner.
From the Apple document:
updating(_:body:)
Updates the provided gesture state property as the gesture’s value changes.
What is gesture state?
Gesture state is a property wrapper that updates a property while the user performs a gesture and resets the property back to its initial state when the gesture ends.
You can declare it like other property wrappers. It comes with an ability to reset the property back to its initial state when the gesture ends. In our case, we only keep track of finger position during the gesture and reset afterward; this makes good use to gesture state ability.
In short, you can think gesture state (@GestureState) is similar to @State with two noticeable differences.
- Read-only and can only update via
updating(_:body:). - Reset once the gesture is completed.
It is easier to see it in action.
First, we declare a new gesture state variable.
@GestureState private var fingerLocation: CGPoint? = nilUpdating @GestureState
@GestureState has a special way of setting a value, you can set it like this self.fingerLocation = value.location. The only way to update it is via updating(_:body:).
@GestureState private var fingerLocation: CGPoint? = nil

var fingerDrag: some Gesture {
    DragGesture()
        .updating($fingerLocation) { (value, fingerLocation, transaction) in // 1, 2
            fingerLocation = value.location // 3
        }
}
<1> We put a binding to a view’s GestureState property as a first parameter of .updating.
<2> The second parameter is the callback that SwiftUI invokes as the gesture’s value changes. It contains three parameters.
- The current state of the gesture which is the DragGesture.Value, the same one that we received in
.onChanged. - The
inoutvalue of our gesture state parameter. This is where we can modify our gesture state property. - The transaction is the context of the gesture.
<3> We modify @GestureState by assigning a new value to the second inout parameter.
The following is the full code converting fingerDrag to .updating.
struct ContentView: View {
    @State private var location: CGPoint = CGPoint(x: 50, y: 50)
    @GestureState private var fingerLocation: CGPoint? = nil

    var simpleDrag: some Gesture {
        DragGesture()
            .onChanged { value in
                self.location = value.location
            }
    }

    var fingerDrag: some Gesture {
        DragGesture()
            .updating($fingerLocation) { (value, fingerLocation, transaction) in
                fingerLocation = value.location
            }
    }

    var body: some View {
        ZStack {
            RoundedRectangle(cornerRadius: 10)
                .foregroundColor(.pink)
                .frame(width: 100, height: 100)
                .position(location)
                .gesture(
                    simpleDrag.simultaneously(with: fingerDrag)
                )
            if let fingerLocation = fingerLocation {
                Circle()
                    .stroke(Color.green, lineWidth: 2)
                    .frame(width: 44, height: 44)
                    .position(fingerLocation)
            }
        }
    }
}
Make it better
At this point, you have learned everything about drag gesture, you know how to add actions to a specific life cycle of the gesture through .onChanged, .onEnded, and .updating. Let's make the jump go away.
Translation instead of Location
In our previous example, we use location property from DragGesture.Value, but what we really need is a translation which we can apply to the current position. Luckily DragGesture.Value has translation which returns the total translation from the start of the drag gesture to the current event of the drag gesture.
The translation returns the total translation from the start. That's means we need another variable to keep the start position. That's all we need to do to fix a jumping bug.
struct ContentView: View {
    @State private var location: CGPoint = CGPoint(x: 50, y: 50)
    @GestureState private var fingerLocation: CGPoint? = nil
    @GestureState private var startLocation: CGPoint? = nil // 1

    var simpleDrag: some Gesture {
        DragGesture()
            .onChanged { value in
                var newLocation = startLocation ?? location // 3
                newLocation.x += value.translation.width
                newLocation.y += value.translation.height
                self.location = newLocation
            }.updating($startLocation) { (value, startLocation, transaction) in
                startLocation = startLocation ?? location // 2
            }
    }

    var fingerDrag: some Gesture {
        DragGesture()
            .updating($fingerLocation) { (value, fingerLocation, transaction) in
                fingerLocation = value.location
            }
    }

    var body: some View {
        ZStack {
            RoundedRectangle(cornerRadius: 10)
                .foregroundColor(.pink)
                .frame(width: 100, height: 100)
                .position(location)
                .gesture(
                    simpleDrag.simultaneously(with: fingerDrag)
                )
            if let fingerLocation = fingerLocation {
                Circle()
                    .stroke(Color.green, lineWidth: 2)
                    .frame(width: 44, height: 44)
                    .position(fingerLocation)
            }
        }
    }
}
<1> Declare a new @GestureState for keeping a start location.
<2> We set startLocation to current rectangle position. Since startLocation is @GestureState, it will reset once the gesture ended, which makes it ready for the next gesture.
<3> Instead set .position directly from value.location, we set it with a translation from startLocation.
Finally, we have smooth dragging behavior.

You can easily support sarunw.com by checking out this sponsor.
AI Grammar: Correct grammar, spell check, check punctuation, and parphrase.
Related Resources
Read more article about SwiftUI, Gesture, or see all available topic
Enjoy the read?
If you enjoy this article, you can subscribe to the weekly newsletter.
Every Friday, you'll get a quick recap of all articles and tips posted on this site. No strings attached. Unsubscribe anytime.
Feel free to follow me on Twitter and ask your questions related to this post. Thanks for reading and see you next time.
If you enjoy my writing, please check out my Patreon https://www.patreon.com/sarunw and become my supporter. Sharing the article is also greatly appreciated.
Become a patron Buy me a coffee Tweet ShareQuick way to open a Custom URL Scheme in iOS Simulator
In the past, the way I test a custom URL scheme is to go to Safari and open up any of my custom URLs. If you are still doing that, there is a better alternative.
Make a placeholder view in SwiftUI with redacted()
SwiftUI provides an easy way to convert to render any view into a placeholder style by redacting its content.