Scaling custom fonts automatically with Dynamic Type
Table of Contents
Font is an essential part of an app. A good selection of font would make your app stand out from the crowd. But whatever fonts you choose, you have to make sure it doesn't lose its core function, readability. You might feel reluctant to use a custom font in the past because you might lose the benefit of dynamic type goodness that Apple provides with their system font. Since iOS 11, this is no longer the case. You can easily use your custom font dynamic type.
What is Dynamic Type?
Apple introduced dynamic type back in iOS 7 as a way to let users choose their preferred text size to suit their needs.
Here are the weight, size, and leading values for each text style at large text size. You can see others value at Human Interface Guidelines - Dynamic Type Sizes
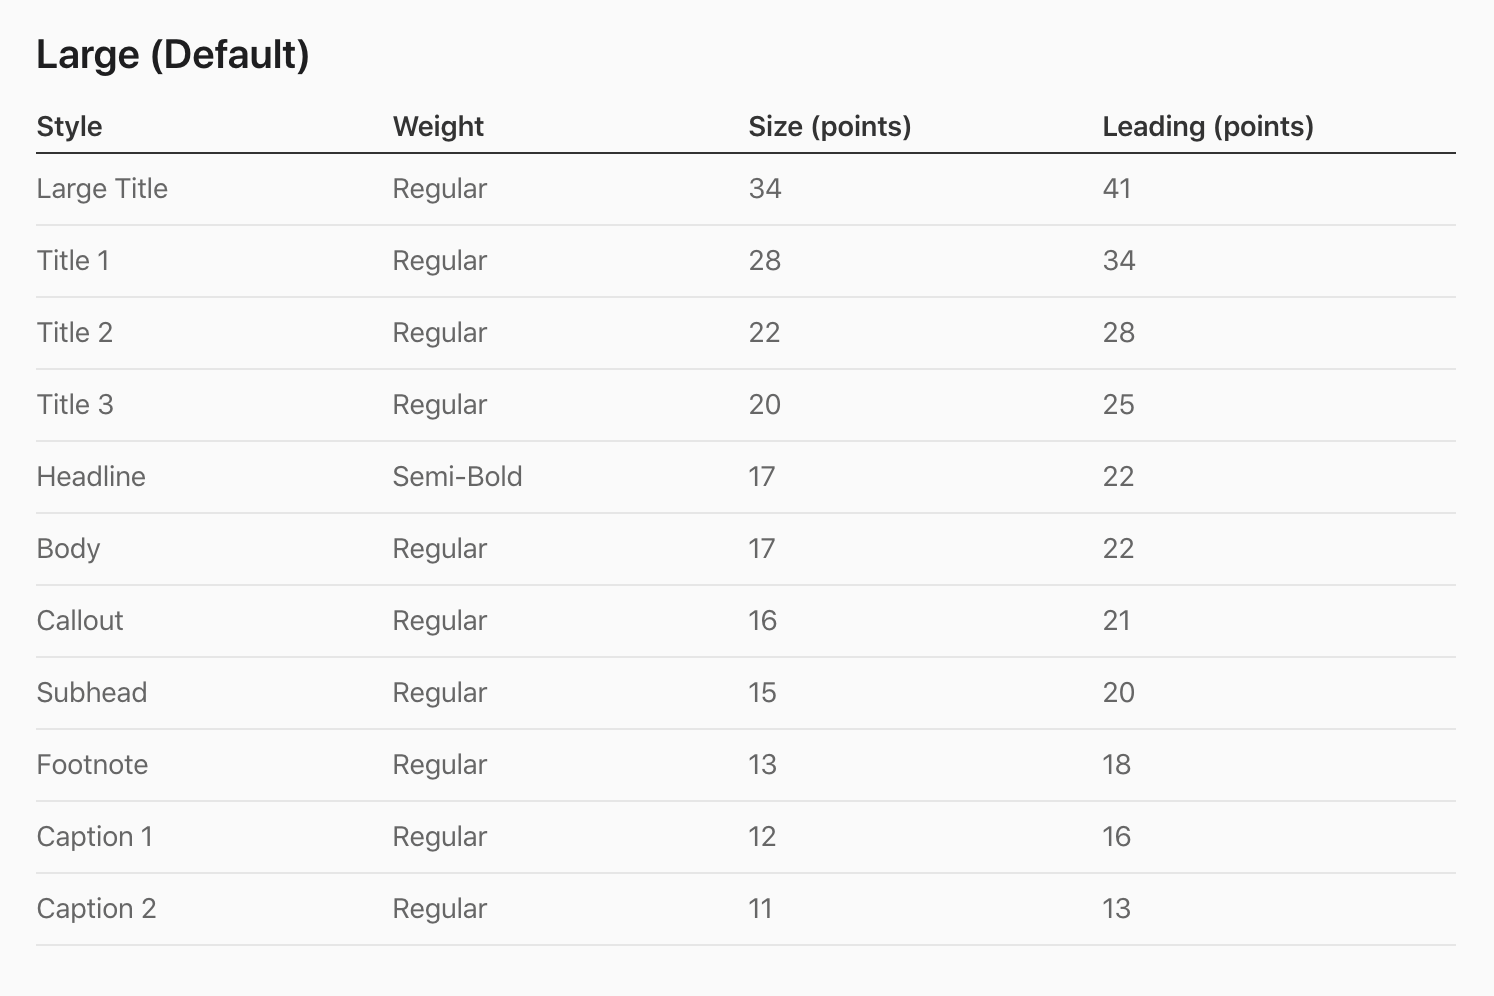
As you can see from the table, dynamic type work together with text style (.headline, .subheadline, .body, .footnote, .caption1, .caption2, .largeTitle, .title1, .title2, .title3 and .callout). Text style is used to dictate a scale factor for each text size. For example, .caption2, which is the smallest text style, won't scale down any further than a size of 11 because it will hard to read beyond that point. A .caption2 text style size will remain 11pt on Extra Small, Small, Medium, and Large text size.
To get a dynamic type font, we initialize a font with a UIFont class method preferredFont(forTextStyle:).
let label = UILabel()
label.font = UIFont.preferredFont(forTextStyle: .body)
label.adjustsFontForContentSizeCategory = true // <1>
<1> Set adjustsFontForContentSizeCategory to true will automatically updates the font when the device's content size category changes.
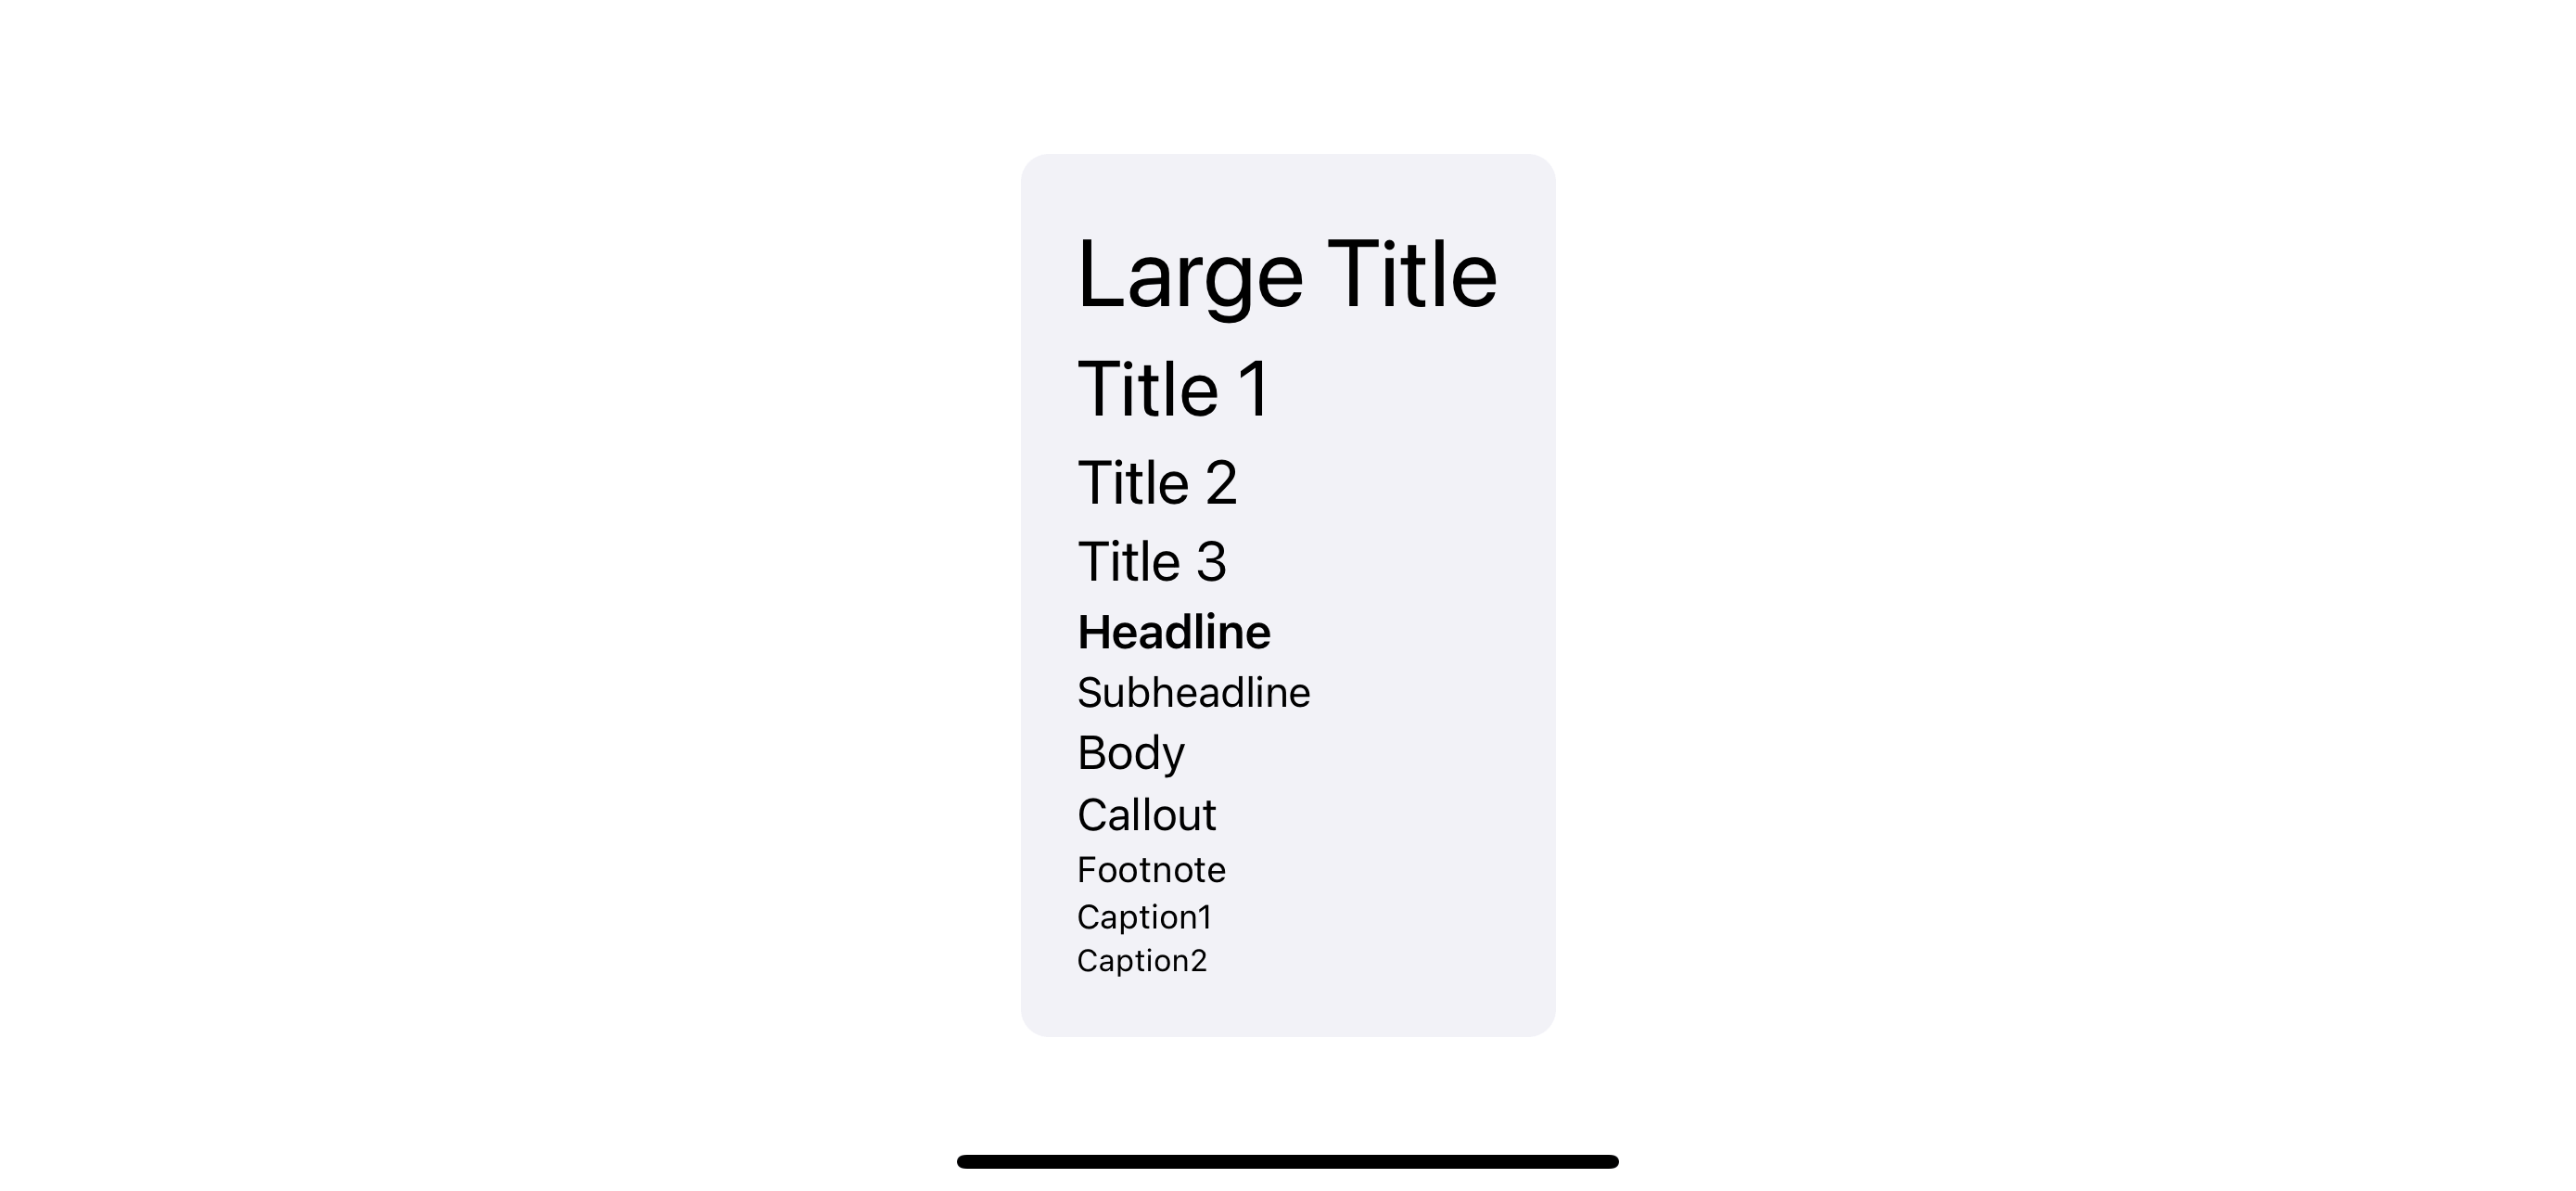
The above code will return an Apple San Francisco regular font of size 17 (body style on large text size). The following is an example of all text styles on the large text size.
You can easily support sarunw.com by checking out this sponsor.

Translate your app In 1 click: Simplifies app localization and helps you reach more users.
Change the font size
You can change the font size by:
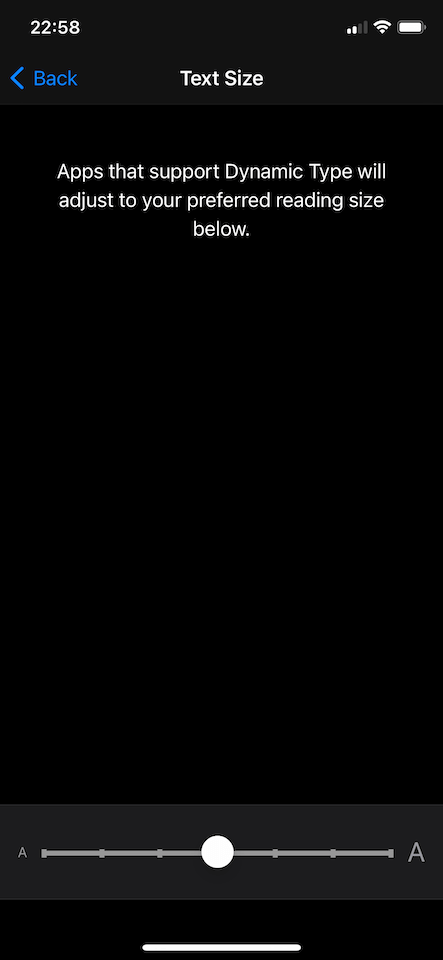
- Go to Settings > Display & Brightness, then select Text Size.
- Drag the slider to select the font size you want.
Make the font even bigger
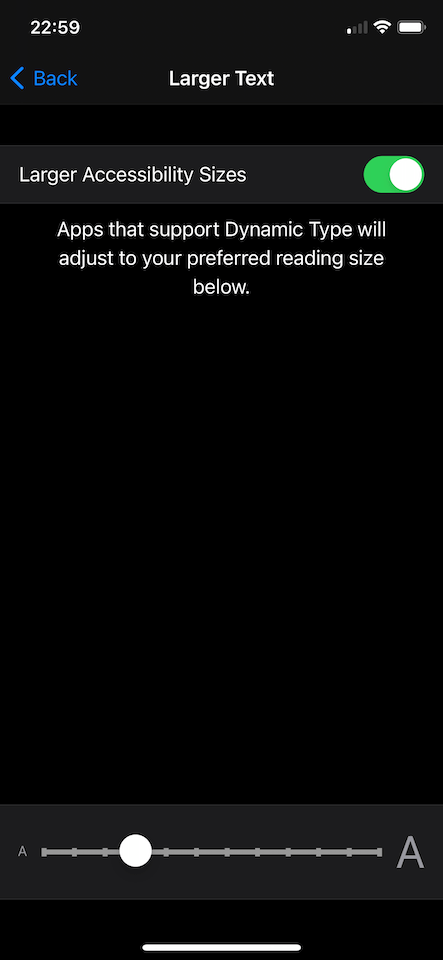
Apple has five extra large font sizes, but you need to enable it in the Accessibility menu.
- Go to Settings > Accessibility, then select Display & Text Size.
- Tap Larger Text for larger font options.
- Drag the slider to select the font size you want.
Debugging font size
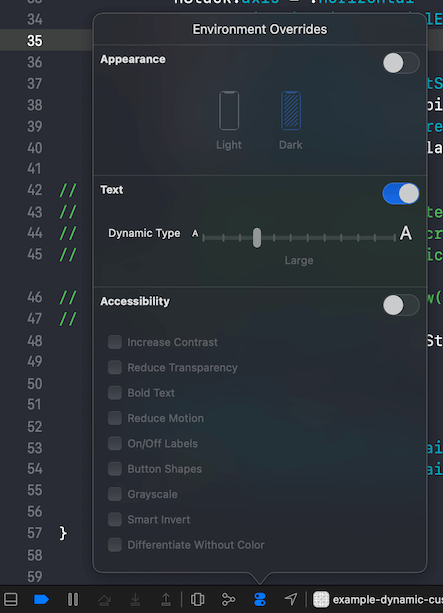
During the development phase, you can also adjust the font directly from Xcode.
- Click on Environment Overrides icon or Click on Debug Menu > View Debugging > Configure Environment Overrides...
- Turn on "Text".
- Drag the slider to select the font size you want.
Using Custom Fonts
The total font variation of 12 text sizes and 11 text styles is in 132 variations. You might be giving up to use a custom font with dynamic type by looking at this number. Luckily, in iOS 11, Apple introduces UIFontMetrics to make our life easier.
To use it, we create a UIFontMetrics of specified text style. You then pass your custom font to the scaledFont(for:) method to obtain a font object that is based on your custom font, has the appropriate style information, and automatically scales to match the current Dynamic Type settings.
let customFont = UIFont(name: "Merriweather-Regular", size: 17)! // <1>
let label = UILabel()
label.adjustsFontForContentSizeCategory = true
label.font = UIFontMetrics(forTextStyle: .body).scaledFont(for: customFont) // <2>
<1> We initilize our custom font. In this example, I use Merriweather font from Google Fonts.
<2> We define UIFontMetrics with body text style and then use it to scale our custom font.
Caveat
If you try to get every text style for your custom fonts, the result might not be what you expected.
Here is a snippet where I loop through every text style and apply it to my custom font.
let customFont = UIFont(name: "Merriweather-Regular", size: 17)!

let styles: [UIFont.TextStyle] = [.largeTitle, .title1, .title2, .title3, .headline, .subheadline, .body, .callout, .footnote, .caption1, .caption2]
for style in styles {
    ...
    let label = UILabel()
    label.adjustsFontForContentSizeCategory = true
    label.text = String(describing: style)
    label.font = UIFontMetrics(forTextStyle: style).scaledFont(for: customFont)
    ...
}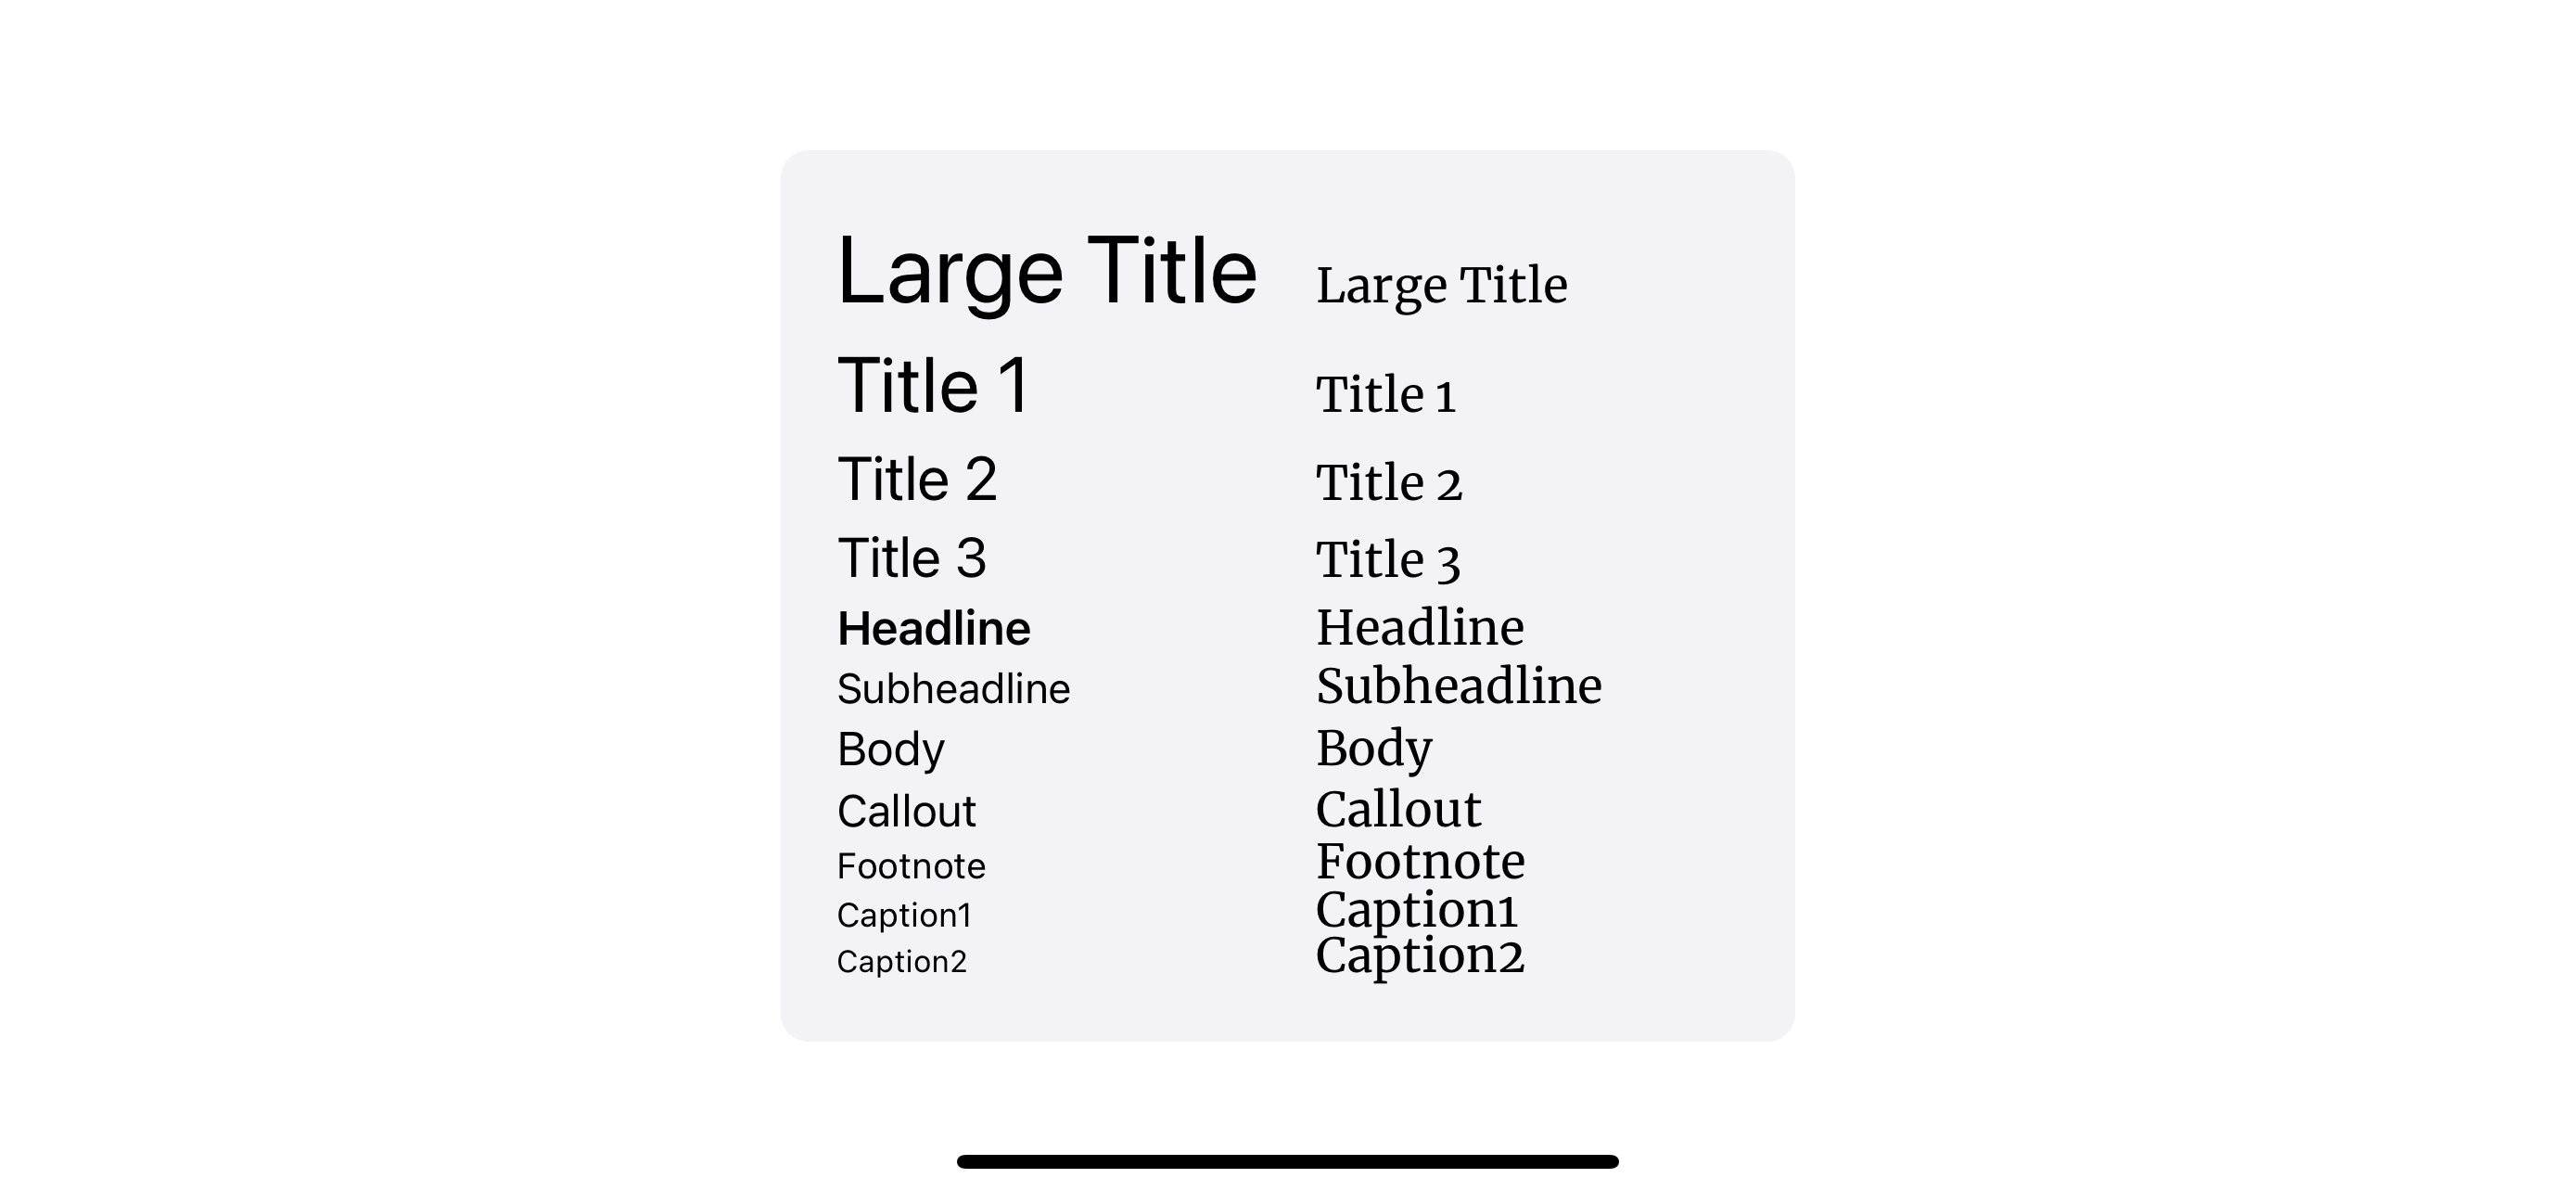
Why they got the same size?
As you can see, the result of our custom font is the same for all text styles. That's because what scaledFont(for:) really does is scale our font with a multiplier that appropriates for specified text style for the current text size. In the example above, we run on a large text size environment, which is the default size, so the multiplier for all text styles is the same: 1 (no scaling).
We will start to see the difference multiplier when we change the text size. The following are the result when we try adjusting text size to extra small and extra extra extra large.
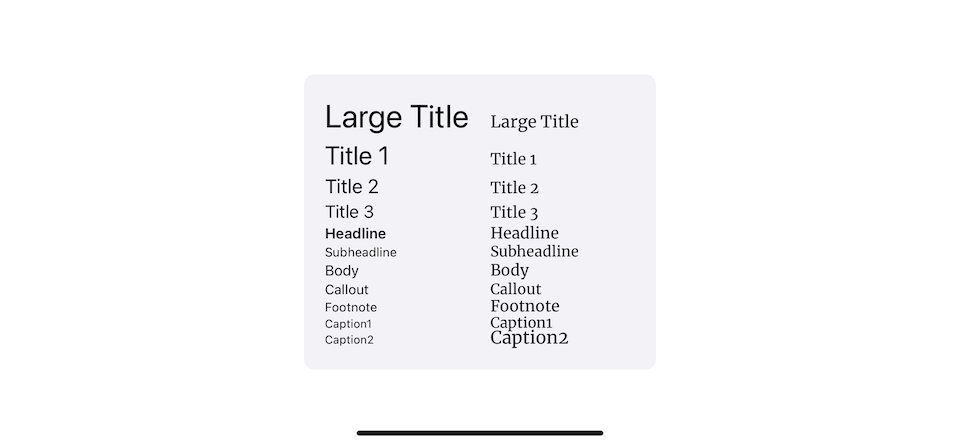
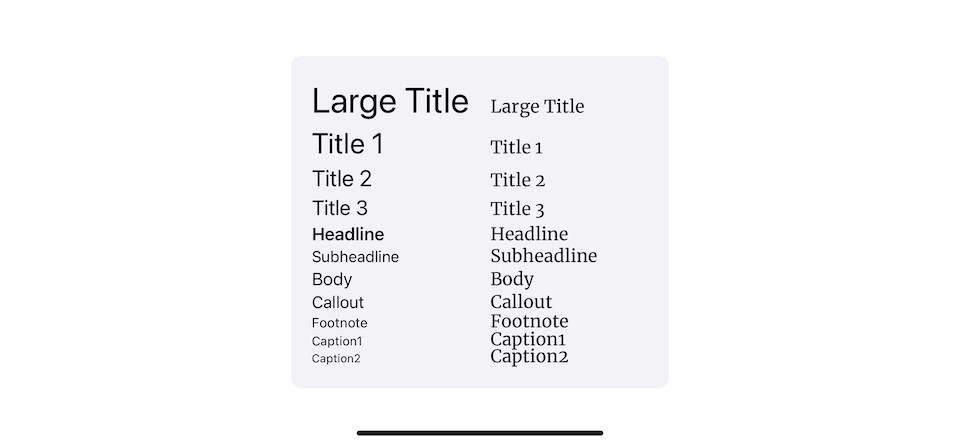
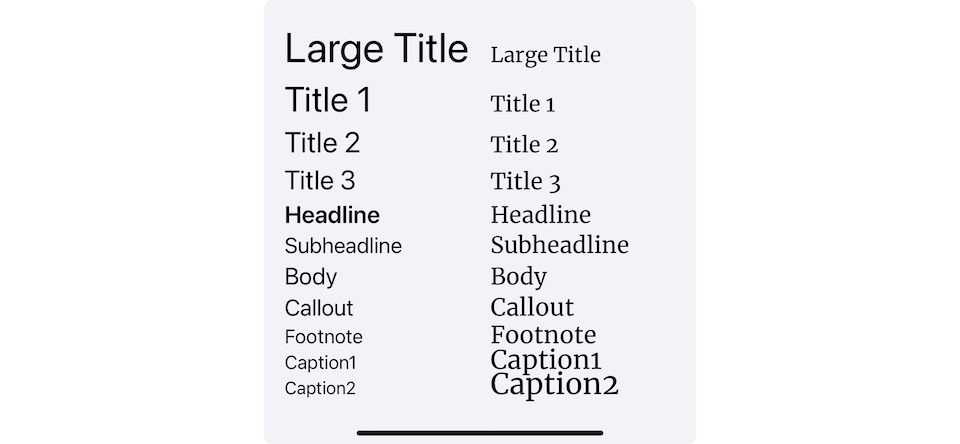
As you can see, as the text size change, each style got a different scaling factor based on its style.
What we need to do to support dynamic for custom fonts
Turn out UIFontMetrics isn't that magical. We still have some work to do. scaledFont(for:) apply scale factor based on the based font size which is a large text, so instead of defining all 132 variations, UIFontMetrics helps lower that number to 11, which is a number of the all text style on the large text size. But how do we define a proper base size that matches the multiplier that scaledFont(for:) provided?
Luckily, Apple document the font metrics they use for the system typeface in the iOS Human Interface Guidelines. You can use this as a starting point for defining your custom font for each text style.
Here is my simple implementation based on Apple metrics.
let customFonts: [UIFont.TextStyle: UIFont] = [
    .largeTitle: UIFont(name: "Merriweather-Regular", size: 34)!,
    .title1: UIFont(name: "Merriweather-Regular", size: 28)!,
    .title2: UIFont(name: "Merriweather-Regular", size: 22)!,
    .title3: UIFont(name: "Merriweather-Regular", size: 20)!,
    .headline: UIFont(name: "Merriweather-Bold", size: 17)!,
    .body: UIFont(name: "Merriweather-Regular", size: 17)!,
    .callout: UIFont(name: "Merriweather-Regular", size: 16)!,
    .subheadline: UIFont(name: "Merriweather-Regular", size: 15)!,
    .footnote: UIFont(name: "Merriweather-Regular", size: 13)!,
    .caption1: UIFont(name: "Merriweather-Regular", size: 12)!,
    .caption2: UIFont(name: "Merriweather-Regular", size: 11)!
]

extension UIFont {
    class func customFont(forTextStyle style: UIFont.TextStyle) -> UIFont {
        let customFont = customFonts[style]!
        let metrics = UIFontMetrics(forTextStyle: style)
        let scaledFont = metrics.scaledFont(for: customFont)

        return scaledFont
    }
}
Replace UIFontMetrics(forTextStyle: style).scaledFont(for: customFont) to UIFont.customFont(forTextStyle: style) and run again.
let styles: [UIFont.TextStyle] = [.largeTitle, .title1, .title2, .title3, .headline, .subheadline, .body, .callout, .footnote, .caption1, .caption2]
for style in styles {
    ...
    let label = UILabel()
    label.adjustsFontForContentSizeCategory = true
    label.text = String(describing: style)
    label.font = UIFont.customFont(forTextStyle: style)
    ...
}
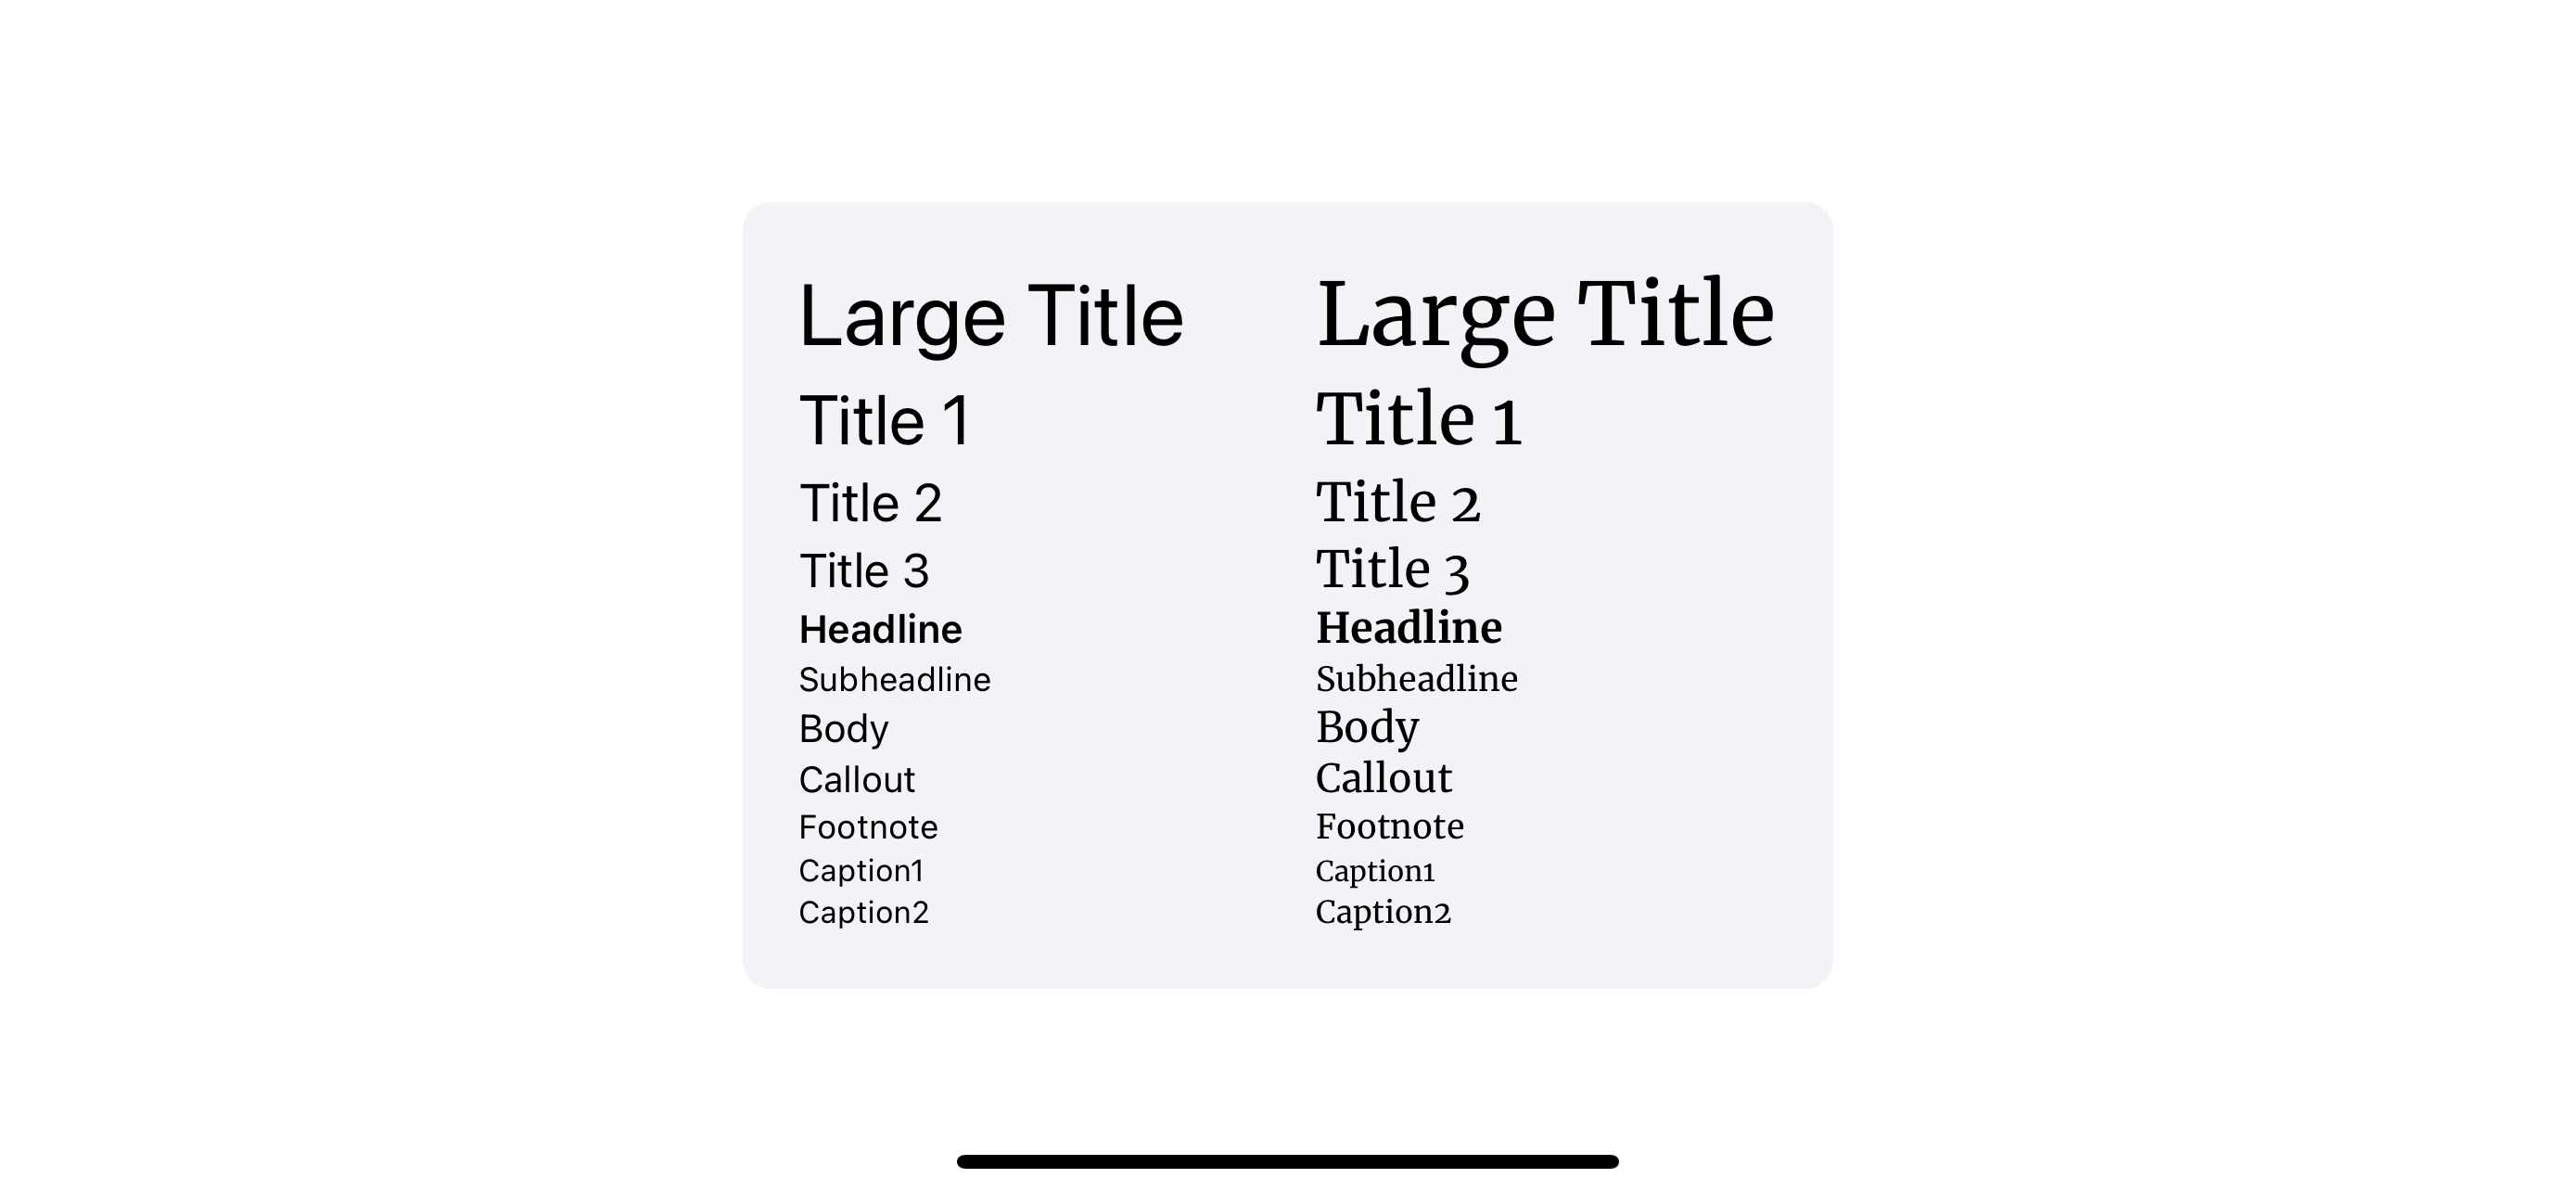
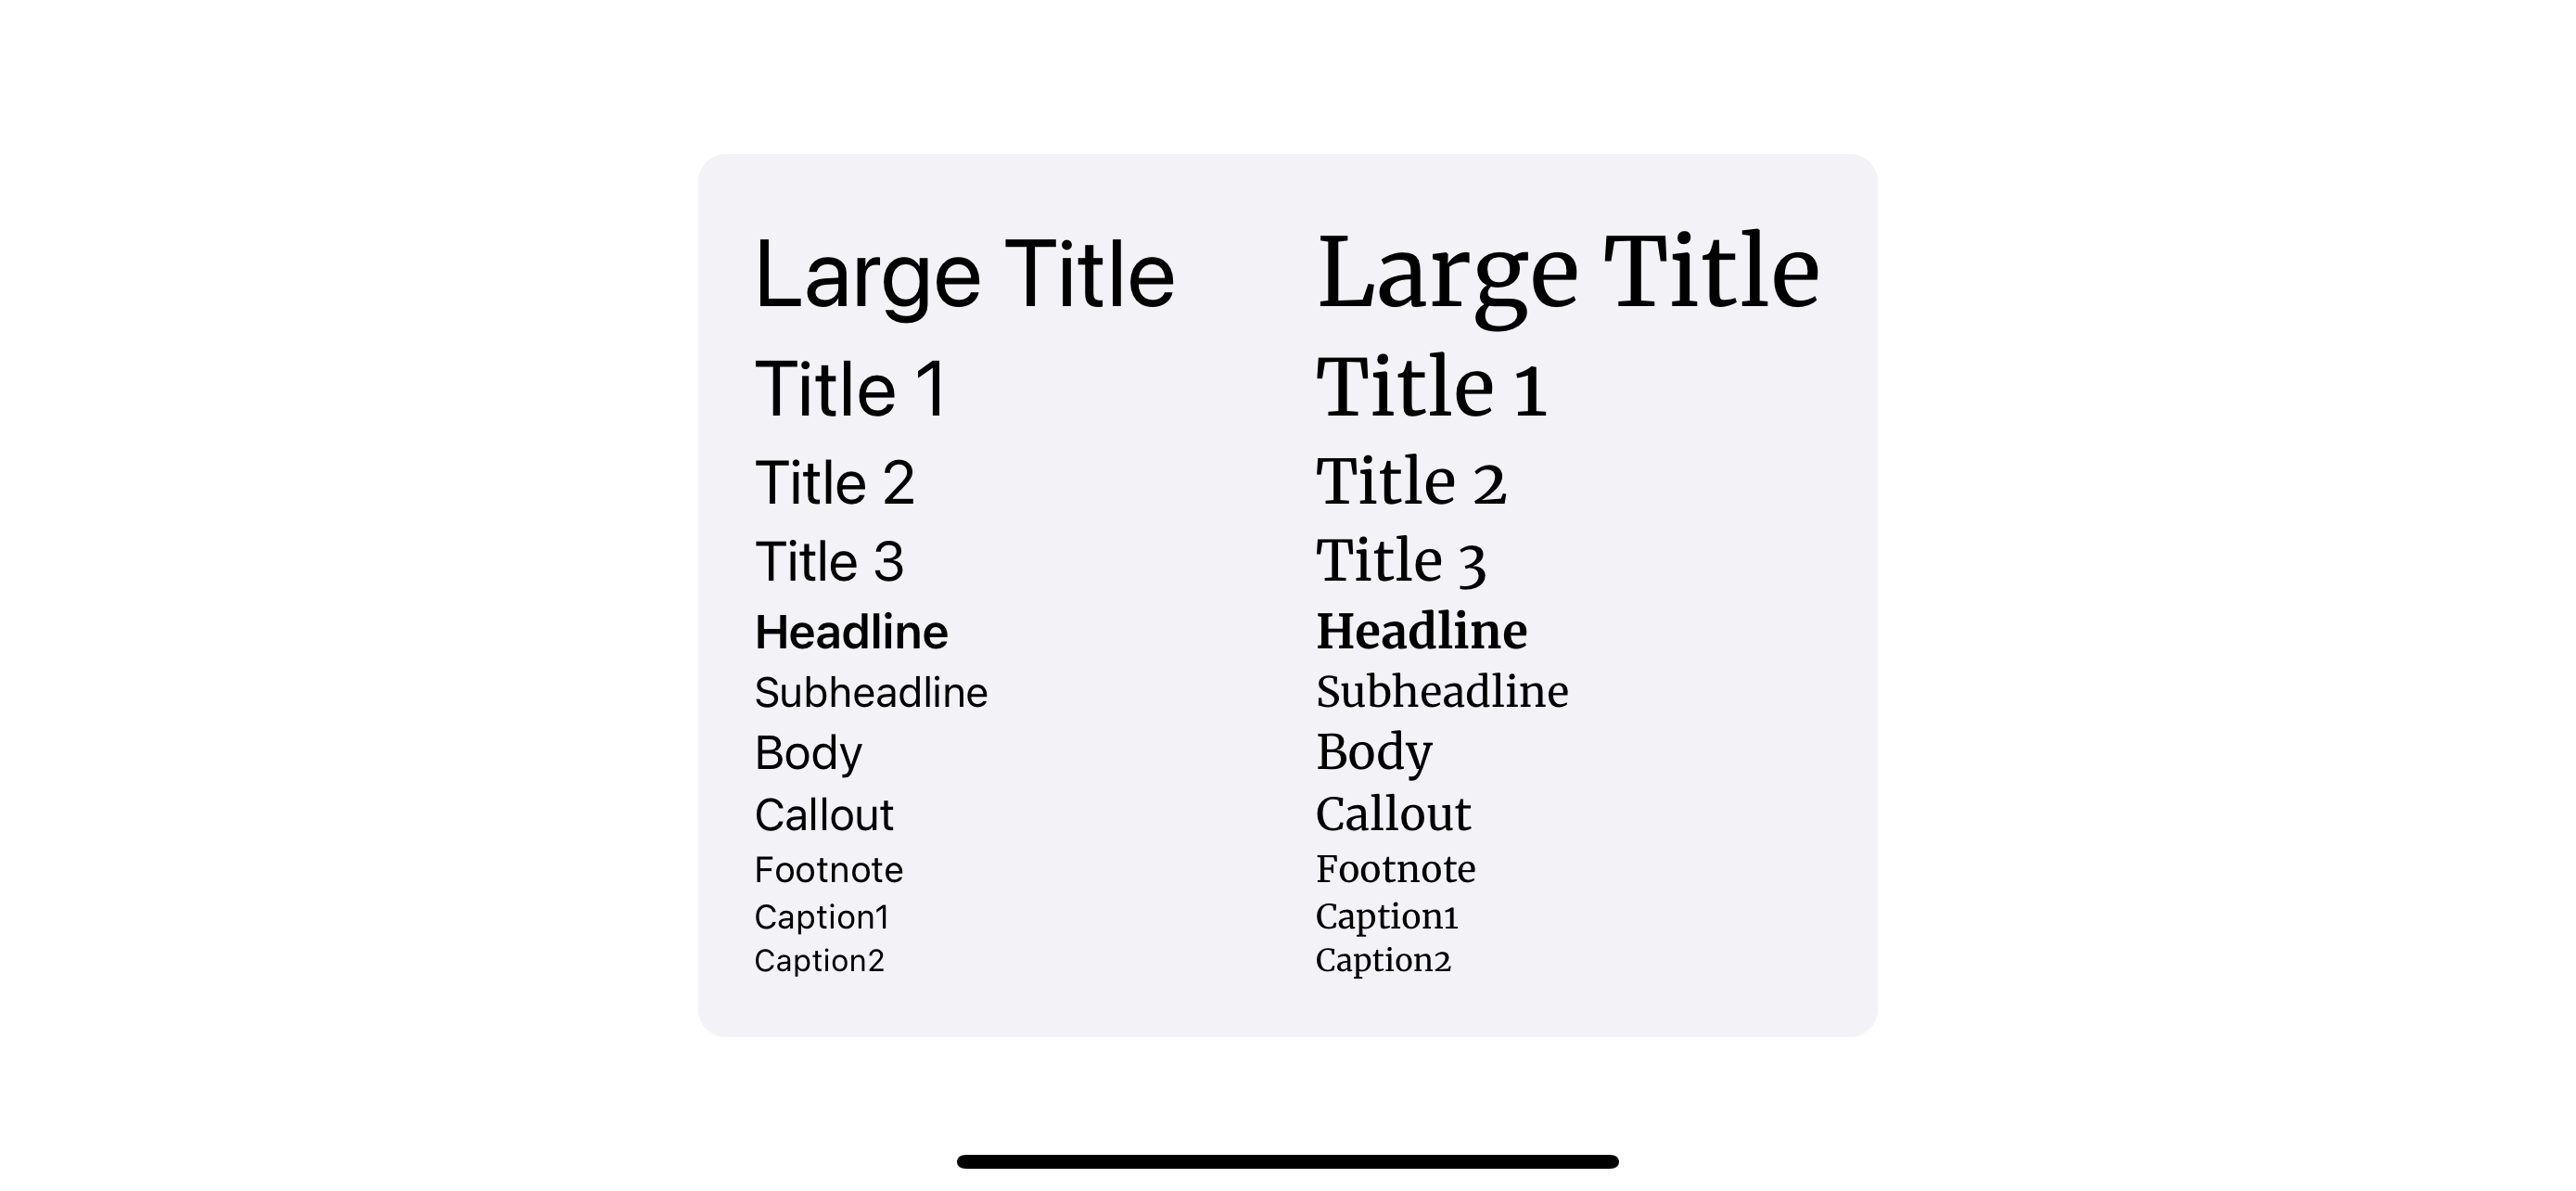
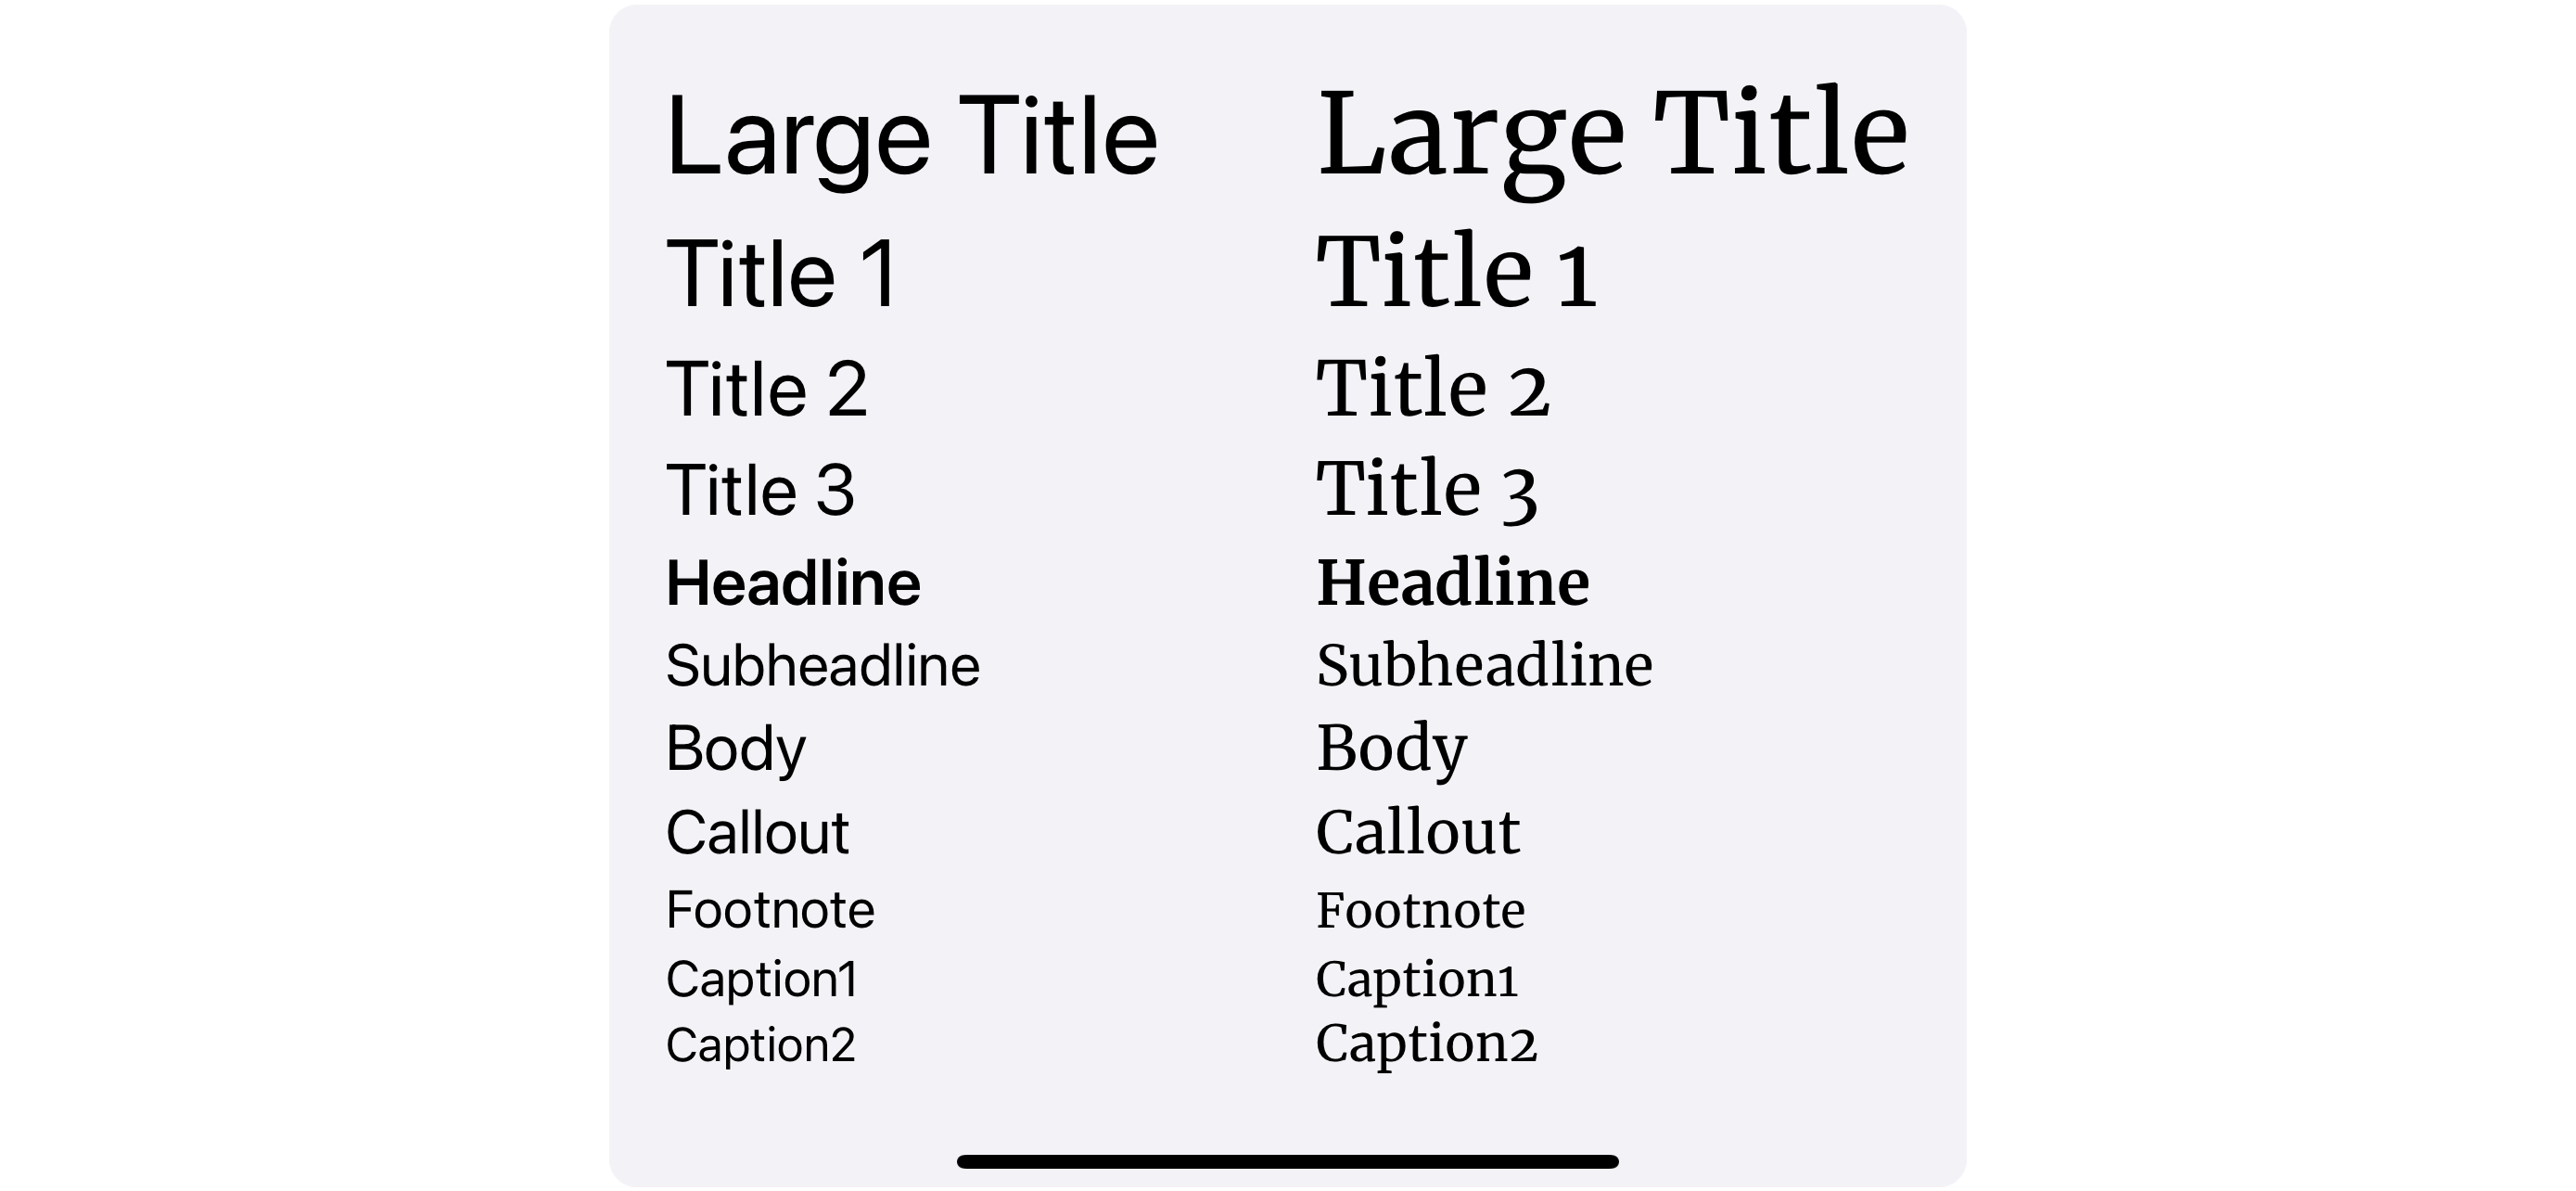
It looks a lot better, even with this minimum effort.
Conclusion
UIFontMetrics can reduce the amount of effort we need to do to make a custom font support dynamic type. We might need to put some time to fine-tune your base font to make sure your font looks suitable for all variations, but it isn't getting out of hand with the help of UIFontMetrics.
You can easily support sarunw.com by checking out this sponsor.

Translate your app In 1 click: Simplifies app localization and helps you reach more users.
Related Resources
Read more article about iOS 11, Dynamic Type, UIKit, Font, or see all available topic
Enjoy the read?
If you enjoy this article, you can subscribe to the weekly newsletter.
Every Friday, you'll get a quick recap of all articles and tips posted on this site. No strings attached. Unsubscribe anytime.
Feel free to follow me on Twitter and ask your questions related to this post. Thanks for reading and see you next time.
If you enjoy my writing, please check out my Patreon https://www.patreon.com/sarunw and become my supporter. Sharing the article is also greatly appreciated.
Become a patron Buy me a coffee Tweet ShareMulti-cursor editing in Xcode
It is a hidden gem in Xcode that can save up your coding time. Learn what it is, how to use it, and some use cases.
Custom UIStackView spacing
Learn a lesser-known API to create a custom UIStackView spacing without nested them together.