Swift In-Out (inout) Parameters
Table of Contents
What is Swift In-Out parameter
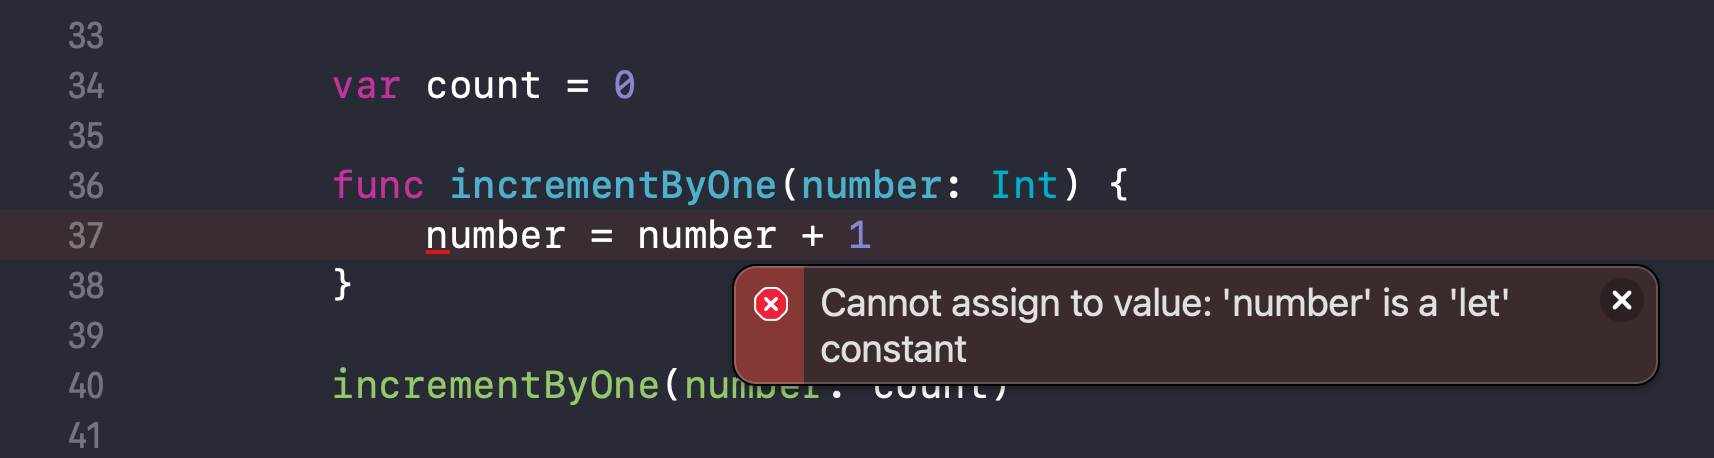
In Swift, any value type that pass as a function parameters is made constant (let) by default.
So, it is impossible to change the value of a function parameter from within the function body.
You will get a compile error since you try to change a let constant.
If you really want to change a parameter's value from within a function body, you need to define that parameter as an in-out parameter using the inout keyword.
You can easily support sarunw.com by checking out this sponsor.
AI Paraphrase:Are you tired of staring at your screen, struggling to rephrase sentences, or trying to find the perfect words for your text?
How to define an In-Out Parameter
To mark a parameter as an in-out parameter, you place the inout keyword before a parameter's type.
Here is an example where I create a function that increments the passing integer by one.
We make the number parameter become an in-out parameter by using an inout keyword.
func incrementByOne(number: inout Int) {
    number = number + 1
}
How to pass a value to an In-Out Parameter
When passing an argument to an in-out parameter, you need to place an ampersand (&) directly before a variable's name.
Since an in-Out parameter has a unique behavior, it is reasonable to make this obvious on the call site.
This will make people aware that the parameter is an in-out parameter and the original value might be modified after the call.
var count = 0

func incrementByOne(number: inout Int) {
    number = number + 1
}
// 1
incrementByOne(number: &count)

print(count)
// print 1
1 You need to prefix your argument with &, &count.
As you can see, we can modify the count variable's value from 0 to 1 by modifying the inout parameter (number) inside the incrementByOne function.
Is In-out parameter the same as pass by reference
You might wonder how Swift's in-out parameter work behind the scene.
At first, I was thinking about something similar to pass by reference, but in-out parameter behavior is simple than that.
Here is how it works.
- When the function is called, the value of the argument is copied.
- You modify the copy in the function body.
- When the function returns, the copy's value is assigned back to the original argument.
This behavior is known as copy-in copy-out or call by value result.
You can easily support sarunw.com by checking out this sponsor.
AI Paraphrase:Are you tired of staring at your screen, struggling to rephrase sentences, or trying to find the perfect words for your text?
Should I use In-out parameter
Immutable or value types are easy to work with. When you pass it around, you know that it won't affect the original value.
An in-out parameter makes it possible to mutate the original value, which destroys the benefit of a value type.
Since you know that an in-out parameter automatically assigns the value back at the end of a function call, you probably make your function work without an in-out parameter by just returning the value from the function and assigning the value back yourselves.
If the resulting function still makes sense for you, I encourage you to use a normal parameter because it is more straightforward and easier to understand.
Here is an example of the incrementByOne function without using an inout parameter.
var count = 0
// 1
func incrementByOne(number: Int) -> Int {
    return number + 1
}
// 2
count = incrementByOne(number: count)

print(count)
// print 1
1 We change a function to return a value that we want to assign back to count.
2 Then, we manually assign the returning value back to count.
Read more article about Swift or see all available topic
Enjoy the read?
If you enjoy this article, you can subscribe to the weekly newsletter.
Every Friday, you'll get a quick recap of all articles and tips posted on this site. No strings attached. Unsubscribe anytime.
Feel free to follow me on Twitter and ask your questions related to this post. Thanks for reading and see you next time.
If you enjoy my writing, please check out my Patreon https://www.patreon.com/sarunw and become my supporter. Sharing the article is also greatly appreciated.
Become a patron Buy me a coffee Tweet ShareHow to remove Back button title in SwiftUI
Learn a proper way to remove a back button title in SwiftUI.
Allow users to manage In-App Subscription in SwiftUI
In iOS 15, we finally got a way for users to manage their subscriptions right within the app.