How to Reorder List rows in SwiftUI List
Table of Contents
SwiftUI List provides an easy way to enable Reorder functionality by applying the onMove(perform:) modifier to items in a List.
onMove(perform:) accept a closure that gets called when items in the List view are moved.
A closure takes two arguments, an IndexSet of moving items and a new destination position in Int.
.onMove { fromOffsets: IndexSet, toOffset: Int in

}
How to Reorder List rows in SwiftUI List
To enable the SwiftUI List rows reordering, you need to do the following steps.
- Create a data source.
- Populate a List view using
ForEach. - Apply
onMove(perform:)modifier to theForEach. - Manually move items in the
onMove's closure.
Create Data Source
Since you want to move an item in a List view, your data source must be mutable.
In this example, I use a @State variable as a data source.
@State private var contacts = [
    "John",
    "Alice",
    "Bob",
    "Foo",
    "Bar"
]
Create a List view with ForEach
The onMove modifier only works with ForEach, so we need to populate our List view using ForEach.
struct ContentView: View {
    @State private var contacts = [
        "John",
        "Alice",
        "Bob",
        "Foo",
        "Bar"
    ]

    var body: some View {
        List {
            ForEach(contacts, id: \.self) { contact in
                Text(contact)
            }
        }
    }
}
Apply onMove modifier on ForEach
Apply the onMove modifier on ForEach to enable the reorder function.
struct ContentView: View {
    @State private var contacts = [
        "John",
        "Alice",
        "Bob",
        "Foo",
        "Bar"
    ]

    var body: some View {
        List {
            ForEach(contacts, id: \.self) { contact in
                Text(contact)
            }.onMove { from, to in
                // TODO: move the data source.
            }
        }
    }
}
Move items in Data Source
The onMove modifier doesn't automatically move an item in your data source. You have to do it yourselves.
The onMove's closure takes two arguments, an IndexSet of moving items and a new destination position in Int.
Swift Array has a move(fromOffsets:toOffset:) method that match the two arguments we got.
extension MutableCollection {
    mutating func move(
        fromOffsets source: IndexSet,
        toOffset destination: Int
    )
}
We mutate the data source inside the onMove's closure, contacts.move(fromOffsets: from, toOffset: to).
struct ContentView: View {
    @State private var contacts = [
        "John",
        "Alice",
        "Bob",
        "Foo",
        "Bar"
    ]

    var body: some View {
        List {
            ForEach(contacts, id: \.self) { contact in
                Text(contact)
            }.onMove { from, to in
                contacts.move(fromOffsets: from, toOffset: to)
            }
        }
    }
}
That's all we need to do to enable List row reordering.
You can easily support sarunw.com by checking out this sponsor.
Offline Transcription: Fast, privacy-focus way to transcribe audio, video, and podcast files. No data leaves your Mac.
What does onMove do
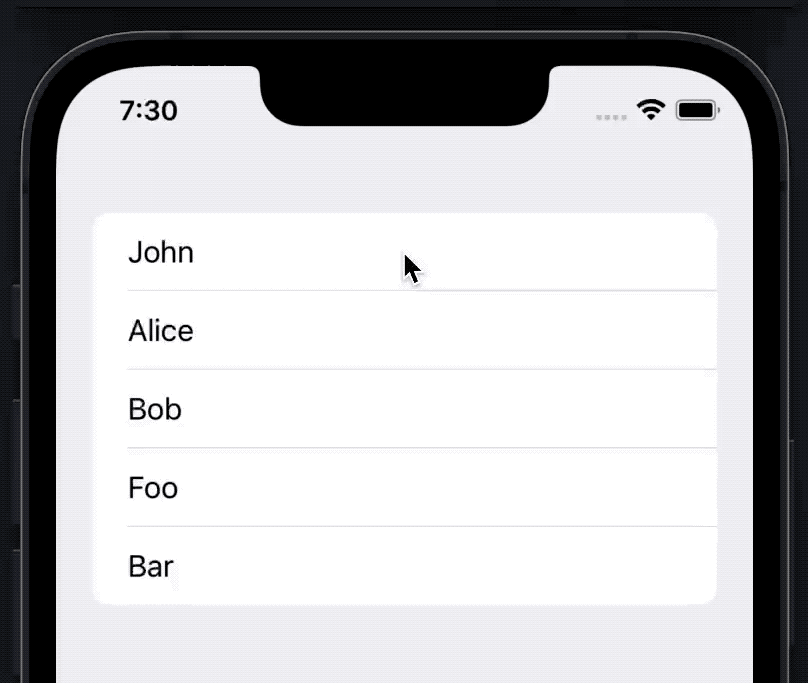
By enabling the reordering function by attaching the onMove(perform:) modifier, users can reorder the list item by Long-press on the row that you want to move, then drag it to the destination.
Long-press
Users can Long-press on any row to move that particular row.
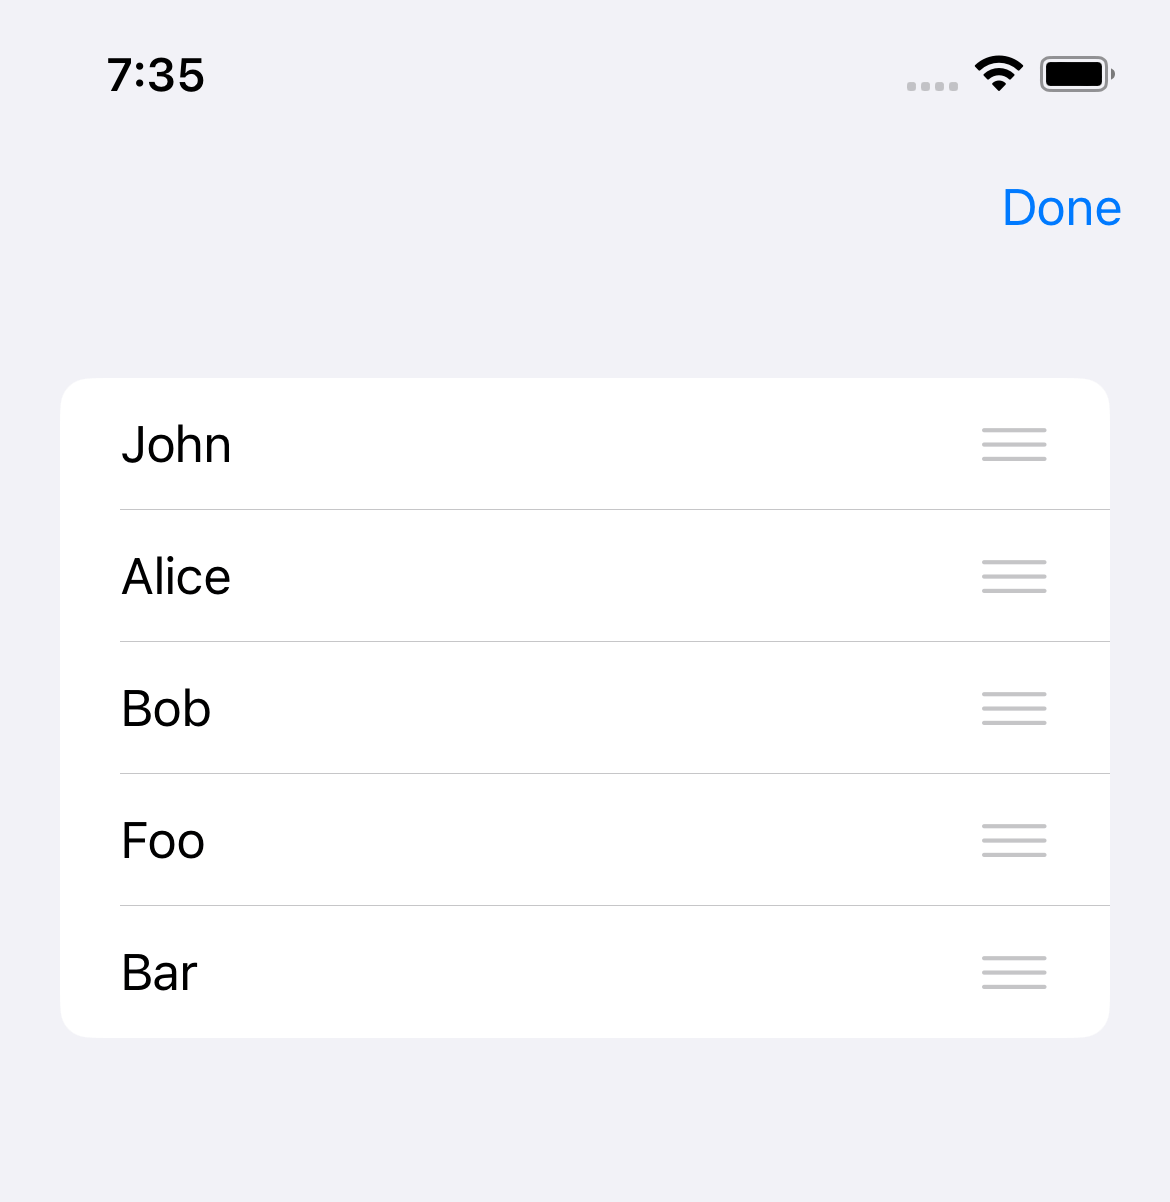
Items in EditMode
In the Edit mode, SwiftUI also shows a drag handler on the trailing side of the row content to indicate that list rows can be moved around.
There are two options to enter the Edit mode.
- Using the
EditButton - Setting the
.editModeenvironment value
I will use EditButton in this case.
struct ContentView: View {
    @State private var contacts = [
        "John",
        "Alice",
        "Bob",
        "Foo",
        "Bar"
    ]

    var body: some View {
        NavigationView {
            List {
                ForEach(contacts, id: \.self) { contact in
                    Text(contact)
                }.onMove { from, to in
                    contacts.move(fromOffsets: from, toOffset: to)
                }
            }
            .toolbar {
                // 1
                EditButton()
            }
        }

    }
}
I added the edit button on a navigation bar 1 to allow users to enter the Edit mode.
Once you enter the edit mode by tapping the "Edit" button, you will see the drag handler at the end of each row.
You can easily support sarunw.com by checking out this sponsor.
Offline Transcription: Fast, privacy-focus way to transcribe audio, video, and podcast files. No data leaves your Mac.
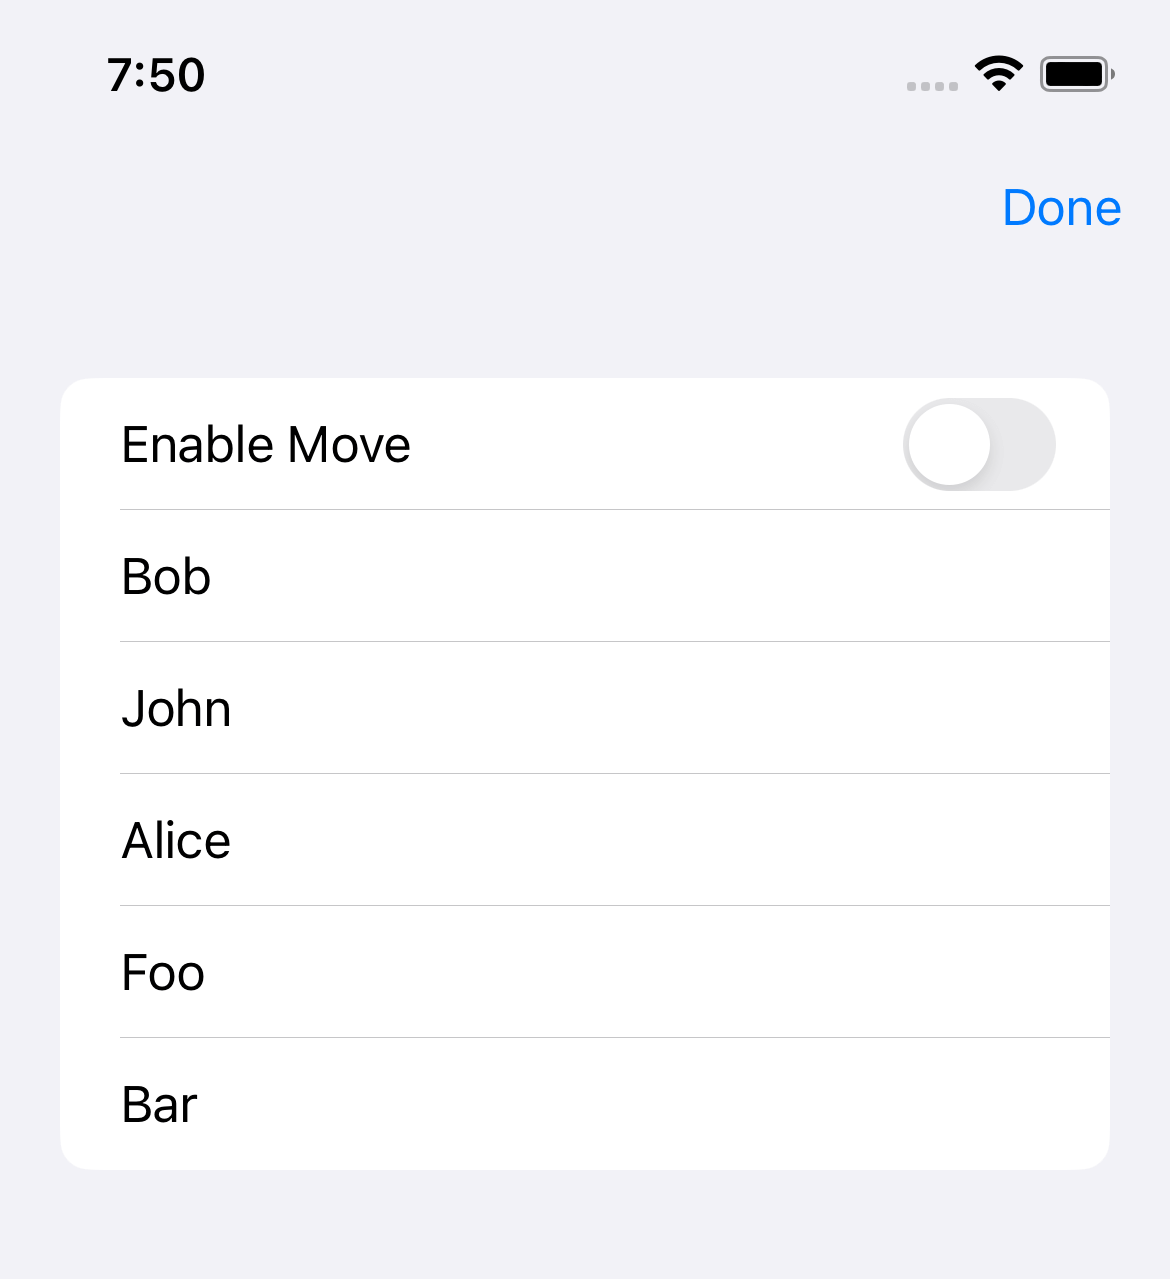
How to conditionally Disable the Reorder ability
If you want to disable the reorder ability, you can do that by passing nil to the onMove.
ForEach(contacts, id: \.self) { contact in
    Text(contact)
}
.onMove(perform: nil)
Here is an example where we control reorder ability with the boolean value, enableMove.
struct ReorderExample: View {
    @State private var contacts = [
        "John",
        "Alice",
        "Bob",
        "Foo",
        "Bar"
    ]

    // 1
    @State private var enableMove = true

    var body: some View {
        NavigationView {
            List {
                Toggle("Enable Move", isOn: $enableMove)
                ForEach(contacts, id: \.self) { contact in
                    Text(contact)
                }
                // 2
                .onMove(perform: enableMove ? move: nil)
            }
            .toolbar {
                EditButton()
            }
        }

    }

    // 3
    func move(from: IndexSet, to: Int) {
        contacts.move(fromOffsets: from, toOffset: to)
    }
}
1 A state variable use to control reorder ability.
2 We use enableMove to conditionally disable reorder ability. We disable it by set perform closure as nil.
3 We extract a move logic out as a separate function to improve readability.
Read more article about SwiftUI, List, or see all available topic
Enjoy the read?
If you enjoy this article, you can subscribe to the weekly newsletter.
Every Friday, you'll get a quick recap of all articles and tips posted on this site. No strings attached. Unsubscribe anytime.
Feel free to follow me on Twitter and ask your questions related to this post. Thanks for reading and see you next time.
If you enjoy my writing, please check out my Patreon https://www.patreon.com/sarunw and become my supporter. Sharing the article is also greatly appreciated.
Become a patron Buy me a coffee Tweet ShareSwift mod operator (%)
There might be several reasons that cause this error. I will share the solution that works for me.
What is the difference between #available and @available
#available and @available are features related to the availability of APIs. They are tools that mean to use together. Let's learn the difference and when to use them.