Multiple rows Selection in SwiftUI List
Table of Contents
SwiftUI List view has many built-in styles and functions.
With few lines of code, we can easily add multiple rows selection support in a SwiftUI list view.
How to make SwiftUI List support multiple rows selection
There are three steps to make SwiftUI List support multiple selections.
- Create a
Setvariable to hold the selected rows. It must be a set of the list data'sIdentifiable.IDtype. - Initialize a
Listwith an initializer that acceptsselectionbinding. Use the set we created in step 1 as an argument. - Get the list into Edit mode by either modifying the
editModevalue or adding anEditButton.
The following example shows how to create a simple list from an array of a Contact type.
The Contact type conforms to the Identifiable protocol with an id of type UUID.
// 1
struct Contact: Identifiable {
    let id = UUID()
    let name: String
}

struct ContentView: View {
    let contacts = [
        Contact(name: "John"),
        Contact(name: "Alice"),
        Contact(name: "Bob")
    ]
    // 2
    @State private var multiSelection = Set<UUID>()

    var body: some View {
        NavigationView {
            VStack {
                // 3
                List(contacts, selection: $multiSelection) { contact in
                    Text(contact.name)
                }
                Text("\(multiSelection.count) selections")
            }
            .navigationTitle("Contacts")
            .toolbar {
                // 4
                EditButton()
            }
        }
    }
}
1 I create a Contact type with an Identifiable.ID of type UUID. This will be the type for our Set variable to hold selected rows.
2 We create a Set<UUID> variable to hold selected item. It has the same type as the list data's Identifiable.ID type, which is UUID in this case.
3 Initialize a List view with an initializer that accept the selection binding, init(selection:content:).
4 Add EditButton as a way to enter the Edit mode.
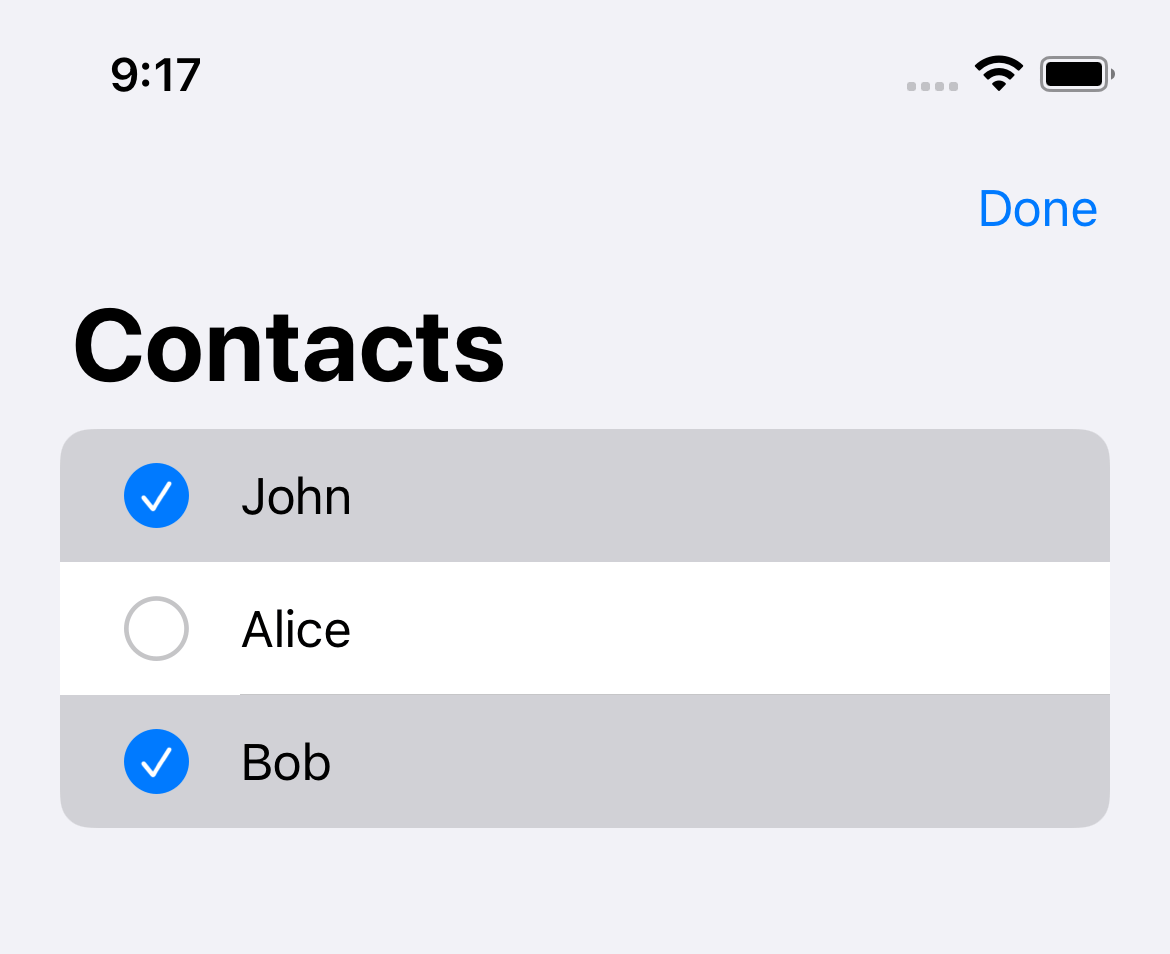
To enable multiple rows selection, a list view needs to be in Edit mode.
When you put the list into Edit mode, the list shows a circle next to each list item. When selected, a circle change to a checkmark to indicate selection.
You can easily support sarunw.com by checking out this sponsor.
Screenshot Studio: Create App Store screenshots in seconds not minutes.
Make multiple selections without entering an edit mode
In the previous section, I mentioned that we need to enter an Edit mode to be able to select row items.
But that is not entirely true.
Not all platforms are created equal. Mac users can make multiple selections without entering an Edit mode.
By using a combination of modifier keys like Command (⌘), and mouse click, users can select multiple items in a list view without entering edit mode.
Here is an example of the same list on Mac. I remove EditButton entirely in this example.
struct ContentView: View {
    let contacts = [
        Contact(name: "John"),
        Contact(name: "Alice"),
        Contact(name: "Bob")
    ]

    @State private var multiSelection = Set<UUID>()

    var body: some View {
        NavigationView {
            VStack {
                List(contacts, selection: $multiSelection) { contact in
                    Text(contact.name)
                }
                Text("\(multiSelection.count) selections")
            }
            .navigationTitle("Contacts")
        }
    }
}
iOS 16 Behavior changes
In iOS 16, there are two noticeable changes in list selection:
- Users can select a single item without entering an Edit mode.
- If the devices have access to a keyboard and mouse or trackpad, like Mac and iPad, users can make multiple selections using a combination of modifier keys and click.
These two changes make it possible to use multiple selections with a list view across the platforms.
Here is an example of the same list without EditButton on iPhone with iOS 16.
struct ContentView: View {
    let contacts = [
        Contact(name: "John"),
        Contact(name: "Alice"),
        Contact(name: "Bob")
    ]

    @State private var multiSelection = Set<UUID>()

    var body: some View {
        NavigationView {
            VStack {
                List(contacts, selection: $multiSelection) { contact in
                    Text(contact.name)
                }
                Text("\(multiSelection.count) selections")
            }
            .navigationTitle("Contacts")
        }
    }
}
As you can see, we can select multiple items on iPhone without entering an Edit mode.
Read more article about SwiftUI, List, or see all available topic
Enjoy the read?
If you enjoy this article, you can subscribe to the weekly newsletter.
Every Friday, you'll get a quick recap of all articles and tips posted on this site. No strings attached. Unsubscribe anytime.
Feel free to follow me on Twitter and ask your questions related to this post. Thanks for reading and see you next time.
If you enjoy my writing, please check out my Patreon https://www.patreon.com/sarunw and become my supporter. Sharing the article is also greatly appreciated.
Become a patron Buy me a coffee Tweet ShareSwiftUI Button: Basic usage
SwiftUI made it incredibly easy to create a button compared to how we do it in UIKit. Let's learn how to do it.
How to remove List Section separators in SwiftUI
Some list style has section separators. Let's learn how to remove them.