What should you know about a navigation history stack in iOS 14
Table of Contents
Prior to iOS 14, If you are deep down in a navigation stack, the only way to go back is to smash your back button until you reach the root level. This is no longer a case in iOS 14.
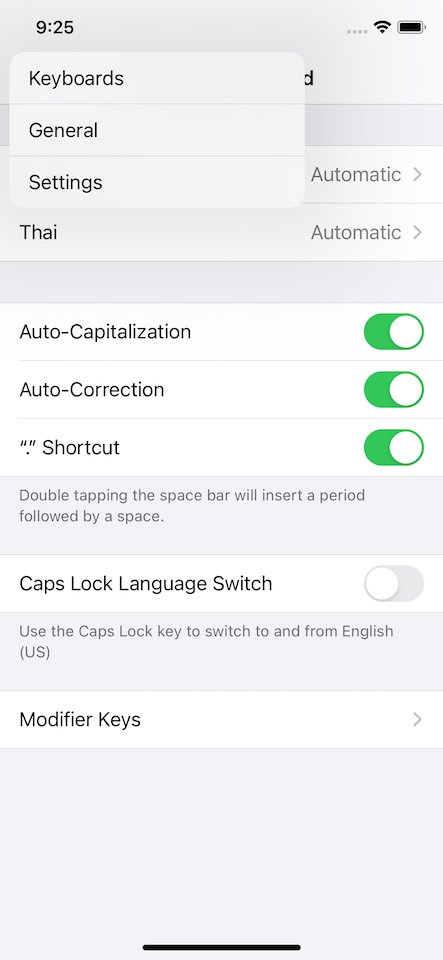
With iOS 14, if you're deep down in a navigation stack and want to head back to any level quickly, you can long-press the back button to bring up the history stack.
Why should we care about this?
At first glance, this looks like a nice feature and nothing we need to do to adopt this. We get this behavior automatically when building our app against iOS 14 SDK.
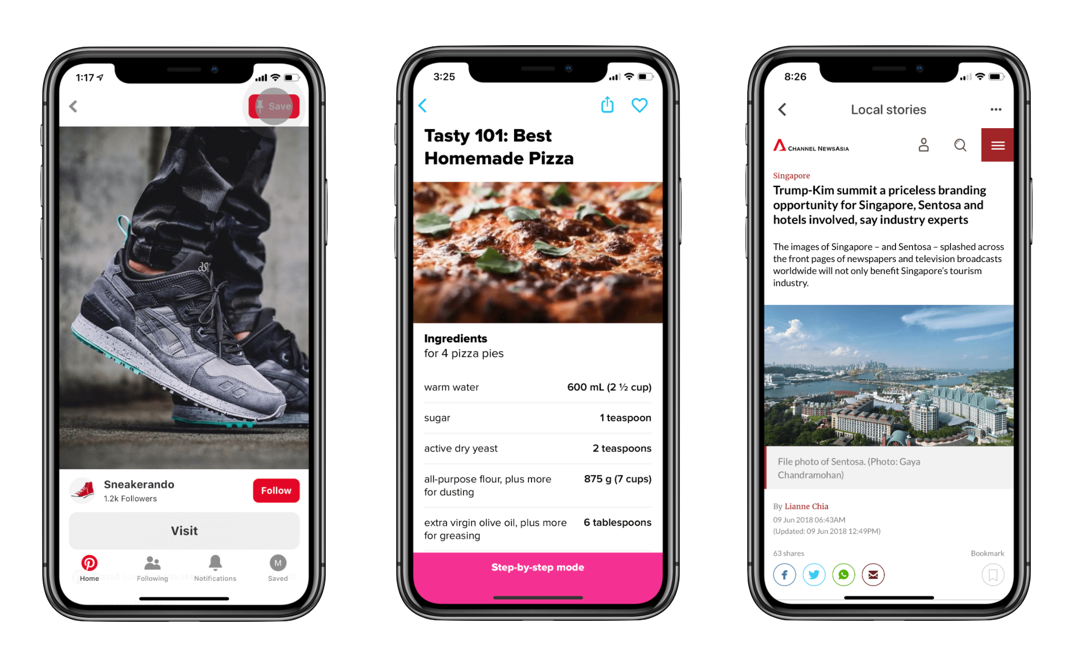
The problem is, it is quite a trend nowadays that designers would design an app without a back button title. The following are some example apps without a back button title.
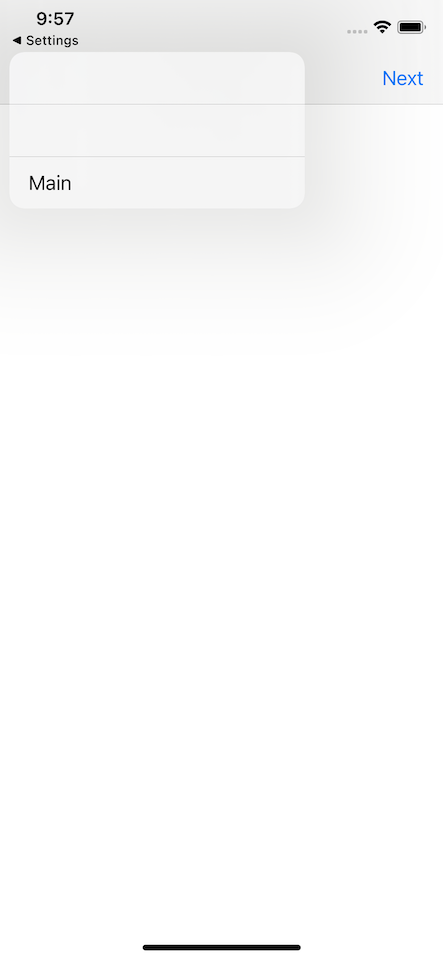
Without a back button title, history stack will look like this (I assume you hide back button title with this method).
You can easily support sarunw.com by checking out this sponsor.
Offline Transcription: Fast, privacy-focus way to transcribe audio, video, and podcast files. No data leaves your Mac.
Where does history stack pick up the title?
To solve this problem, we need to know which string is used as titles in a history stack. From my testing, a history stack getting the title from a navigation back button title, not the navigation title.
Scenarios
Let's test this out in different scenarios. In the following examples, I set up an AViewController where the right navigation item is pushing another AViewController to itself.
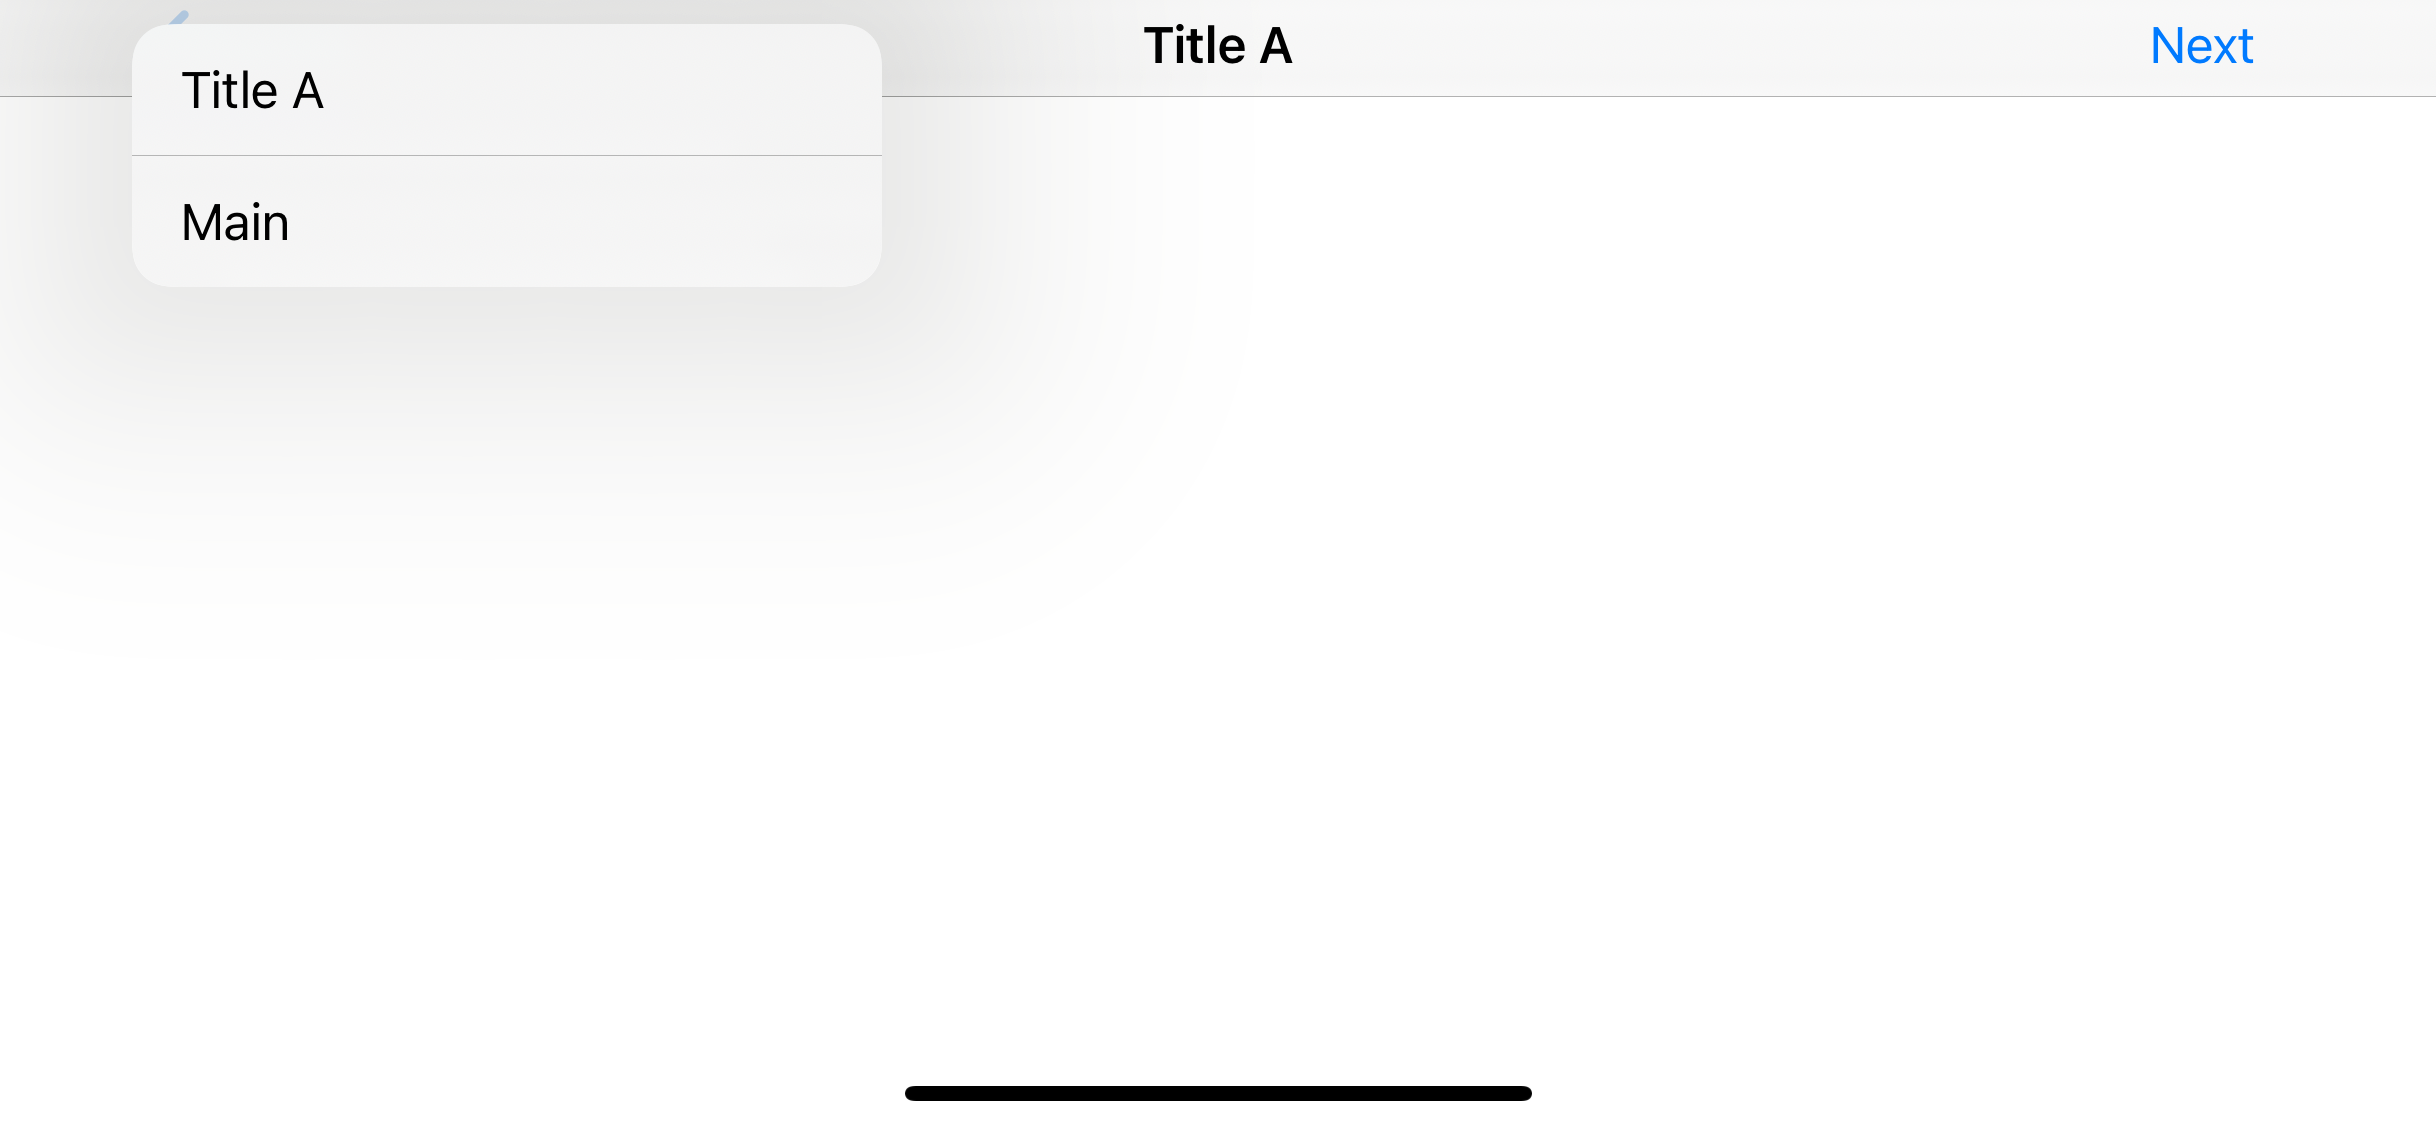
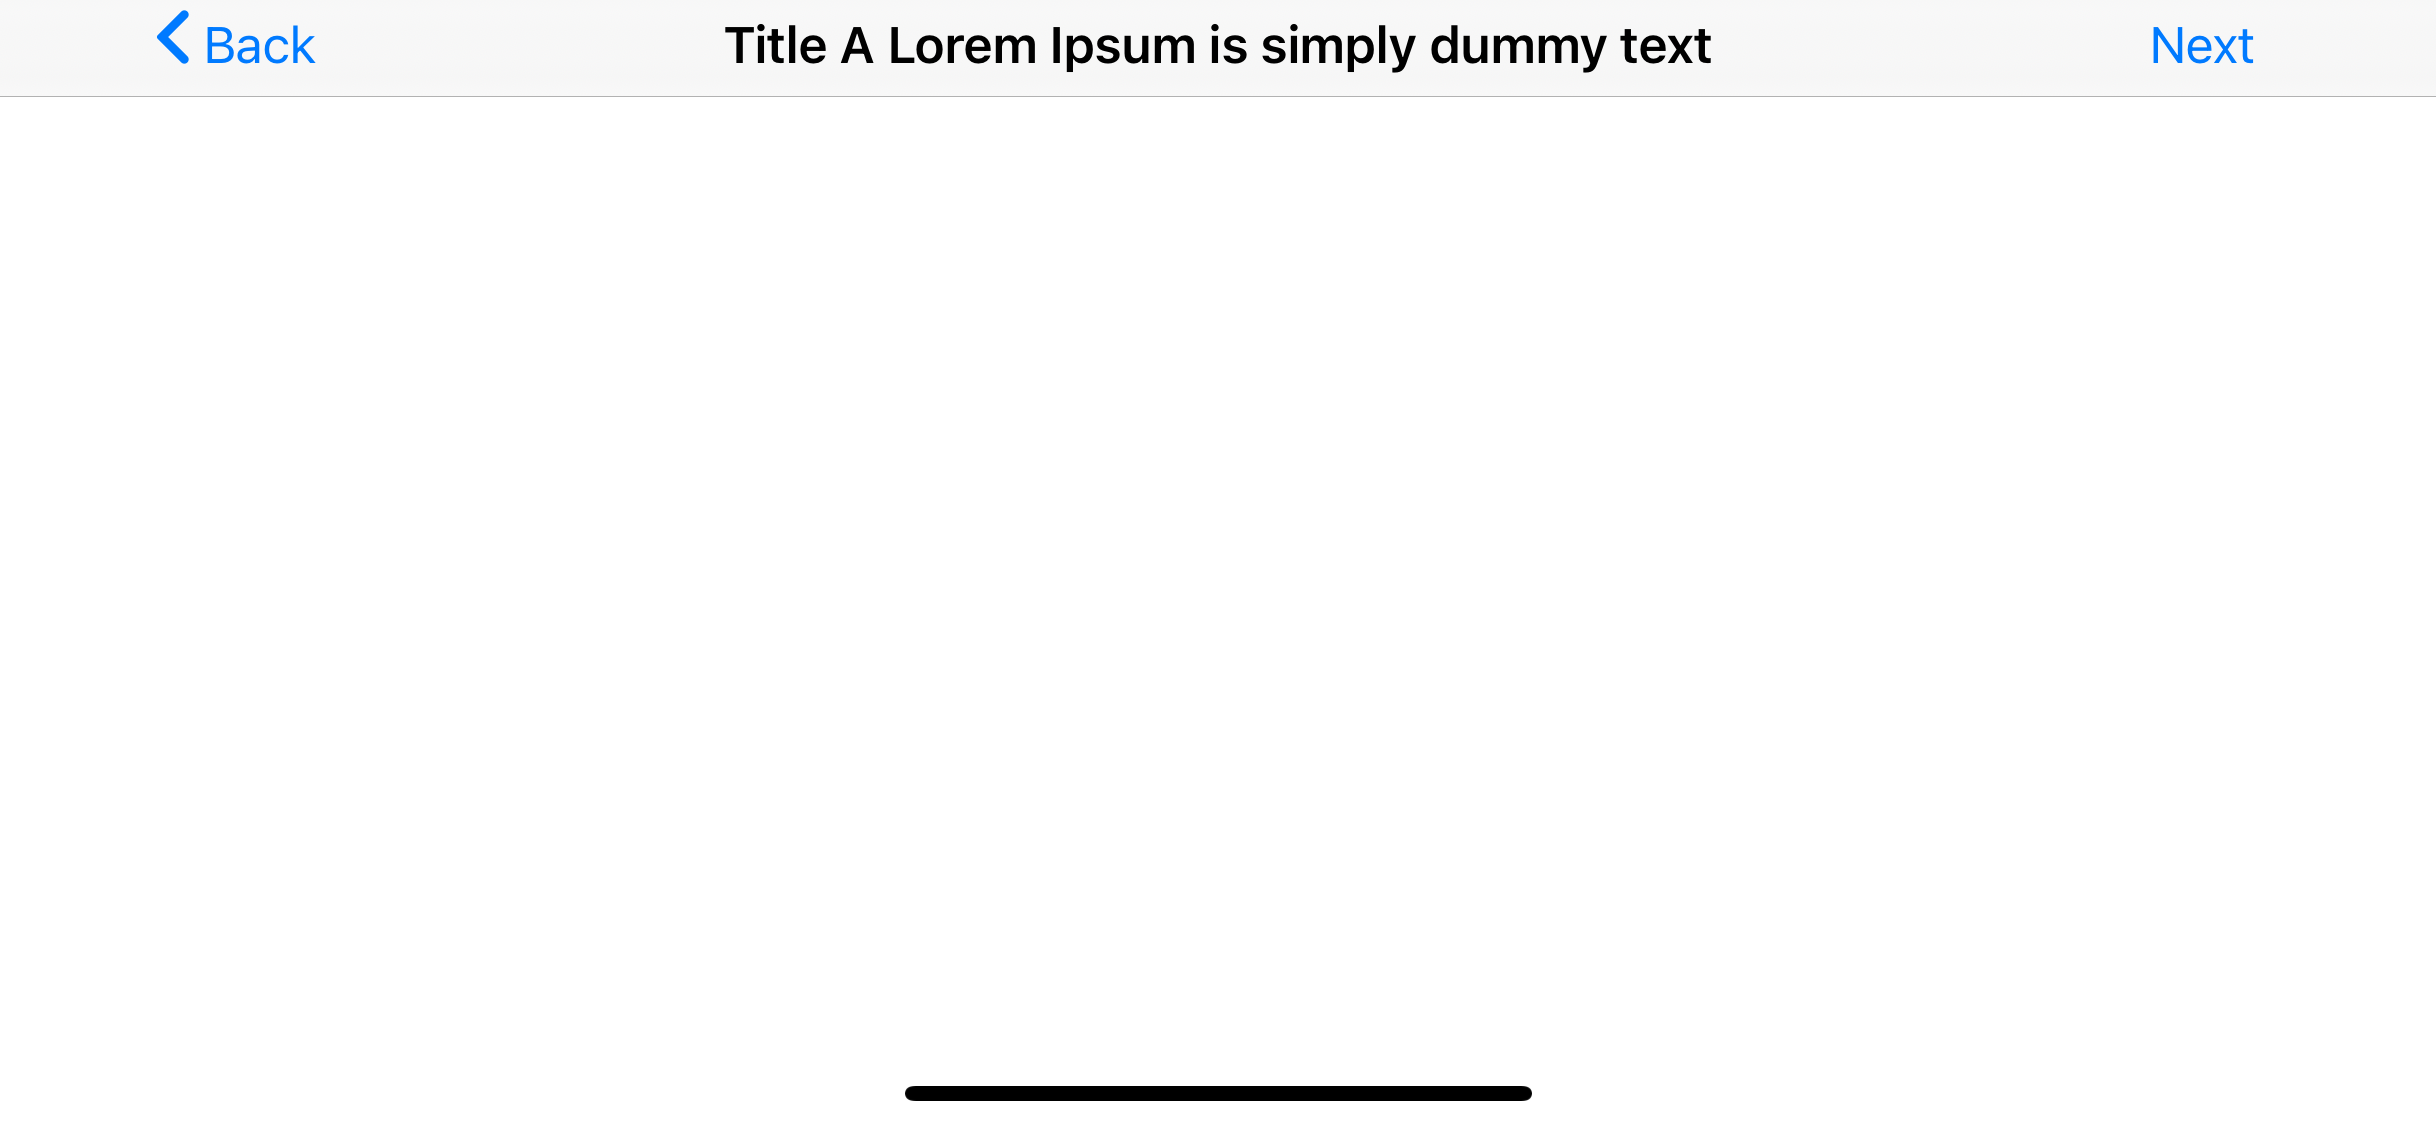
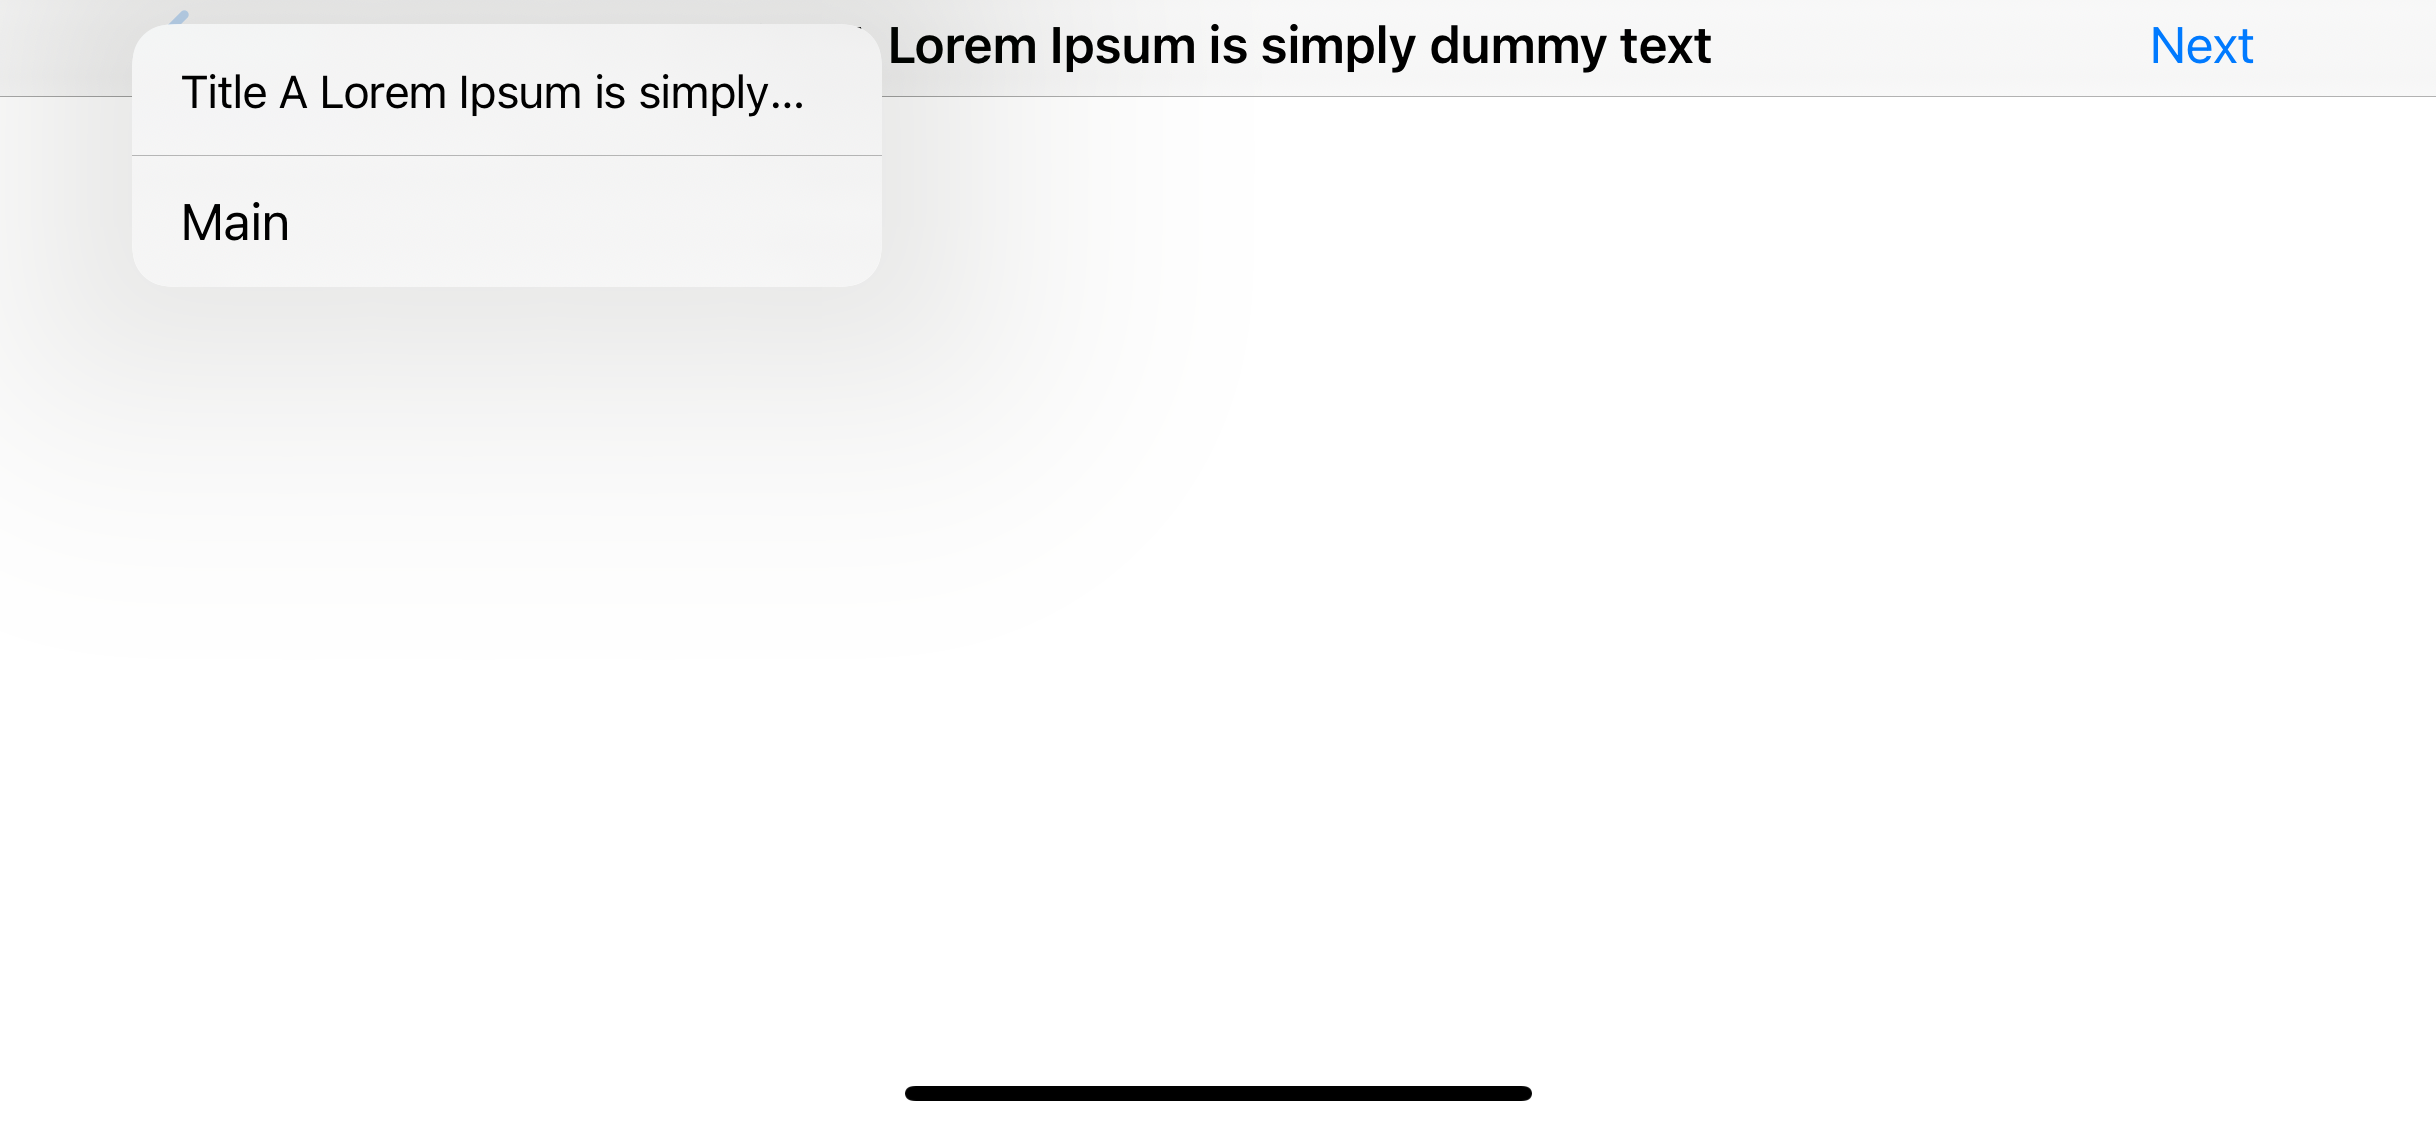
Only title
If we set only title, this title will also use as a back button title and also use in a history stack.
class AViewController: UIViewController {
    override func viewDidLoad() {
        title = "Title A"
    }
}
Long title
If your title is long enough, the back button title will be shortened to just "Back" for saving space, but this won't affect a title in a history stack.
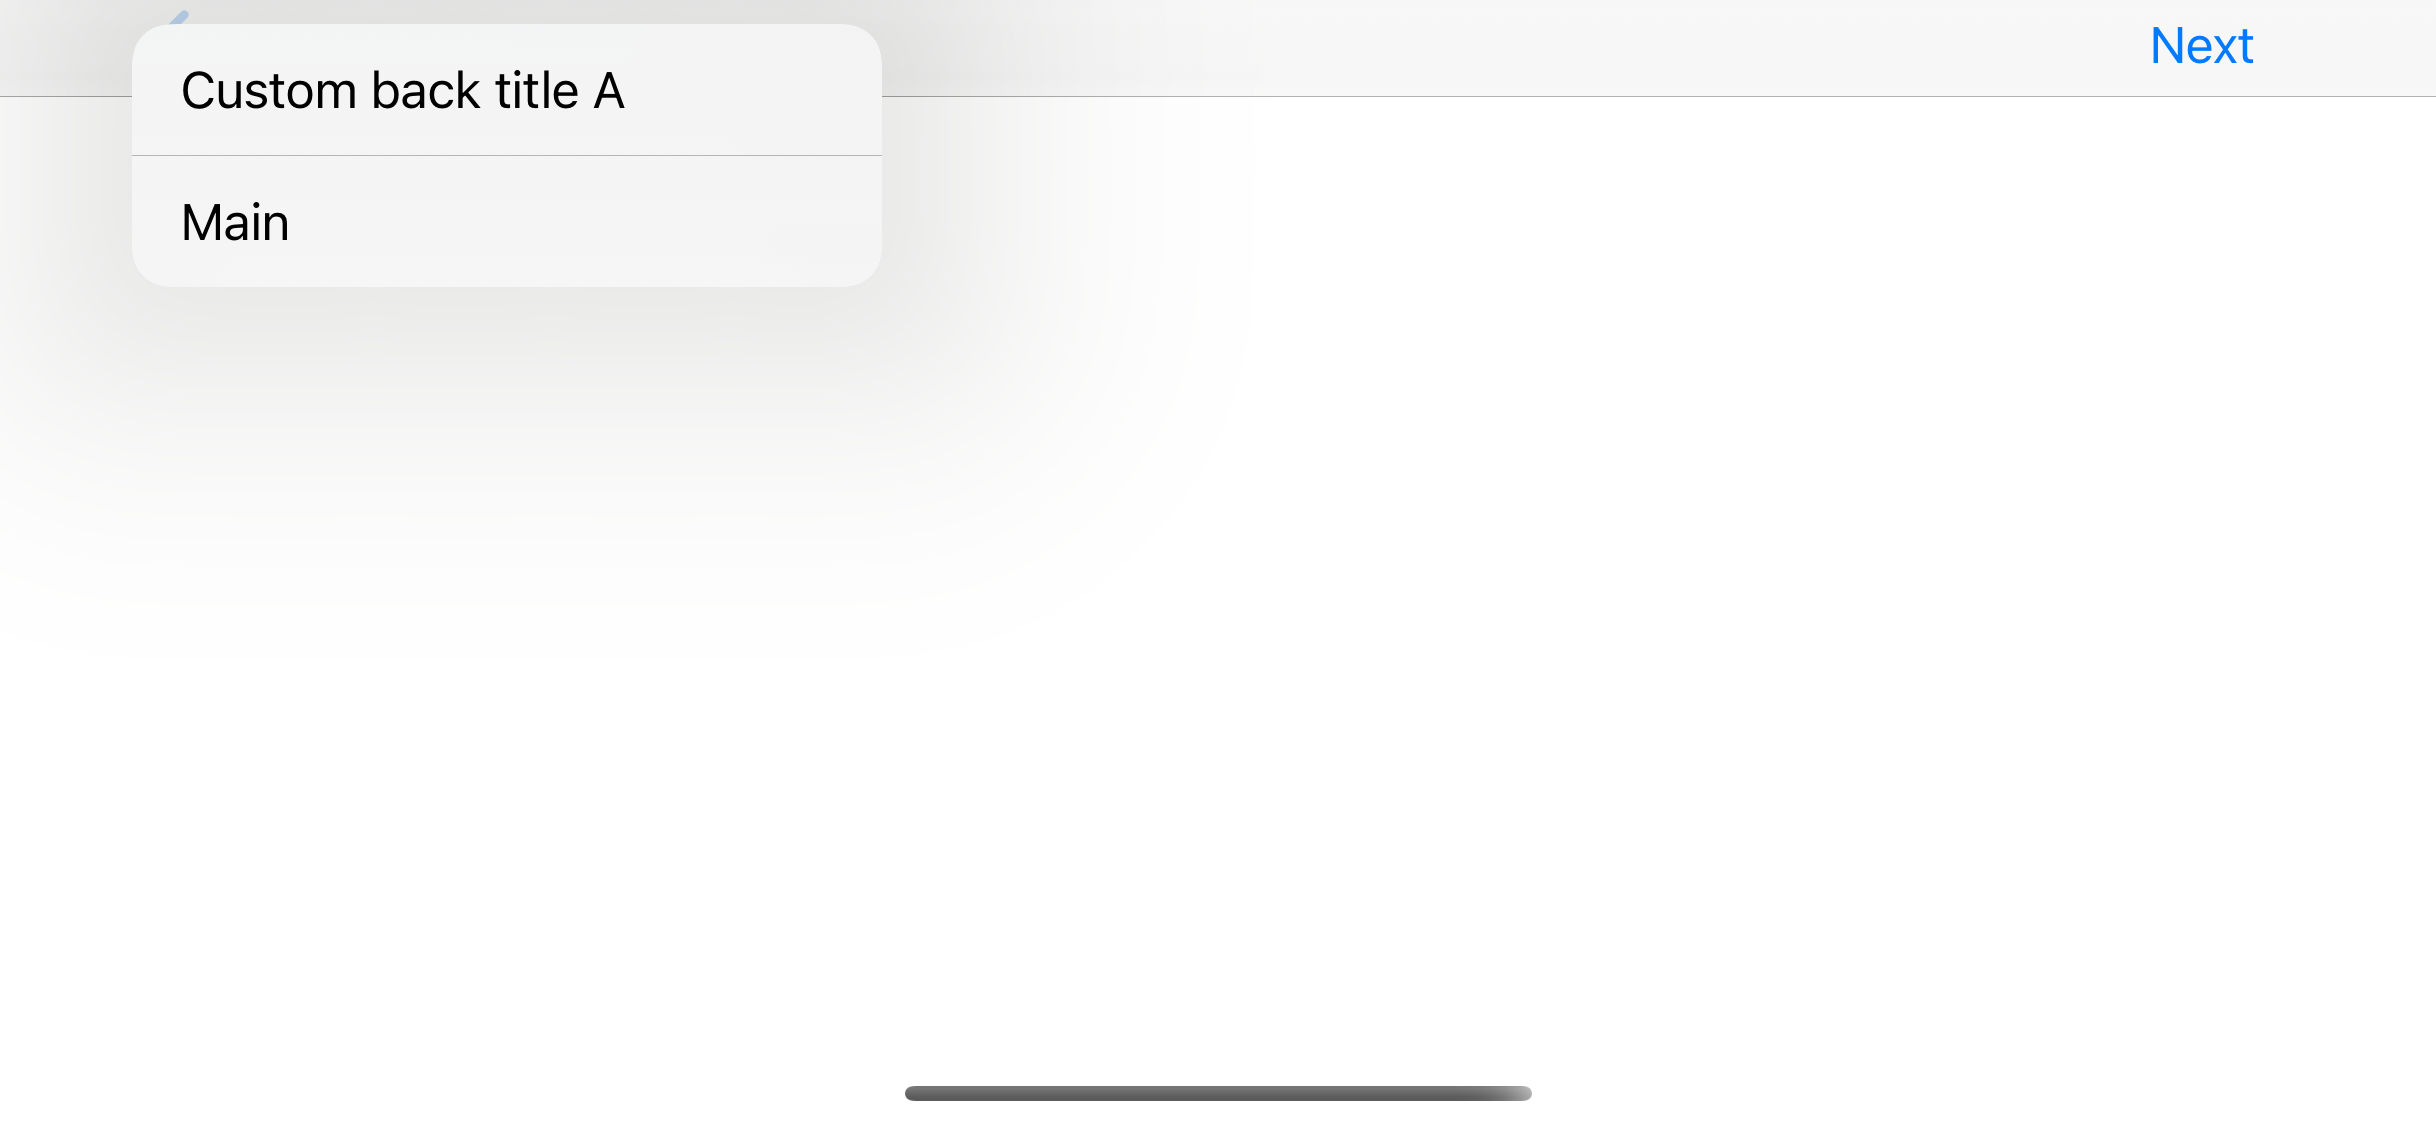
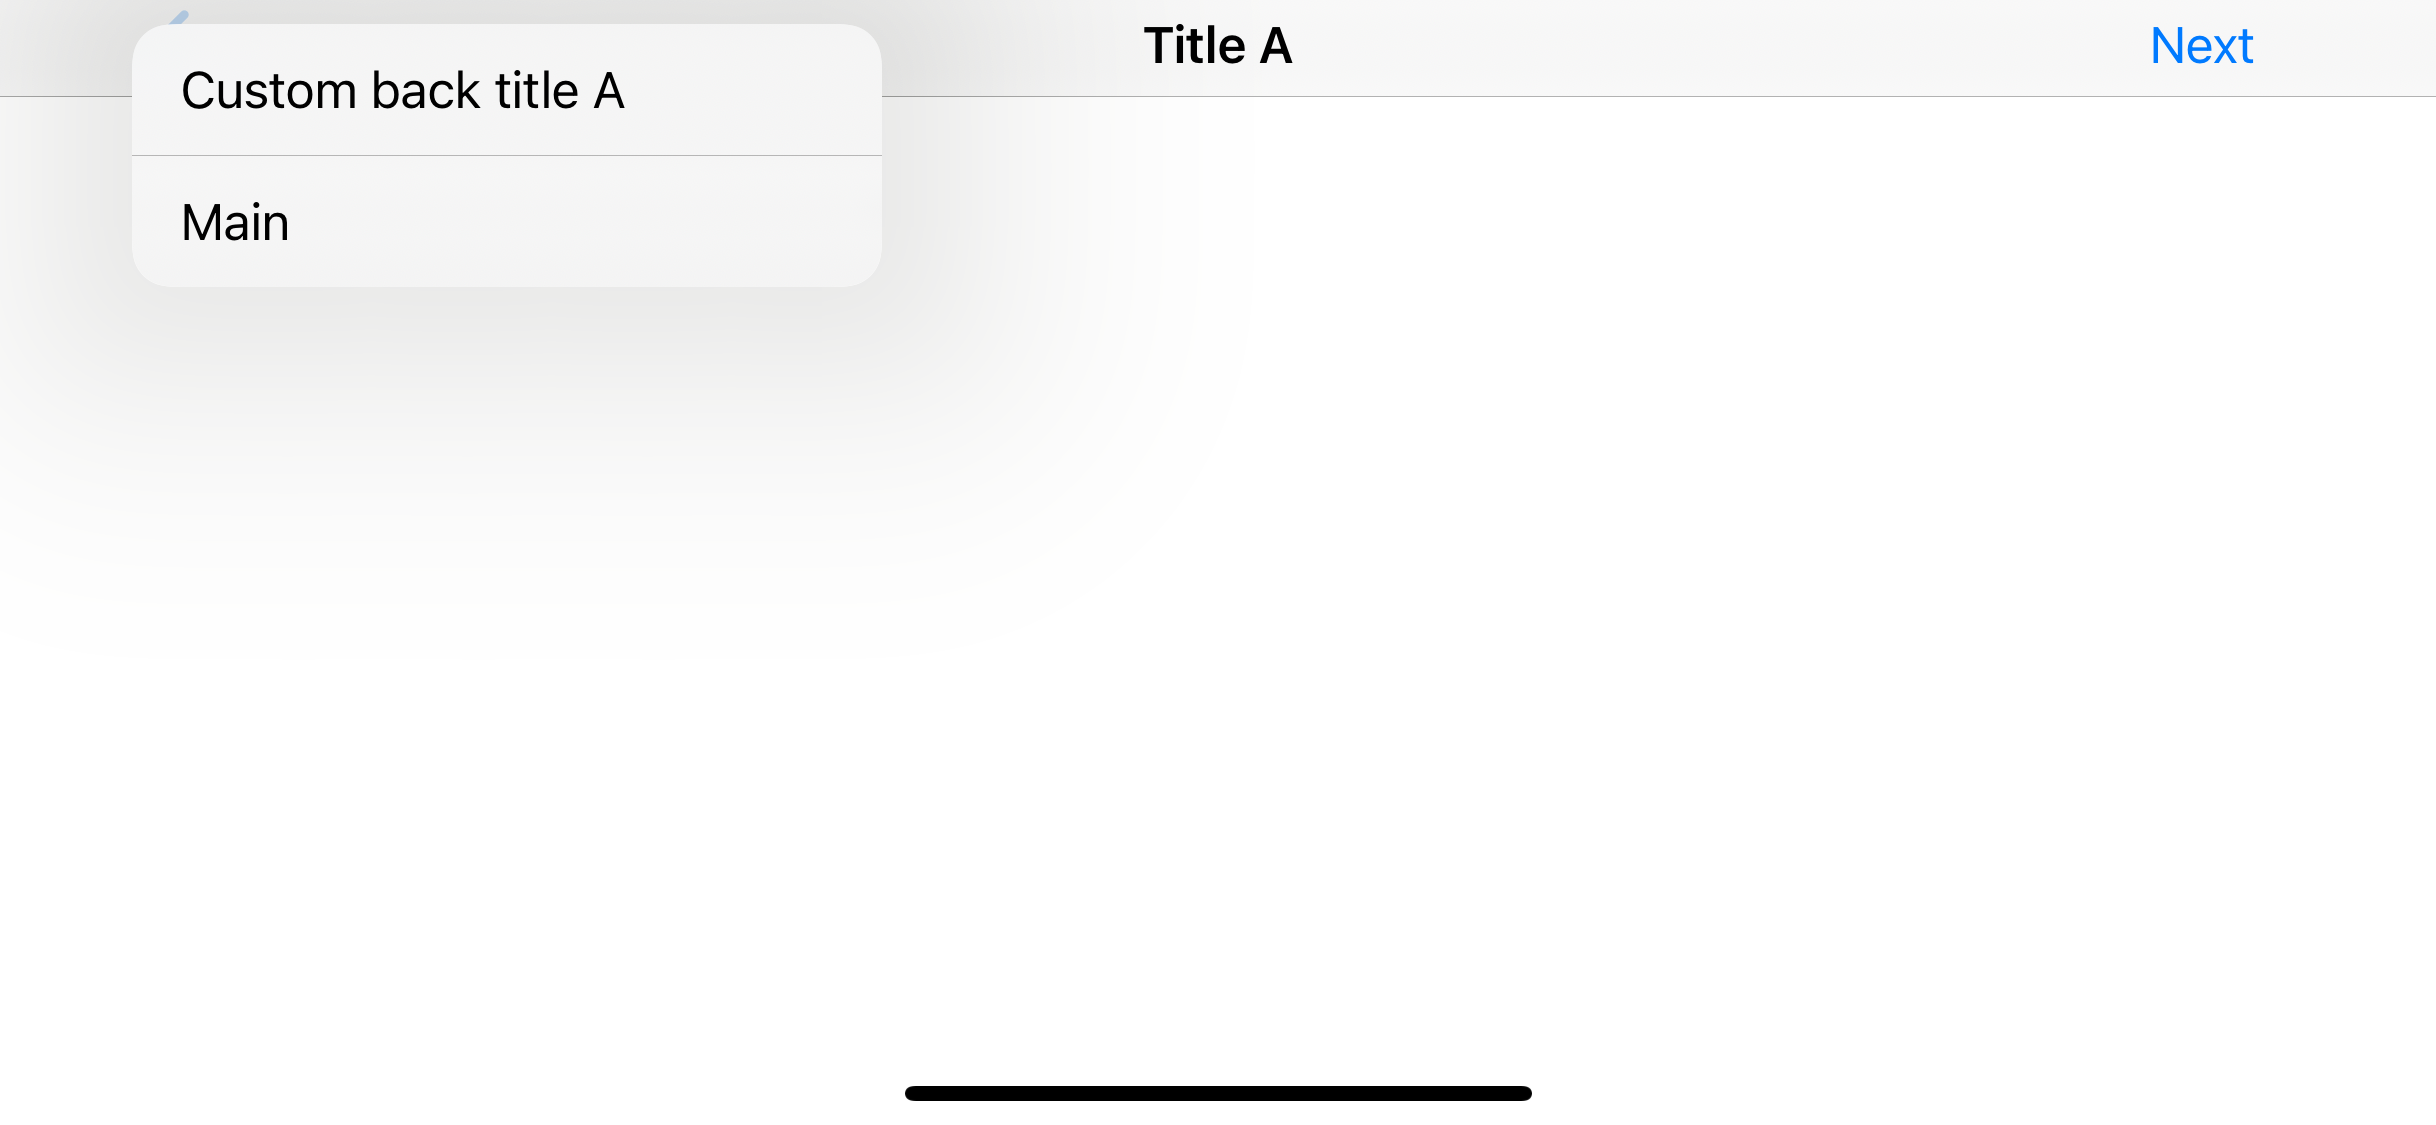
Customize back button title
As mentioned before, a back button title string will be used in a history stack. So, the text in backButtonTitle will be used as a title in a history stack if set.
class AViewController: UIViewController {
    override func viewDidLoad() {
        title = "Title A"
        navigationItem.backButtonTitle = "Custom back title A"
    }
}

No title
Since history stack depends on the back button title, set empty title won't affect a history stack. You can design an app with or without a title since this won't affect a history stack.
class AViewController: UIViewController {
    override func viewDidLoad() {
        title = ""
        navigationItem.backButtonTitle = "Custom back title A"
    }
}
No back button title
This is the most interesting scenario of all since an empty back button title is quite popular among designers.
class AViewController: UIViewController {
    override func viewDidLoad() {
        title = "Title A"
        navigationItem.backButtonTitle = ""
    }
}
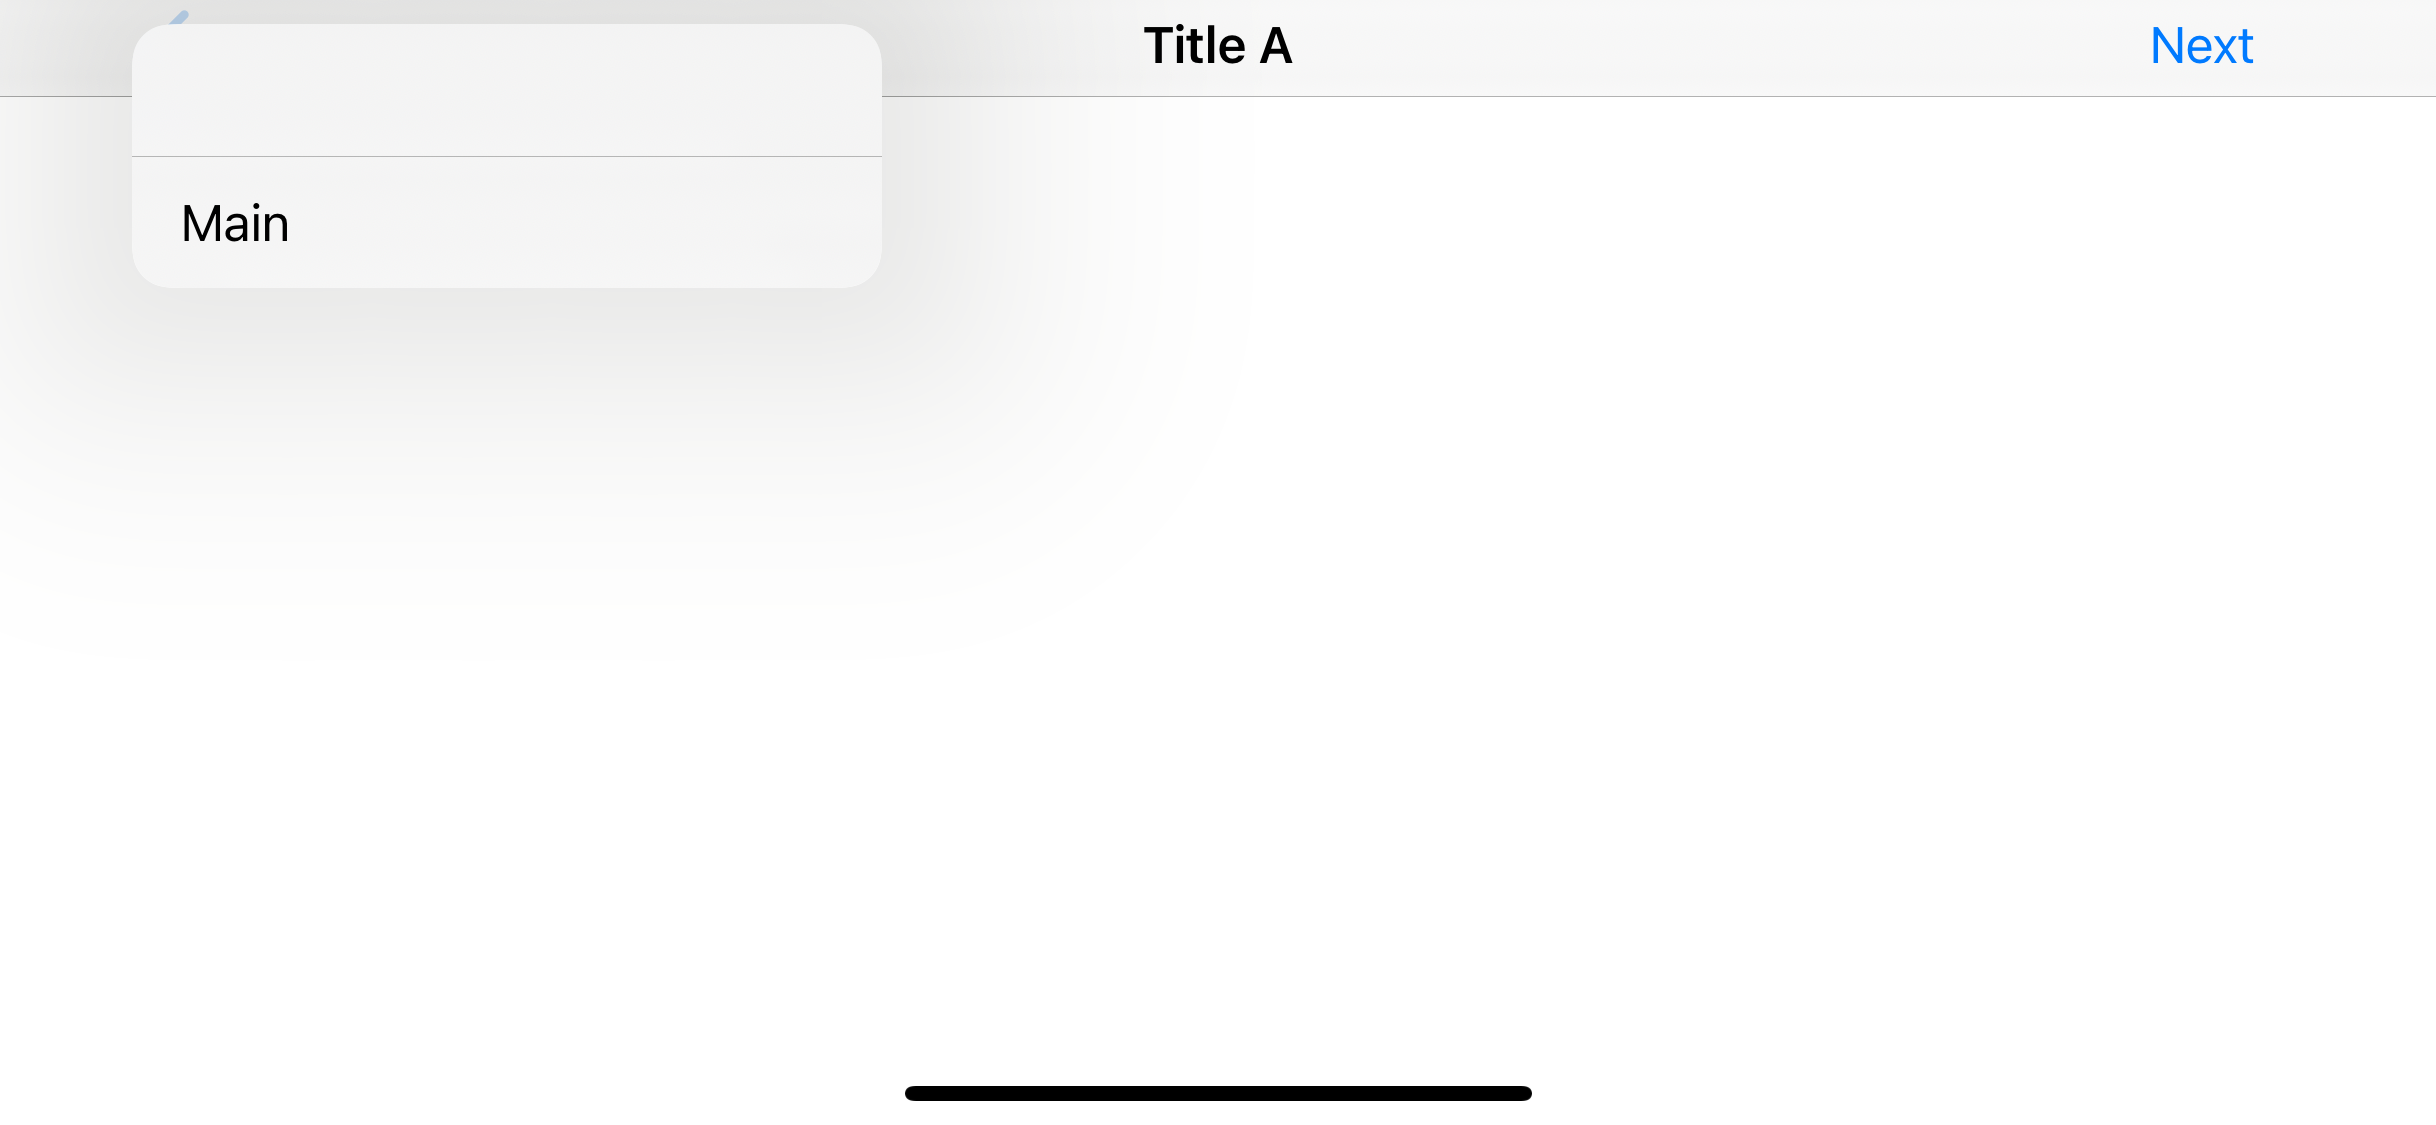
As you can see, this is the most harmful design for iOS 14. Does this mean we have to tell our designers to put back a button title from now on? Luckily, the answer is no. We can work around this problem.
Solution
We know that a back button title must be there for history stack to pick up a title. So, we have to set backButtonTitle a value you want to show in history and then try to hide it in UI.
Change offset (not work)
The first idea that comes up is setting negative x offset like what we sometimes do with a CSS styling. You can hide a back button title with this method, but you will suffer from transition animation. You will see a title slide beyond the back button indicator.
UIBarButtonItem.appearance().setBackButtonTitlePositionAdjustment(UIOffset(horizontal:-500, vertical: 0), for: .compact)
UIBarButtonItem.appearance().setBackButtonTitlePositionAdjustment(UIOffset(horizontal:-500, vertical: 0), for: .default)
Transparent color
This solution is quite straight forward. We set a back button title color to transparent. This method uses some knowledge from UINavigationBar changes in iOS13, you might want to check it out.
let appearance = UINavigationBarAppearance()
appearance.configureWithDefaultBackground()

appearance.backButtonAppearance.normal.titleTextAttributes = [.foregroundColor: UIColor.clear]

UINavigationBar.appearance().standardAppearance = appearance
UINavigationBar.appearance().compactAppearance = appearance
Conclusion
This looks like a subtle change, but it requires some extra work on both the design and implementation phases. You can continue to design an app without a back button title, but make sure you provide a name for each view for a history stack.
You can easily support sarunw.com by checking out this sponsor.
Offline Transcription: Fast, privacy-focus way to transcribe audio, video, and podcast files. No data leaves your Mac.
Related Resources
Read more article about iOS, WWDC20, Breaking Change, Back Button, or see all available topic
Enjoy the read?
If you enjoy this article, you can subscribe to the weekly newsletter.
Every Friday, you'll get a quick recap of all articles and tips posted on this site. No strings attached. Unsubscribe anytime.
Feel free to follow me on Twitter and ask your questions related to this post. Thanks for reading and see you next time.
If you enjoy my writing, please check out my Patreon https://www.patreon.com/sarunw and become my supporter. Sharing the article is also greatly appreciated.
Become a patron Buy me a coffee Tweet ShareCross-promote apps with SKOverlay
SKOverlay is a new tool from Apple for doing apps cross-promotion.
SVG image assets supported in Xcode 12
We finally get SVG supported and the best thing is it is backward compatible with some limitations.