How to prepare your iOS project to support modular architecture
Table of Contents
At the beginning of a project, there are a lot of changes and uncertainty.
Trying to modularize your app at the beginning of the project might cost you time due to this uncertainty.
It might be easier to do that in the later phase when everything is clearer.
Today, I will show you how to continue writing an app as one single module and also prepare them for modularization. So you benefit from development speed but not leaving maintainability behind.
How to prepare your code for modularization
Modular programming is a fancy term that might scare you away. In fact, the process is very simple. Here are three things that you should do to prepare your project for future modularization.
- Use a folder to represent a module.
- Always think about Access Levels, e.g.,
public,private. - Treat a folder as a module.
You can easily support sarunw.com by checking out this sponsor.
AI Grammar: Correct grammar, spell check, check punctuation, and parphrase.
Use a folder to represent a module
Grouping your code into a folder is a good way to prepare for future modularization because that's what a module is all about, a group of related entities[1].
Here is an example of using the Swift Package for modularization. You can see that the MyUI module is just a group of files in a folder.
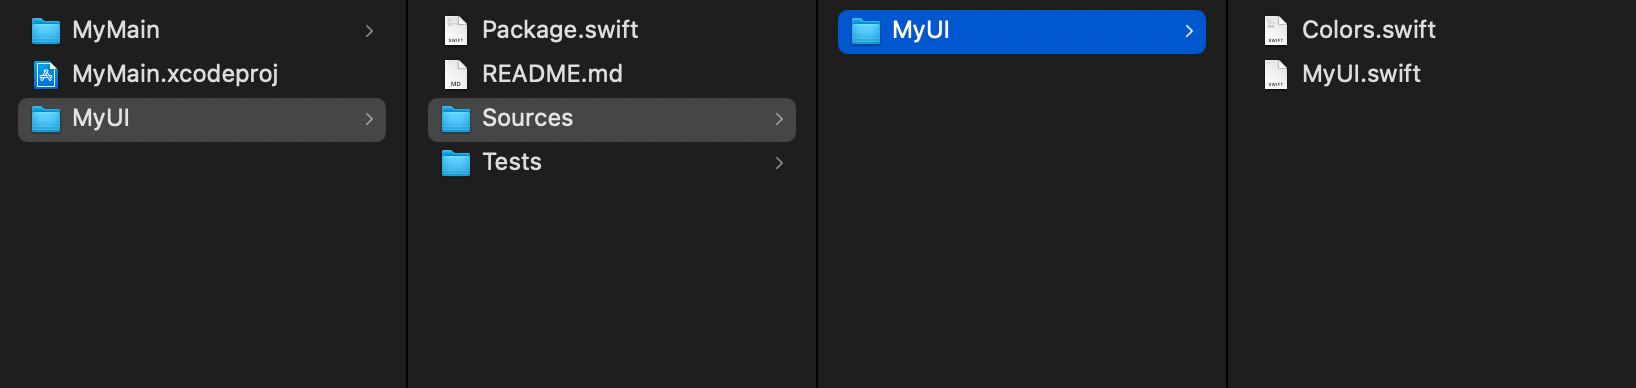
A folder is easier to adapt to change. You can drag and drop files around as you see fit at the time. And when it makes sense to start to modularize your app, it is just a matter of moving and renaming.
Grouping related files together are the first step. The next step is to define an appropriate access level.
Think about Access Levels
All entities can see each other when coding in a single module because the default access level is internal.
Internal access enables entities to be used within any source file within the same module, but not in any source file outside of that module.
Even though we grouped entities into a separate folder, they still see each other. But, this will no longer be a case when we start turning them into a module.
So, it will save you a lot of time and effort if you think about access levels in the early stage.
You don't have to be 100% correct, but at least ask yourself who needs to access each entity and define it as such.
How to decide an access level for an entity
Here are my general rules of thumb.
- If an entity means to use within the same folder, you can leave it as default (
internal). - If it means to use by entities from other folder, use
publicoropen. - If it means to use within their entity, use
privateorfileprivate.
You can easily support sarunw.com by checking out this sponsor.
AI Grammar: Correct grammar, spell check, check punctuation, and parphrase.
Treat a folder as a module
At this point, you have already prepared your entities for future modularization. The last step is about refining.
You can't be right on the first try. The key is to keep iterating over your structure.
When you find yourself using entities from another folder, it might be a time to adjust your code.
There is no silver bullet here. It is totally based on your project.
- You might need to move some entities to a shared folder.
- You might need to decouple things.
- You might decide to introduce a new protocol.
Again, you don't have to be 100% correct. Thinking about this from time to time should make your future modularizing a lot easier.
The various aspects of your code that can have access control applied to them (properties, types, functions, and so on) are referred to as "entities" for brevity. ↩︎
Read more article about Development, Swift Package, iOS, Module, or see all available topic
Enjoy the read?
If you enjoy this article, you can subscribe to the weekly newsletter.
Every Friday, you'll get a quick recap of all articles and tips posted on this site. No strings attached. Unsubscribe anytime.
Feel free to follow me on Twitter and ask your questions related to this post. Thanks for reading and see you next time.
If you enjoy my writing, please check out my Patreon https://www.patreon.com/sarunw and become my supporter. Sharing the article is also greatly appreciated.
Become a patron Buy me a coffee Tweet ShareHow to handle API Changes with @available
The available attribute (@available) is another tool that helps you cope with API changes. Let's see how this is different from the availability condition (#available).
How to change SwiftUI font size
There are two ways to set a font size for Text view in SwiftUI. Let's see what they are and how to set them.