How to draw custom paths and shapes in SwiftUI
Table of Contents
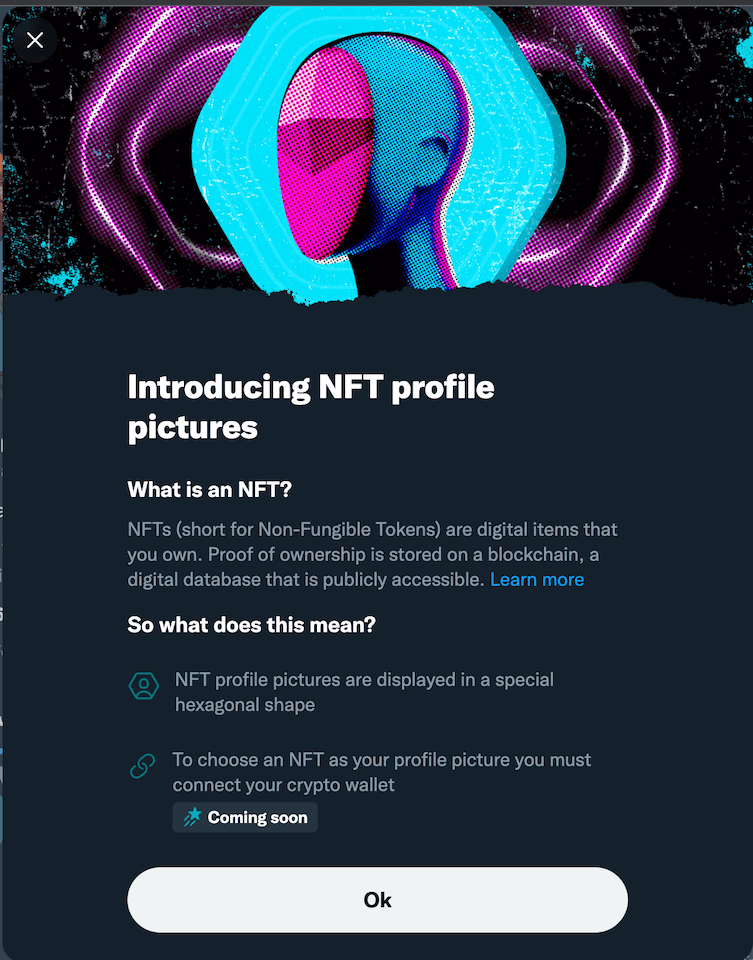
Recently, Twitter introduced the NFT profile picture, a groundbreaking feature that transforms your profile picture into a hexagon shape. I want to take this opportunity to learn NFT/web3 SwiftUI Path by replicating this feature and transforming any image into NFT hexagon-shaped with the help of SwiftUI clipShape, Path, and Shape.
How to create profile pictures
To create a hexagon-shaped profile picture, let's start with the basics. We will create a new view to present our profile picture, AvatarView.
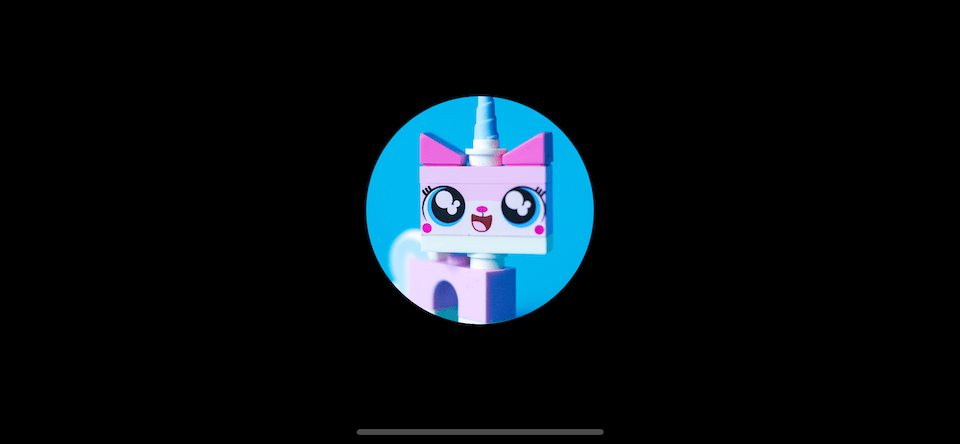
AvatarView presents an image within a circular shape of size 200x200. Here is the code[1].
struct AvatarView: View {
    let name: String
    var body: some View {
        Image(name)
            .resizable()
            .scaledToFill()
            .frame(width: 200, height: 200)
            .clipShape(Circle())
    }
}
resizable and scaledToFill will resize our image aspect fill to the 200x200 frame. And .clipShape(Circle()) will mask our image to the circular shape.
How to create NFT profile pictures
The only change we need to make an NFT profile picture is on .clipShape. .clipShape accepts a Shape that will use as a mask for the modified view. SwiftUI provides many built-in shapes. Too bad hexagon isn't one of them.
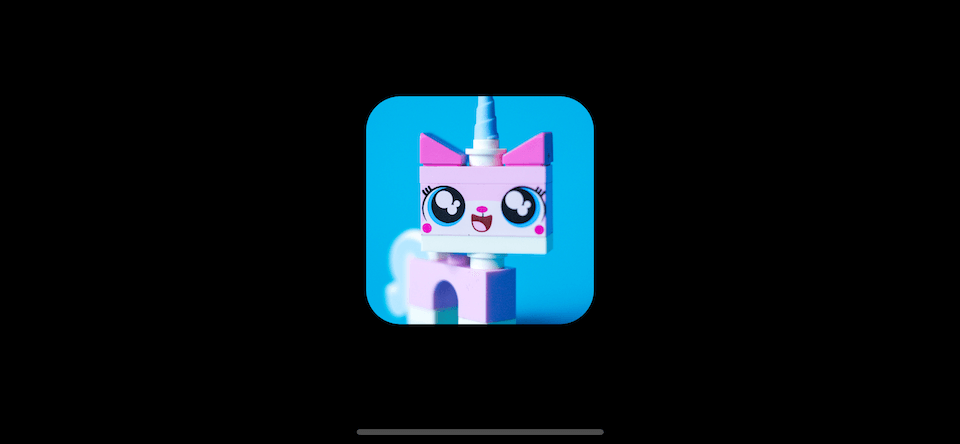
Here is another example of AvatarView, but we use a round rectangle as a clipping mask this time.
struct AvatarView: View {
    let name: String
    var body: some View {
        Image(name)
            .resizable()
            .scaledToFill()
            .frame(width: 200, height: 200)
            .clipShape(RoundedRectangle(cornerRadius: 30))
    }
}
You can easily support sarunw.com by checking out this sponsor.
Offline Transcription: Fast, privacy-focus way to transcribe audio, video, and podcast files. No data leaves your Mac.
How to create hexagon shapes
To create a hexagonal shape, first, we need to create Path. Path is a tool to create 2D shape with low level operation like move(to:), addLine(to:). You can think of this as a real-world drawing with all the methods that resemble how we control our pencils.
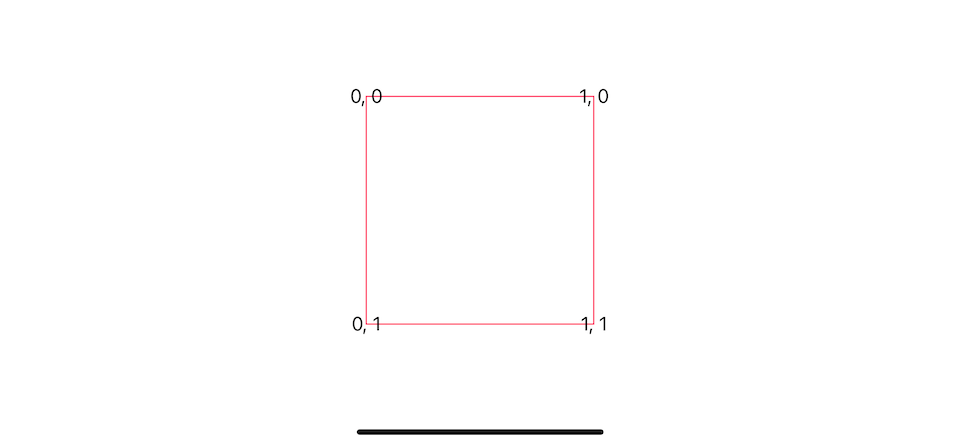
The View coordinate system
To draw a shape, we need to understand the view coordinate system first.
Everything we draw on 2D space is dictated by the x and y coordinate, where x and y are a distance from the origin on the horizontal and vertical axis, respectively. The origin of any particular view is in the top-left corner.
Here is an example of the x, y coordinates of each corner of a square view. The first number represents x, and the second number represents y.
With this knowledge, you can start drawing a simple shape. In the following example, I create a triangle shape of size 200x200.
Path { path in
    let width: CGFloat = 200
    let height: CGFloat = 200
    // 1
    path.move(
        to: CGPoint(
            x: 0 * width,
            y: 1 * height
        )
    )
    // 2
    path.addLine(
        to: CGPoint(
            x: 1 * width,
            y: 1 * height)
    )
    // 3
    path.addLine(
        to: CGPoint(
            x: 0.5 * width,
            y: 0 * height)
    )
    // 4
    path.closeSubpath()
}
.stroke(Color.pink, lineWidth: 1)
You can probably guess what this code is trying to do from the method names.
1 We first move our pencil to the point (0, 1), which is the bottom-left.
2 Then, we draw a line from that point to (1, 1), which is the bottom-right.
3 We draw the triangle's tip by adding another line from (1, 1) to (0.5, 0).
4 We close the paths by calling .closeSubpath(), which draws another line from the last point to the starting point. This completes the current subpath.
Hexagonal Path
If you can draw a triangle, it only takes a few more lines to make it hexagonal, so let's do it.
You can choose any coordinate you want. As long as it contains six sides, it is a hexagon. Here is my implementation.
Path { path in
    let width: CGFloat = 200
    let height: CGFloat = 200

    path.move(
        to: CGPoint(
            x: 0.2 * width,
            y: 0 * height
        )
    )

    path.addLine(
        to: CGPoint(
            x: 0.8 * width,
            y: 0 * height)
    )

    path.addLine(
        to: CGPoint(
            x: 1 * width,
            y: 0.5 * height)
    )

    path.addLine(
        to: CGPoint(
            x: 0.8 * width,
            y: 1 * height)
    )

    path.addLine(
        to: CGPoint(
            x: 0.2 * width,
            y: 1 * height)
    )

    path.addLine(
        to: CGPoint(
            x: 0 * width,
            y: 0.5 * height)
    )

    path.closeSubpath()
}
.stroke(Color.pink, lineWidth: 1)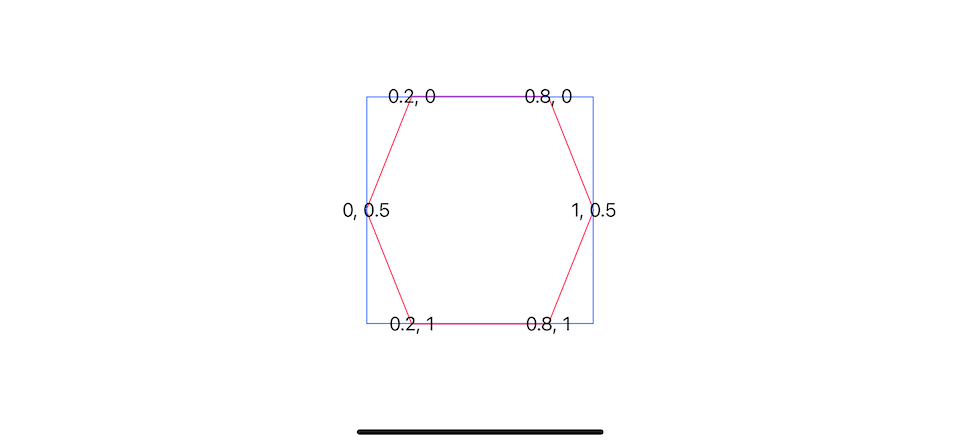
Hexagon Shape
We now have a path representation of hexagon, but .clipShape() accept Shape as an argument. So, the next step is to make a shape out of the hexagonal path.
Shape required us to implement only one method func path(in rect: CGRect) -> Path. Luckily, we already have Path in place.
public protocol Shape : Animatable, View {
    func path(in rect: CGRect) -> Path
}
The only thing we need to change is width and height. Instead of fixed width and height, we use the size of a passing rect, which is a frame of a shape.
struct NFTShape: Shape {
    func path(in rect: CGRect) -> Path {
        Path { path in
            // 1
            // let width: CGFloat = 200
            // let height: CGFloat = 200
            let width: CGFloat = rect.width
            let height: CGFloat = rect.height

            path.move(
                to: CGPoint(
                    x: 0.2 * width,
                    y: 0 * height
                )
            )

            path.addLine(
                to: CGPoint(
                    x: 0.8 * width,
                    y: 0 * height)
            )

            path.addLine(
                to: CGPoint(
                    x: 1 * width,
                    y: 0.5 * height)
            )

            path.addLine(
                to: CGPoint(
                    x: 0.8 * width,
                    y: 1 * height)
            )

            path.addLine(
                to: CGPoint(
                    x: 0.2 * width,
                    y: 1 * height)
            )

            path.addLine(
                to: CGPoint(
                    x: 0 * width,
                    y: 0.5 * height)
            )

            path.closeSubpath()
        }
    }
}
1 Use size from rect instead of hard-coded one.
NFT AvatarView
We have everything ready to make an NFT profile picture at this stage. Let's modify our AvatarView.
The only thing we need to do here is swap out circle shape with our NFTShape.
struct AvatarView: View {
let name: String
var body: some View {
Image(name)
.resizable()
.scaledToFill()
.frame(width: 200, height: 200)
// .clipShape(Circle())
.clipShape(NFTShape())
}
}
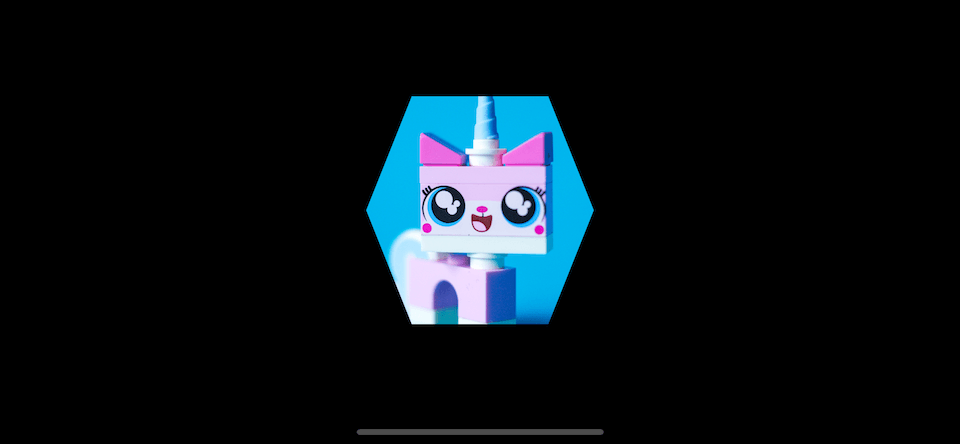
AvatarView(name: "avatar")And here is the result.
You can easily support sarunw.com by checking out this sponsor.
Offline Transcription: Fast, privacy-focus way to transcribe audio, video, and podcast files. No data leaves your Mac.
Conclusion
Drawing a custom path and shape might be a bit scary at first, but it is quite a straightforward task, as you can see. You might need to require some mathematic skills to draw more sophisticated shapes, but I believe you can do this by asking some friends or reading some books.
I hope you can create custom paths and shapes, and don't be afraid to do so after reading this. If you feel challenging, you can try making our hexagon shape rounder by using addQuadCurve(to:control:). I will leave that as an exercise for you :)
Read more article about SwiftUI, Image, Shape, Path, or see all available topic
Enjoy the read?
If you enjoy this article, you can subscribe to the weekly newsletter.
Every Friday, you'll get a quick recap of all articles and tips posted on this site. No strings attached. Unsubscribe anytime.
Feel free to follow me on Twitter and ask your questions related to this post. Thanks for reading and see you next time.
If you enjoy my writing, please check out my Patreon https://www.patreon.com/sarunw and become my supporter. Sharing the article is also greatly appreciated.
Become a patron Buy me a coffee Tweet ShareHow to align text center/leading/trailing in SwiftUI
Align text within a container view in SwiftUI isn't a straightforward operation as you might think. Let's learn how to do it.
How to use Label in SwiftUI custom view
A guideline on how to embrace a label in your custom view.