Multi-cursor editing in Xcode
Table of Contents
What is a cursor?
A cursor is a position indicator of where we are editing our code. Typically, one cursor is all we need.

You can easily support sarunw.com by checking out this sponsor.

Translate your app In 1 click: Simplifies app localization and helps you reach more users.
What is multi-cursor editing?
Multi-cursor editing is a feature that allows you to place multiple cursors in your code and edit them simultaneously.
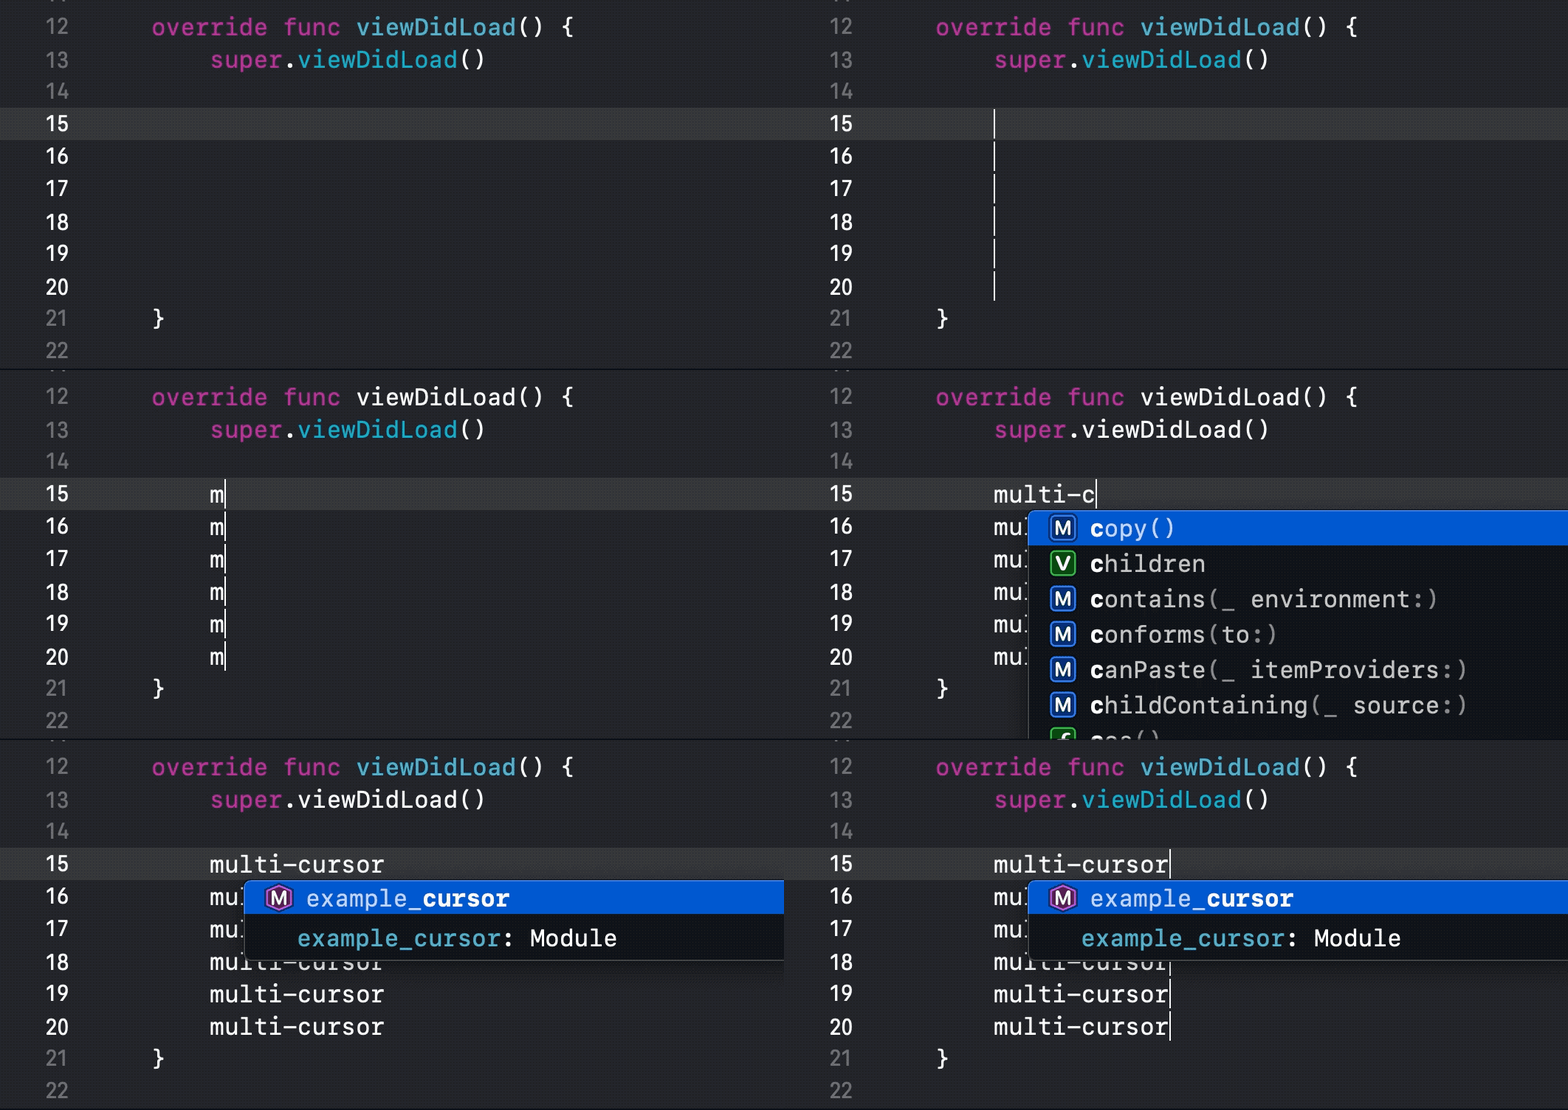
How to use it?
There are a few ways to enable multi-cursor editing.
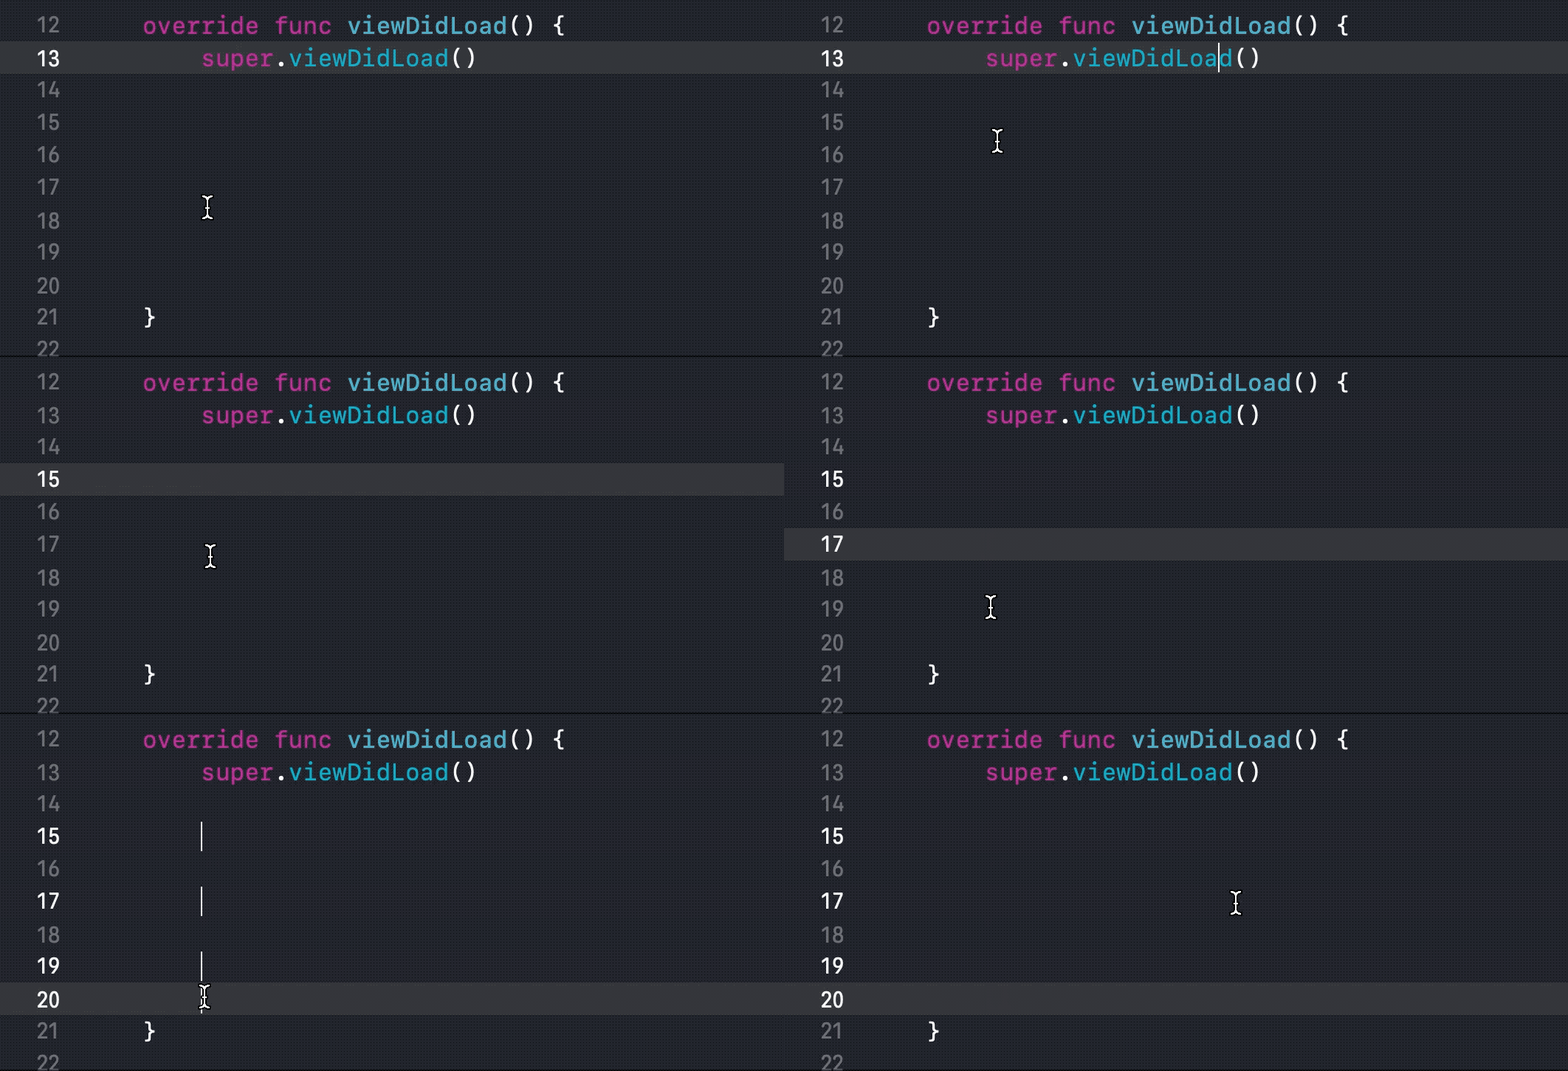
Add a cursor with a click
To add a new cursor, hold Control and SHIFT then click.
⌃ – Control + ⇧ - SHIFT + Click
Add a cursor with an arrow key
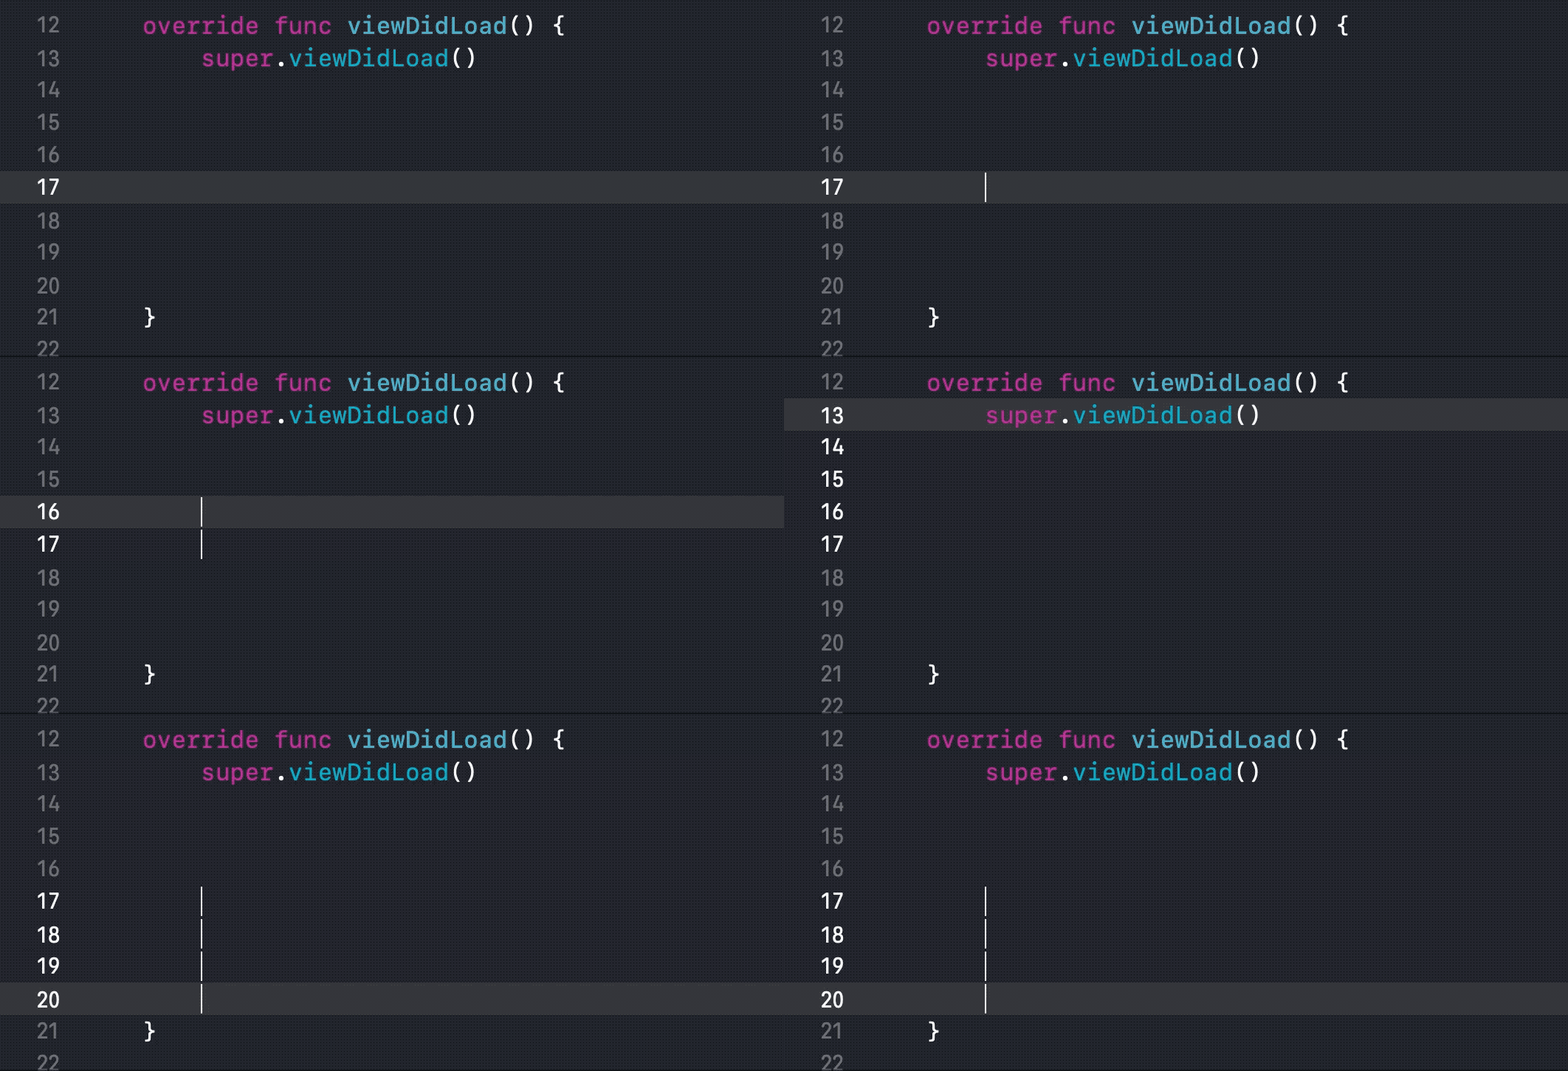
If you want to add multiple cursors at the same column, instead of wasting time aiming and clicking, you can use the arrow key to navigate. Hold ⌃ – Control and ⇧ - SHIFT then ↑ or ↓ to add cursors to the line above and below your current position. You can deselect a cursor by hit the arrow in the opposite direction.
⌃ – Control + ⇧ - SHIFT + ↑
⌃ – Control + ⇧ - SHIFT + ↓
Add a cursor with a drag
If you don't want to hold multiple keys at the same time, this is the method with the least keys holding. To add multiple cursor, hold Option then drag your cursor around.
⌥ – Option + Drag

Remove a cursor with a click
To remove a cursor, hold Control and SHIFT then click on the existing cursor. You can use this regardless of whatever method you add a cursor.
⌃ – Control + ⇧ - SHIFT + Click

Exit multi-cursor editing mode
To go back to single-cursor editing, just hit esc.
esc
Why do we need this?
If you never see this trick before, you might wonder what the benefit of editing in multiple places at the same time is. There are countless ways to use this multi-cursor editing, which you might pick up along the way. I will show some of them to get you started. After you see these examples, you might come up with the one that suits your workflow.
Initialize custom CodingKey
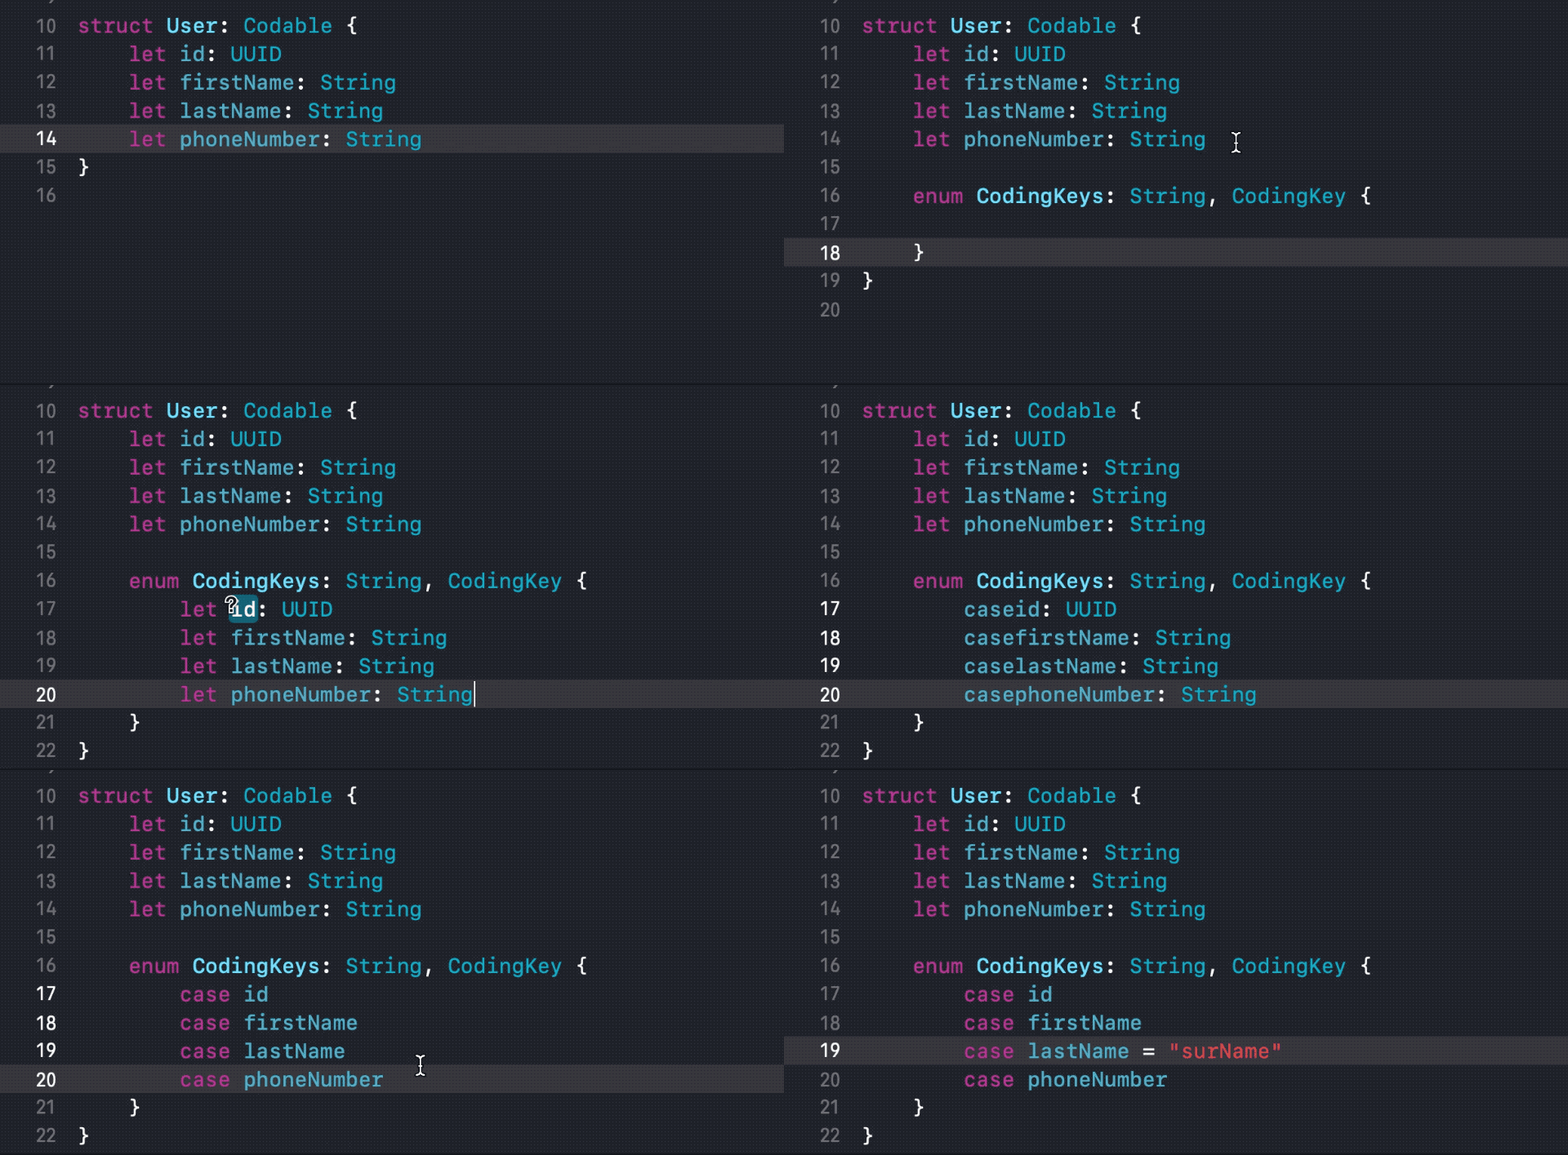
Let's say you have a struct that you want to have a custom coding key. Define all the key for all property in the struct is a tiring process. Multi-cursor editing can help make the process easier.
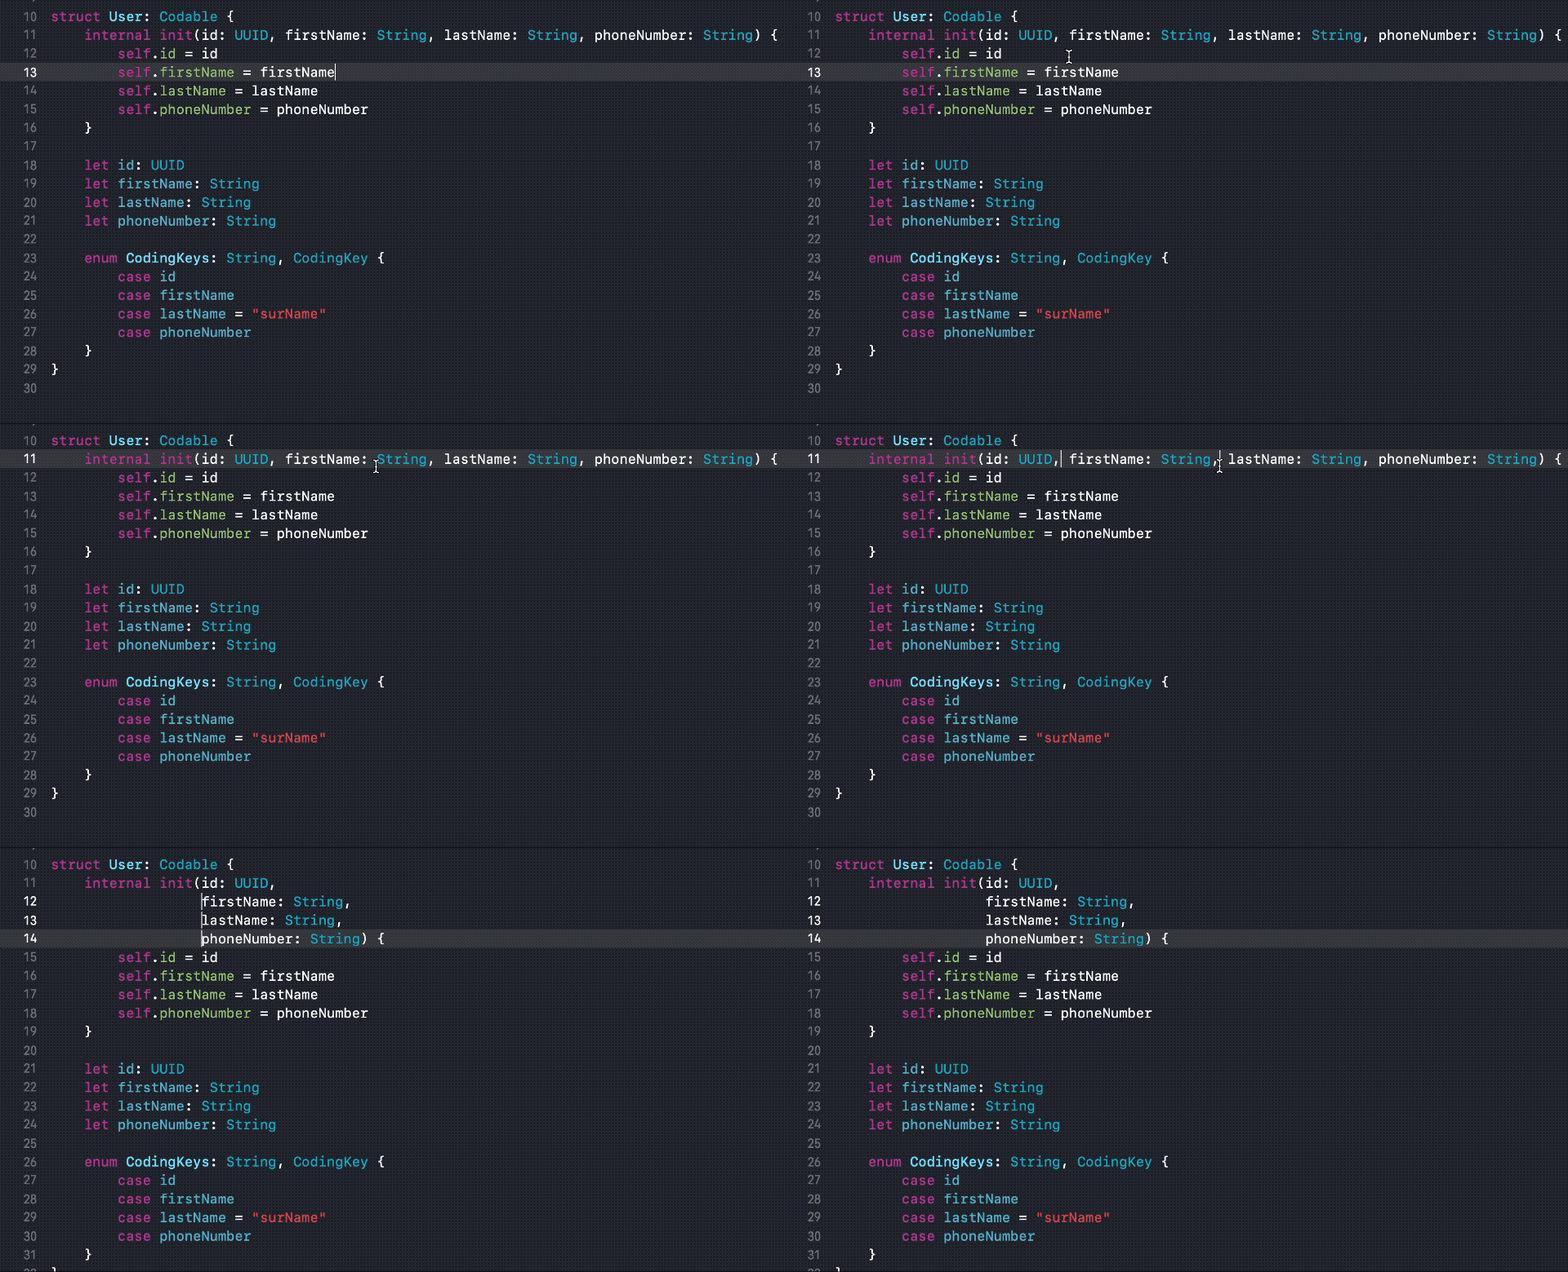
Change method parameter indentation style
We add cursors before each parameter with Control + SHIFT + click then add a new line to expand our parameter into multiple lines.
You can easily support sarunw.com by checking out this sponsor.

Translate your app In 1 click: Simplifies app localization and helps you reach more users.
Conclusion
Multi-cursor is one of my favorite features. I hope you find this trick useful and got it under your belt.
Read more article about Xcode, Workflow, or see all available topic
Enjoy the read?
If you enjoy this article, you can subscribe to the weekly newsletter.
Every Friday, you'll get a quick recap of all articles and tips posted on this site. No strings attached. Unsubscribe anytime.
Feel free to follow me on Twitter and ask your questions related to this post. Thanks for reading and see you next time.
If you enjoy my writing, please check out my Patreon https://www.patreon.com/sarunw and become my supporter. Sharing the article is also greatly appreciated.
Become a patron Buy me a coffee Tweet ShareGetting the number of days between two dates in Swift
There are a few variations when dealing with counting days. You need to ask yourself some questions beforehand.
Scaling custom fonts automatically with Dynamic Type
Font is an essential part of an app. A good selection of font would make your app stand out from the crowd. But whatever fonts you choose, you have to make sure it doesn't lose its core function, readability. You might feel reluctant to use a custom font in the past because you might lose the benefit of dynamic type goodness that Apple provides with their system font. Since iOS 11, this is no longer the case. You can easily use your custom font dynamic type.