How to declare Multiline String in Swift
Table of Contents
Normally, if you want to make a string go to the next line, you can add line feed escape sequence (\n) at a place where you want to add line break.
let string = "Line 1\nLine 2"Output:
print(string)

Line 1
Line 2
This works for a short string, but you can imagine how hard it is to use this on a long string with a lot of lines.
let lorem = "Lorem ipsum dolor sit amet, consectetur adipiscing elit.\nInteger nec odio.\nPraesent libero.\nSed cursus ante dapibus diam.\nSed nisi.\nNulla quis sem at nibh elementum imperdiet.\nDuis sagittis ipsum.\nPraesent mauris."Output:
print(string)

Lorem ipsum dolor sit amet, consectetur adipiscing elit.
Integer nec odio.
Praesent libero.
Sed cursus ante dapibus diam.
Sed nisi.
Nulla quis sem at nibh elementum imperdiet.
Duis sagittis ipsum.
Praesent mauris.
As you can see, it is hard to visualize and confirm the correctness of the result string.
Luckily, Swift has a special syntax of declaring a multiline string.
You can easily support sarunw.com by checking out this sponsor.
Offline Transcription: Fast, privacy-focus way to transcribe audio, video, and podcast files. No data leaves your Mac.
How to declare Multiline String in Swift
To create a multiline string, we surrounded a string with three double quotation marks (""") instead of one.
let multilineString = """
...
"""
The following will produce the same output as our previous use of \n, but it is more readable.
let lorem = """
Lorem ipsum dolor sit amet, consectetur adipiscing elit.
Integer nec odio.
Praesent libero.
Sed cursus ante dapibus diam.
Sed nisi.
Nulla quis sem at nibh elementum imperdiet.
Duis sagittis ipsum.
Praesent mauris.
"""
There are a few rules you should know about Multiline String Literals.
Where the content started and ended
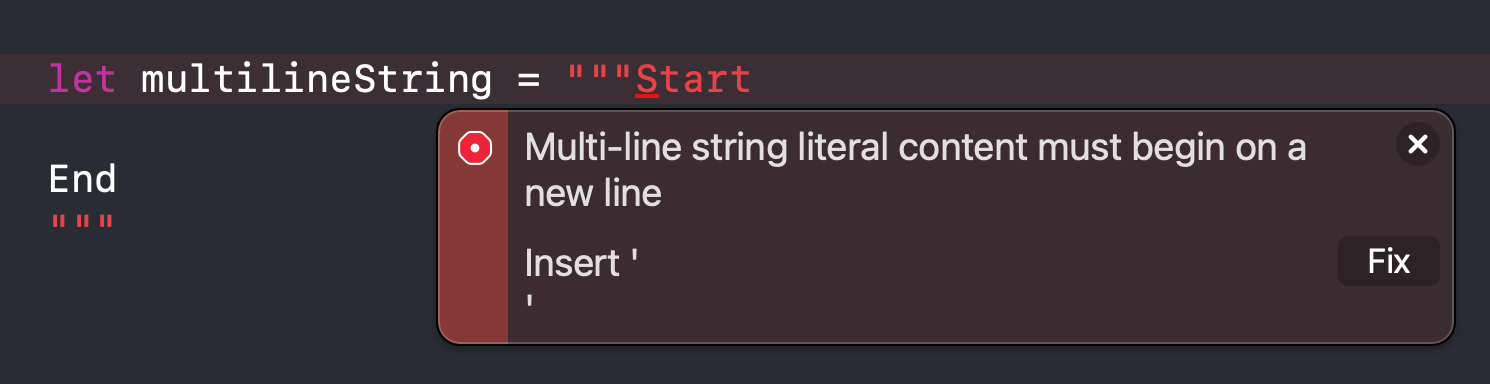
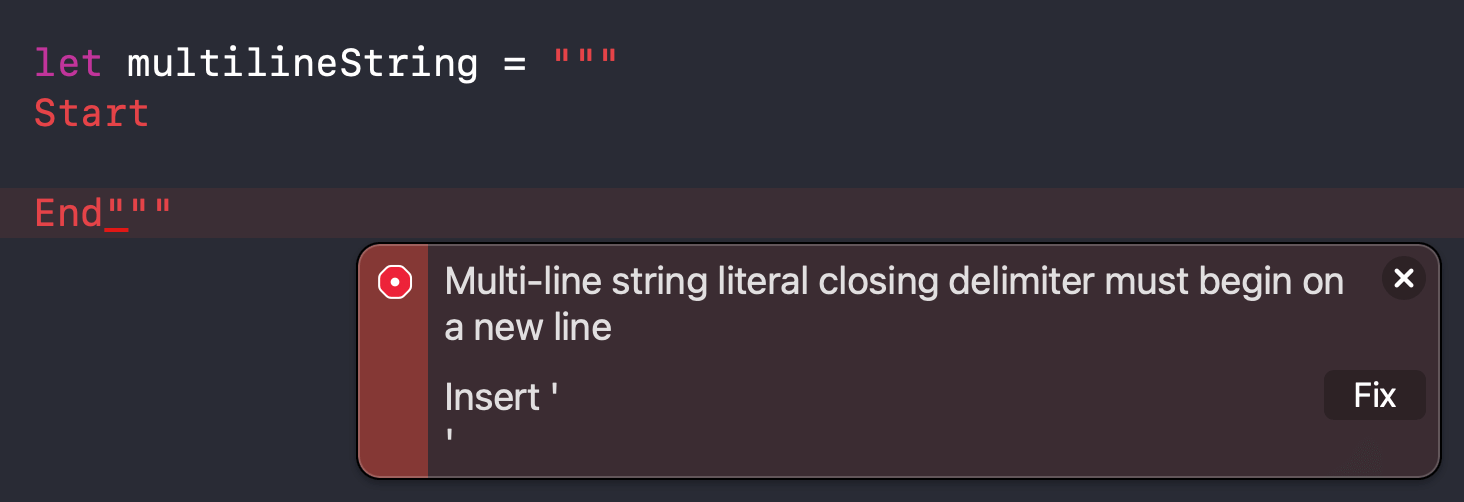
The content of a multiline string includes everything between its opening and closing quotation marks.
- The content start from the first line After the openning quotation marks (
"""). - The content ends on the line Before the closing quotation marks.
let multilineString = """
Start

End
"""
You don't need to worry much about this rule since the compiler can catch this if you declare it wrong.
Omit line break
If you use a multiline string to improve the readability of your source code but don't want the line breaks to be part of the resulting string's value, write a backslash (\) at the end of those lines.
Use a backslash (\) to omits the following line break.
let softWrapped = """
This is just \
one wrong sentence.

This is another one\
.
"""
We can put "This is just" and "one wrong sentence" in a different line in the source code, and it will render on the same line since we omit it with backslash (\).
Output:
This is just one wrong sentence.

This is another one.
Indentation
People have preferences when it comes to code indentation.
With different indentations, a multiline string can be a little bit confusing on where the line started.
But the rule is simple, the content of each line started where the closing quotation marks started.
These three strings represent the same value, "Lorem ipsum dolor sit amet".
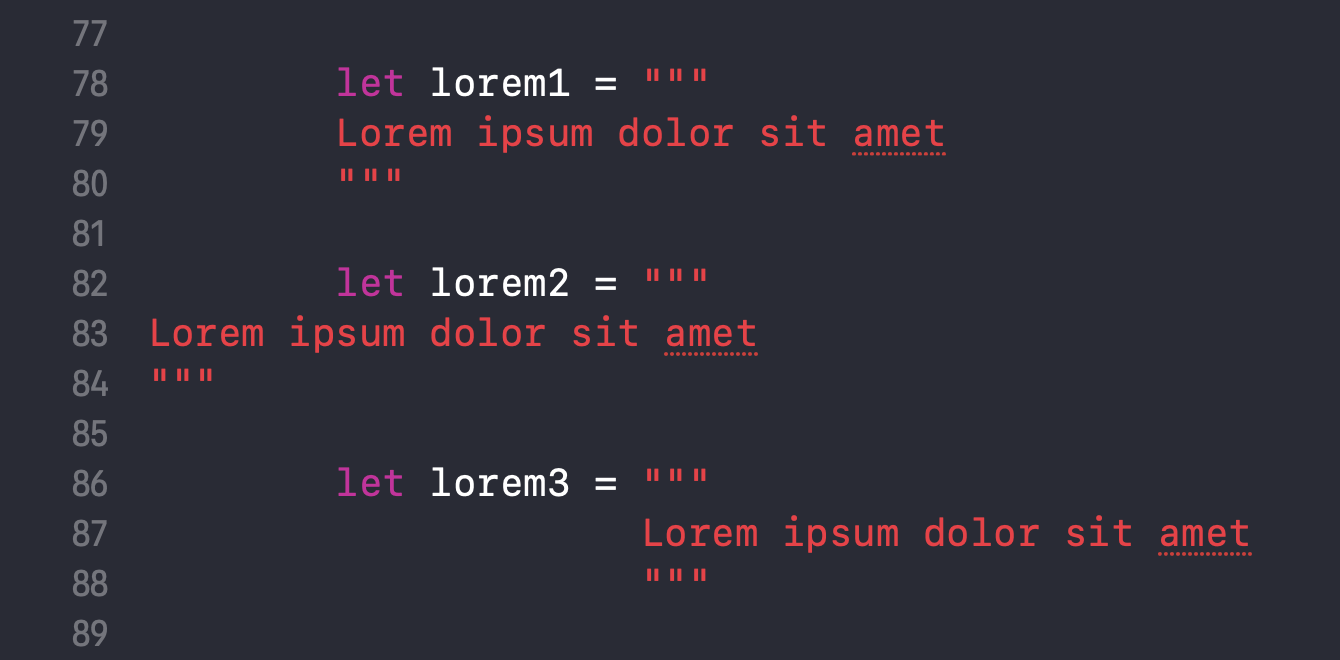
Here is another example.
let lorem1 = """
    Four whitespace characters
"""

let lorem2 = """
    No whitespace characters
    """
Output:
    Four whitespace characters
No whitespace charactersRead more article about Swift, String, or see all available topic
Enjoy the read?
If you enjoy this article, you can subscribe to the weekly newsletter.
Every Friday, you'll get a quick recap of all articles and tips posted on this site. No strings attached. Unsubscribe anytime.
Feel free to follow me on Twitter and ask your questions related to this post. Thanks for reading and see you next time.
If you enjoy my writing, please check out my Patreon https://www.patreon.com/sarunw and become my supporter. Sharing the article is also greatly appreciated.
Become a patron Buy me a coffee Tweet ShareHow to change Status Bar text color in SwiftUI
Learn how to change a status bar text color in SwiftUI.