How to change Status Bar text color in SwiftUI
Table of Contents
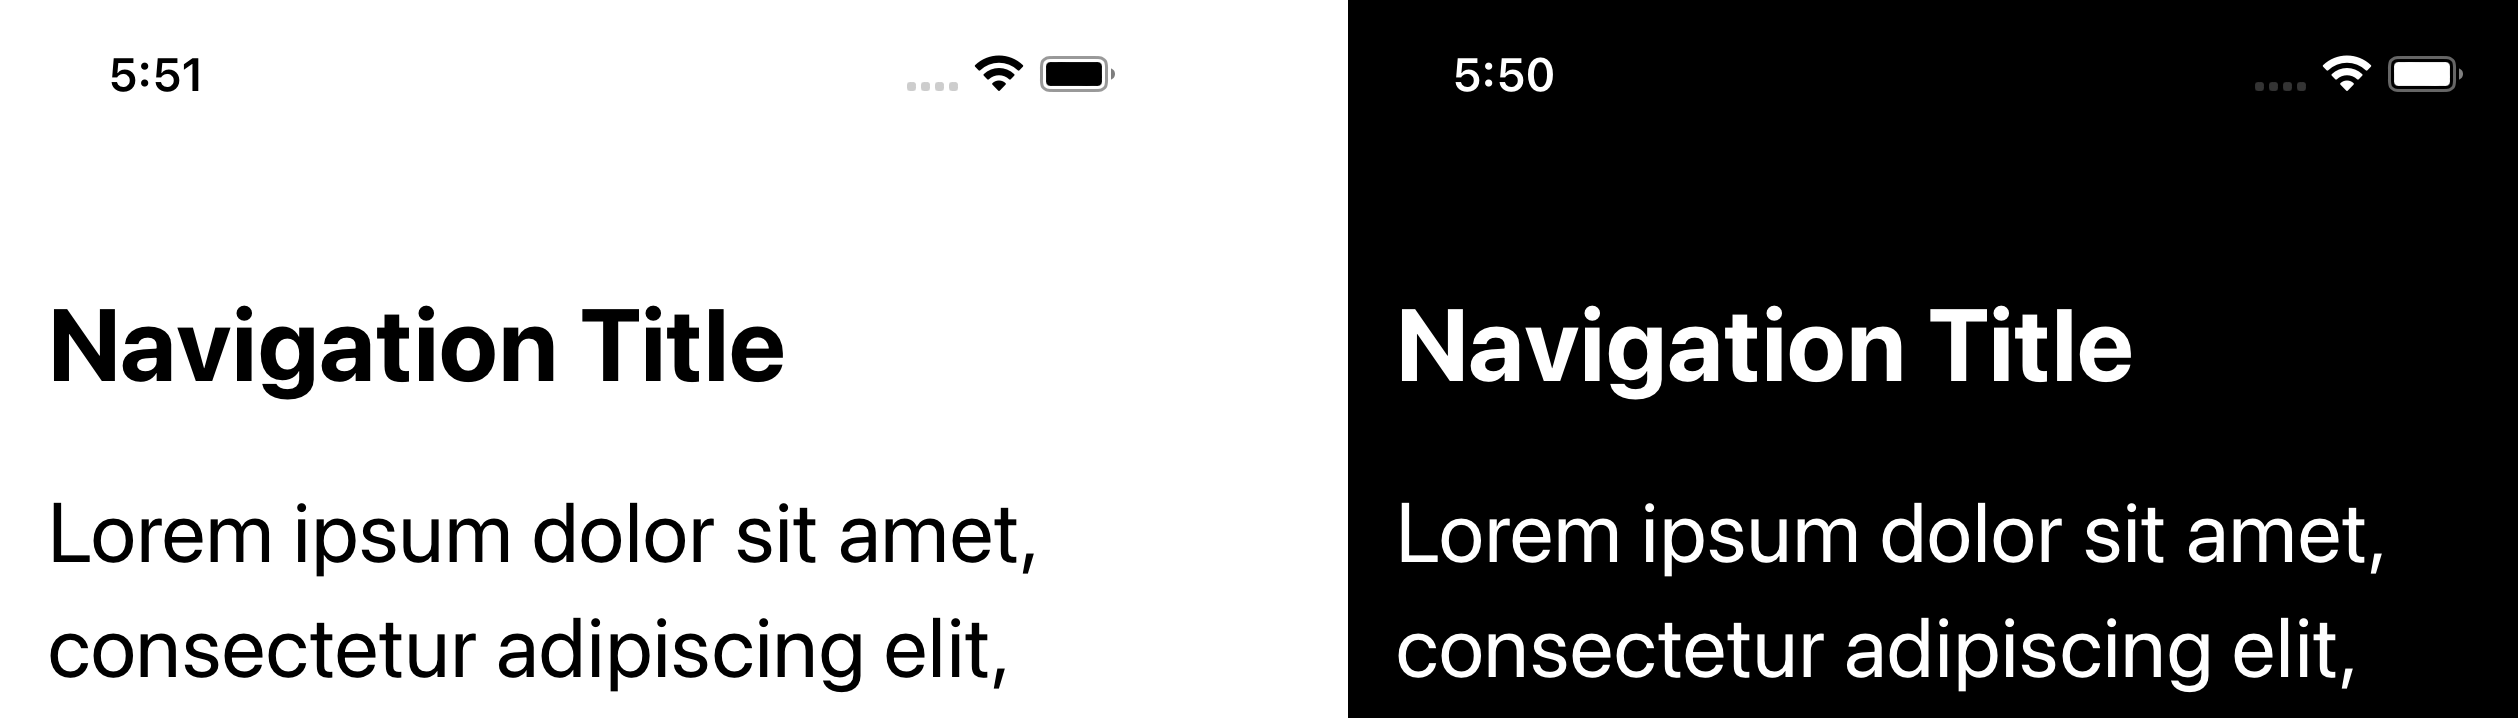
Status Bar is the topmost area that shows information about the device, e.g., time, wi-fi signal, and battery percentage.
It can be present in two colors, black and white.
By default, SwiftUI automatically changes the status bar text color according to the device appearance setting, i.e., light and dark mode.
There are two ways you can override the default behavior, and manually set the status bar text color in SwiftUI.
- Change status bar text color for the whole app.
- Change status bar text color for specific screen.
Change status bar text color for the Whole app using Info.plist
If you want to set the status bar text color to be the same for every screen regardless of the device's appearance, you can do it by specifying two keys in Info.plist.
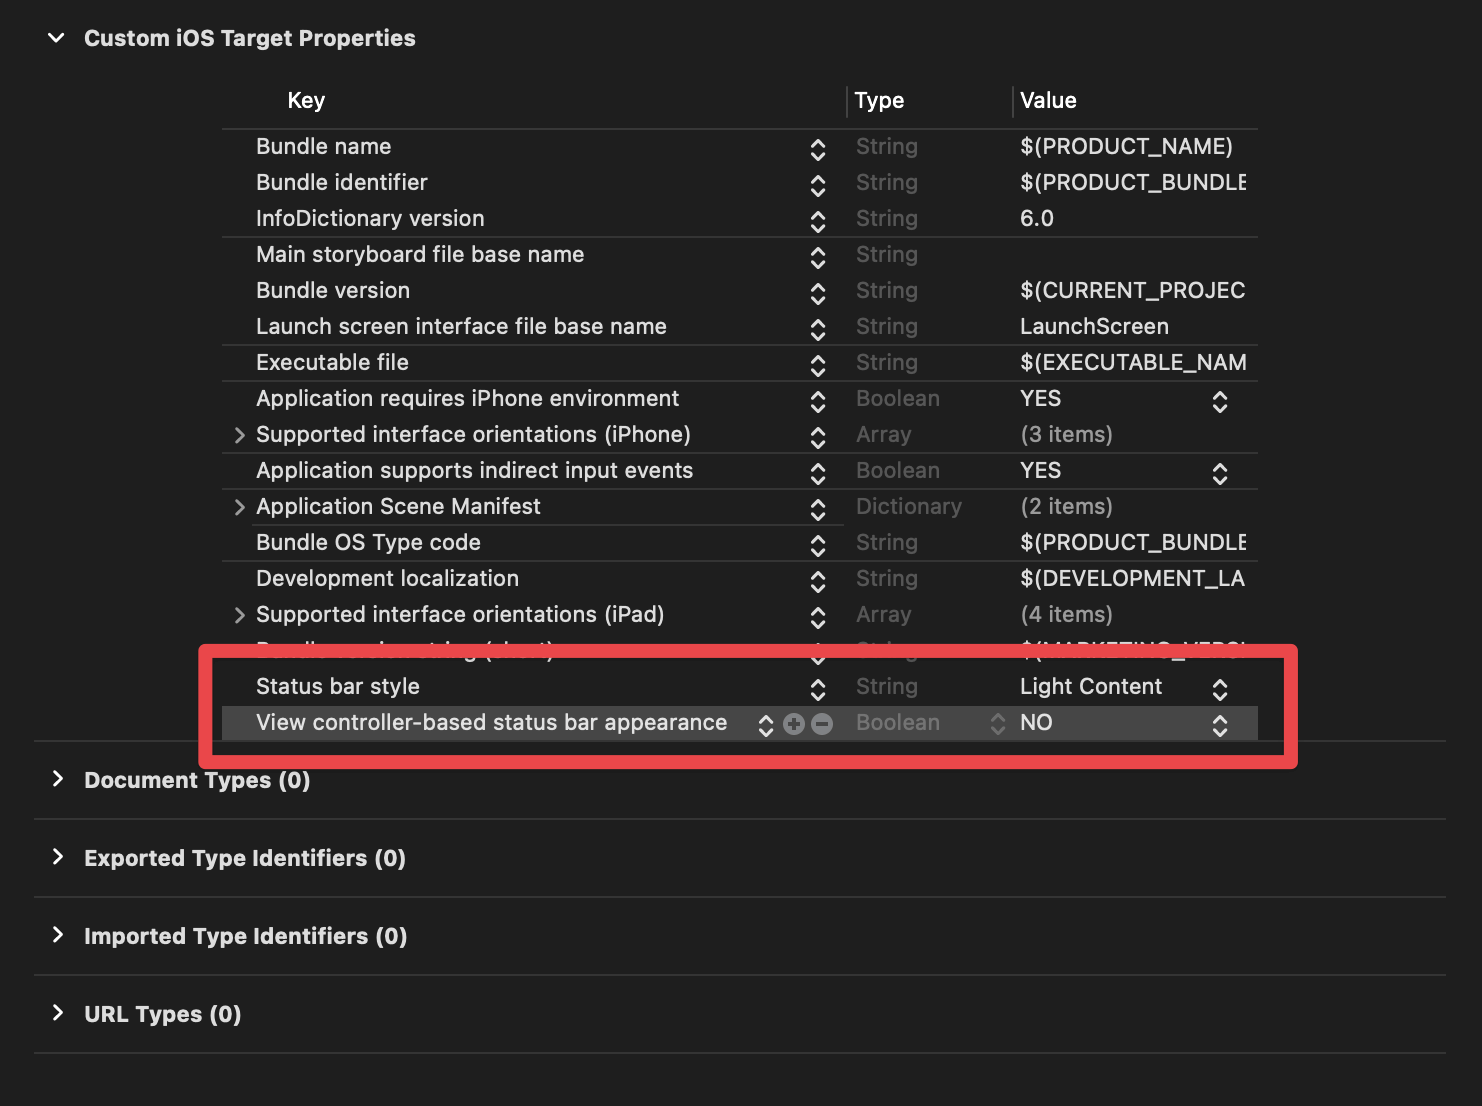
- Open your Info.plist, either from the Project Navigation or the "Info" tab.
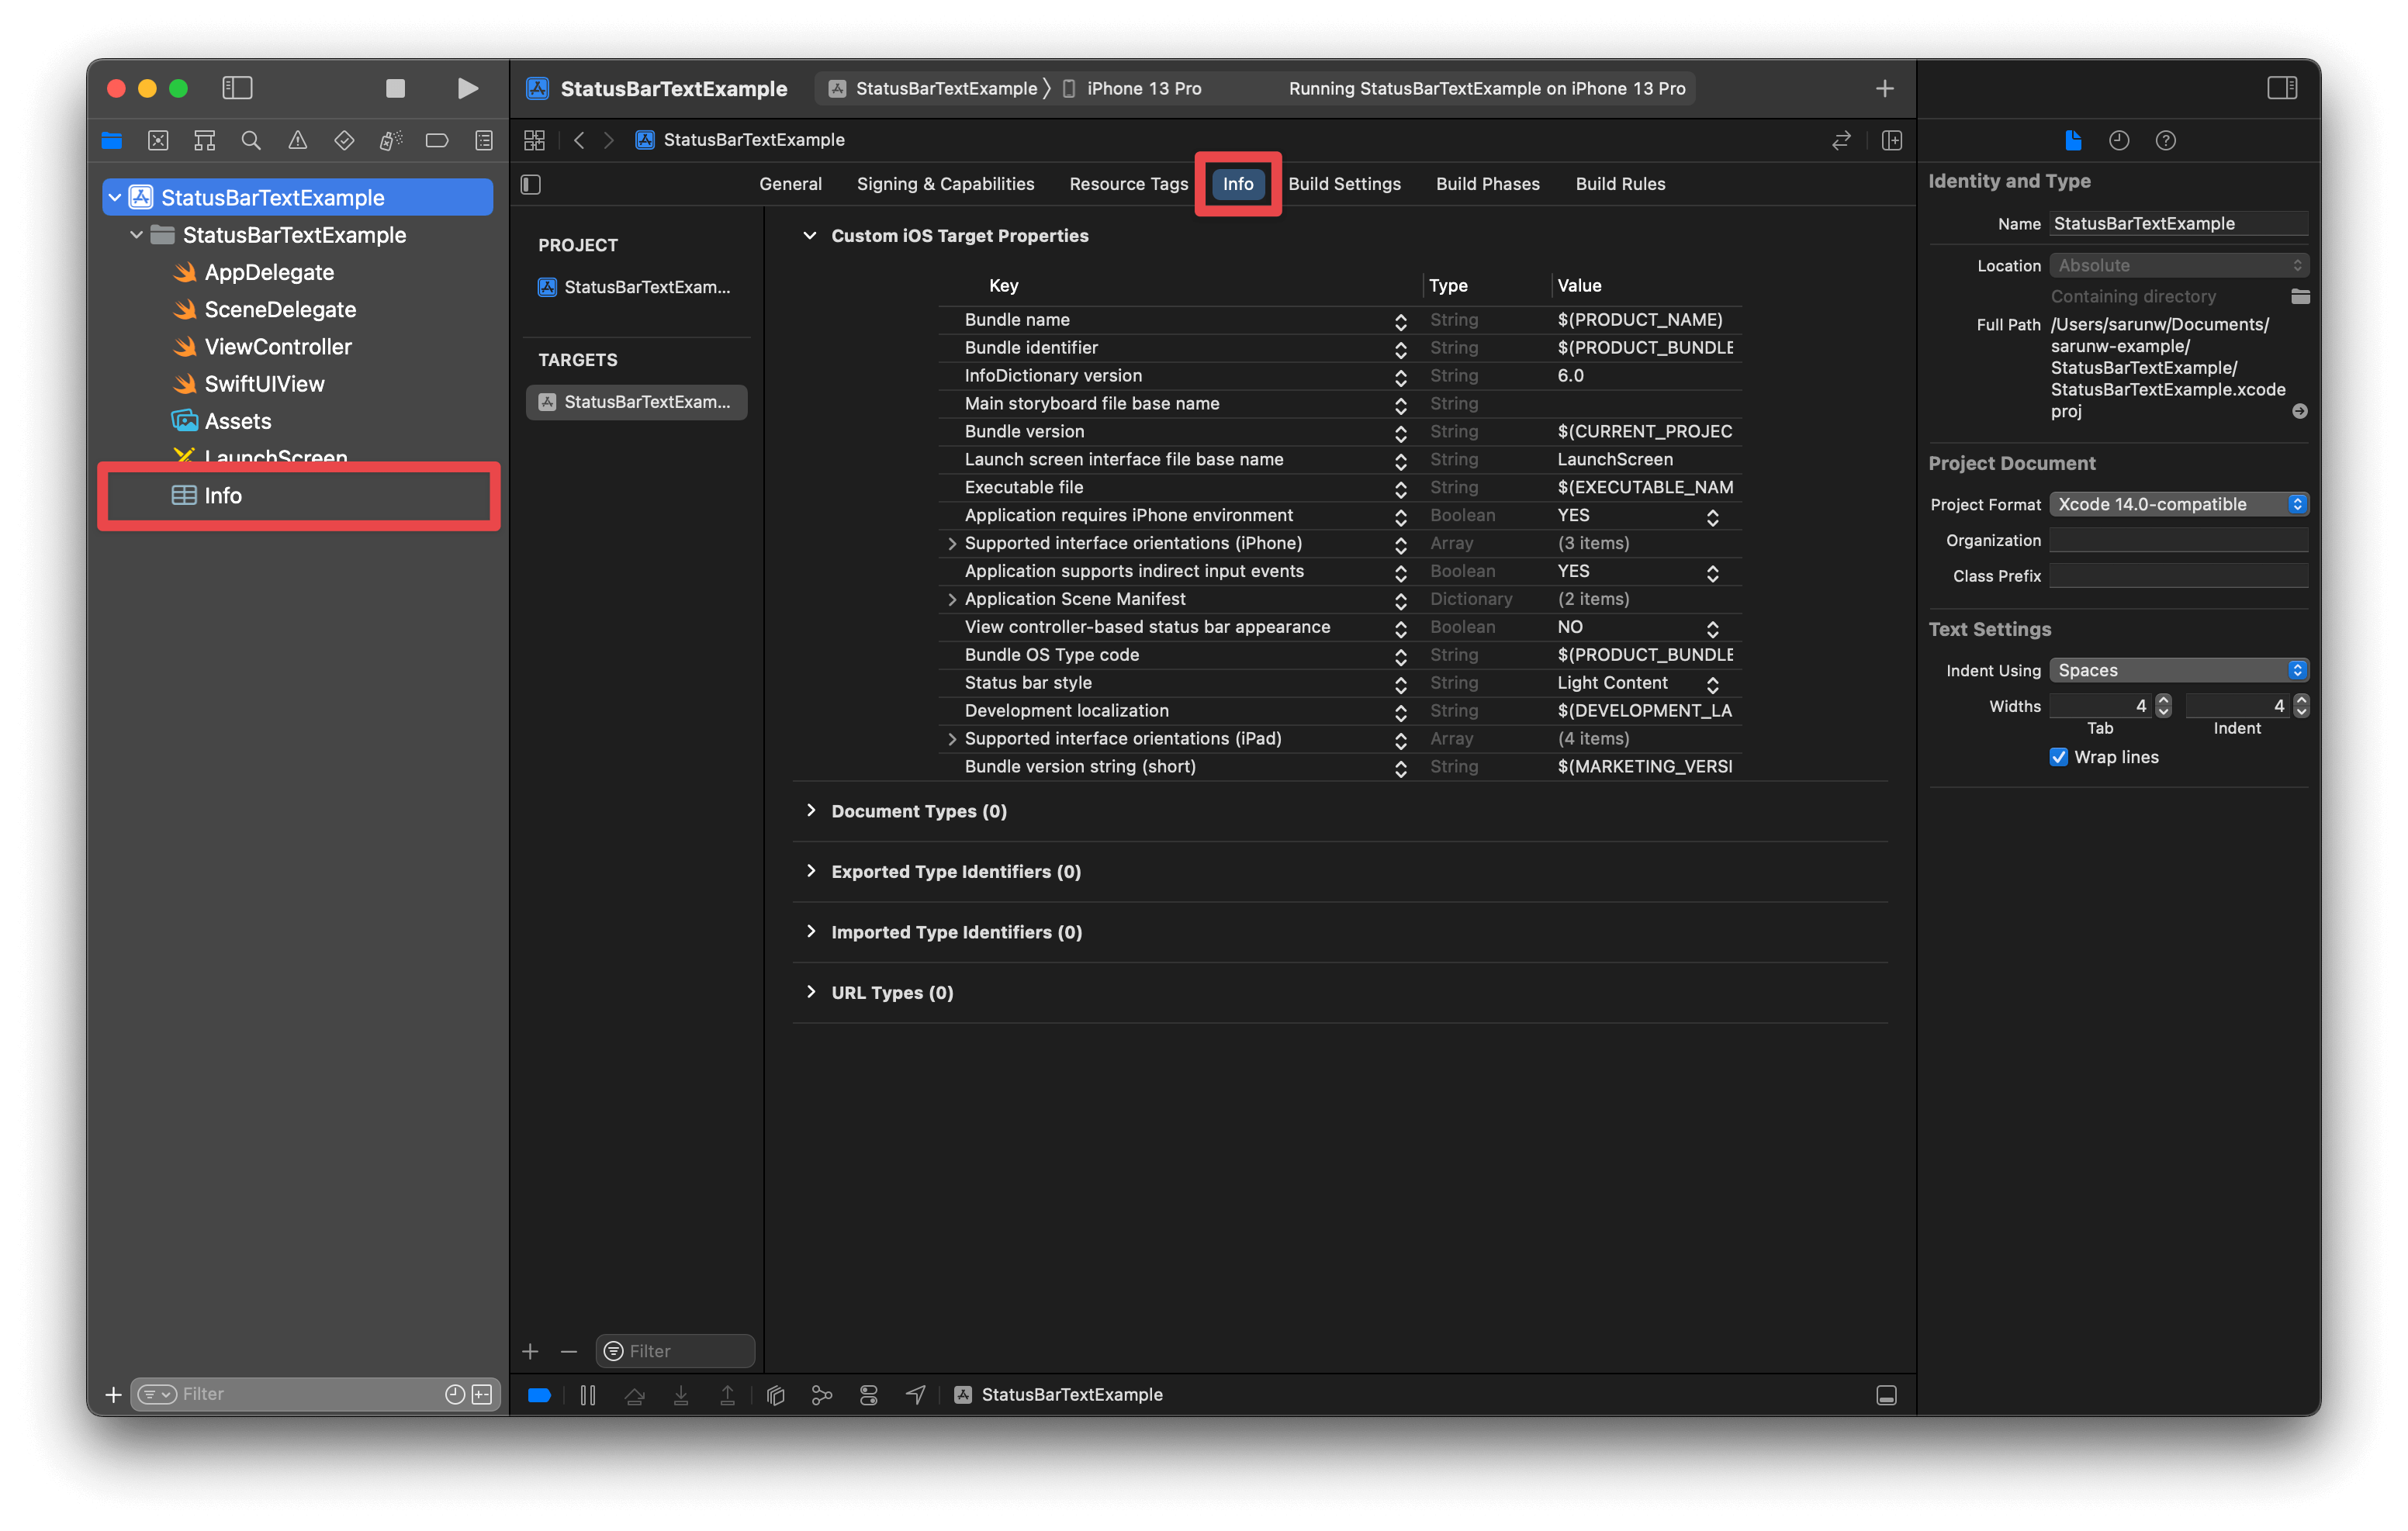
- Add key "Status bar style" (
UIStatusBarStyle) and set value to either "Light Content" (UIStatusBarStyleLightContent) or "Dark Content" (UIStatusBarStyleDarkContent). - Add key "View controller-based status bar appearance" (
UIViewControllerBasedStatusBarAppearance) and set its value to "NO".
You can easily support sarunw.com by checking out this sponsor.
Offline Transcription: Fast, privacy-focus way to transcribe audio, video, and podcast files. No data leaves your Mac.
Change status bar text color for Specific Screen
In iOS 16, we can indirectly change the status bar text color by setting the navigation bar's preferred color scheme.
We set set navigation bar color scheme with the new modifier, .toolbarColorScheme.
Here is an example where we change the status bar text color to white by setting the navigation bar's preferred color scheme to dark, .toolbarColorScheme(.dark, for: .navigationBar).
NavigationView {
ScrollView {
Text("Lorem ipsum dolor sit amet, consectetur adipiscing elit, sed do eiusmod tempor incididunt ut labore et dolore magna aliqua. Ut enim ad minim veniam, quis nostrud exercitation ullamco laboris nisi ut aliquip ex ea commodo consequat. Duis aute irure dolor in reprehenderit in voluptate velit esse cillum dolore eu fugiat nulla pariatur. Excepteur sint occaecat cupidatat non proident, sunt in culpa qui officia deserunt mollit anim id est laborum.")
.font(.title)
.padding()
}
.navigationTitle("Navigation Title")
.toolbarColorScheme(.dark, for: .navigationBar)
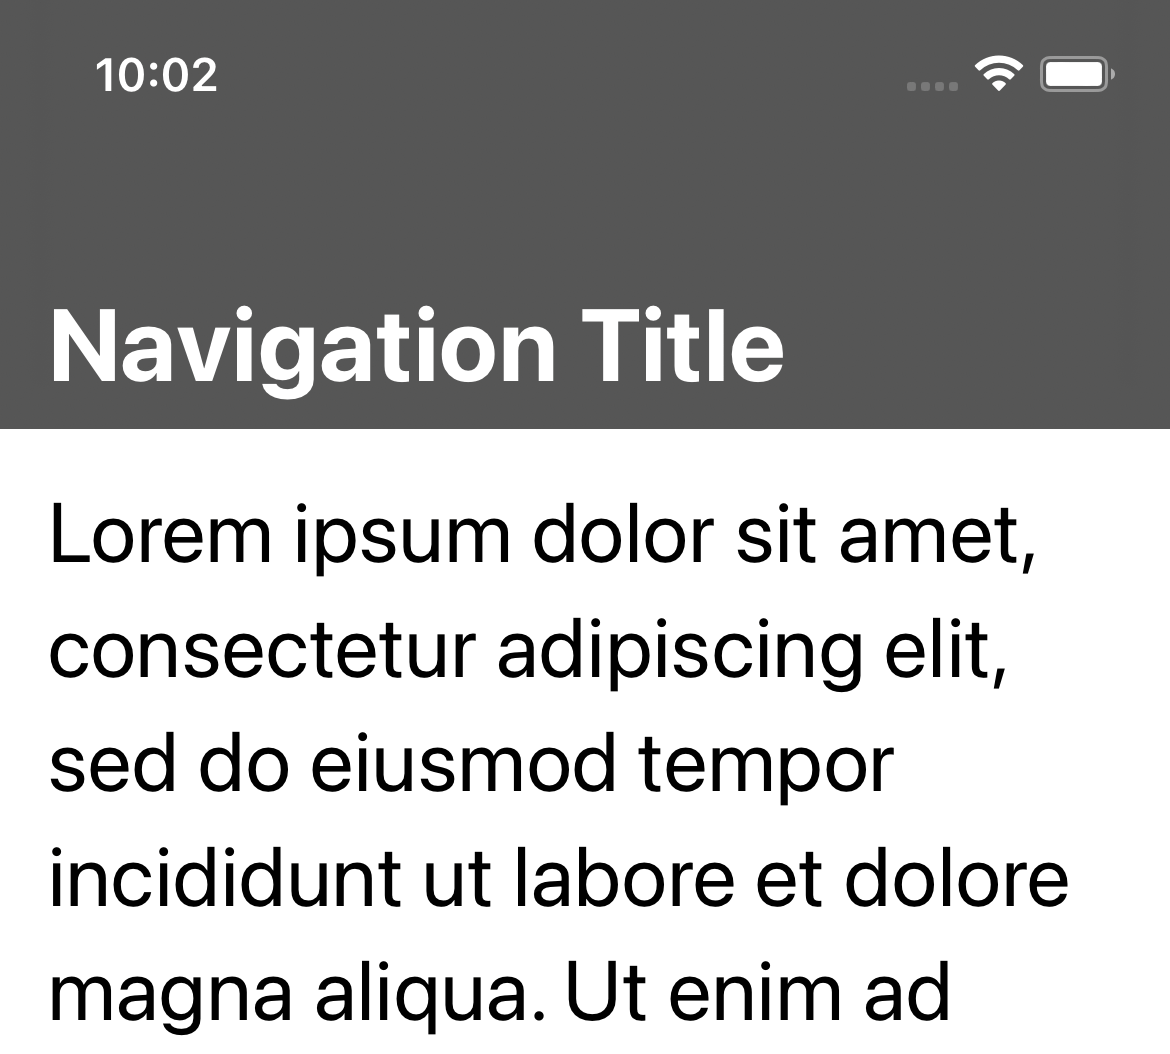
}Note that the provided color scheme, .toolbarColorScheme(.dark, for: .navigationBar), is only taking effect when navigation bar is visible.
So, this would only take effect when users scroll the content up.
You can force navigation bar to always visible with .toolbarBackground(.visible, for: .navigationBar).
NavigationView {
    ScrollView {
        Text("Lorem ipsum dolor sit amet, consectetur adipiscing elit, sed do eiusmod tempor incididunt ut labore et dolore magna aliqua. Ut enim ad minim veniam, quis nostrud exercitation ullamco laboris nisi ut aliquip ex ea commodo consequat. Duis aute irure dolor in reprehenderit in voluptate velit esse cillum dolore eu fugiat nulla pariatur. Excepteur sint occaecat cupidatat non proident, sunt in culpa qui officia deserunt mollit anim id est laborum.")
            .font(.title)
            .padding()

    }
    .navigationTitle("Navigation Title")
    .toolbarBackground(.visible, for: .navigationBar)
    .toolbarColorScheme(.dark, for: .navigationBar)
}
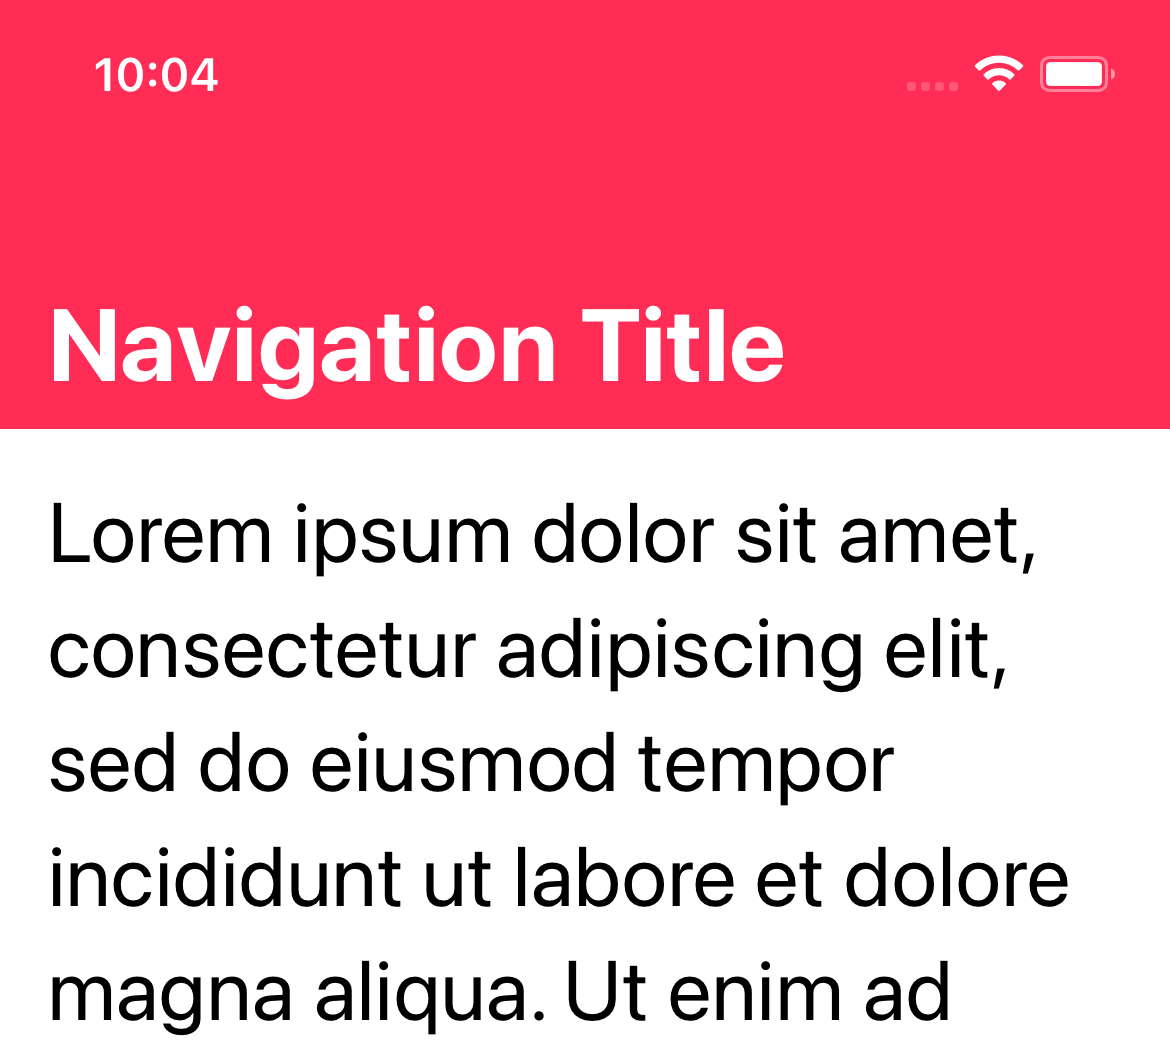
And you can change navigation bar background color with .toolbarBackground().
In the following example, I set it to pink.
NavigationView {
    ScrollView {
        Text("Lorem ipsum dolor sit amet, consectetur adipiscing elit, sed do eiusmod tempor incididunt ut labore et dolore magna aliqua. Ut enim ad minim veniam, quis nostrud exercitation ullamco laboris nisi ut aliquip ex ea commodo consequat. Duis aute irure dolor in reprehenderit in voluptate velit esse cillum dolore eu fugiat nulla pariatur. Excepteur sint occaecat cupidatat non proident, sunt in culpa qui officia deserunt mollit anim id est laborum.")
            .font(.title)
            .padding()

    }
    .navigationTitle("Navigation Title")
    .toolbarBackground(.pink, for: .navigationBar)
    .toolbarBackground(.visible, for: .navigationBar)
    .toolbarColorScheme(.dark, for: .navigationBar)
}
Read more article about SwiftUI, Status Bar, or see all available topic
Enjoy the read?
If you enjoy this article, you can subscribe to the weekly newsletter.
Every Friday, you'll get a quick recap of all articles and tips posted on this site. No strings attached. Unsubscribe anytime.
Feel free to follow me on Twitter and ask your questions related to this post. Thanks for reading and see you next time.
If you enjoy my writing, please check out my Patreon https://www.patreon.com/sarunw and become my supporter. Sharing the article is also greatly appreciated.
Become a patron Buy me a coffee Tweet ShareHow to Delete List rows from SwiftUI List
Learn how to enable/disable the delete ability in SwiftUI List.
How to declare Multiline String in Swift
If you need a string that spans several lines, Swift has a multiline string literal that you can use.