How to show badge on List Row in SwiftUI
Table of Contents
In iOS 15, we can add a badge to any List row with a badge(_:) modifier.
Badges in a List row appear on a trailing edge of a list row.
The following are examples of list row badges on the Reminders and Mail apps.
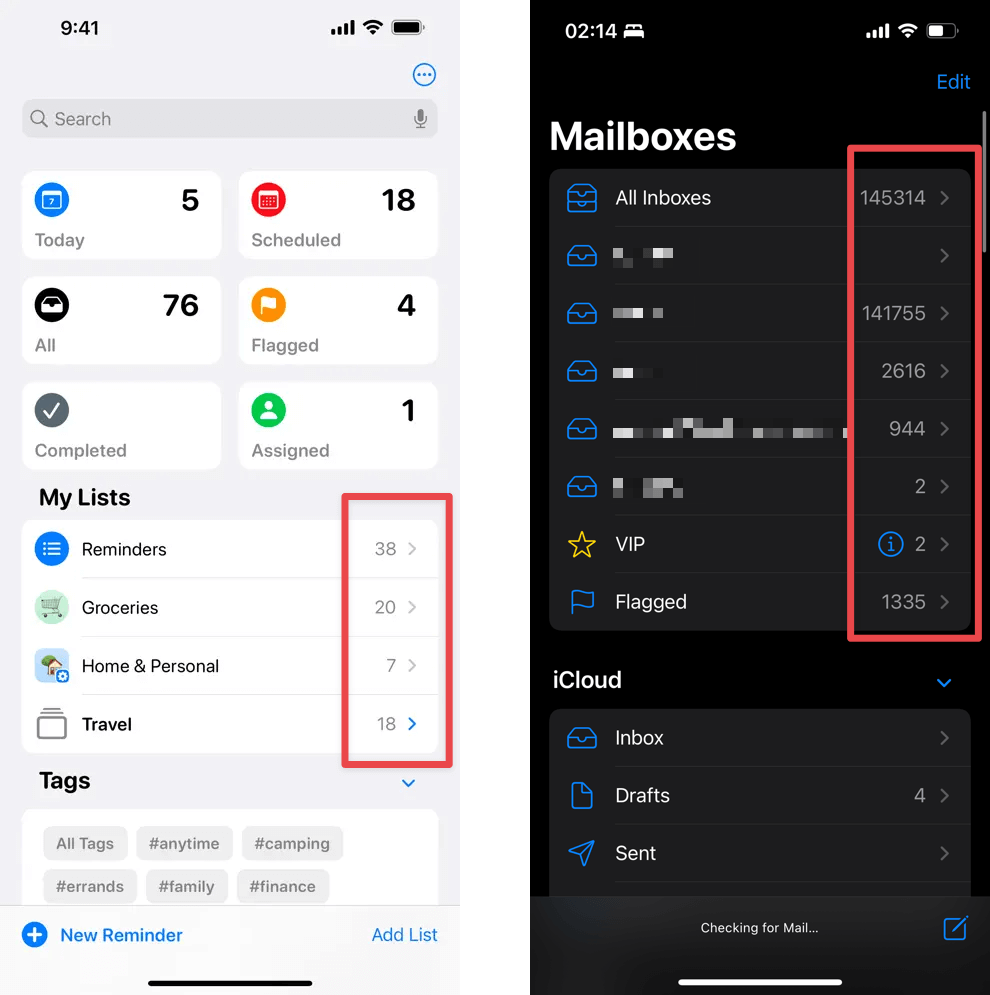
A badge conveys optional, supplementary information about a view.
In the above examples, badges represent an unread message and a number of to-do items.
How to add a badge to a List row
To add a badge to a list row, apply badge(_:) modifier to a list row view.
There are three ways to create a badge view.
You can easily support sarunw.com by checking out this sponsor.

AI Grammar: Correct grammar, spell check, check punctuation, and parphrase.
Create a badge from an integer
The first variation of a badge(_:) accept an integer value.
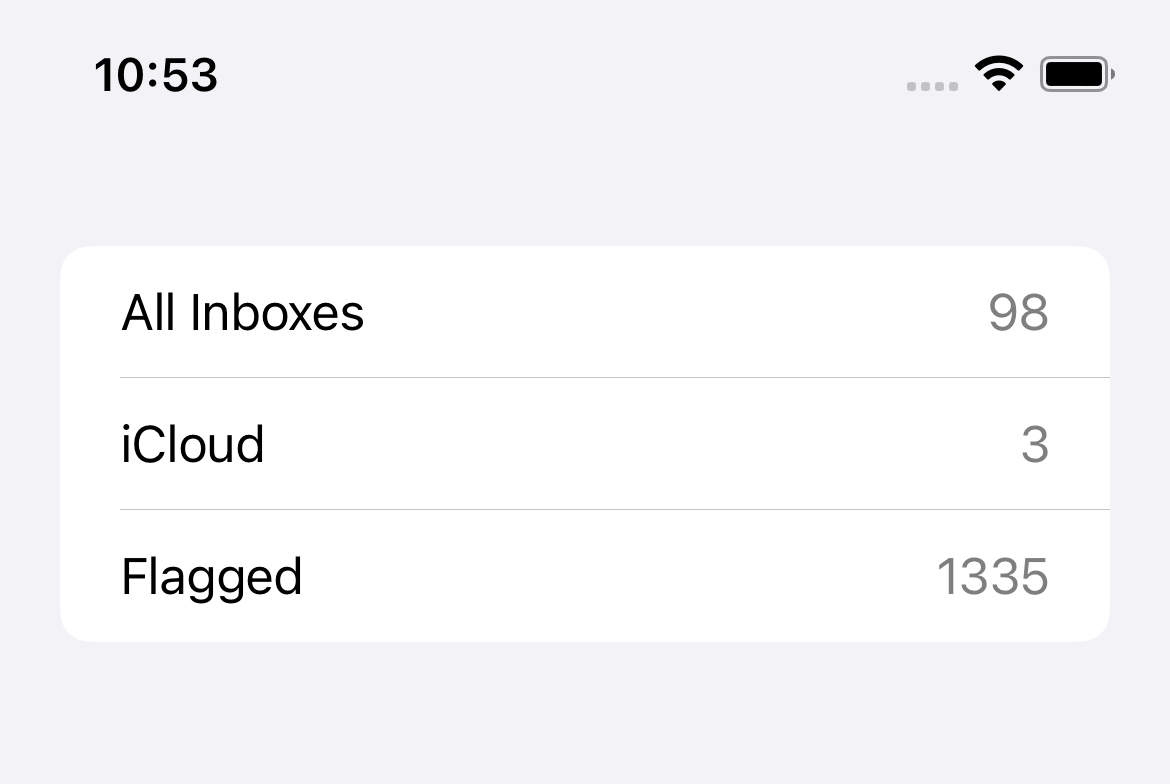
In this example, we put a number of unread emails as a badge value.
List {
    Text("All Inboxes")
        .badge(98)
    Text("iCloud")
        .badge(3)
    Text("Flagged")
        .badge(1335)

}
The default style of a badge on a list row is a grayish text that sits on a trailing edge of a list row content.
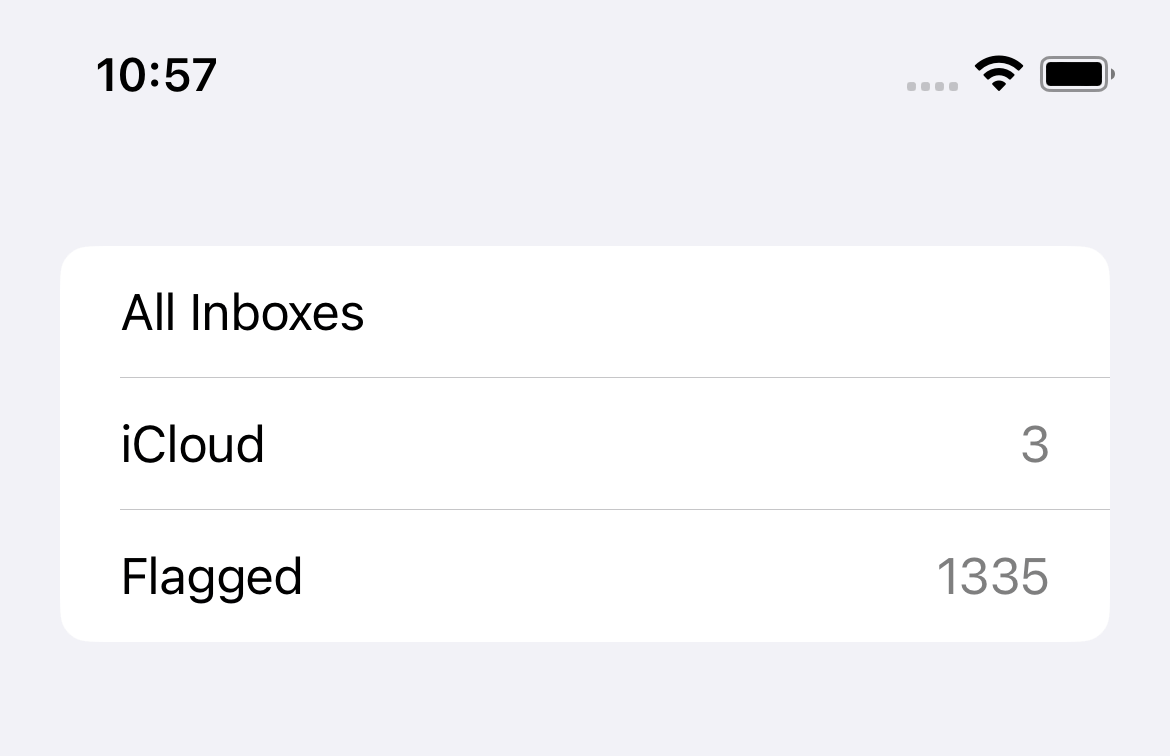
To hide a badge that initializes with an integer, you set the value to zero to hide the badge.
List {
    Text("All Inboxes")
        // 1
        .badge(0)
    Text("iCloud")
        .badge(3)
    Text("Flagged")
        .badge(1335)
}
1 Setting zero value, .badge(0), will hide the badge.
Create a badge from a string
Not all information can be represented as a number.
The badge(_:) modifier also support creating a badge from a string.
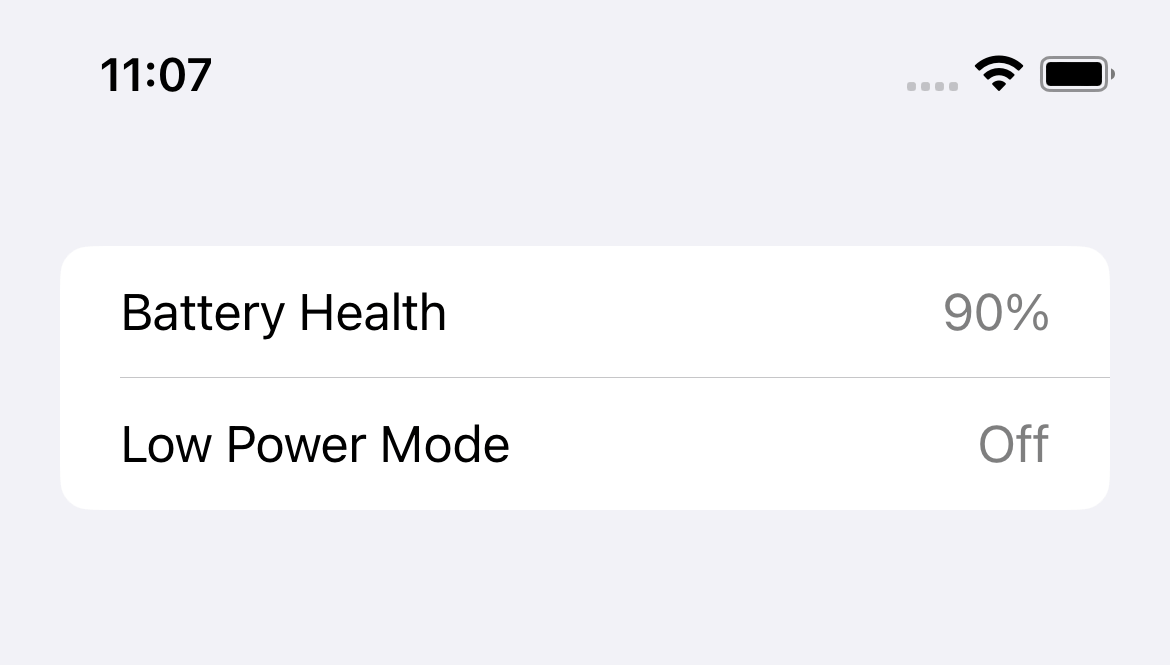
We can use a string to initialize a badge the same way we did with an integer. But instead of an integer, we populate it with a string.
List {
    Text("Battery Health")
        .badge("90%")
    Text("Low Power Mode")
        .badge("Off")
}
To hide a badge that initializes with a string, you set the value to nil to hide the badge.
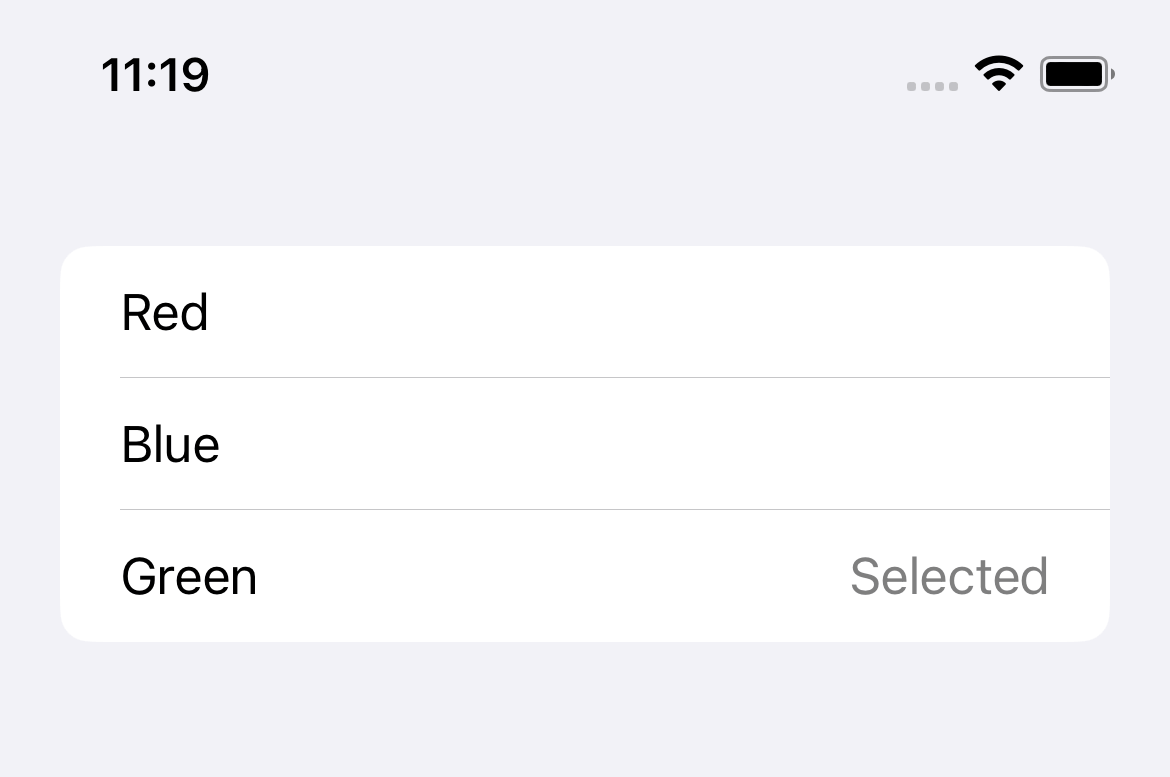
struct ContentView: View {
    @State var selectedColorIndex = 2

    var body: some View {
        List {
            Text("Red")
                .badge(selectedColorIndex == 0 ? "Selected": nil)
            Text("Blue")
                .badge(selectedColorIndex == 1 ? "Selected": nil)
            Text("Green")
                .badge(selectedColorIndex == 2 ? "Selected": nil)
        }
    }
}
In the above example, we present a badge with "Selected" text for a selected row and hide the rest by returning nil.
You can easily support sarunw.com by checking out this sponsor.

AI Grammar: Correct grammar, spell check, check punctuation, and parphrase.
Create a badge from a Text view
The List row badge might seem dull, but it doesn't need to be that way.
We can customize your badge with the final badge(_:) modifier variation, which accepts a Text view.
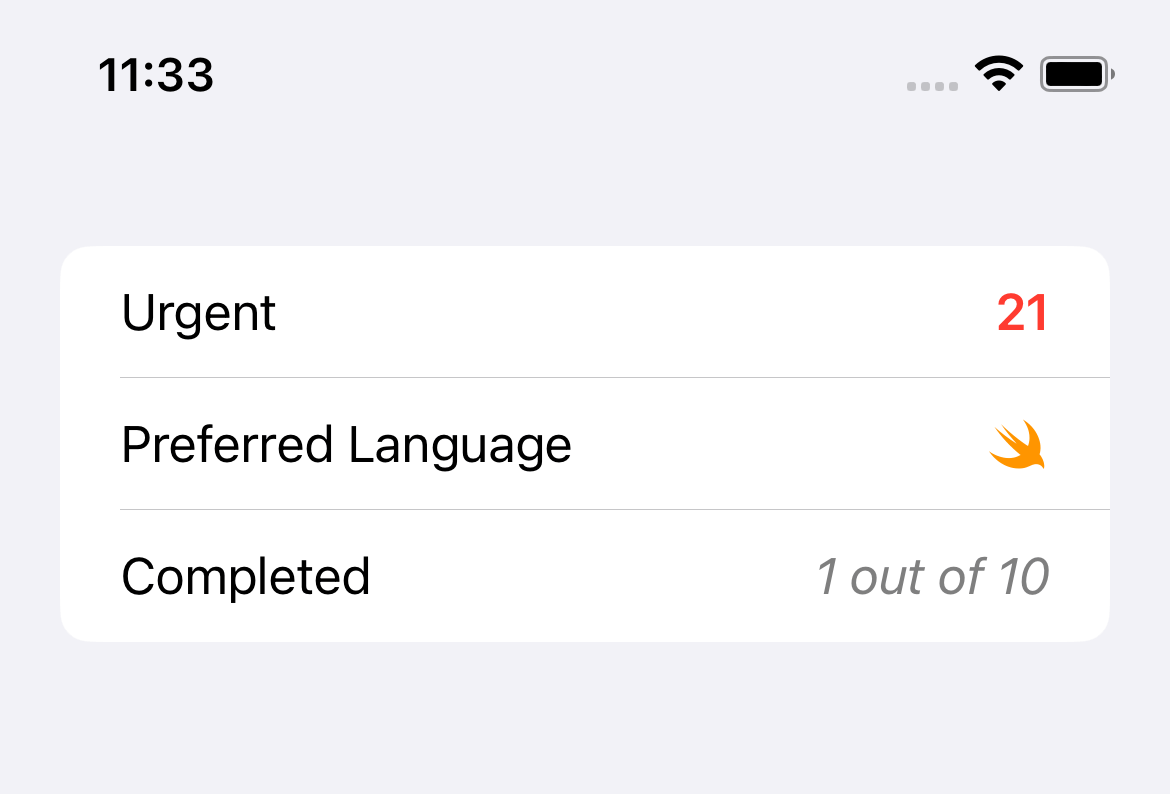
We can style an input text view the way you want. In this example, I tried foregroundColor, bold, italic, and string interpolation.
List {
    Text("Urgent")
        .badge(
            // 1
            Text("21")
                .foregroundColor(.red)
                .bold()
        )
    Text("Preferred Language")
        .badge(
            // 2
            Text("\(Image(systemName: "swift"))")
                .foregroundColor(.orange)
        )
    Text("Completed")
        .badge(
            // 3
            Text("1 out of 10")
                .italic()
        )
}
1 We use foregroundColor and bold to style the badge view.
2 We can show SF Symbols on a badge using string interpolation.
3 We use italic to style our last badge view.
We hide the badge the same way we did with a string. We set the value to nil to hide the badge.
Read more article about SwiftUI, List, Badge, iOS 15, or see all available topic
Enjoy the read?
If you enjoy this article, you can subscribe to the weekly newsletter.
Every Friday, you'll get a quick recap of all articles and tips posted on this site. No strings attached. Unsubscribe anytime.
Feel free to follow me on Twitter and ask your questions related to this post. Thanks for reading and see you next time.
If you enjoy my writing, please check out my Patreon https://www.patreon.com/sarunw and become my supporter. Sharing the article is also greatly appreciated.
Become a patron Buy me a coffee Tweet ShareHow to change a Tab Bar item color in SwiftUI
By default, the selected tab bar item will use the iOS default blue color. Let's learn how to change this in SwiftUI.
Disable scrolling in SwiftUI ScrollView and List
In iOS 16, SwiftUI finally got a new modifier to disable scrolling in ScrolView and List.