How to set ContentInsets on SwiftUI List
Table of Contents
The content inset is an extra space that puts around scrollable content.
This extra space prevents the content from being hidden behind obstacles, e.g., a navigation bar or home indicator.
By default, SwiftUI automatically applies content inset around scrollable content such as ScrollView or List to avoid the system UI, e.g., top and bottom bars.
Here is an example of a SwiftUI list view. You can see that we have an extra space around the content, which makes it always visible.
You can easily support sarunw.com by checking out this sponsor.
AI Paraphrase:Are you tired of staring at your screen, struggling to rephrase sentences, or trying to find the perfect words for your text?
How to set ContentInsets on SwiftUI List
In UIKit, we can control this space by set contentInset property on a UIScrollView.
SwiftUI has no way to set this until iOS 15.
In iOS 15, SwiftUI can indirectly set content inset using .safeAreaInset modifier.
The .safeAreaInset modifier allows us to:
- Add a view to any
edgeto a modified view. - The modified view is inset by the same height/width of that view.
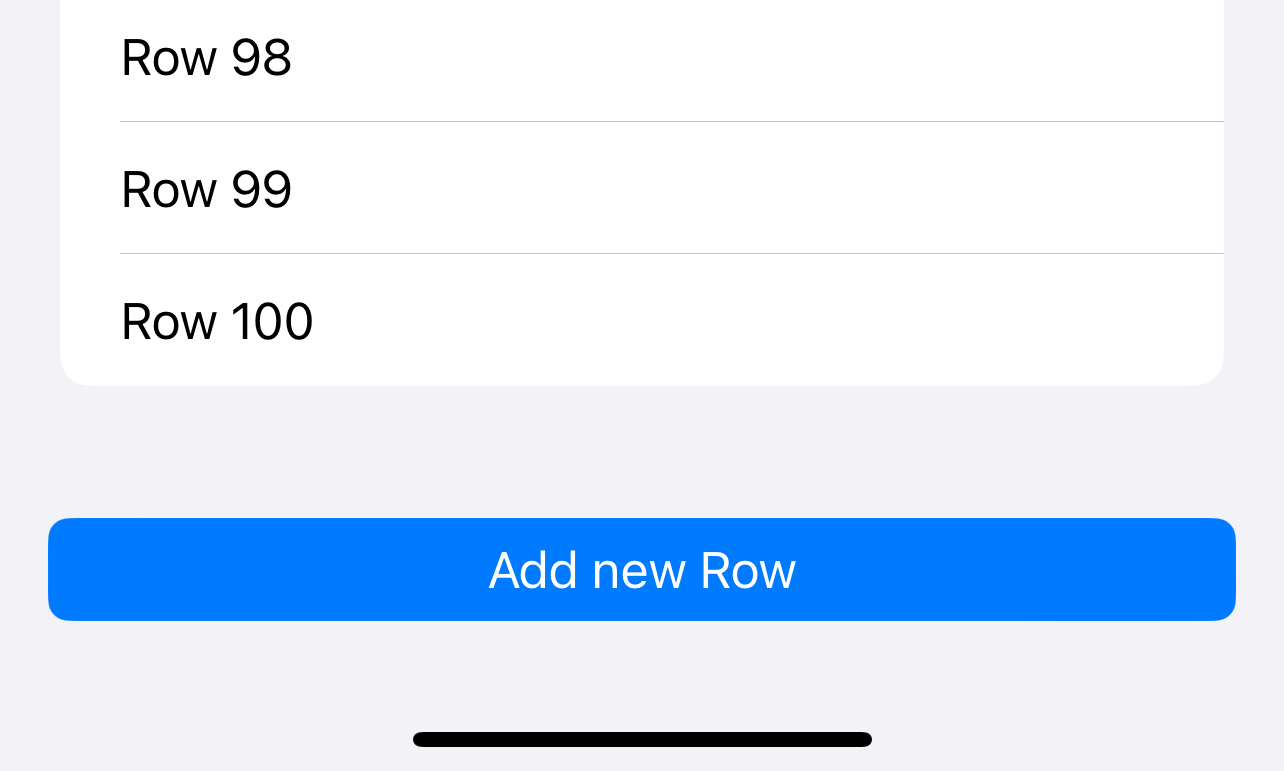
In this example, we add a bottom button to a list view.
struct ContentView: View {
    var body: some View {
        NavigationStack {
            List(0..<100) { i in
                Text("Row \(i + 1)")
            }
            // 1
            .safeAreaInset(edge: .bottom, content: {
                // 2
                Button {

                } label: {
                    Text("Add new Row")
                        .frame(maxWidth: .infinity)
                }
                .buttonStyle(.borderedProminent)
                .padding()
            })
            .navigationTitle("List")
        }
    }
}
1 We apply .safeAreaInset to a list view. Specified that we want to add some view to the .bottom edge of scrollable content.
2 We provide a button as content. The button's total height will be used as an additional inset for the modifier view (List view).
As you can see, we can scroll to the end of the list, and all the rows are still visible.
Read more article about SwiftUI, List, iOS 15, or see all available topic
Enjoy the read?
If you enjoy this article, you can subscribe to the weekly newsletter.
Every Friday, you'll get a quick recap of all articles and tips posted on this site. No strings attached. Unsubscribe anytime.
Feel free to follow me on Twitter and ask your questions related to this post. Thanks for reading and see you next time.
If you enjoy my writing, please check out my Patreon https://www.patreon.com/sarunw and become my supporter. Sharing the article is also greatly appreciated.
Become a patron Buy me a coffee Tweet ShareHow to check if code is in DEBUG or RELEASE build in Swift
Learn how to compile code only on a specific build configuration.
How to use AttributedString in UIKit
Learn how to use the new AttributedString inside UIKit components.