SwiftUI List Style examples
Table of Contents
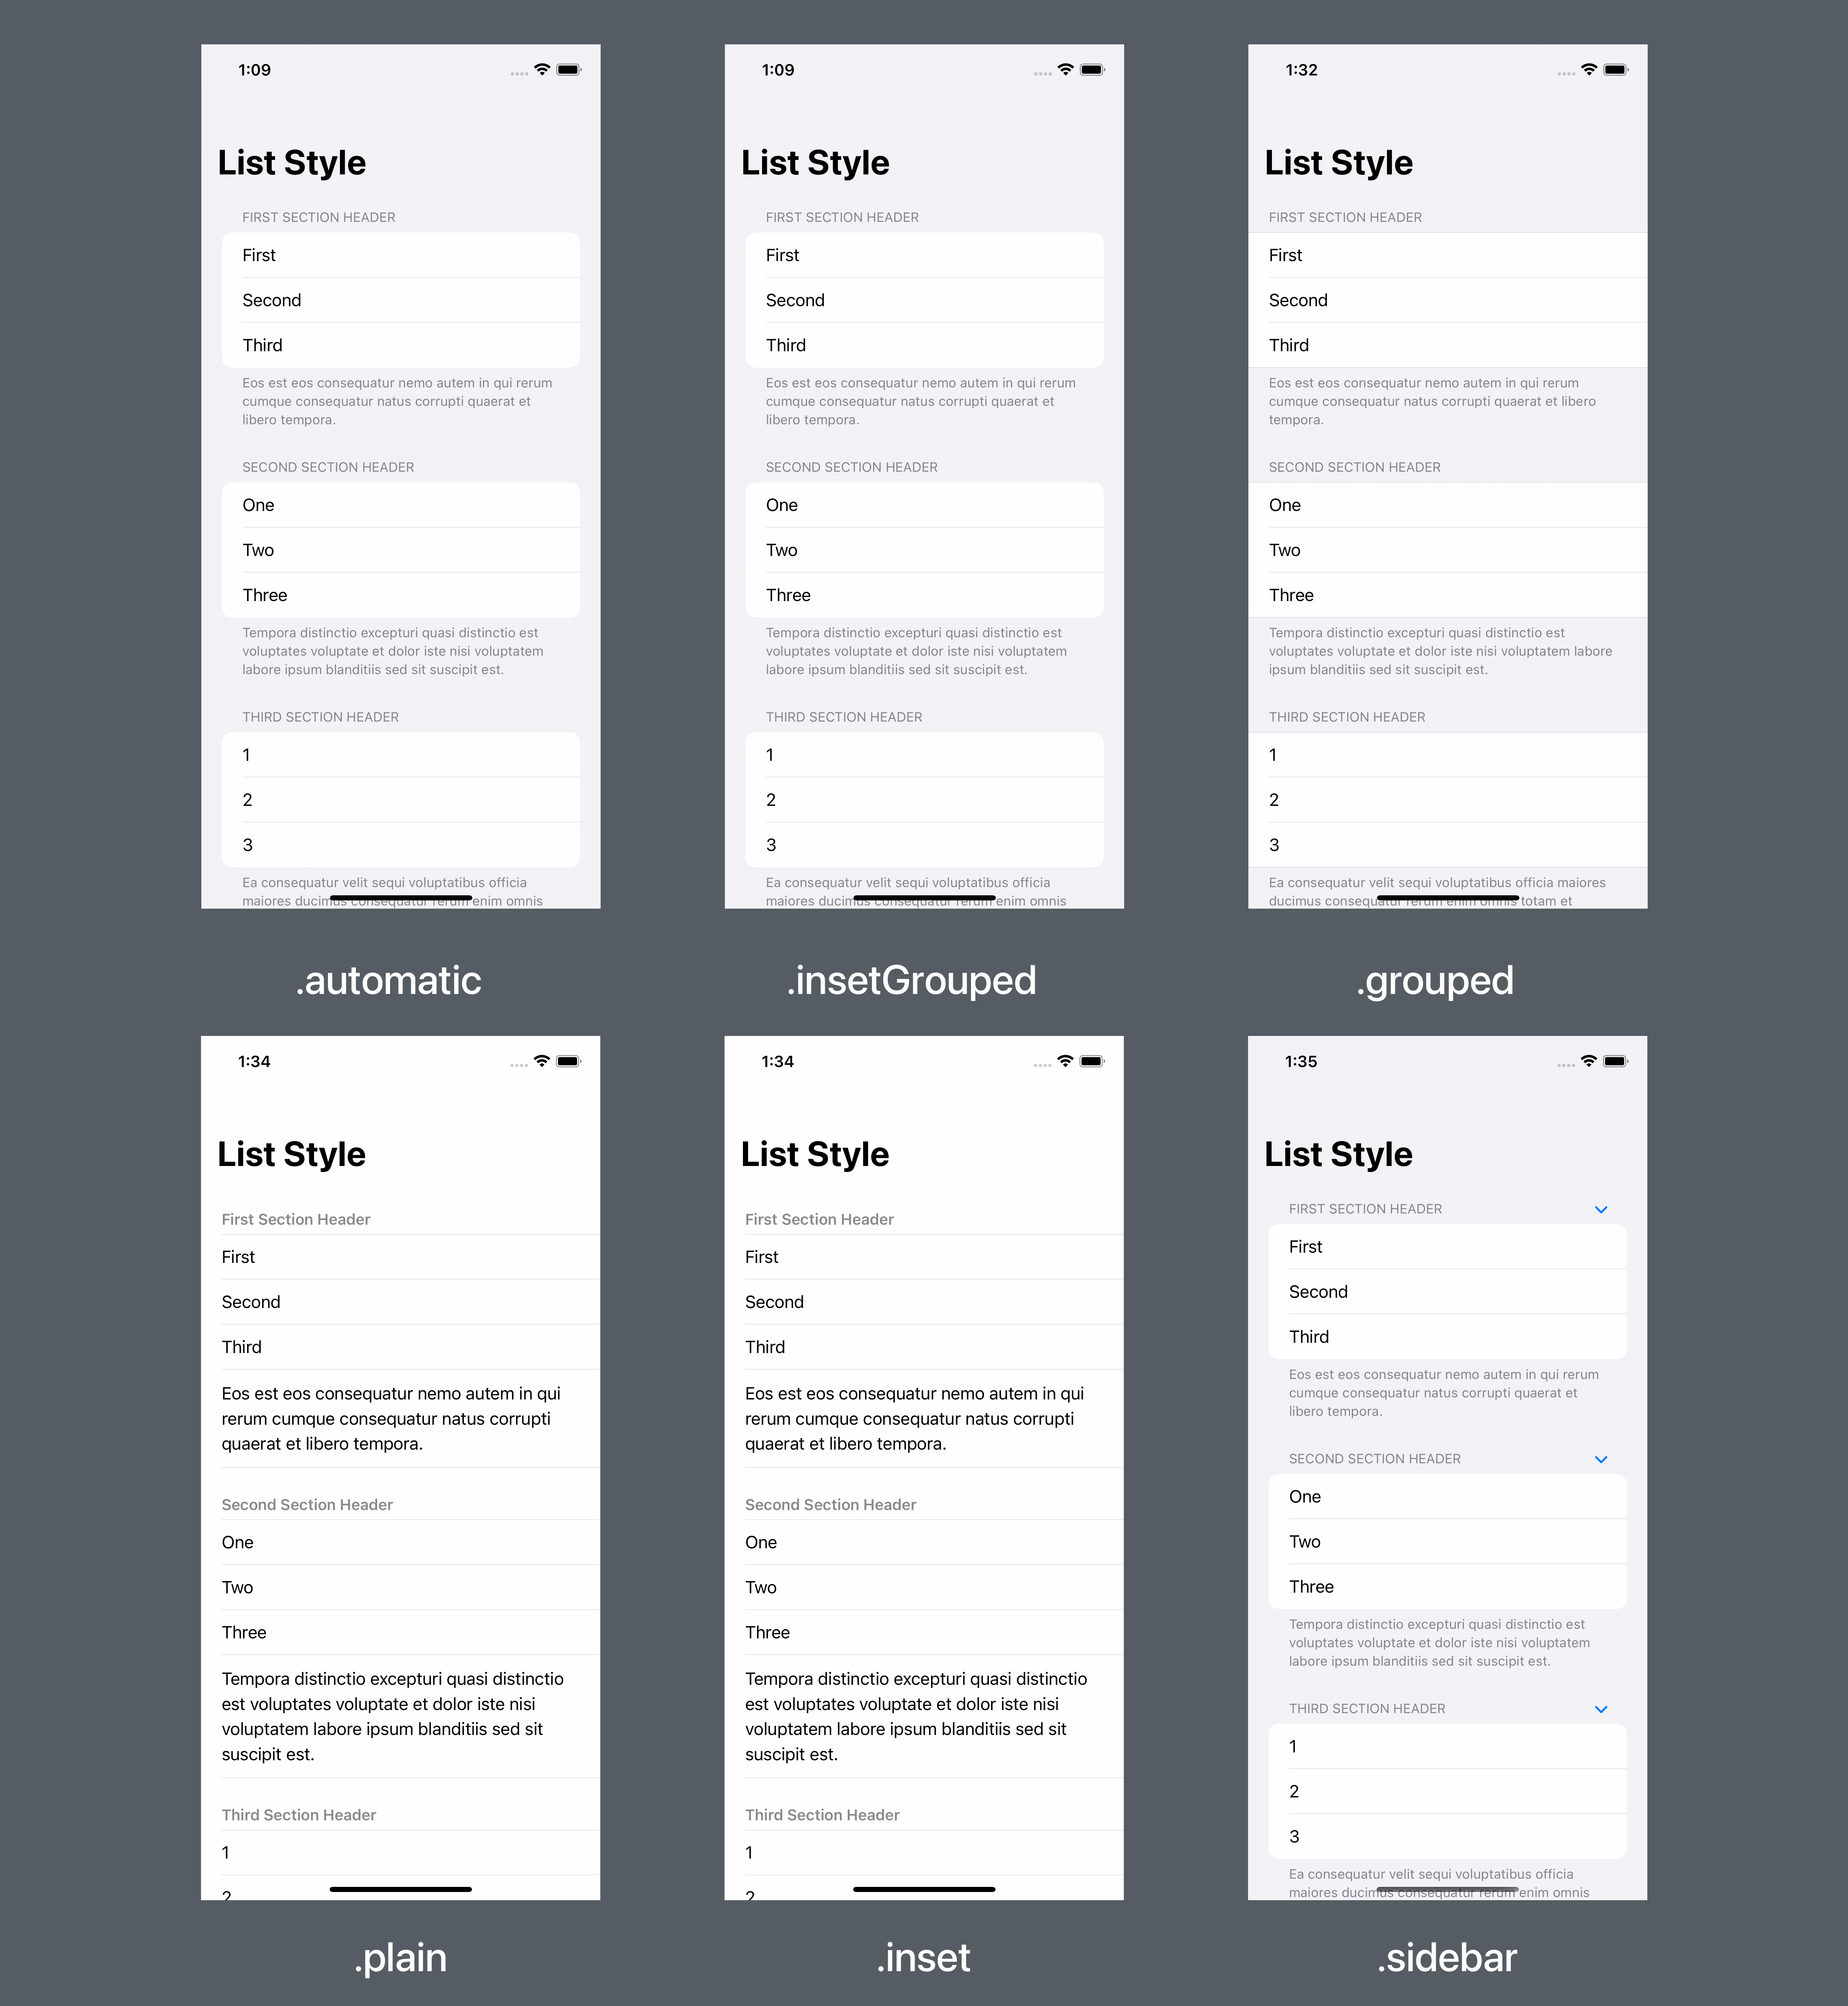
In this article, I will show you all 6 list styles that you can use with SwiftUI List view in iOS.
SwiftUI List Styles
The SwiftUI List view has many styles to choose from. If we don't specify any list style, it will default to the .automatic list style.
The .automatic list style means we left the style choice in SwiftUI hand. SwiftUI will choose the one that appropriates for the context.
This might vary based on platforms, e.g., iPhone, iPad, Mac, or even the place where List view is used.
For iOS, the default list style (.automatic ) is .insetGrouped.

You can easily support sarunw.com by checking out this sponsor.
Localization Buddy: Easiest way to localize and update App Store metadata.
How to change SwiftUI List style
If you want to control your own style choice, you can customize your list style using .listStyle(_:) modifier.
We apply the .listStyle modifier to the list that you want to change the style. In this example, I set the list style to .insetGrouped.
List {
  Text("Row 1")
  Text("Row 2")
  ...
}
.listStyle(.insetGrouped)
6 iOS ListStyles
SwiftUI supports many styles that vary based on the platforms.
In this article, we will only focus on iOS. We have six options.
We will use the same code for all styles. The only difference is the list style we specified in the .listStyle modifier.
NavigationStack {
    List {
        Section {
            Text("First")
            Text("Second")
            Text("Third")
        } header: {
            Text("First Section Header")
        } footer: {
            Text("Eos est eos consequatur nemo autem in qui rerum cumque consequatur natus corrupti quaerat et libero tempora.")
        }

        Section {
            Text("One")
            Text("Two")
            Text("Three")
        } header: {
            Text("Second Section Header")
        } footer: {
            Text("Tempora distinctio excepturi quasi distinctio est voluptates voluptate et dolor iste nisi voluptatem labore ipsum blanditiis sed sit suscipit est.")
        }

        Section {
            Text("1")
            Text("2")
            Text("3")
        } header: {
            Text("Third Section Header")
        } footer: {
            Text("Ea consequatur velit sequi voluptatibus officia maiores ducimus consequatur rerum enim omnis totam et voluptates eius consectetur rerum dolorem quis omnis ut ut.")
        }
    }
    .navigationTitle("List Style")
    // This is the only difference.
    .listStyle(.insetGrouped)
}
Automatic
As mentioned earlier, SwiftUI will use Inset Grouped style when setting automatic (.automatic) or DefaultListStyle on iOS.
List {
    // ...
}
// Leave blank or .listStyle(.automatic) yield the same result in iOS.
.listStyle(.automatic)
Inset Grouped
Example of Inset Grouped .insetGrouped or InsetGroupedListStyle.
List {
    // ...
}
.listStyle(.insetGrouped)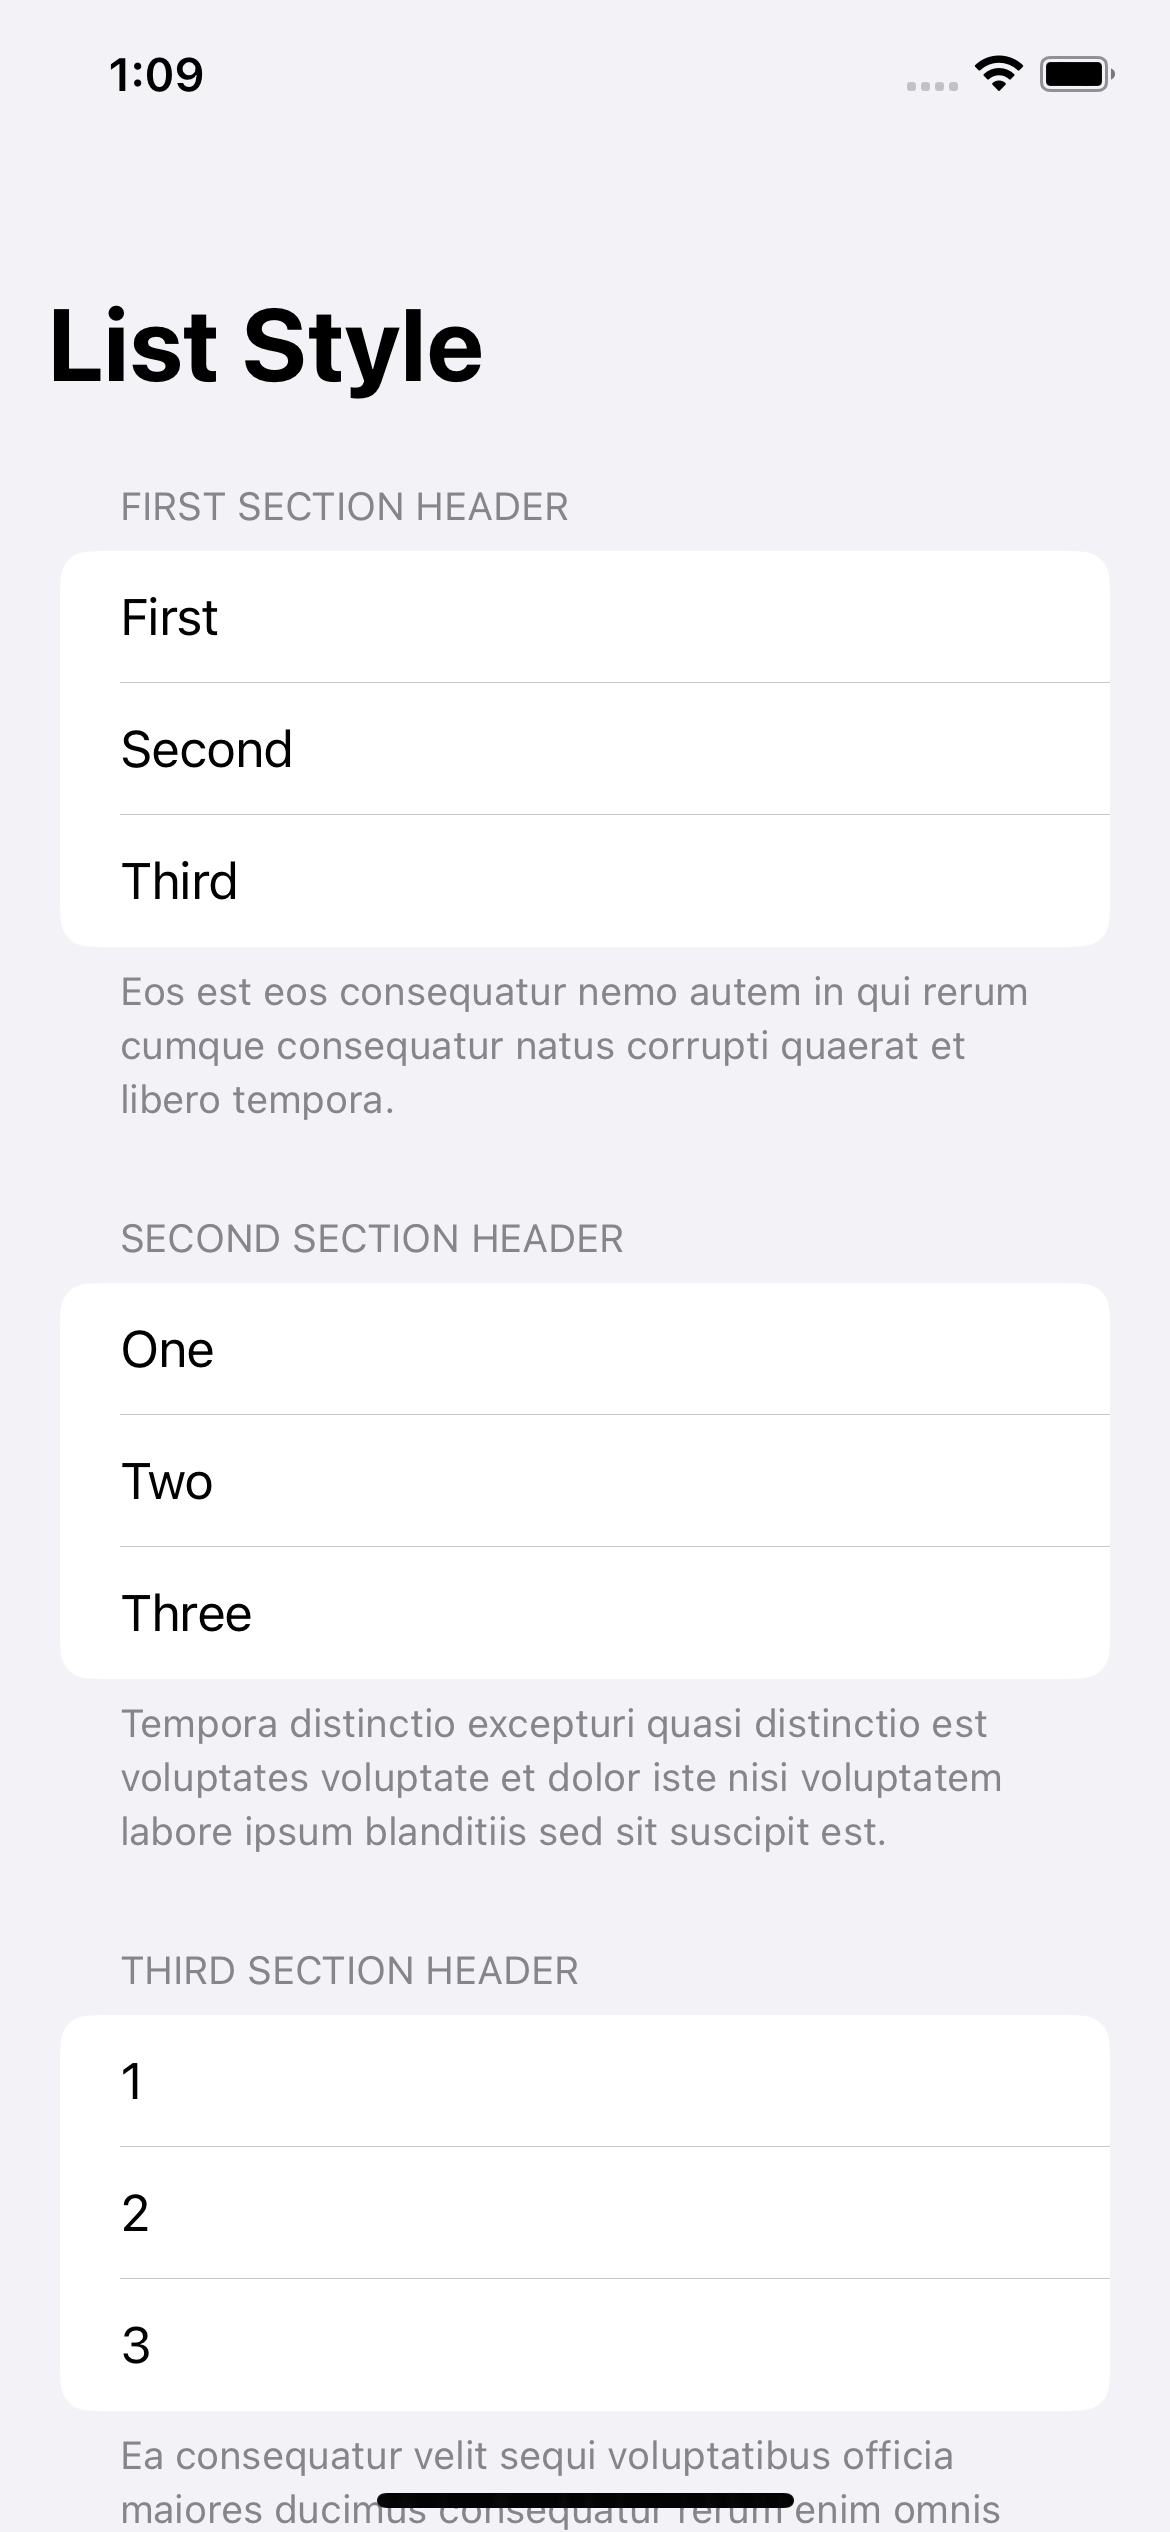
Grouped
Example of Grouped .grouped or GroupedListStyle.
List {
    // ...
}
.listStyle(.grouped)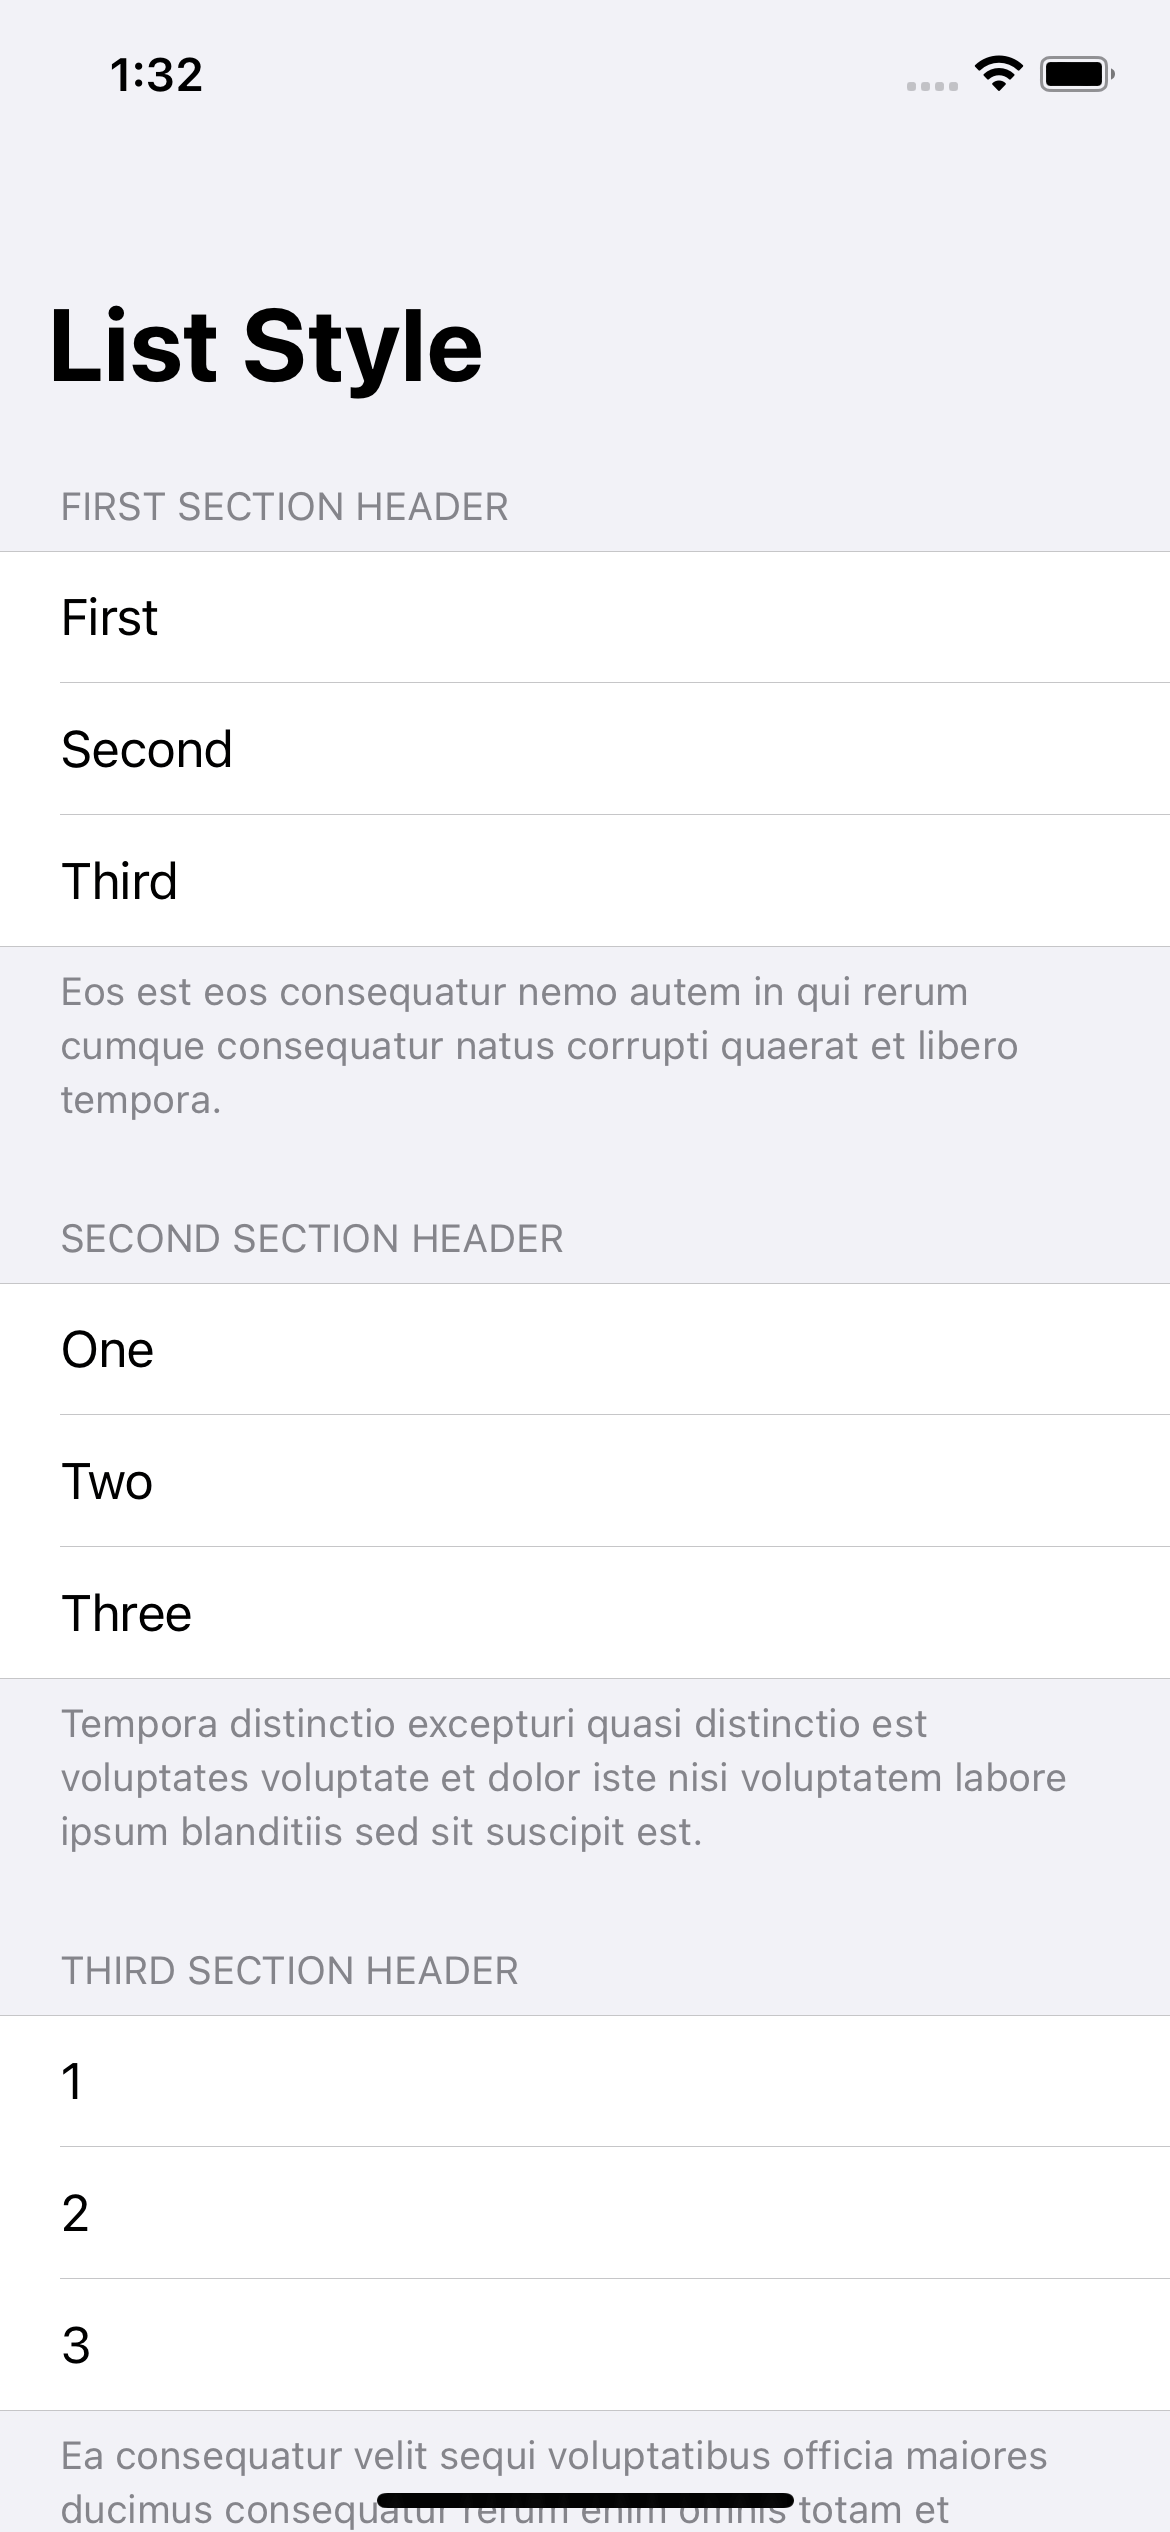
Inset
Example of Inset .inset or InsetListStyle.
List {
    // ...
}
.listStyle(.inset)
Plain
Example of Plain .plain or PlainListStyle.
List {
    // ...
}
.listStyle(.plain)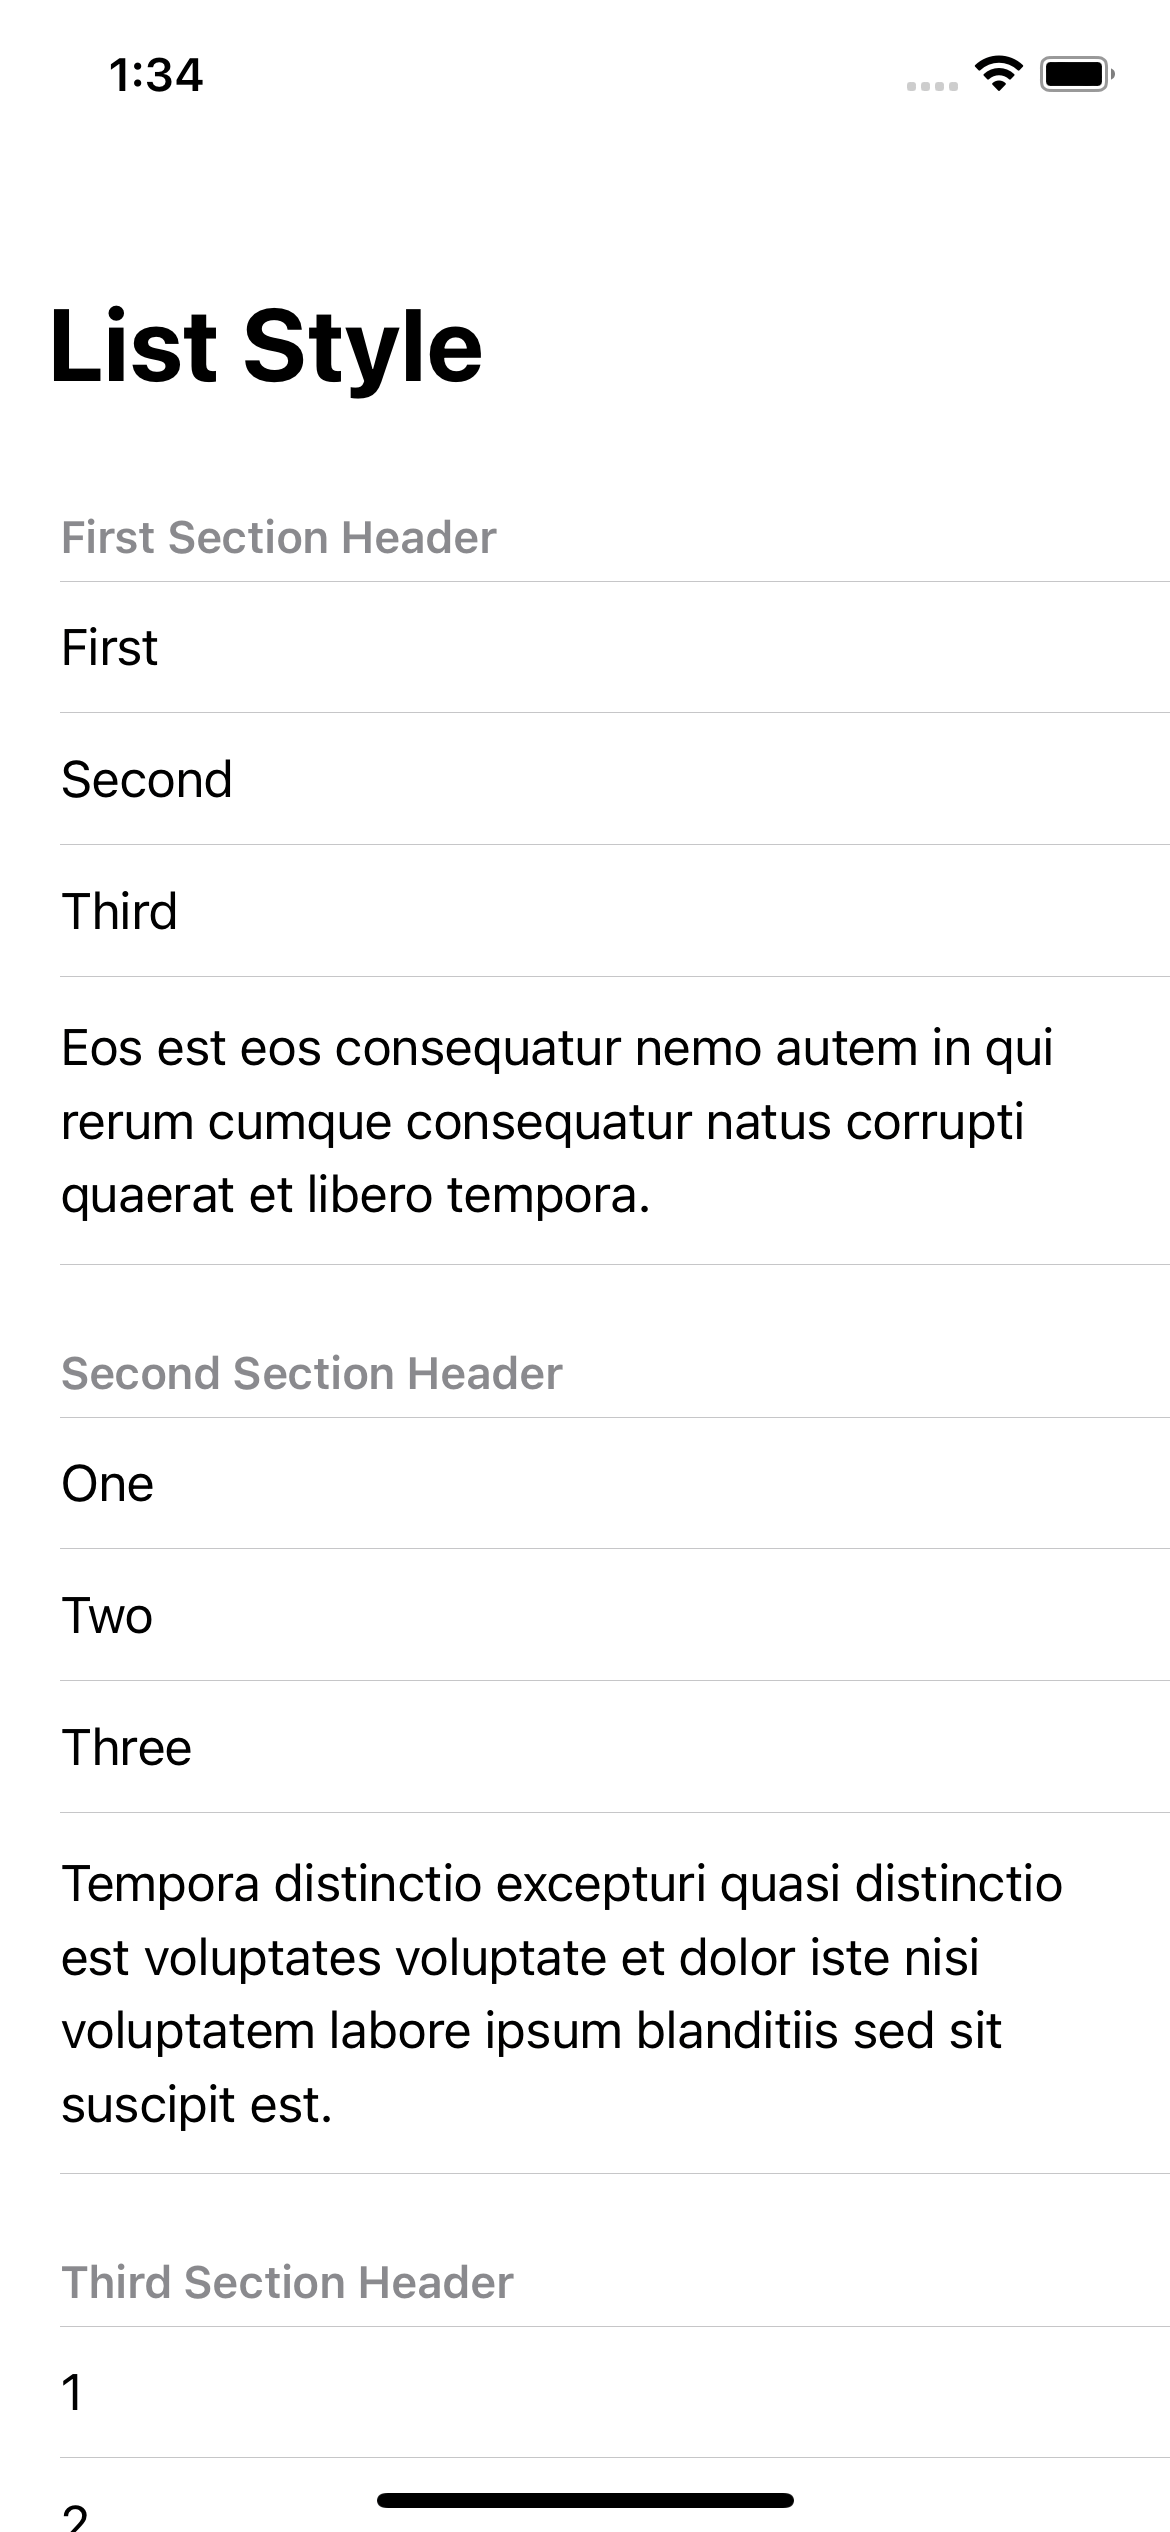
Sidebar
The sidebar style (.sidebar or SidebarListStyle) comes equipped with a special function. On macOS and iOS, the sidebar list style displays disclosure indicators in the section headers that allow the user to collapse and expand sections.
List {
    // ...
}
.listStyle(.sidebar)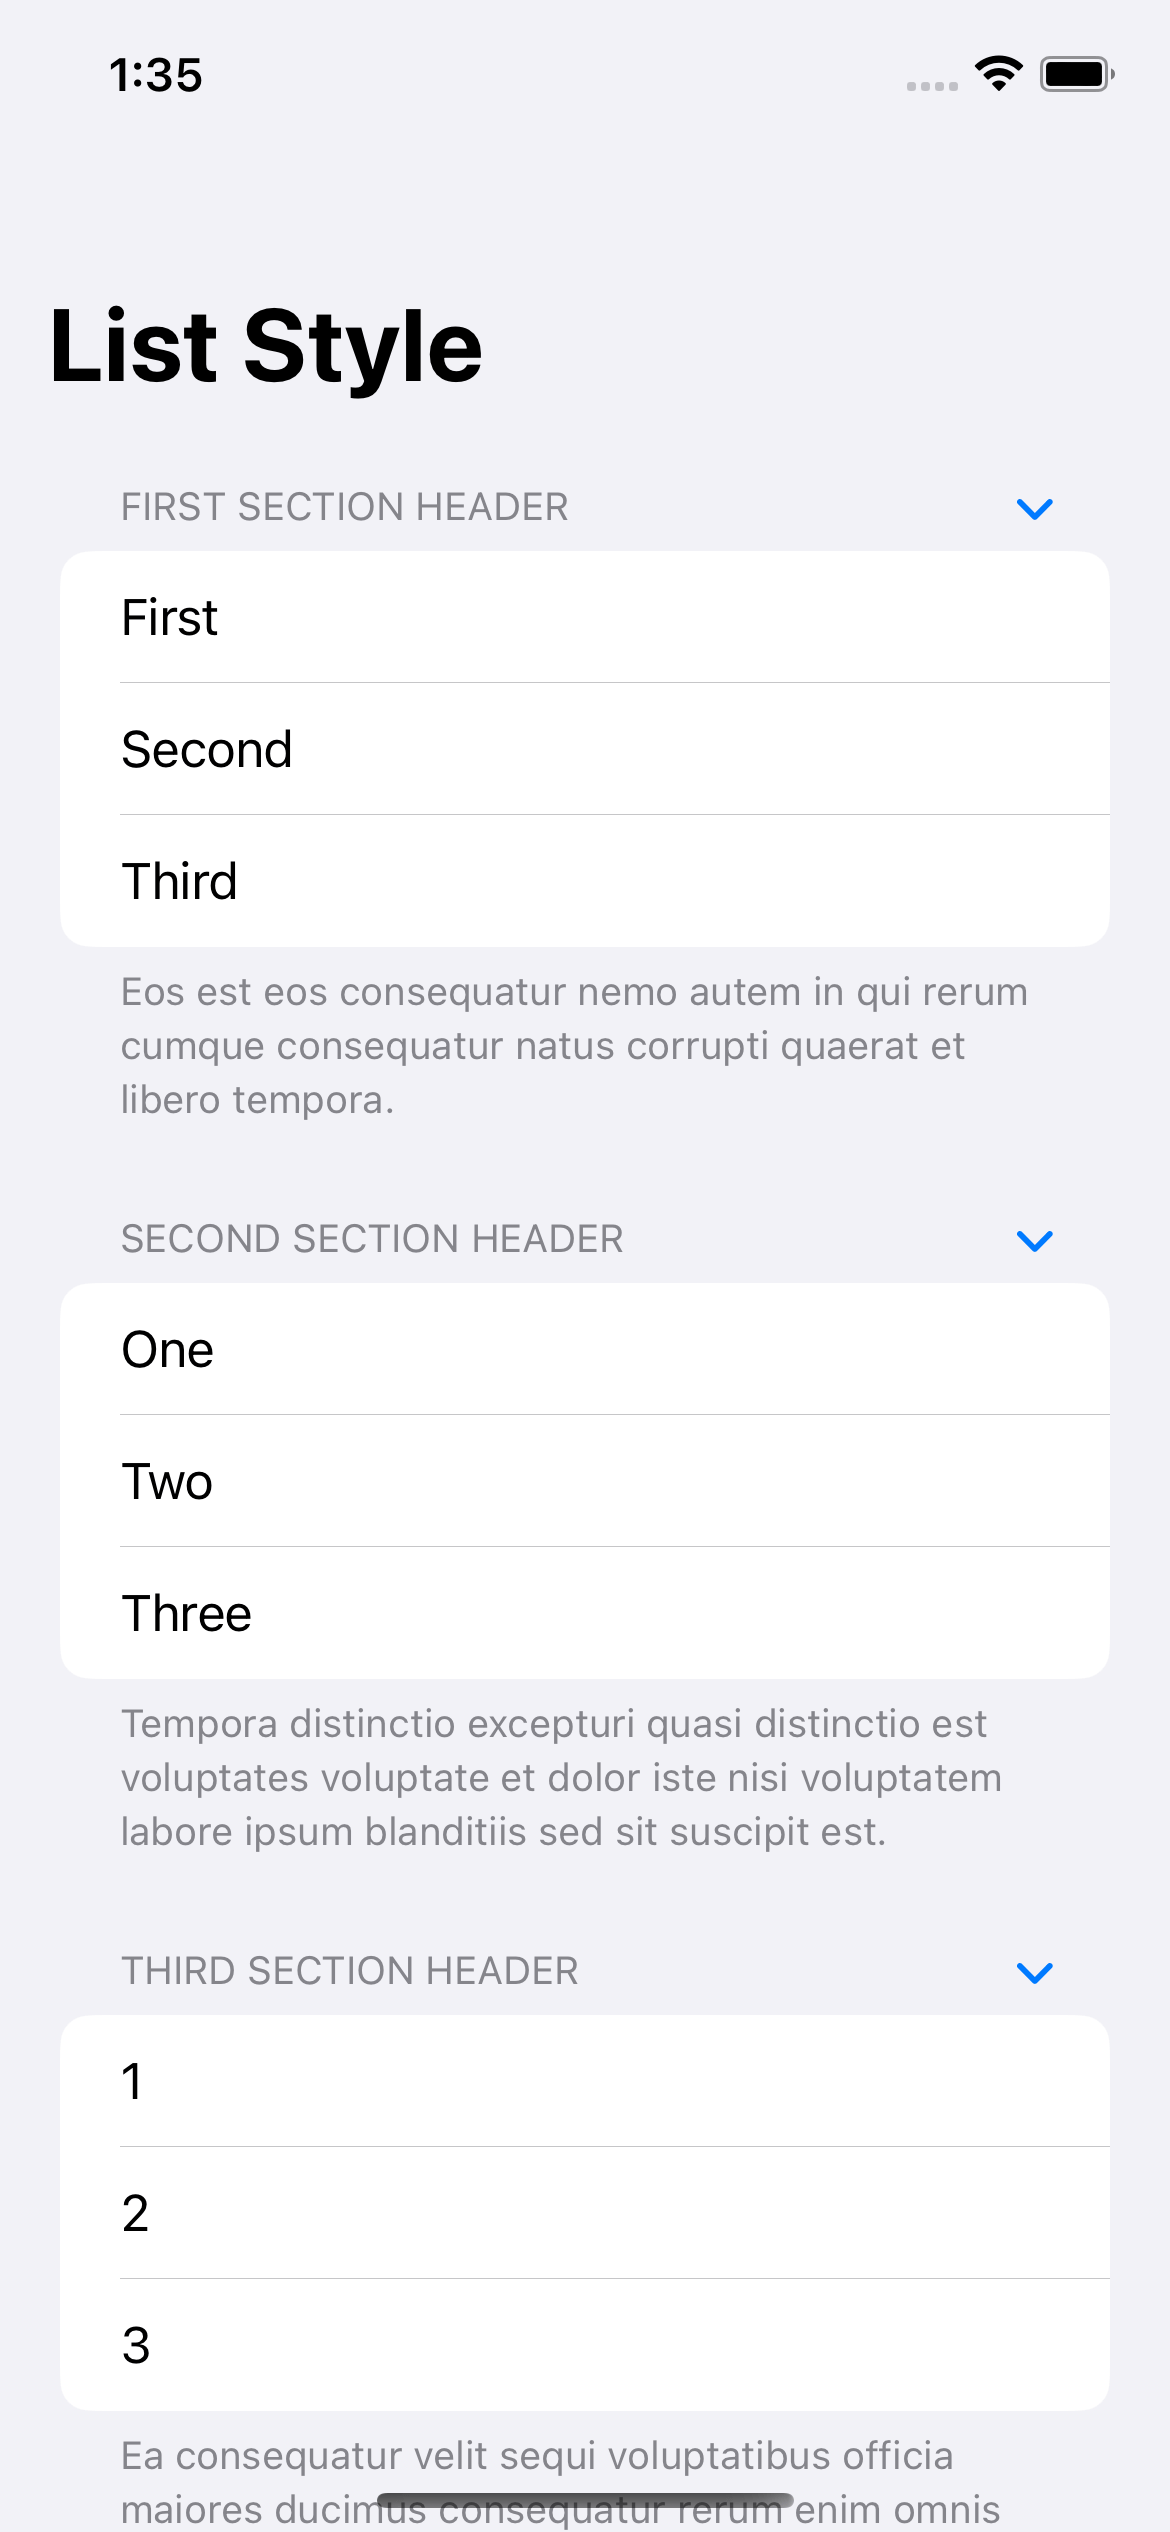
Tap on disclosure indicators in the section headers will collapse and expand that section.
You can easily support sarunw.com by checking out this sponsor.
Localization Buddy: Easiest way to localize and update App Store metadata.
Conclusion
Here are all six styles for your comparison.
Read more article about SwiftUI, List, or see all available topic
Enjoy the read?
If you enjoy this article, you can subscribe to the weekly newsletter.
Every Friday, you'll get a quick recap of all articles and tips posted on this site. No strings attached. Unsubscribe anytime.
Feel free to follow me on Twitter and ask your questions related to this post. Thanks for reading and see you next time.
If you enjoy my writing, please check out my Patreon https://www.patreon.com/sarunw and become my supporter. Sharing the article is also greatly appreciated.
Become a patron Buy me a coffee Tweet ShareHow to dismiss sheet in SwiftUI
SwiftUI has many ways to dismiss a sheet view based on how you structure your view and the minimum iOS version you support.