Where is Info.plist in Xcode 13
Table of Contents
Since Xcode 13, if you create a new SwiftUI project, you will not see an Info.plist file created in the Project Navigator anymore.
You can't even find it in the file system.
Where is Info.plist in Xcode 13
Apple decided to make the project look cleaner by extracting common configuration fields from an Info.plist to the target's Info tab.
Info.plist file we re-add to the project once we add additional fields.
The following is a release note from Xcode 13 Release Notes.
Projects created from several templates no longer require configuration files such as entitlements and Info.plist files. Configure common fields in the target’s Info tab, and build settings in the project editor. These files are added to the project when additional fields are used. (68254857)
You can easily support sarunw.com by checking out this sponsor.
AI Paraphrase:Are you tired of staring at your screen, struggling to rephrase sentences, or trying to find the perfect words for your text?
How to edit Info.plist
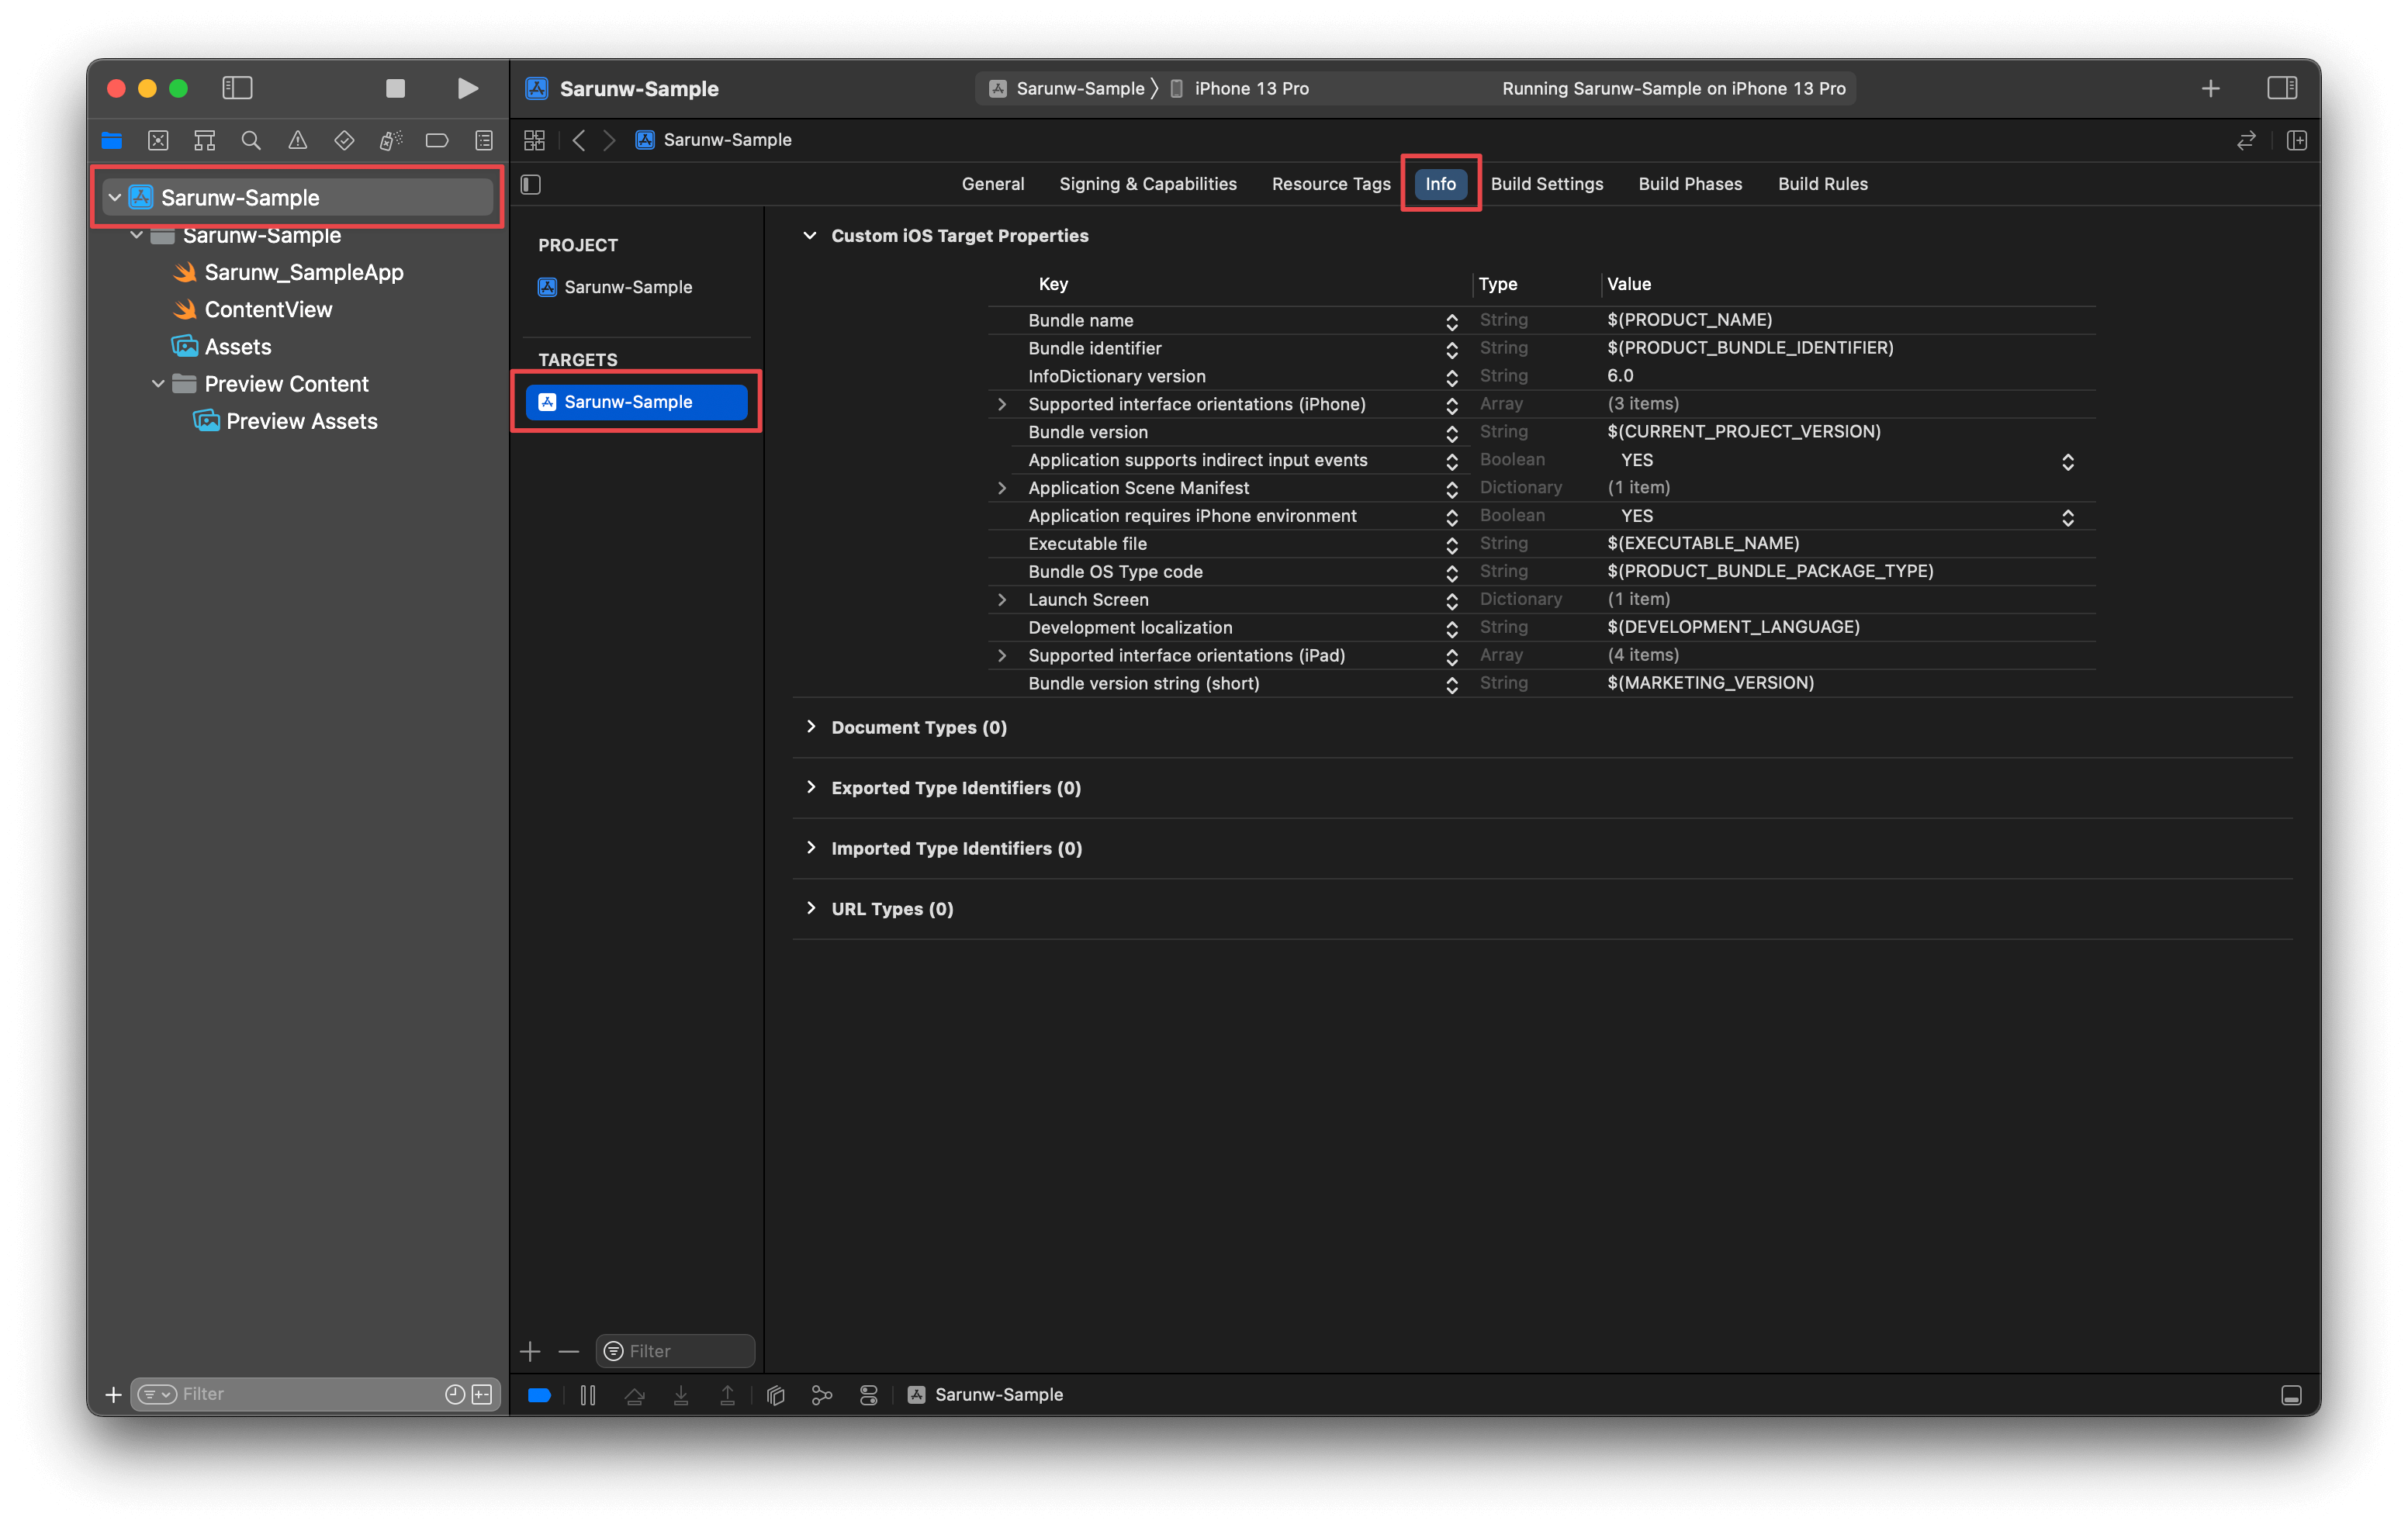
Since common configuration fields, e.g., app name, are moved to the target's Info tab, you can edit those fields by going there.
You can find the target's Info tab using the following steps.
- Select the project root directory from the Project Navigator.
- Select your app target.
- Then, select the "Info" tab.
How to bring Info.plist back
With this new approach, you don't need to care about Info.plist file.
You can treat the target's Info tab as your new Info.plist file and customize everything there.
Additional fields
Info.plist file will automatically re-add to the project once you add an additional fields to it.
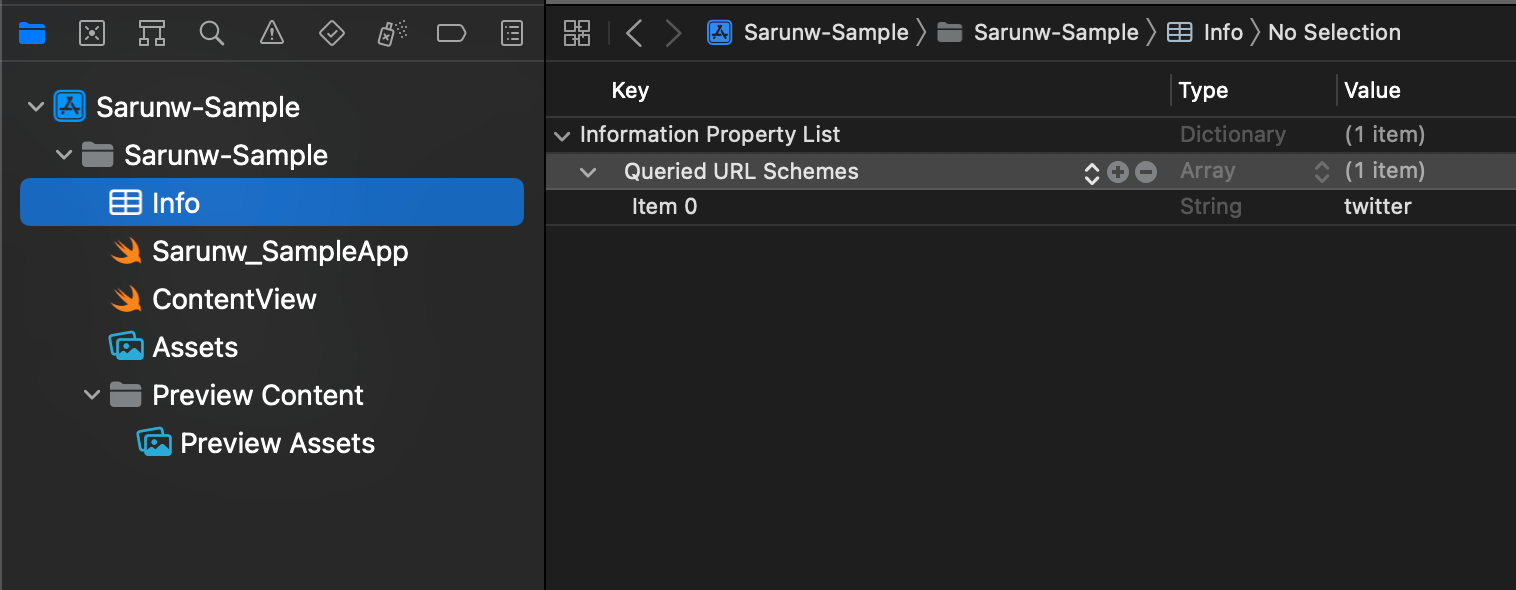
In this example, I add the Queried URL Schemes (LSApplicationQueriesSchemes) key with the list of URL schemes I want to query in my app.
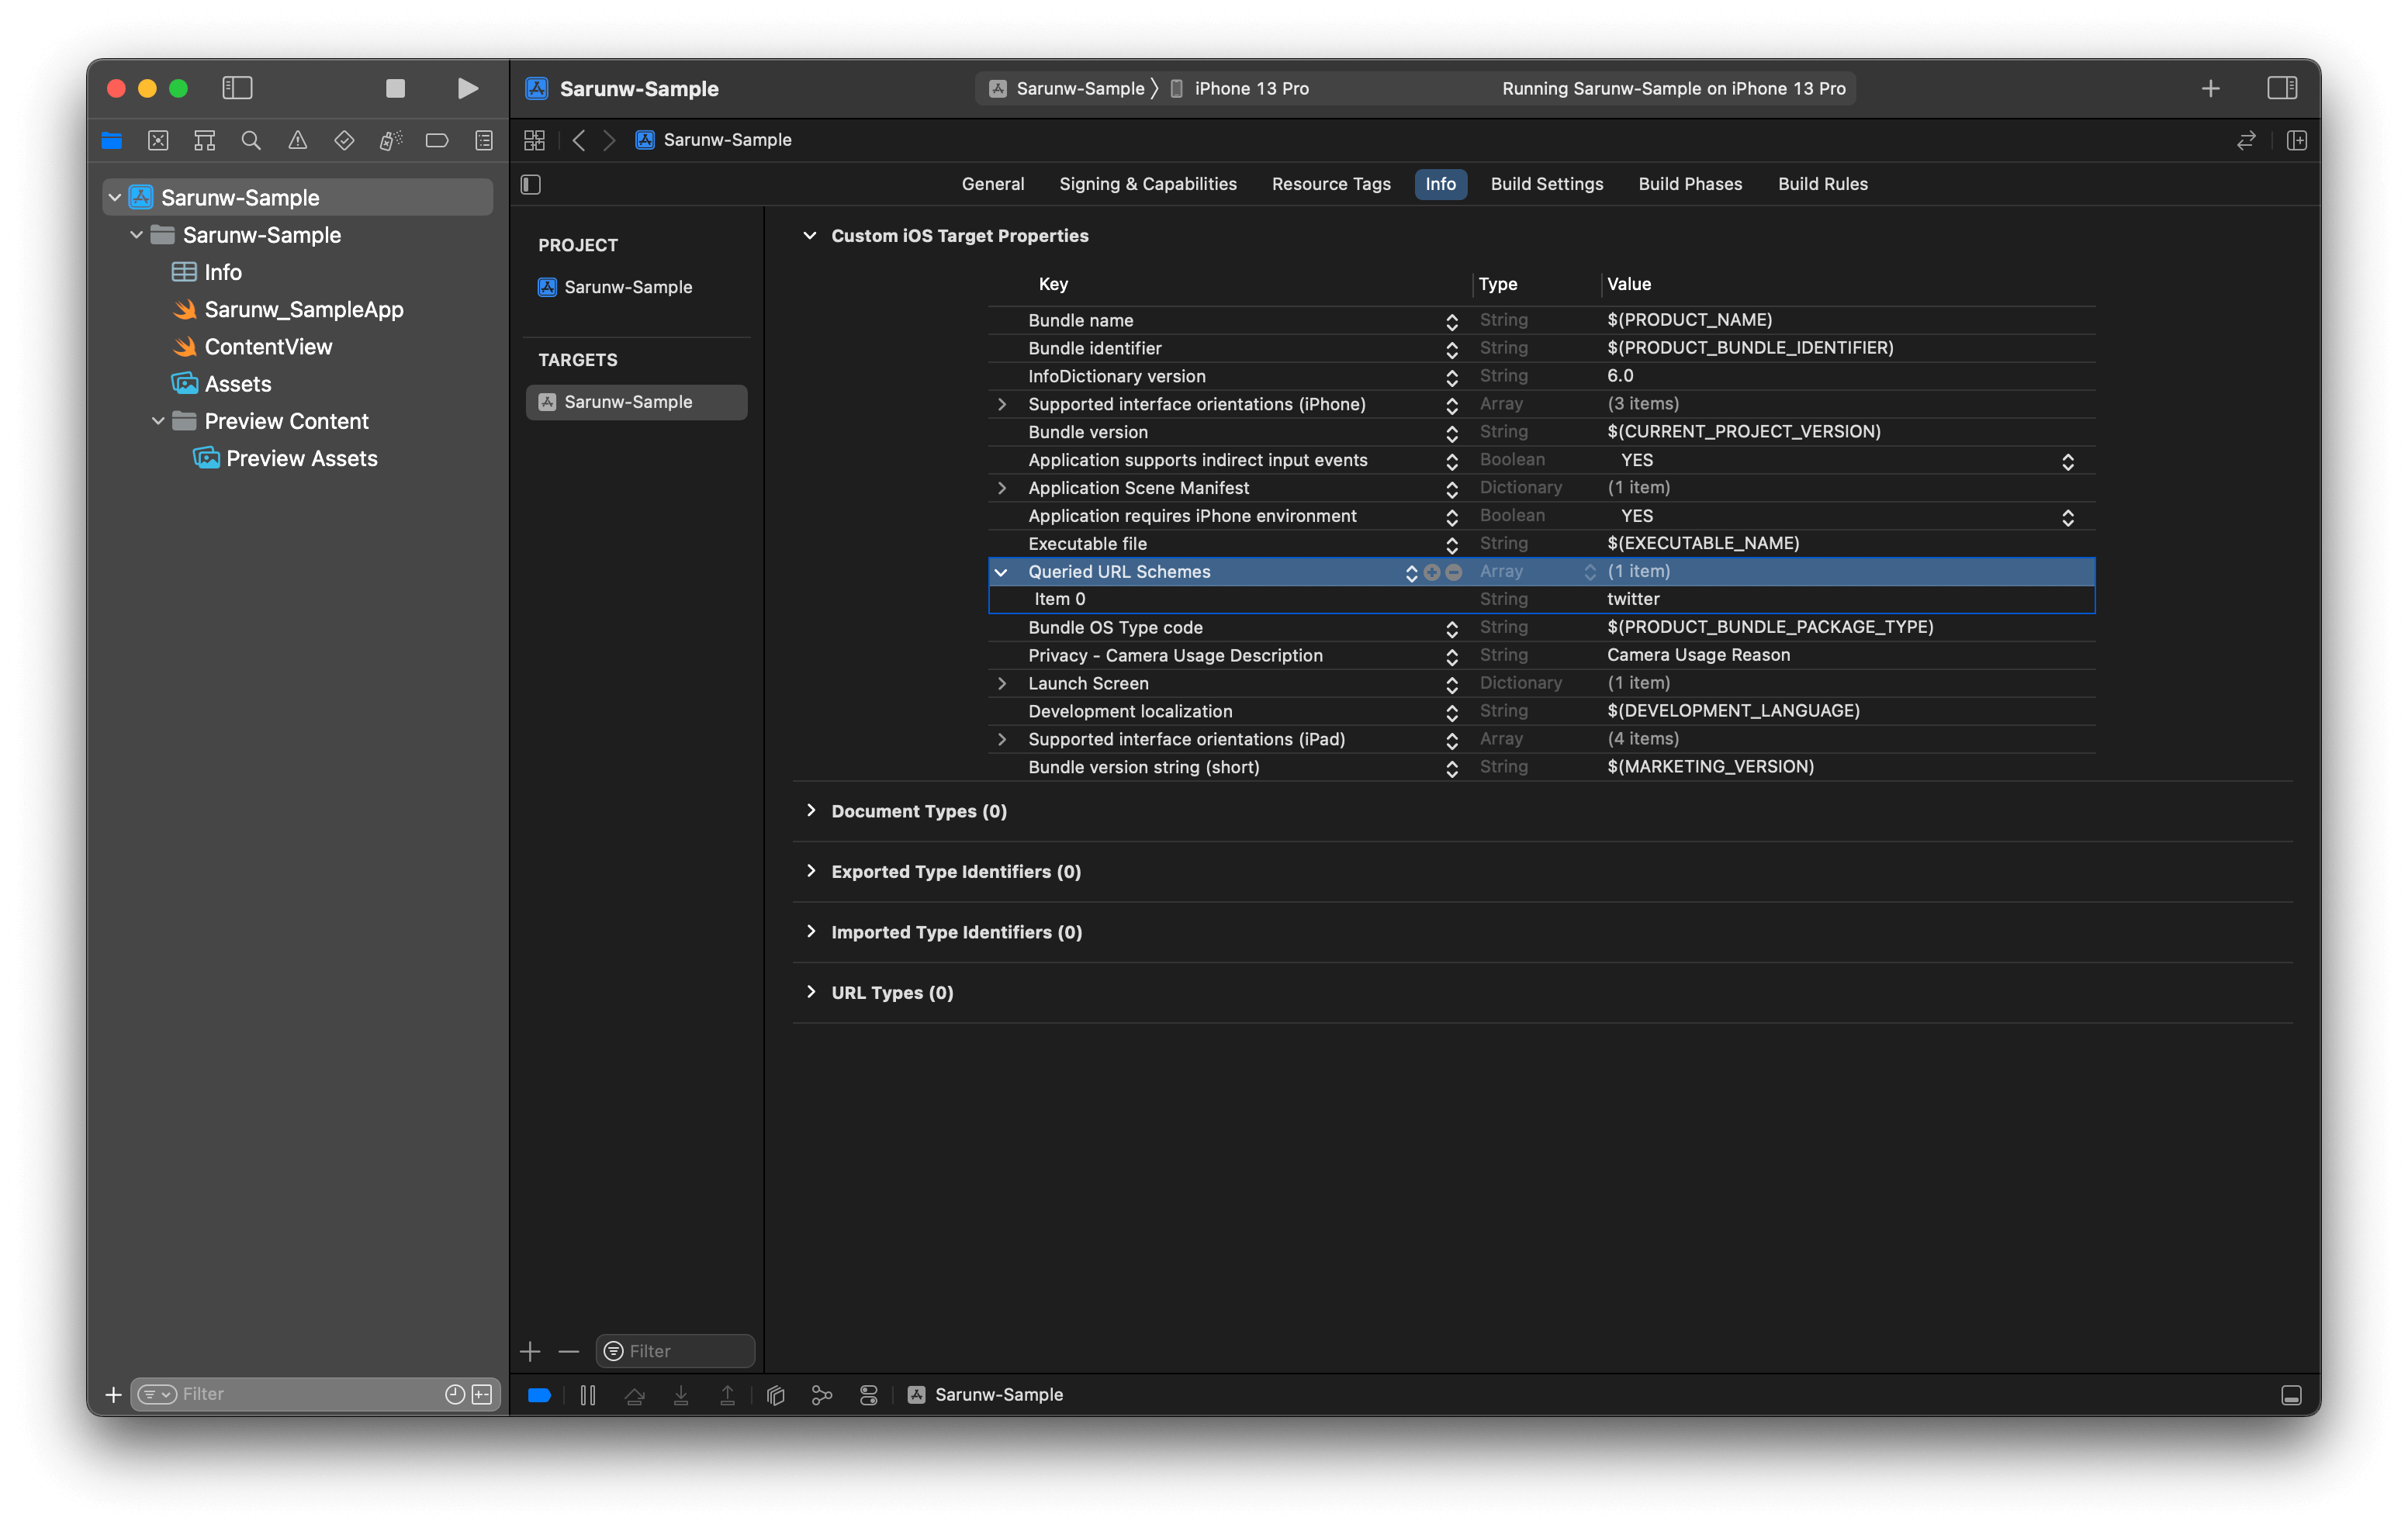
After adding this key in the Info tab, Xcode will create a new Info.plist containing that additional key and value.
Info.plist vs Info tab
In theory Info.plist file and information in the Info tab should sync, but in reality, that isn't the case.
From my observation (in Xcode 14), the sync works well if you edit the information from the target's Info tab.
So, I recommend you edit values from the Info tab.
UIKit project
If you create a new SwiftUI project, you won't see any Info.plist file.
But if you create a new UIKit project, you will get one.
That's because UIKit needs one additional configuration, Application Scene Manifest (UIApplicationSceneManifest), by default.
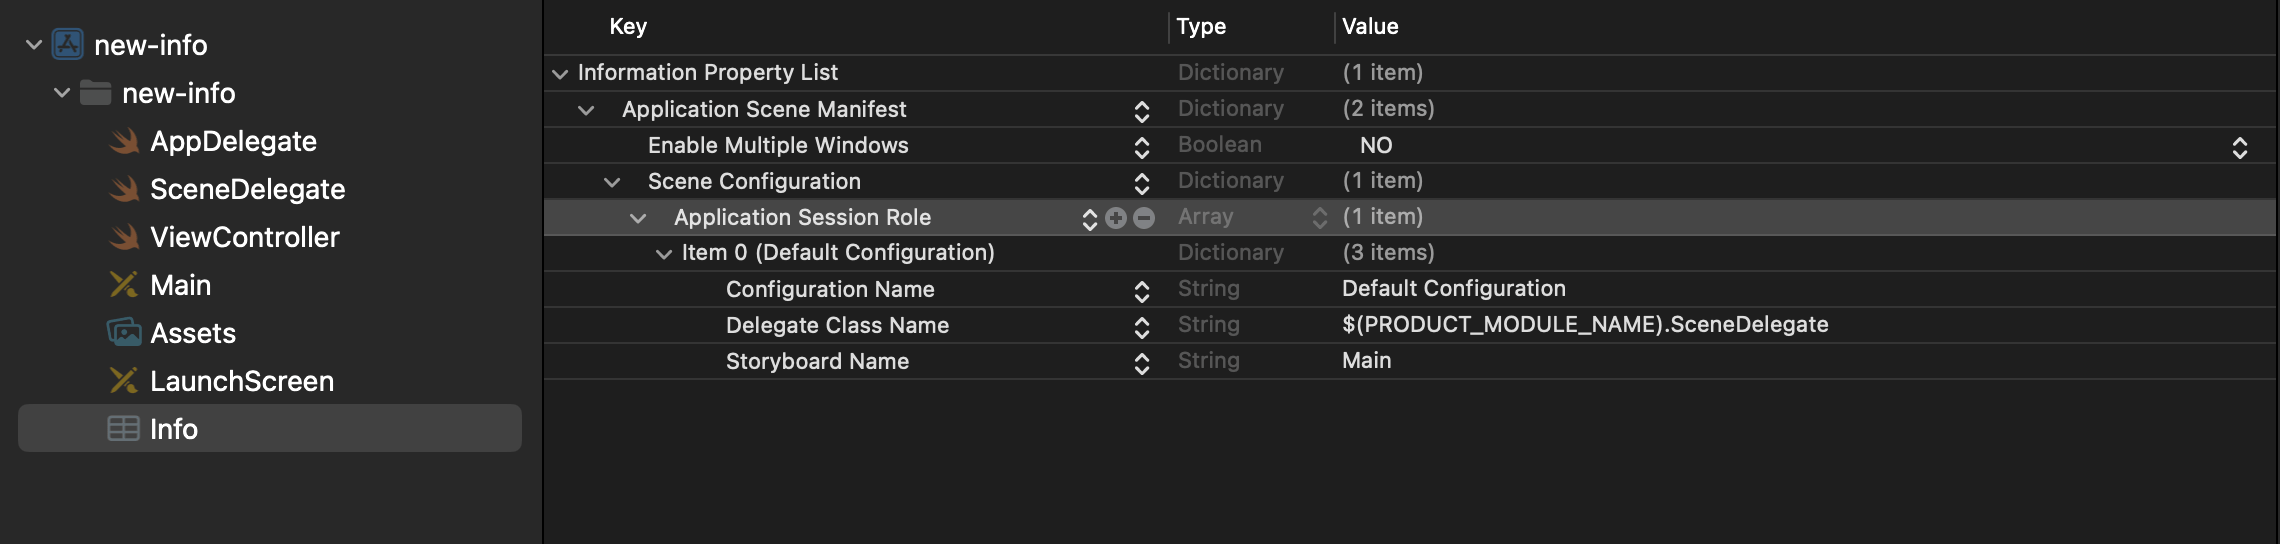
So, you still get one Info.plist file for a UIKit project.
But the same rule still applies. The content in the Info.plist contains only an additional configuration key.
You can easily support sarunw.com by checking out this sponsor.
AI Paraphrase:Are you tired of staring at your screen, struggling to rephrase sentences, or trying to find the perfect words for your text?
Conclusion
Info.plist has been an essential part of iOS development for a very long time.
Having it hidden away like this can cause confusion to both experienced developers and newcomers.
The way Xcode conditionally adds Info.plist file based on the added key is way more confusing, in my opinion.
Having two sources of truth trigger a question of where you should add or update the value.
My rule of thumb is to treat the target's Info tab as the only source of truth and always add and edit a value there.
Read more article about Xcode, Development, or see all available topic
Enjoy the read?
If you enjoy this article, you can subscribe to the weekly newsletter.
Every Friday, you'll get a quick recap of all articles and tips posted on this site. No strings attached. Unsubscribe anytime.
Feel free to follow me on Twitter and ask your questions related to this post. Thanks for reading and see you next time.
If you enjoy my writing, please check out my Patreon https://www.patreon.com/sarunw and become my supporter. Sharing the article is also greatly appreciated.
Become a patron Buy me a coffee Tweet ShareWhat is Swift Guard Case
The guard-case is a syntax to allow us to precondition check for one specific enum case.
How to change Background color of Rounded Corner Border Button in SwiftUI
Having both background and border in SwiftUI isn't straightforward. Let's learn how to do it.