How to change Status Bar text color in iOS
Table of Contents
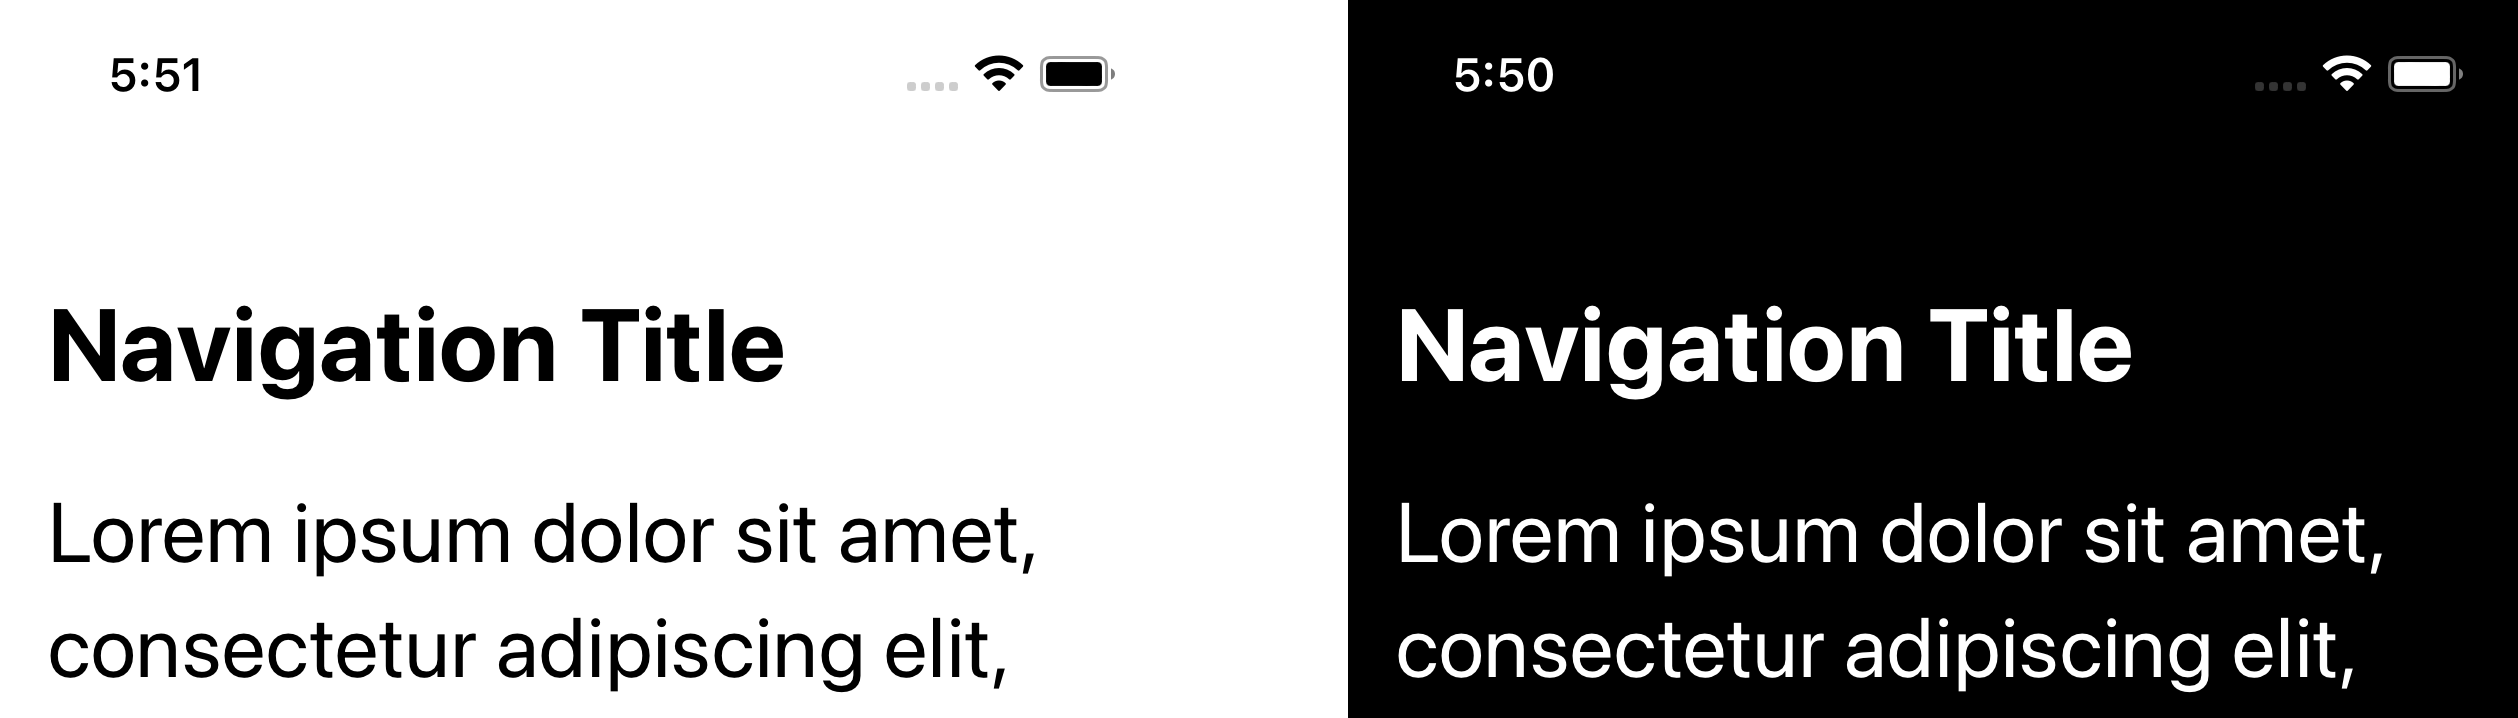
By default, the color of a status bar text will change according to the device appearance setting. For example, the text will be black on light appearance and white text on dark appearance.
There are two ways to opt-out of this behavior and set the status bar text color yourselves.
- Change a status bar text color for an entire app.
- Change a status bar text color for specific view controller.
Change status bar text color for the Entire App using Info.plist
If you want to set the status bar text color for an entire app, you can do it by specifying two keys in Info.plist.
- "Status bar style" (
UIStatusBarStyle) - "View controller-based status bar appearance" (
UIViewControllerBasedStatusBarAppearance)
Here are the steps to do it.
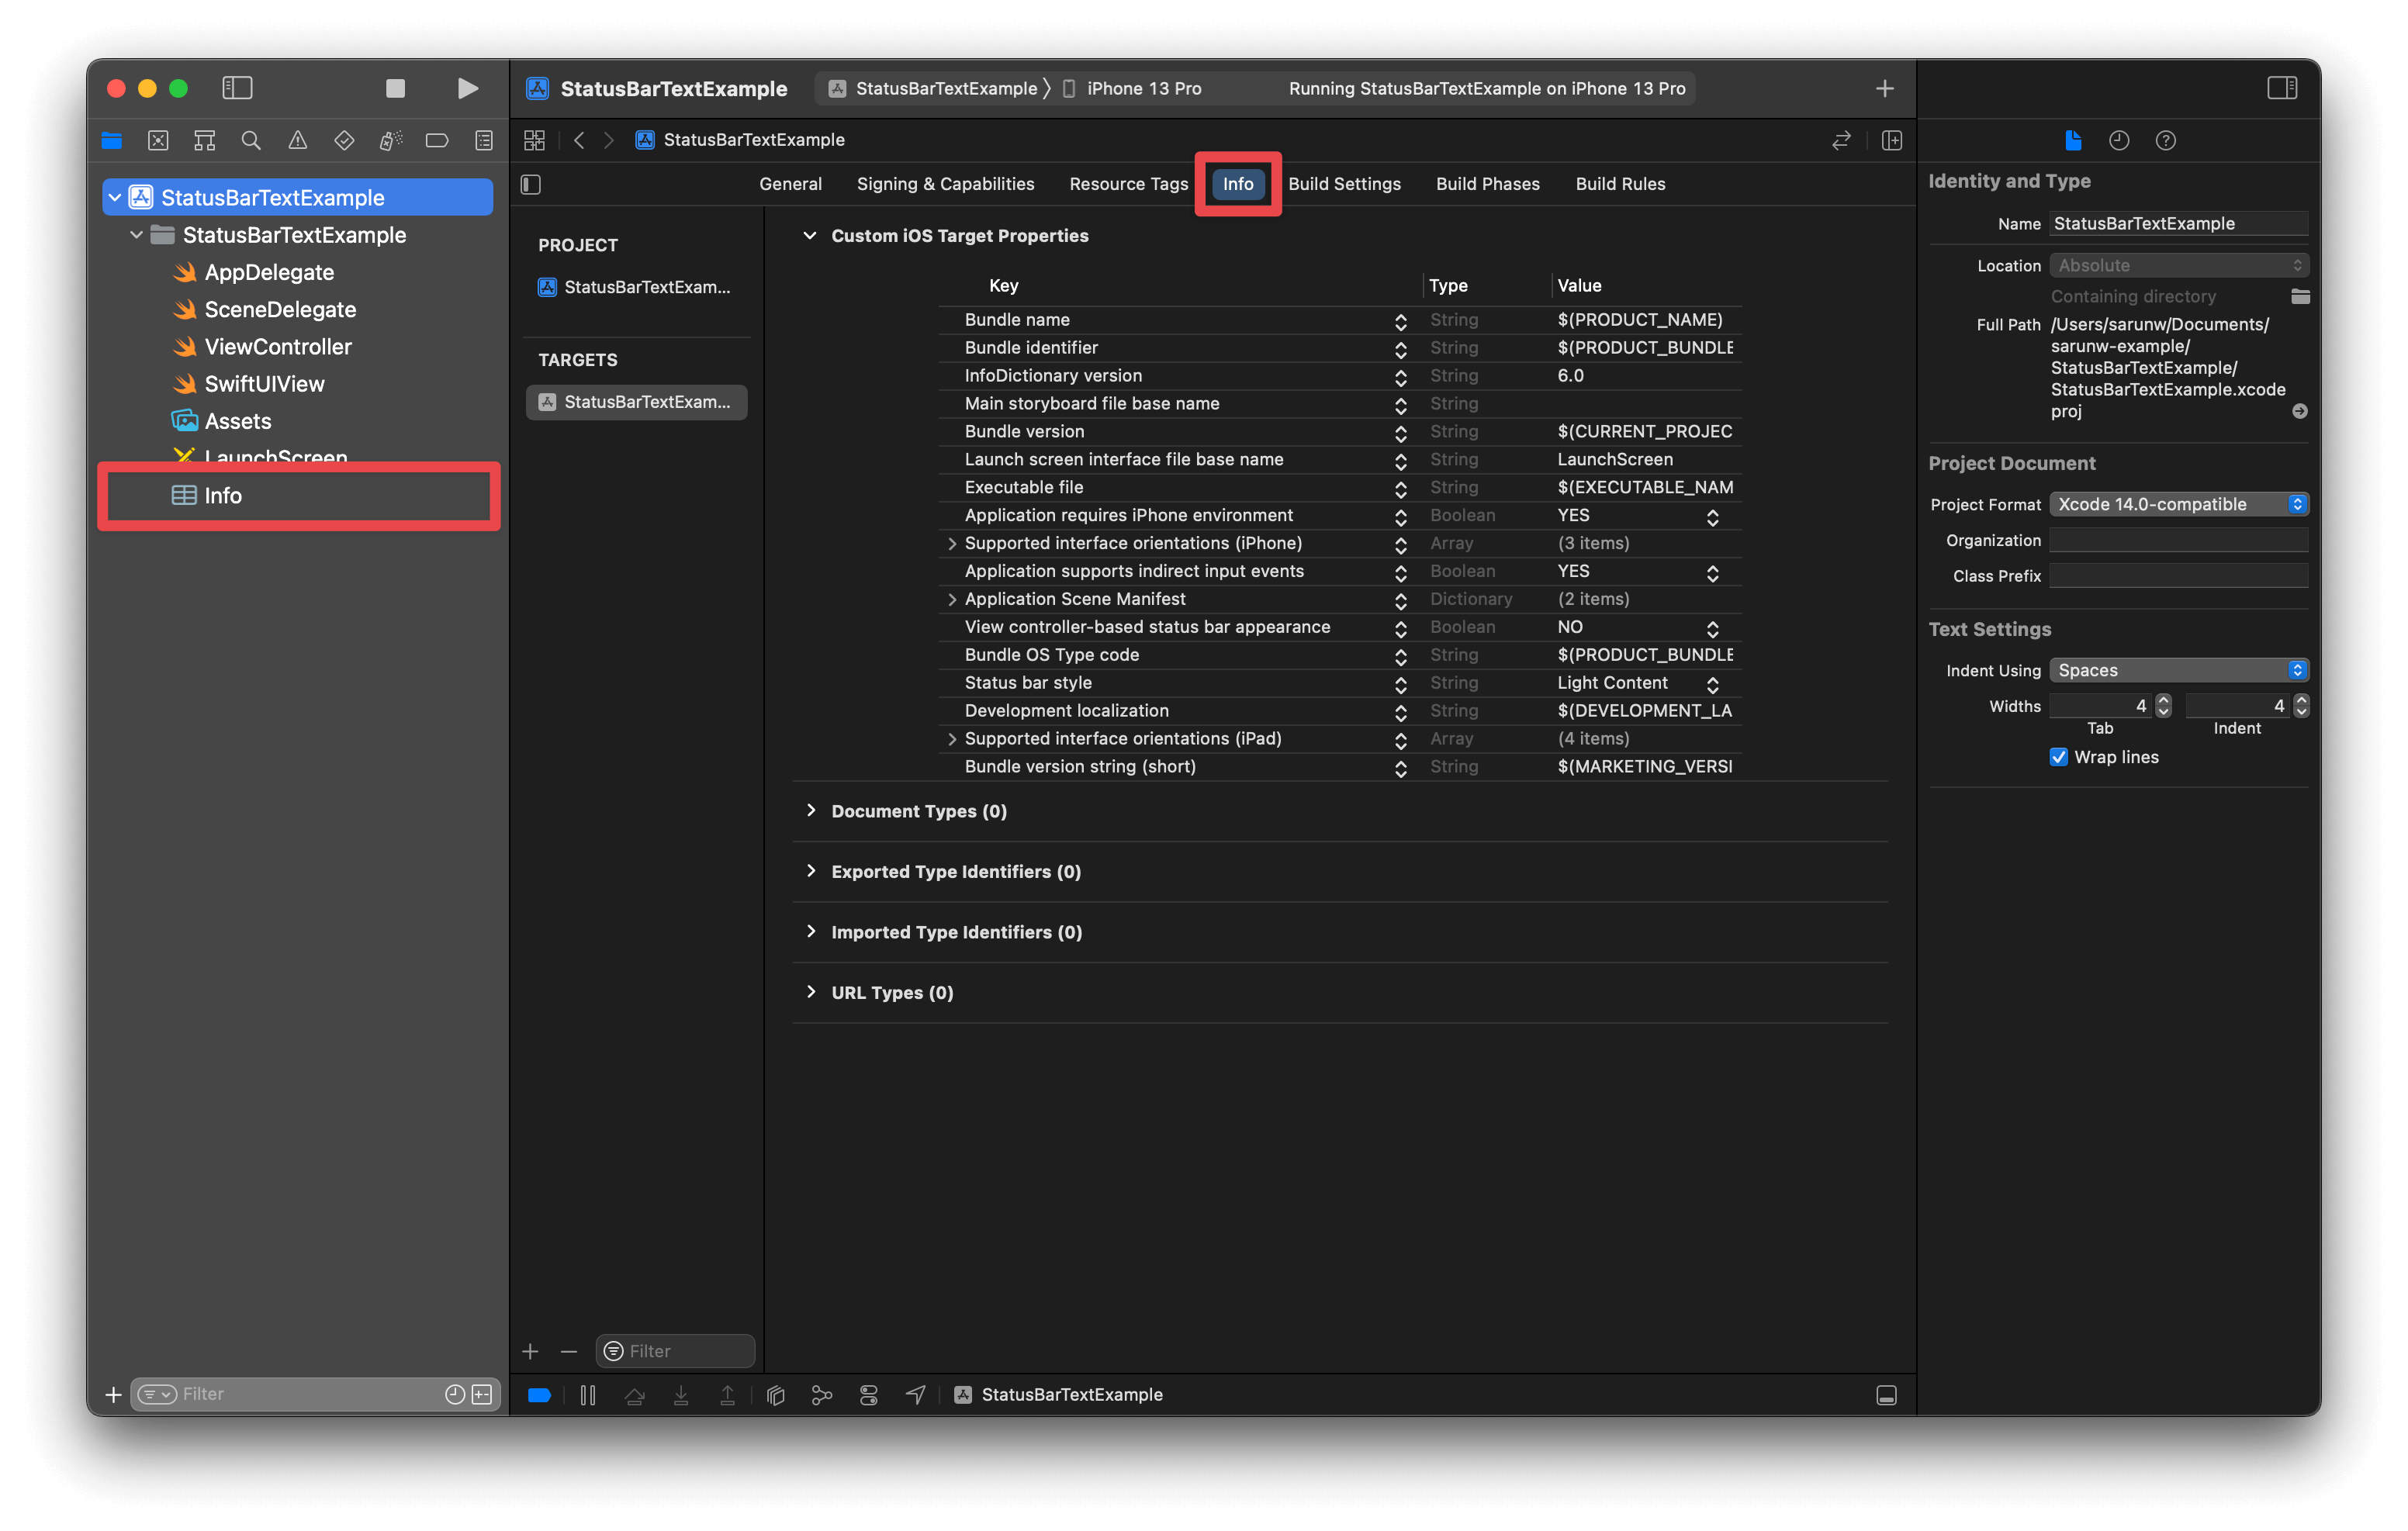
- Open your Info.plist, either from the Project Navigation or the "Info" tab.
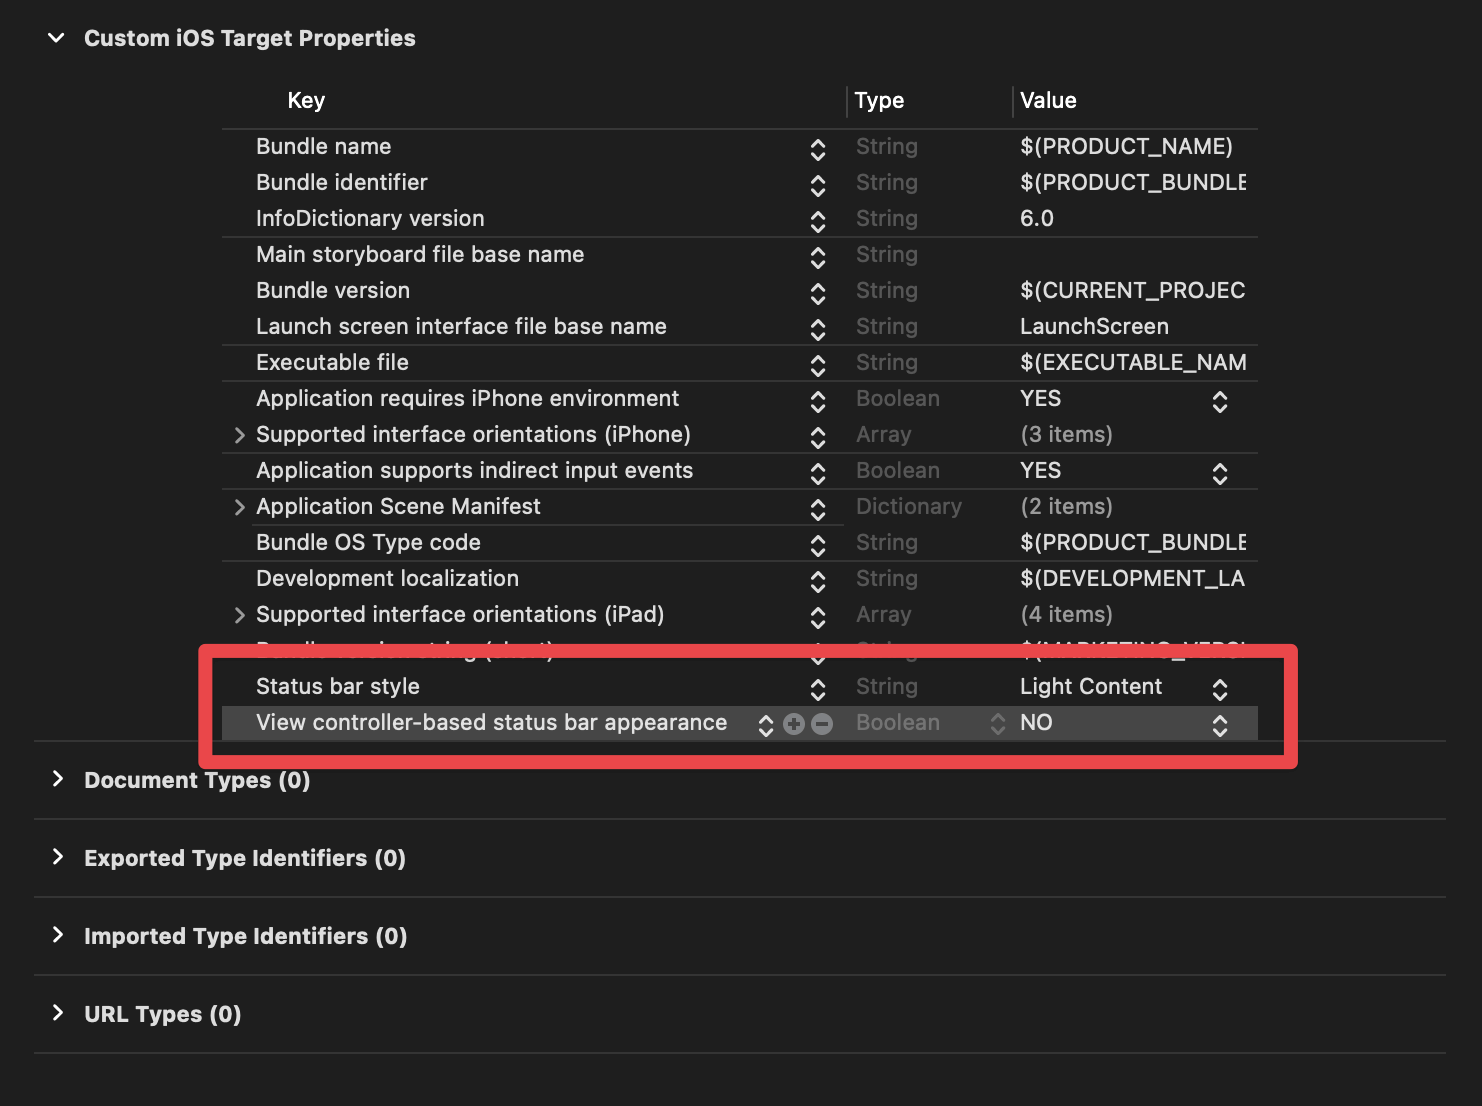
- Add key "Status bar style" (
UIStatusBarStyle) and set value to either "Light Content" (UIStatusBarStyleLightContent) or "Dark Content" (UIStatusBarStyleDarkContent). - Add key "View controller-based status bar appearance" (
UIViewControllerBasedStatusBarAppearance) and set its value to "NO".
You can easily support sarunw.com by checking out this sponsor.
AI Grammar: Correct grammar, spell check, check punctuation, and parphrase.
Change status bar text color for specific view controller
By default, the status bar text color will change according to active view controller.
A view controller communicates the preferred text color to the system via preferredStatusBarStyle property.
You can control the status bar text color by override preferredStatusBarStyle property in a view controller and return the style you want.
In this example, we set the status bar text color to white.
override var preferredStatusBarStyle: UIStatusBarStyle {
    return .lightContent
}Read more article about UIKit, Status Bar, or see all available topic
Enjoy the read?
If you enjoy this article, you can subscribe to the weekly newsletter.
Every Friday, you'll get a quick recap of all articles and tips posted on this site. No strings attached. Unsubscribe anytime.
Feel free to follow me on Twitter and ask your questions related to this post. Thanks for reading and see you next time.
If you enjoy my writing, please check out my Patreon https://www.patreon.com/sarunw and become my supporter. Sharing the article is also greatly appreciated.
Become a patron Buy me a coffee Tweet ShareCreate SwiftUI List from an Array
It is very common to populate a list view from an array of data. Let's learn how to do it in SwiftUI.