Create SwiftUI List from an Array
Table of Contents
We can easily create a List view from an array of data in SwiftUI.
It has a similar syntax as Swift map function where a result of a mapping function is a single row of the list.
let contacts = [
    Contact(name: "John"),
    Contact(name: "Alice"),
    Contact(name: "Bob"),
    Contact(name: "Foo"),
    Contact(name: "Bar")
]

List(contacts) { contact in
    Text(contact.name)
}
As you can see, it quite resembles a Swift map.
contacts.map { contact in
    print("List row content")
}
Here is what we get.
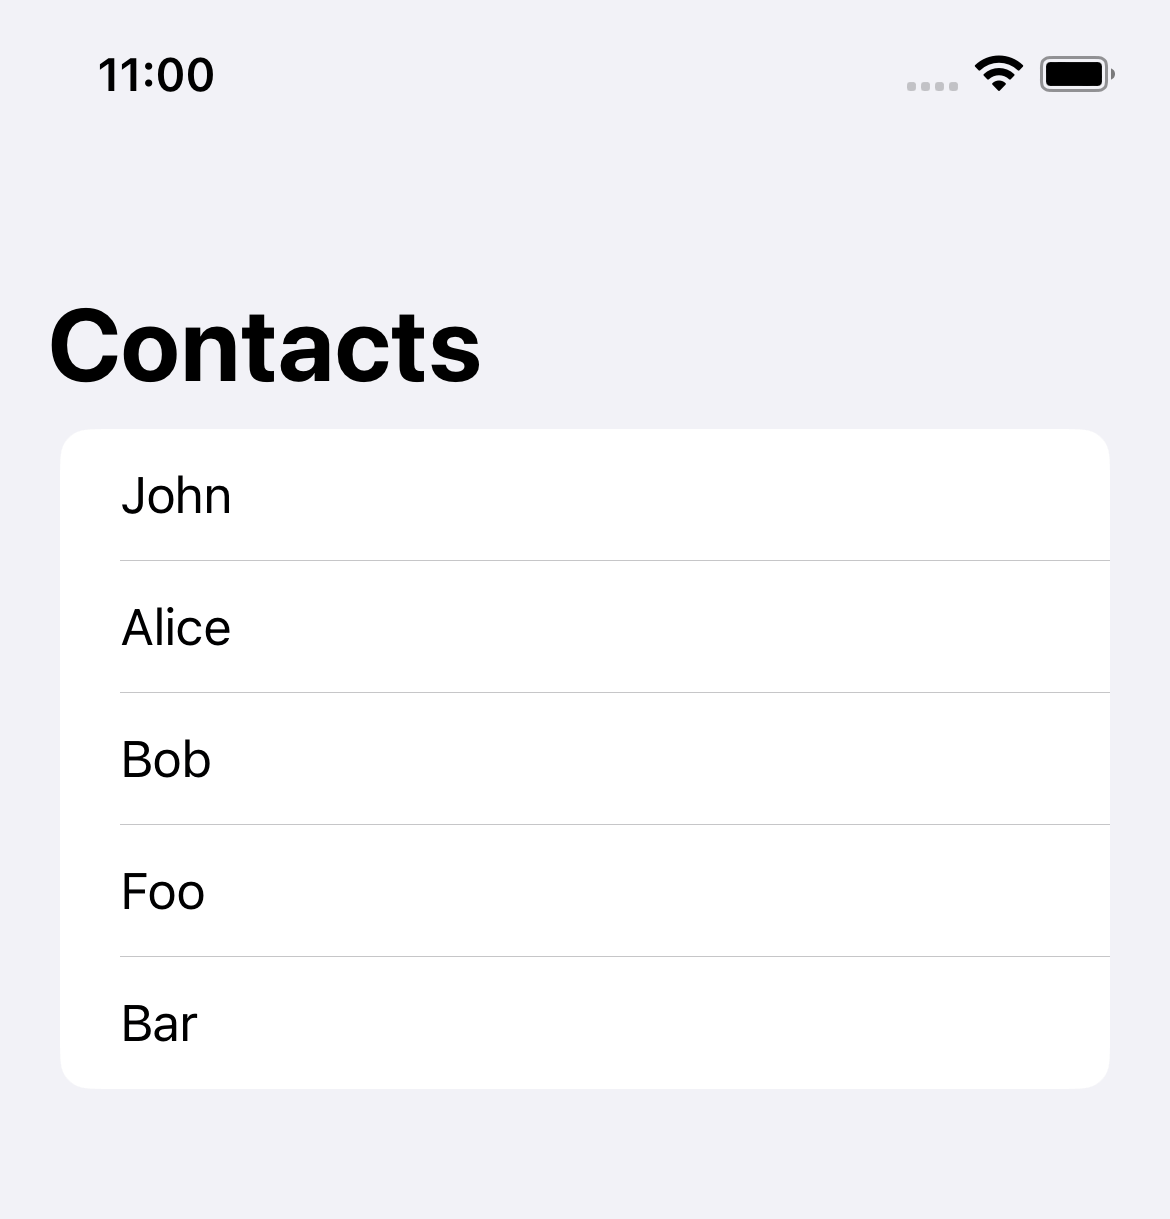
The only requirement for creating a list view in SwiftUI is the data must be uniquely identifiable.
SwiftUI list view supports many functions, such as reordering, adding, and removing. So, it needs something to identify which item is moved, added, or deleted.
SwiftUI gives us two ways to provide an identity for the data.
Create List from an Array of Identifiable data
Identifiable is a simple protocol. It asks for one thing, a stable identity.
A stable identity (id) can be anything you can guarantee to remain unique for the lifetime of an object, such as a database id, national id, or a UUID.
Identifiable only requires an id variable of type Identifiable.ID, which can be anything as long as it is unique and conform to Hashable.
public protocol Identifiable {

    /// A type representing the stable identity of the entity associated with
    /// an instance.
    associatedtype ID : Hashable

    /// The stable identity of the entity associated with this instance.
    var id: Self.ID { get }
}
In this example, I create a Contact struct to represent contact information. An id is UUID, which is unique and conforms to Hashable.
struct Contact: Identifiable {
    let id = UUID()
    let name: String
}
And that's all we need. We can create an array of Contact and use that to populate our list view.
struct ListArrayExample: View {
// 1
let contacts = [
Contact(name: "John"),
Contact(name: "Alice"),
Contact(name: "Bob"),
Contact(name: "Foo"),
Contact(name: "Bar")
]
var body: some View {
// 2
List(contacts) { contact in
// 3
Text(contact.name)
}
}
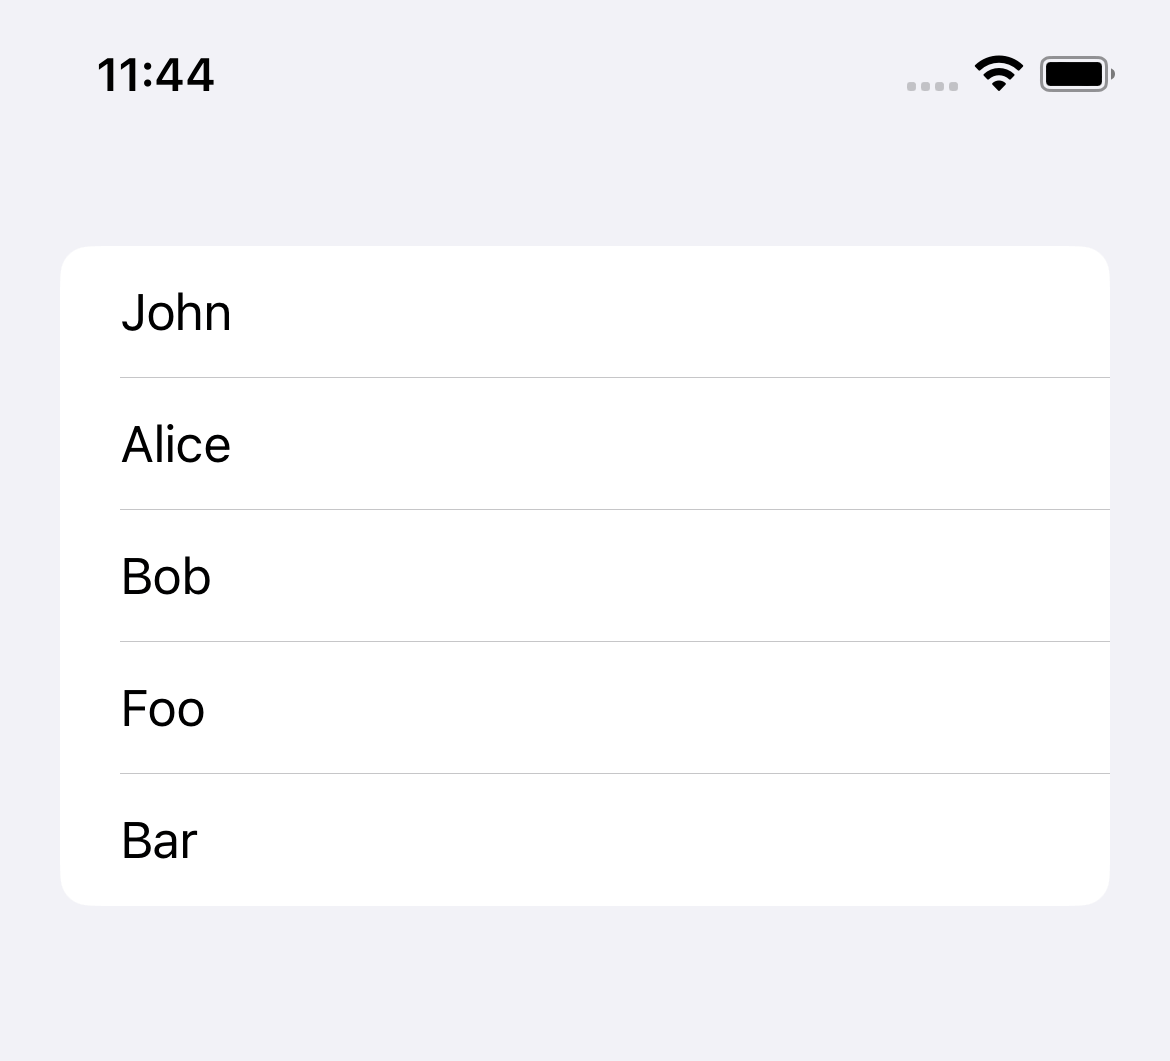
}1 We create an array of Identifiable data.
2 Use it to initialize a List view.
3 And use a passing Identifiable data to create a row content. In this case, we use the contact name as row content.
You can easily support sarunw.com by checking out this sponsor.
AI Paraphrase:Are you tired of staring at your screen, struggling to rephrase sentences, or trying to find the perfect words for your text?
Create List from an Array of any data
If you want to use a primitive data type like String or don't want to bother making data Identifiable, List has other variations of initializers that accept arbitrary data type.
No Identifiable protocol means a list view need other ways to identify each item.
KeyPath is a tool that a list view uses to identify the data in this case.
Here is an example where we create a list view out of an array of string. And we will use the string itself as an identifier.
The keypath that reference the data itself is \.self.
struct ListArrayExample: View {
    let contacts = [
        "John",
        "Alice",
        "Bob",
        "Foo",
        "Bar"
    ]

    var body: some View {
        // 1
        List(contacts, id: \.self) { contact in
            Text(contact)
        }
    }
}
1 List view ask for the second parameter, id. We specify \.self, which is a keypath to the string itself.
Read more article about SwiftUI, List, or see all available topic
Enjoy the read?
If you enjoy this article, you can subscribe to the weekly newsletter.
Every Friday, you'll get a quick recap of all articles and tips posted on this site. No strings attached. Unsubscribe anytime.
Feel free to follow me on Twitter and ask your questions related to this post. Thanks for reading and see you next time.
If you enjoy my writing, please check out my Patreon https://www.patreon.com/sarunw and become my supporter. Sharing the article is also greatly appreciated.
Become a patron Buy me a coffee Tweet ShareHow to dismiss fullScreenCover in SwiftUI
SwiftUI has many ways to dismiss a modal view based on how you structure your view and the minimum iOS version you support.
How to change Status Bar text color in iOS
Learn how to change a status bar text color in UIKit app.