How to manage Safe Area insets in Flutter
Table of Contents
What are Safe area insets
Not all available space on a screen is safe to use. With new devices coming, some areas might get obstructed by device shape or new hardware components.
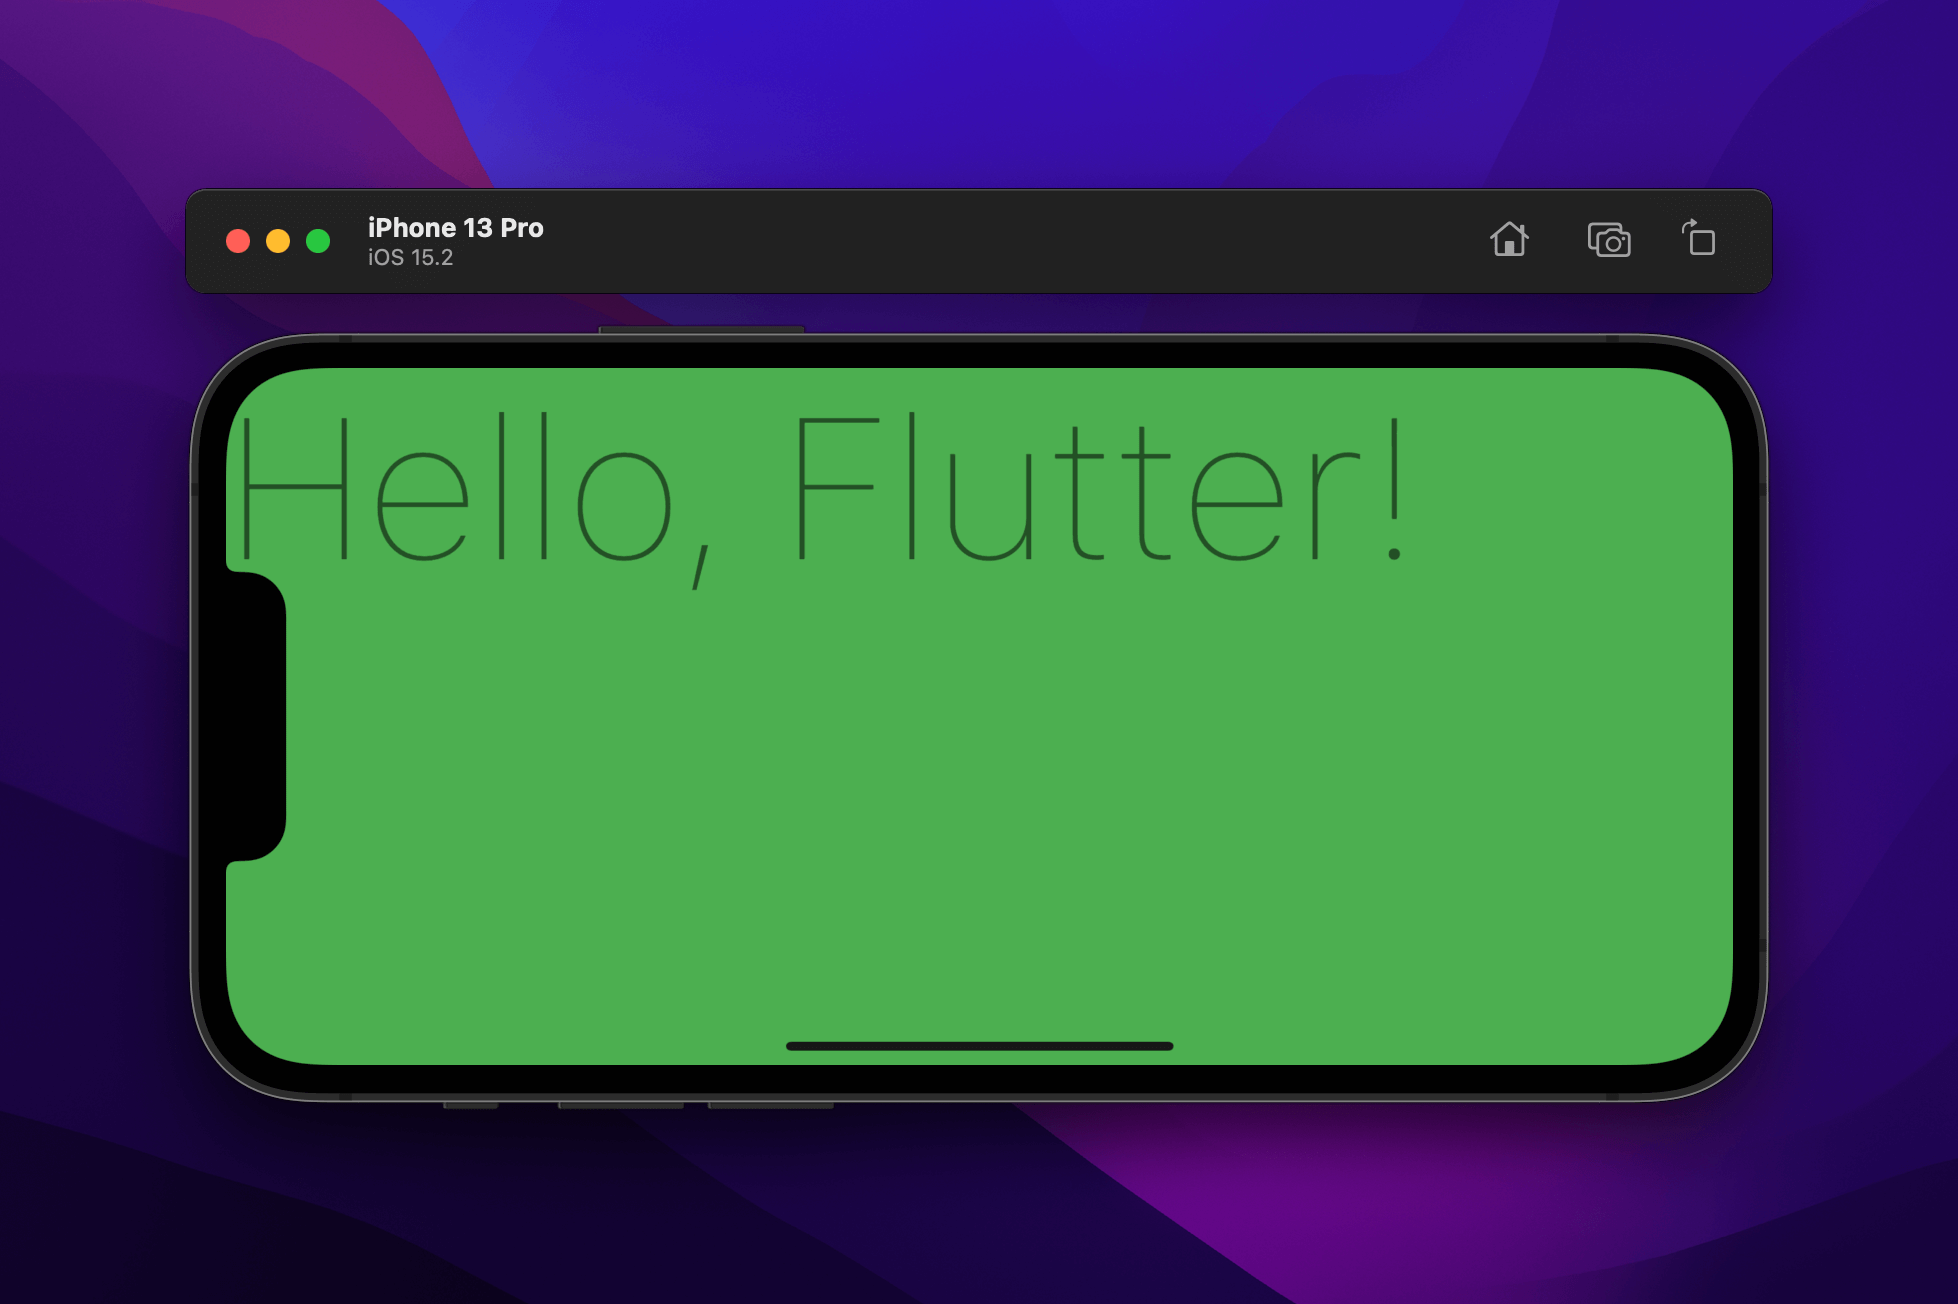
Here is an example of the iPhone 13 Pro, which has round corners, and the Notch.
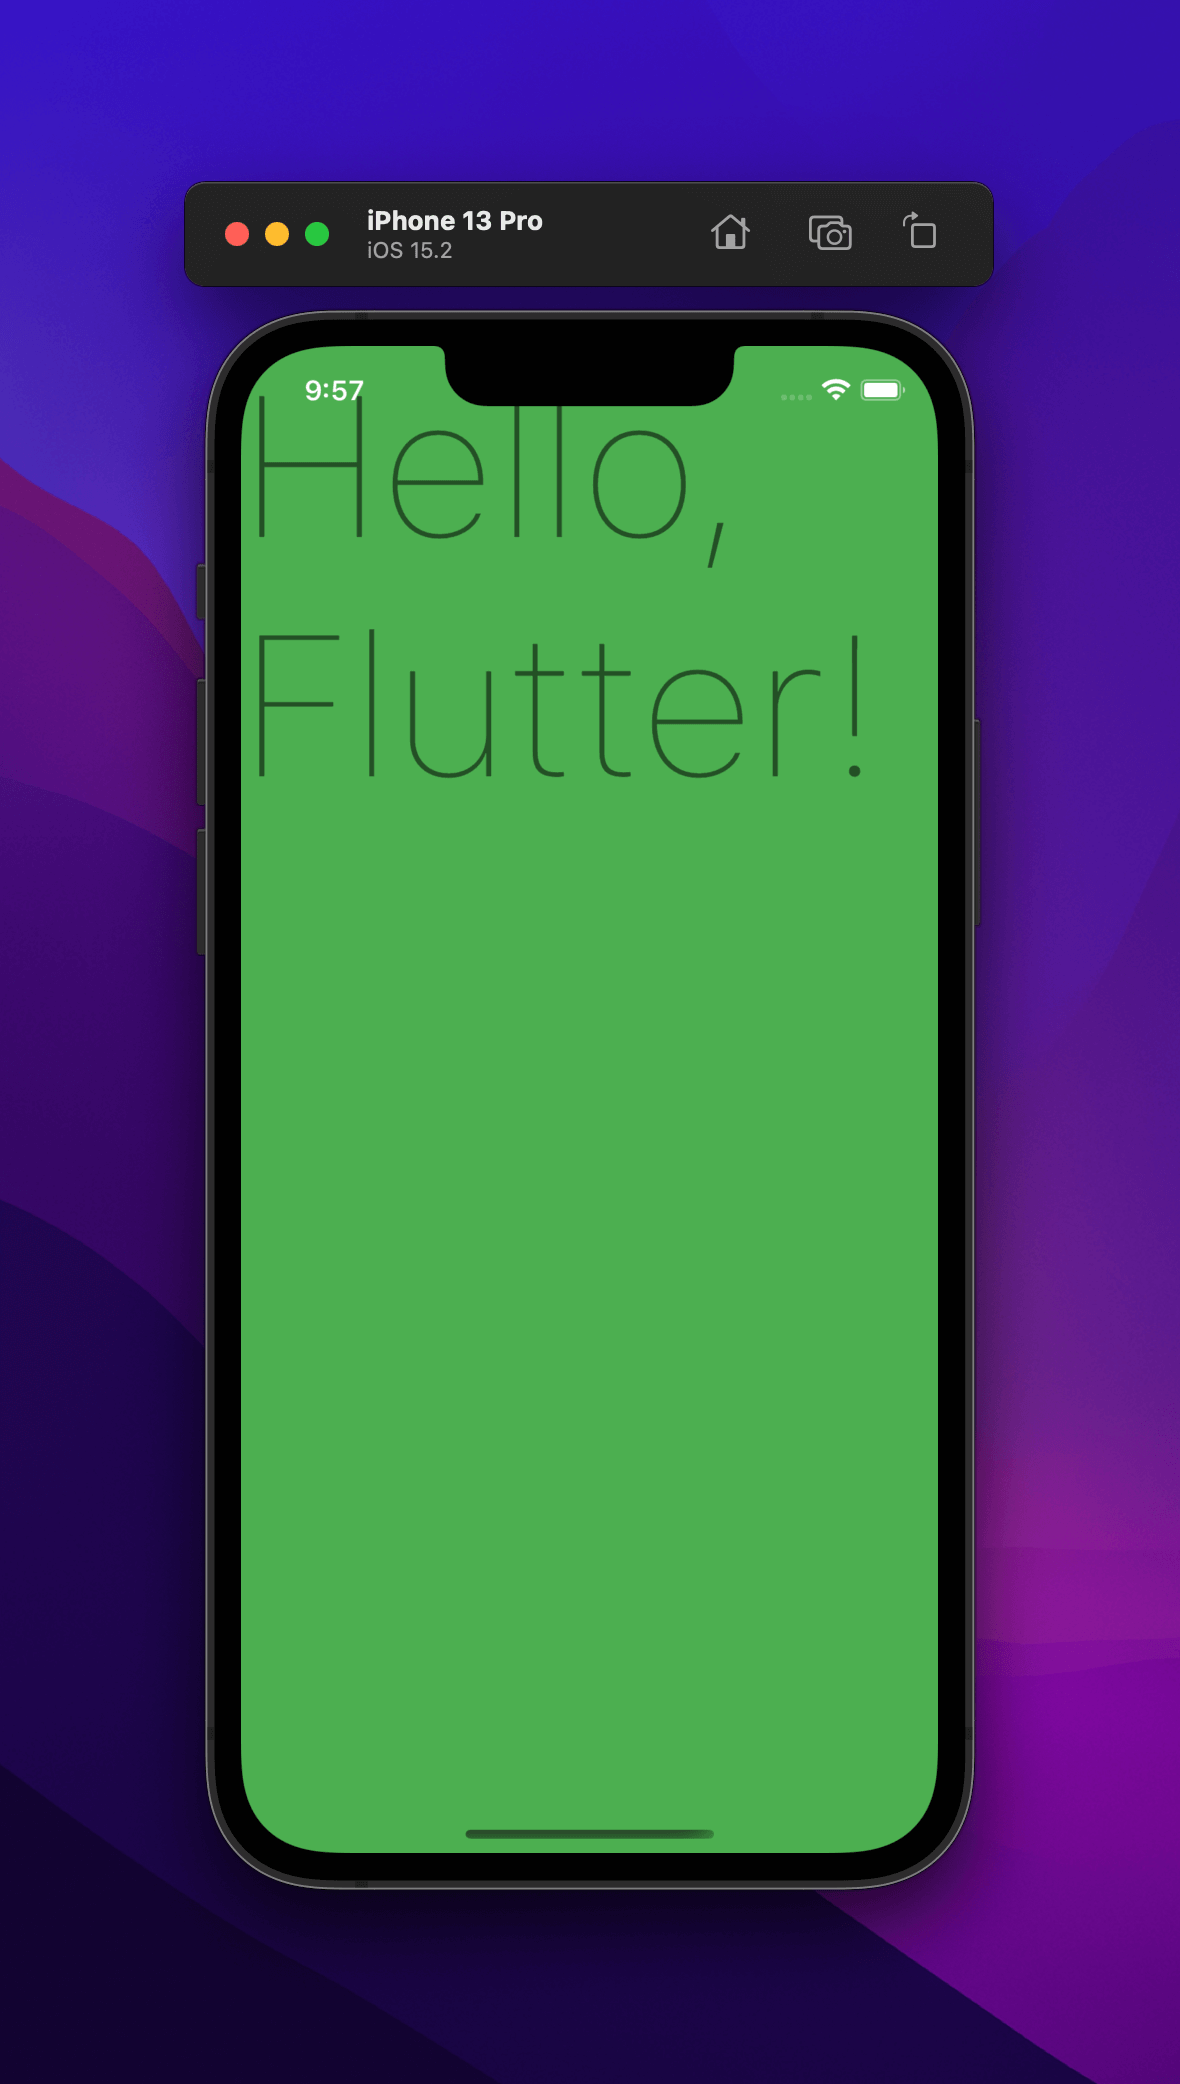
But this isn't limited to just hardware. Software components like the system UI, e.g., clock and battery, can also obstruct your UI.
Here is an example of the iOS status bar and home indicator, which always shows in portrait orientation.
Safe area insets refer to sufficient padding to avoid those obstacles.
You can easily support sarunw.com by checking out this sponsor.

AI Grammar: Correct grammar, spell check, check punctuation, and parphrase.
SafeArea widget
SafeArea is a widget that insets its child with sufficient padding to avoid obstacles.
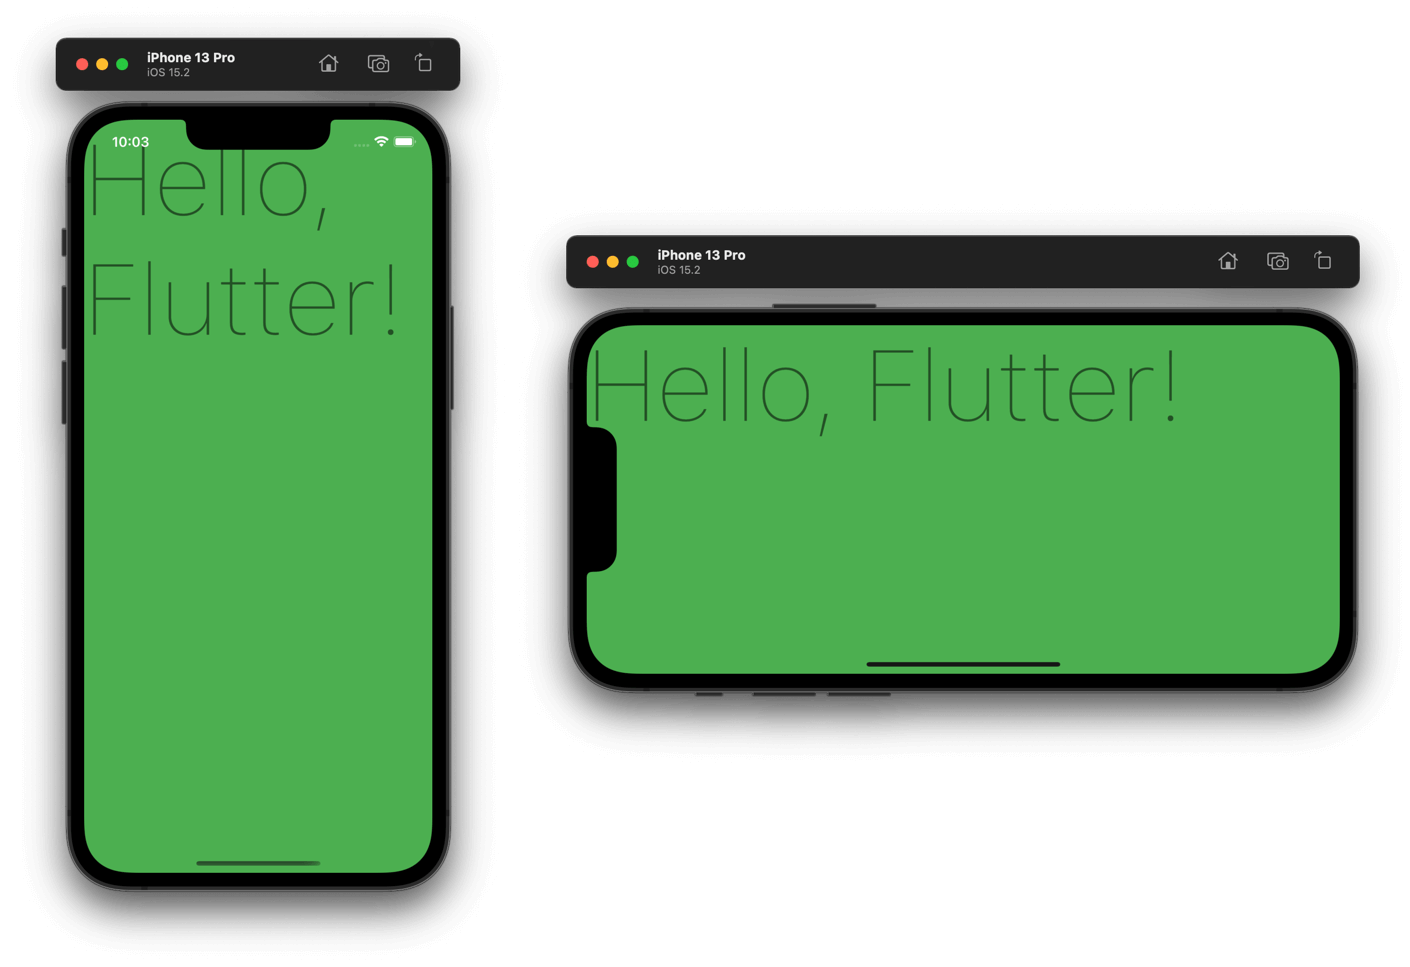
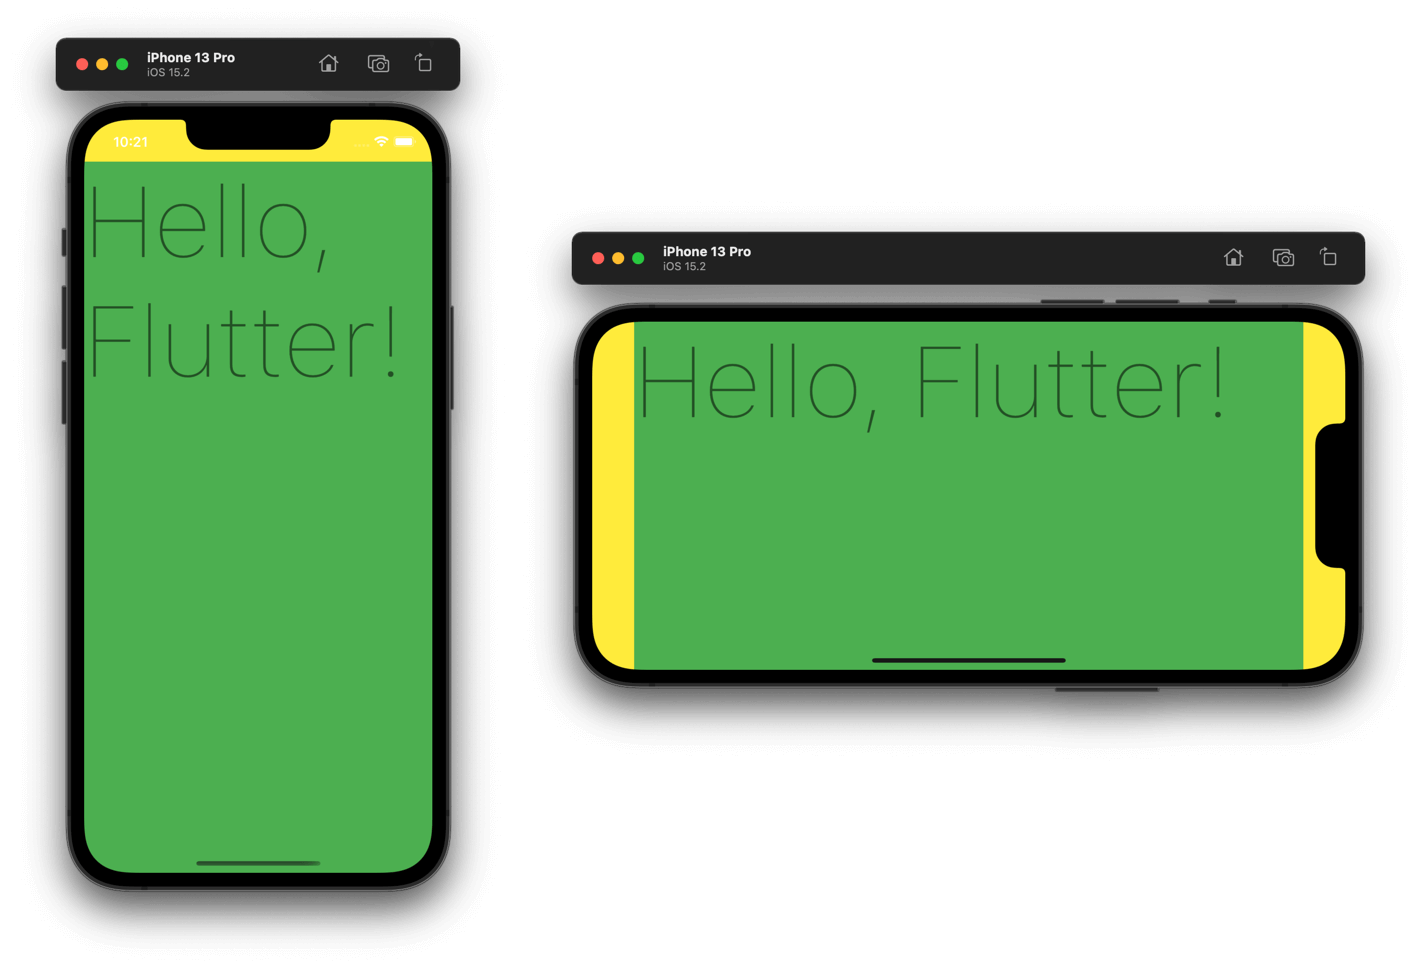
By default, Flutter renders its view ignoring of safe area. So your view might be getting behind those hardware and software components.
class MyApp extends StatelessWidget {
const MyApp({Key? key}) : super(key: key);
Widget build(BuildContext context) {
return MaterialApp(
debugShowCheckedModeBanner: false,
title: 'Flutter Demo',
home: Scaffold(
backgroundColor: Colors.yellow,
body: SizedBox.expand(
child: Container(
decoration: BoxDecoration(color: Colors.green),
child: Text(
'Hello, Flutter!',
style: Theme.of(context).textTheme.displayLarge,
),
),
),
),
);
}
}Widgets got obstructed by hardware and software components.
Layout widgets inside the Safe area
To lay out widgets inside the safe area, simply put a widget that you want to avoid those obstacles as a child of the SafeArea widget.
For example, this will put enough offset to the child to avoid all the obstacles.
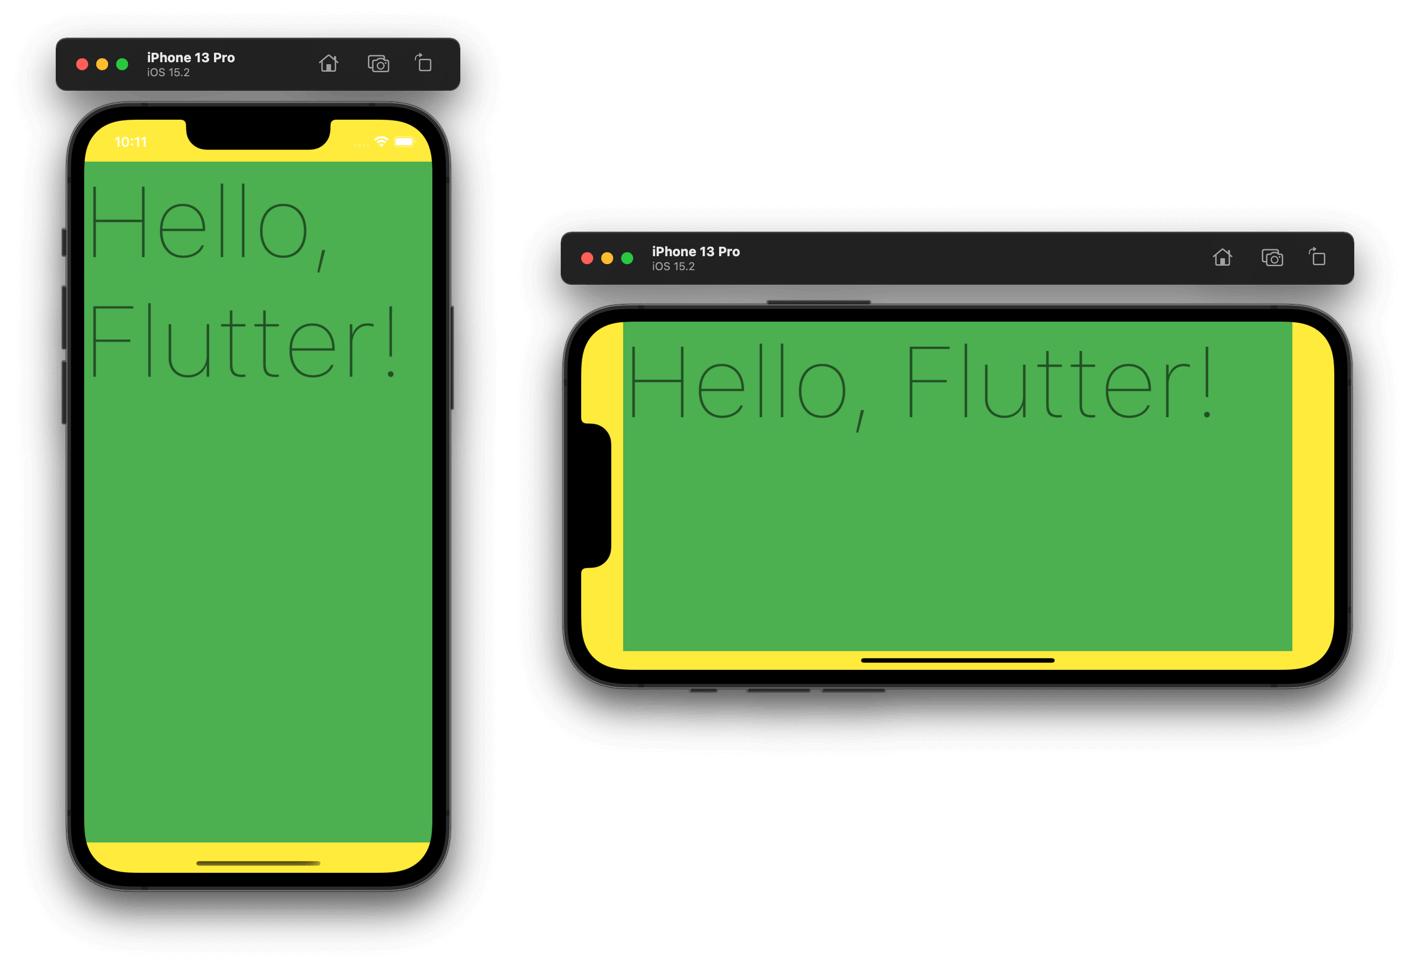
Here is an example of the previous widget, but this time we use the SafeArea widget.
class MyApp extends StatelessWidget {
const MyApp({Key? key}) : super(key: key);
Widget build(BuildContext context) {
return MaterialApp(
debugShowCheckedModeBanner: false,
title: 'Flutter Demo',
home: Scaffold(
backgroundColor: Colors.yellow,
body: SafeArea(
child: SizedBox.expand(
child: Container(
decoration: BoxDecoration(color: Colors.green),
child: Text(
'Hello, Flutter!',
style: Theme.of(context).textTheme.displayLarge,
),
),
),
),
),
);
}
}We set the parent background to yellow to demonstrate the non-safe area easier.
You can rest assured that a widget inside a SafeArea widget won't be obstructed by anything.
Ignore safe area insets at a specific edge
If you have a specific design need, you can ignore safe area insets to particular edges by set false to those edges.
Here is an example where we ignore the safe area for the bottom edge.
class MyApp extends StatelessWidget {
const MyApp({Key? key}) : super(key: key);
Widget build(BuildContext context) {
return MaterialApp(
debugShowCheckedModeBanner: false,
title: 'Flutter Demo',
home: Scaffold(
backgroundColor: Colors.yellow,
body: SafeArea(
bottom: false,
child: SizedBox.expand(
child: Container(
decoration: BoxDecoration(color: Colors.green),
child: Text(
'Hello, Flutter!',
style: Theme.of(context).textTheme.displayLarge,
),
),
),
),
),
);
}
}Ignore safe area insets at the bottom.
Read more article about Flutter or see all available topic
Enjoy the read?
If you enjoy this article, you can subscribe to the weekly newsletter.
Every Friday, you'll get a quick recap of all articles and tips posted on this site. No strings attached. Unsubscribe anytime.
Feel free to follow me on Twitter and ask your questions related to this post. Thanks for reading and see you next time.
If you enjoy my writing, please check out my Patreon https://www.patreon.com/sarunw and become my supporter. Sharing the article is also greatly appreciated.
Become a patron Buy me a coffee Tweet ShareCustom Back button Action in SwiftUI
Learn how to have custom logic for a navigation view back button.
How to remove duplicate items from Array in Swift
Learn how to do that using the Swift Algorithms module and without it.