How to make Empty Space Tappable in SwiftUI
Table of Contents
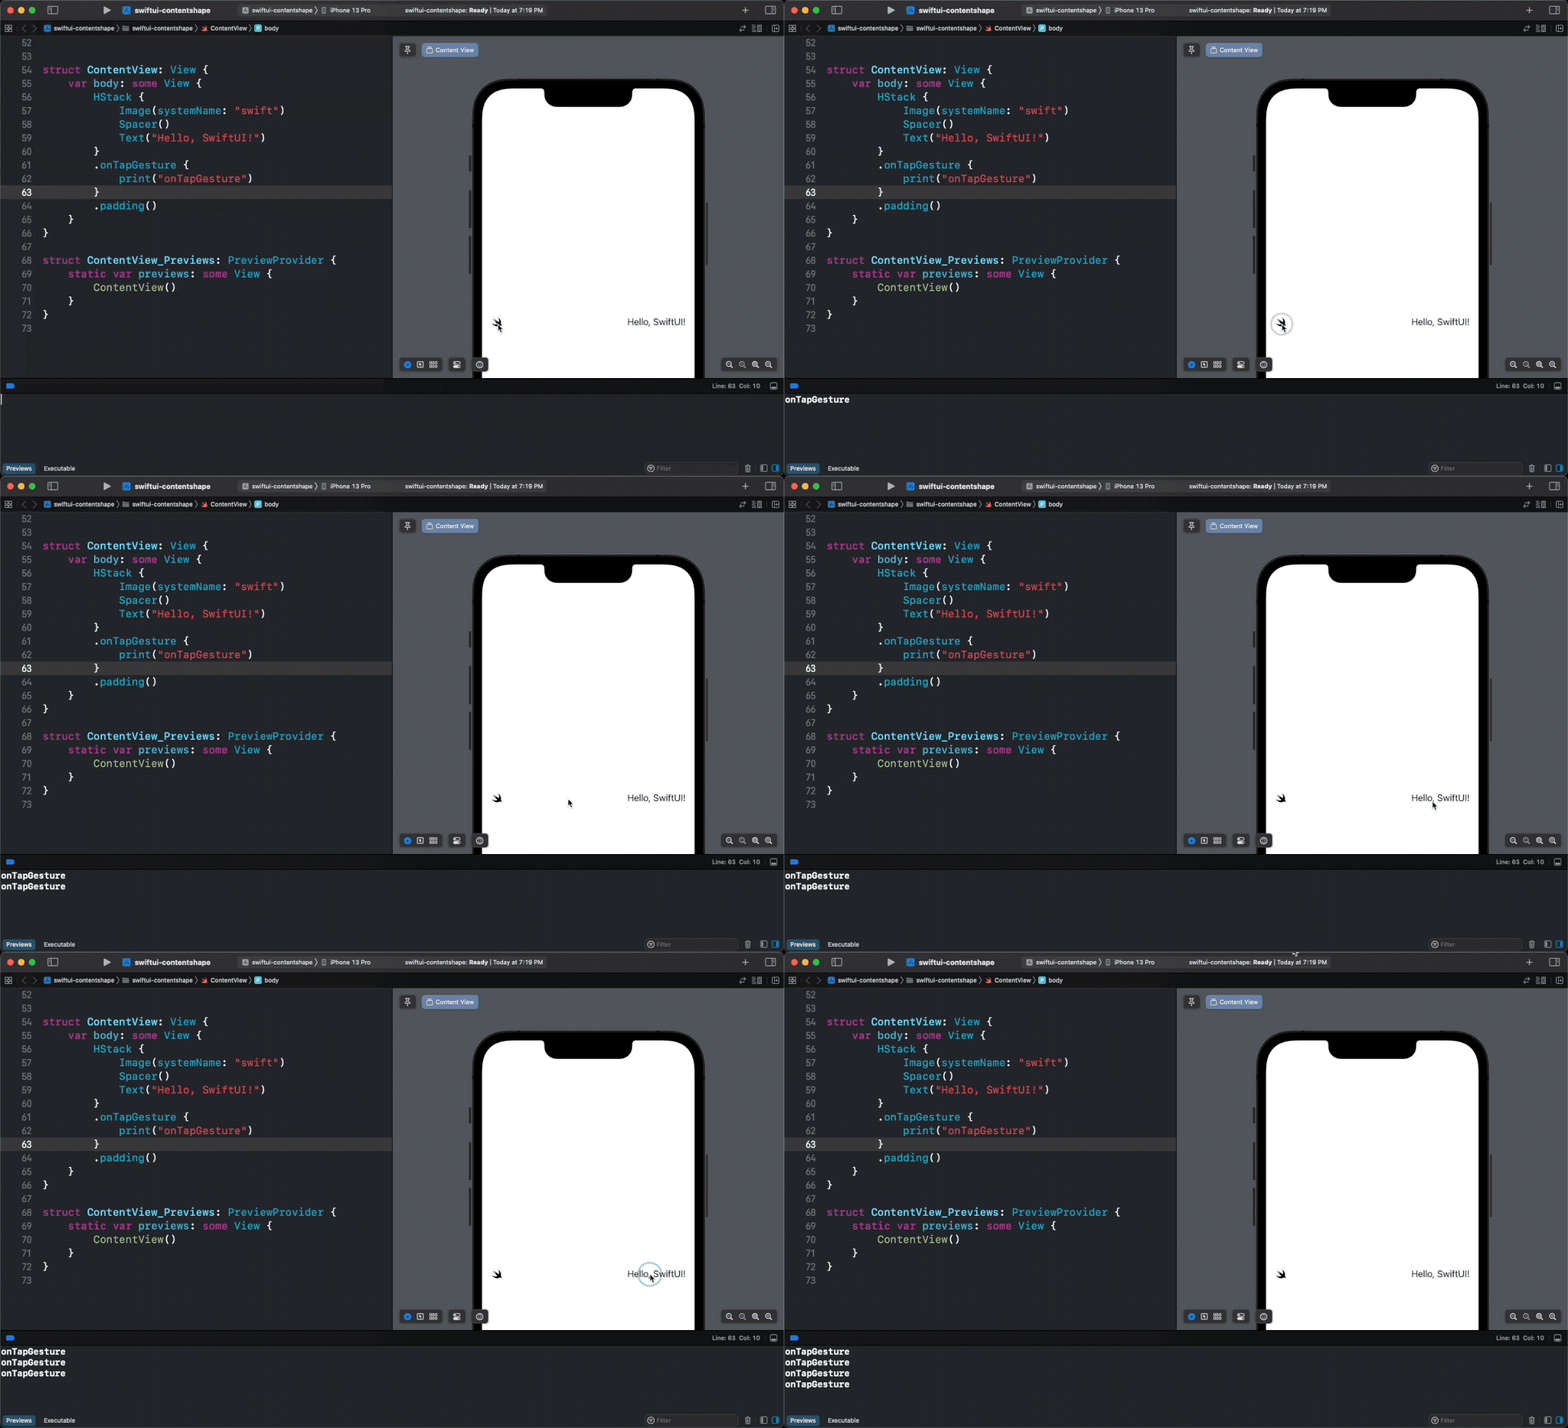
If you have ever added a tap gesture to a VStack or HStack, you might notice that space between content in a stack isn't tappable.
Tap action only recognizes when you tap on content, e.g., text or an image.
In this example, "onTapGesture" only prints when we tap on the image and text inside an HStack.
struct ContentView: View {
    var body: some View {
        HStack {
            Image(systemName: "swift")
            Spacer()
            Text("Hello, SwiftUI!")
        }
        .onTapGesture {
            print("onTapGesture")
        }
        .padding()
    }
}
How to make Empty Space Tappable in SwiftUI
SwiftUI can't possibly know whether you want the empty space to be tappable or not.
By default, tap gesture only active when user tap on the view content, but not an empty space.
You have to explicitly define the hitting area if the default behavior isn't what you need.
You can define the hitting area using contentShape() modifier.
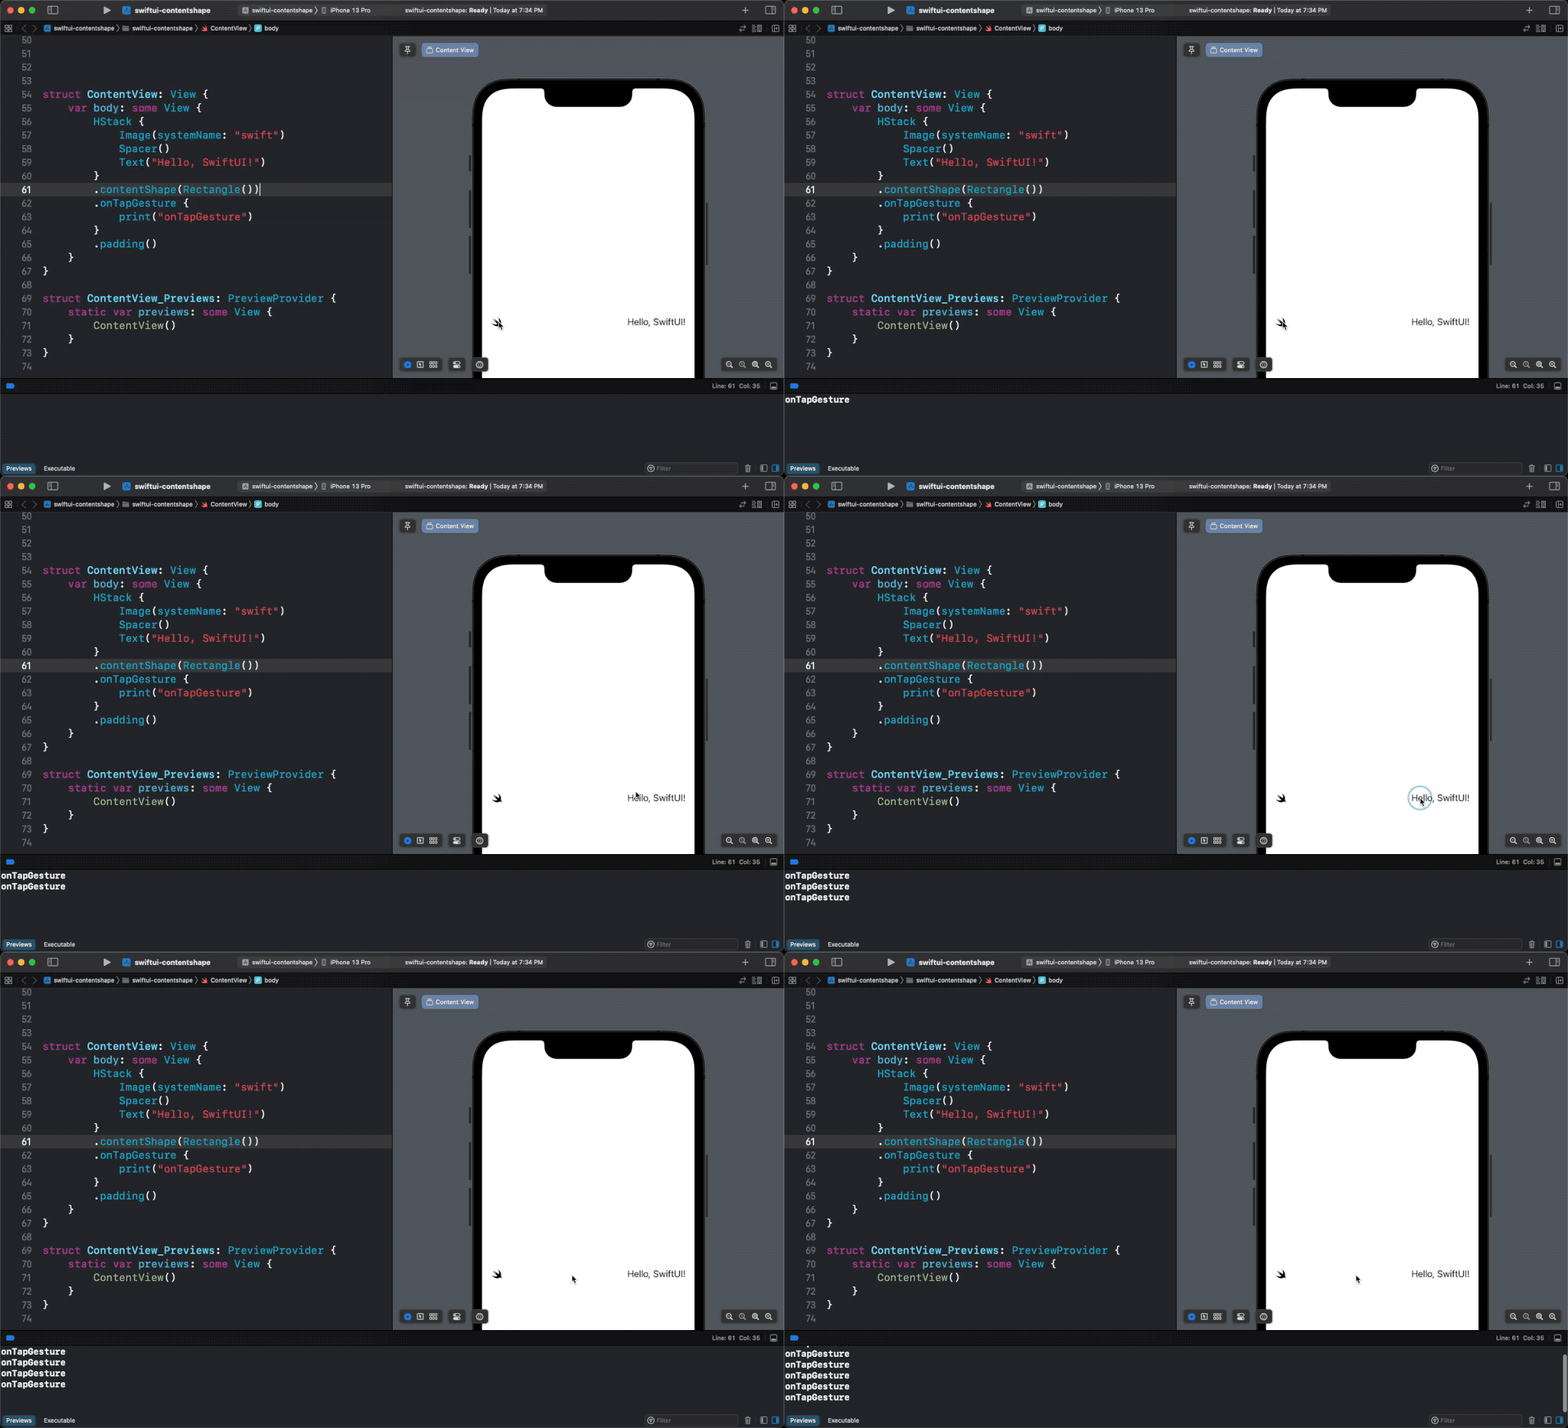
To make the whole HStack tappable, we define a new hitting area using a rectangle shape, Rectangle().
struct ContentView: View {
    var body: some View {
        HStack {
            Image(systemName: "swift")
            Spacer()
            Text("Hello, SwiftUI!")
        }
        .contentShape(Rectangle())
        .onTapGesture {
            print("onTapGesture")
        }
        .padding()
    }
}
With this simple change, the whole HStack is tappable.

You can easily support sarunw.com by checking out this sponsor.

Turn your code into a snapshot: Codeshot creates a beautiful image of your code snippets. Perfect size for Twitter.
Use Button or List instead of onTapGesture
Another way to make an empty space in HStack or VStack tappable is by wrapping it inside something that SwiftUI can assume a tappable area, e.g., a button or navigation link.
Users expected the whole area of a button to be tappable, so if you use HStack or VStack as button content, SwiftUI provides the most likely behavior we want. That is, the whole area of that stack view will be tappable.
The same principle applies to a navigation link. Users expected the whole area of a list row to be tappable.
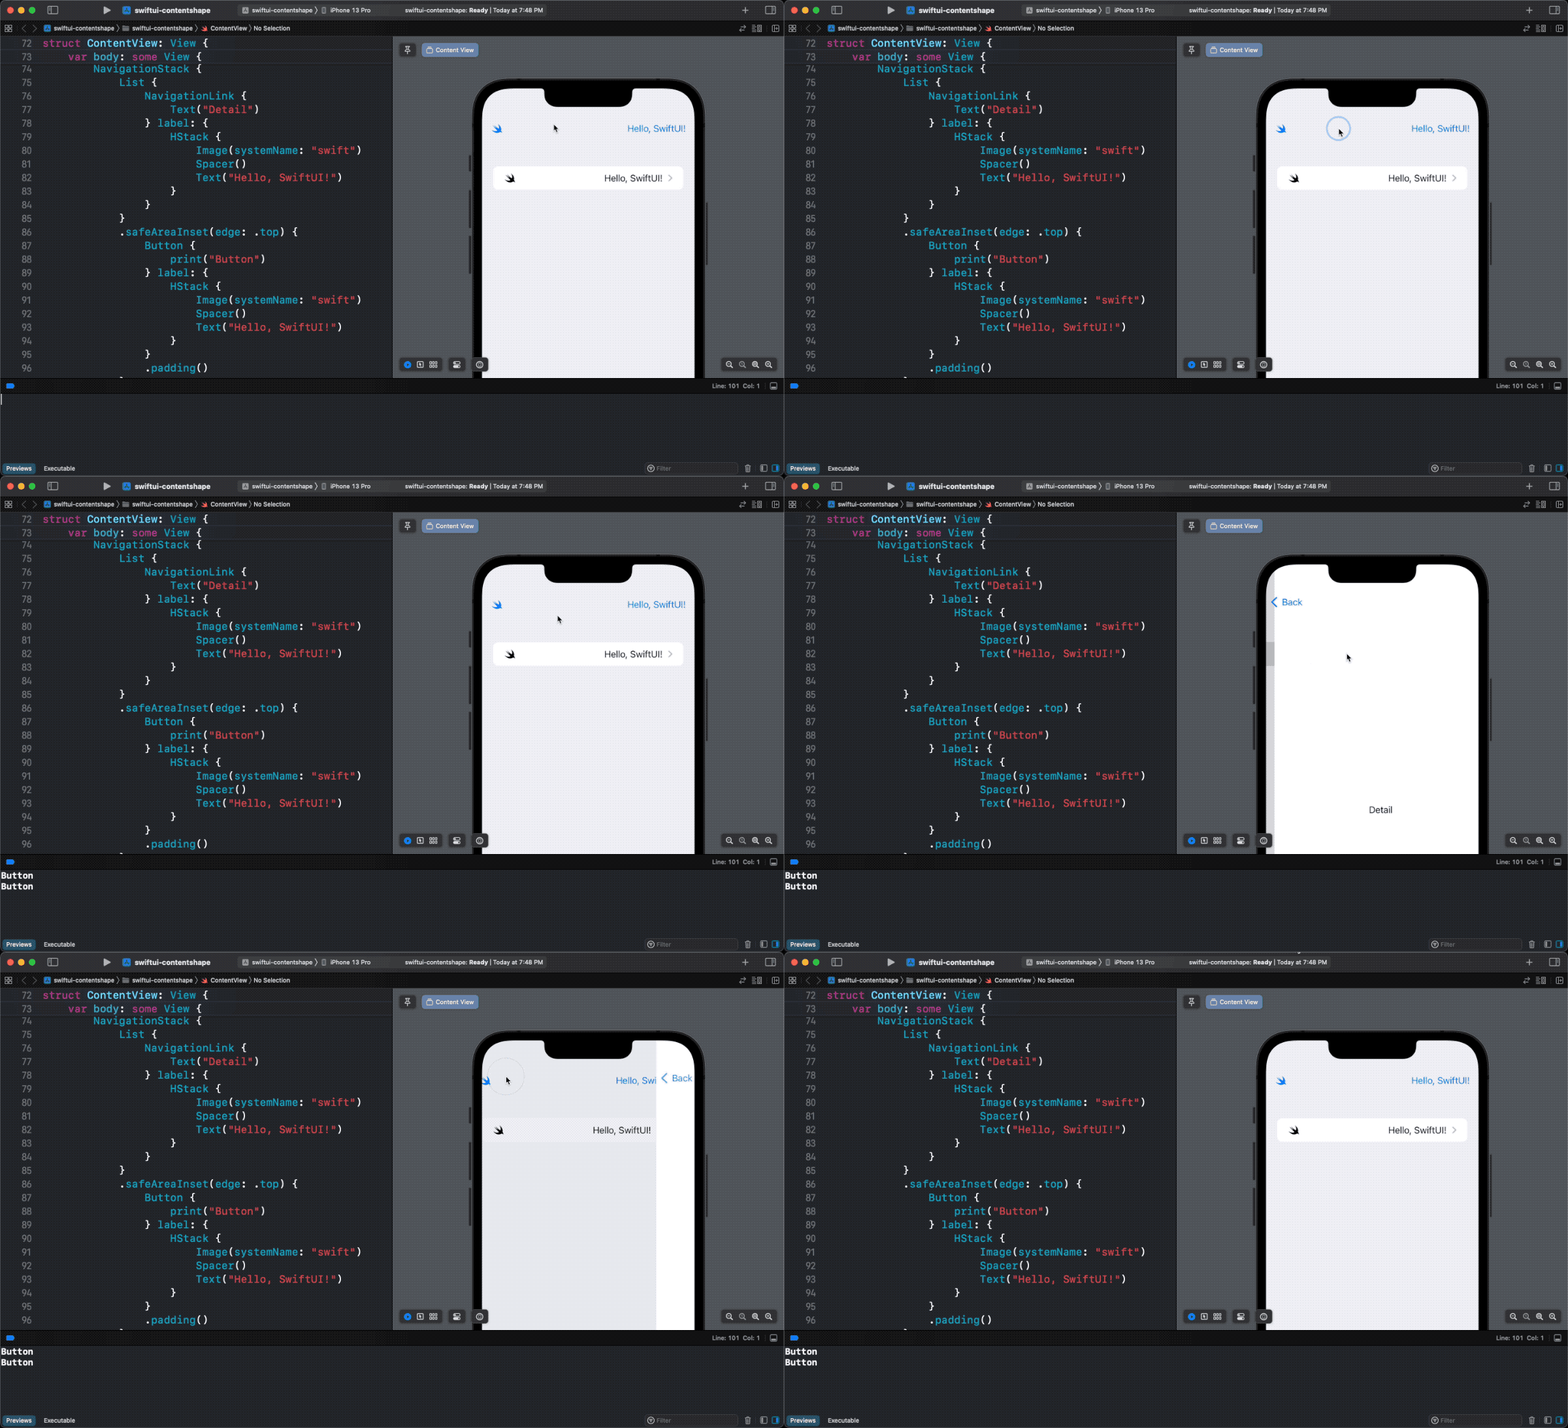
In the following example, the tap action will be active even when tapping a space between the content.
struct ContentView: View {
    var body: some View {
        NavigationStack {
            List {
                NavigationLink {
                    Text("Detail")
                } label: {
                    HStack {
                        Image(systemName: "swift")
                        Spacer()
                        Text("Hello, SwiftUI!")
                    }
                }
            }
            .safeAreaInset(edge: .top) {
                Button {
                    print("Button")
                } label: {
                    HStack {
                        Image(systemName: "swift")
                        Spacer()
                        Text("Hello, SwiftUI!")
                    }
                }
                .padding()
            }
        }
    }
}
Using HStack as content for a button and a navigation link.

Read more article about SwiftUI or see all available topic
Enjoy the read?
If you enjoy this article, you can subscribe to the weekly newsletter.
Every Friday, you'll get a quick recap of all articles and tips posted on this site. No strings attached. Unsubscribe anytime.
Feel free to follow me on Twitter and ask your questions related to this post. Thanks for reading and see you next time.
If you enjoy my writing, please check out my Patreon https://www.patreon.com/sarunw and become my supporter. Sharing the article is also greatly appreciated.
Become a patron Buy me a coffee Tweet ShareHow to use AttributedString in UIKit
Learn how to use the new AttributedString inside UIKit components.
#file behavior change in Swift 5.8
In Swift 6.0, the behavior of the #file will change. Prepare yourself for the change.