What is contentInset in a scroll view
Table of Contents
What is Content Inset
Content Inset is an extra space we put around the content that we want to show in a scroll view.
You can think of a content inset as padding of your scrollable content.
You can easily support sarunw.com by checking out this sponsor.
AI Paraphrase:Are you tired of staring at your screen, struggling to rephrase sentences, or trying to find the perfect words for your text?
Why do we need Content Inset
We need content inset or extra space around our content because we don't want it to be blocked by other obstacles.
In iOS, content can be blocked by many things, e.g., navigation bar, home indicator, or a device frame.
Here is an example of a content without content inset.
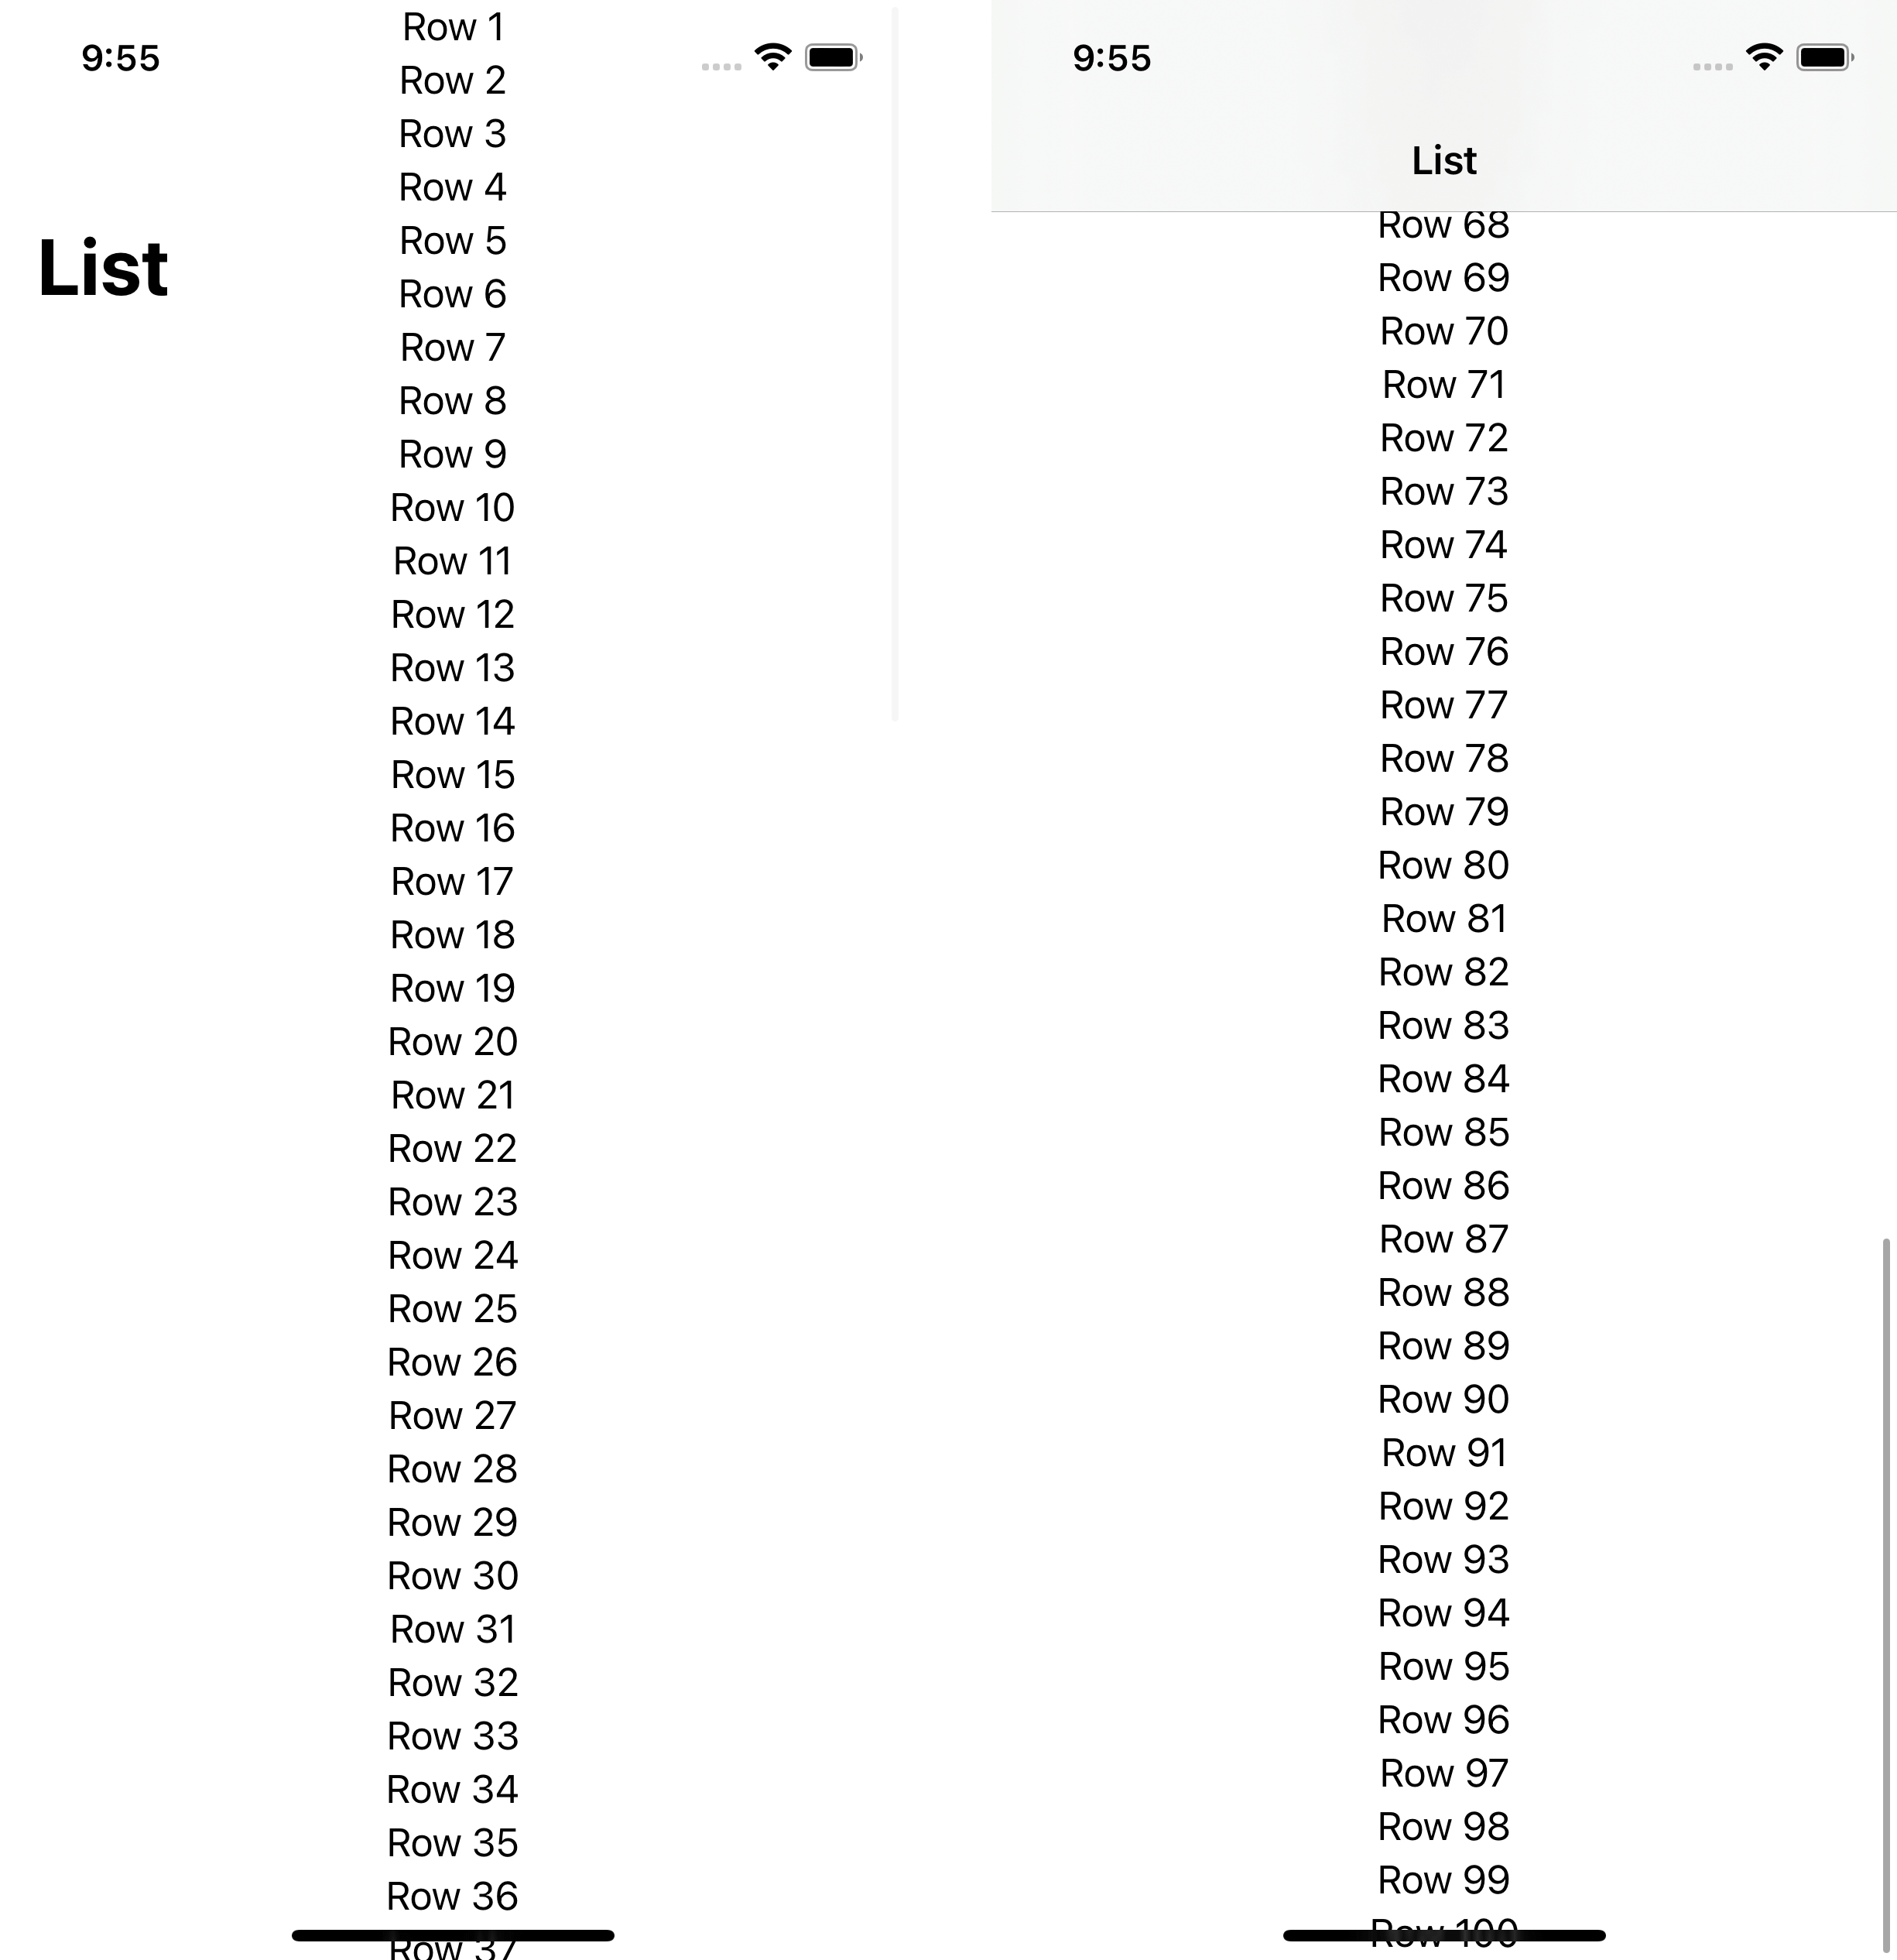
As you can see, the content is obstructed by the notch, navigation title, and home indicator.
Safe area Inset
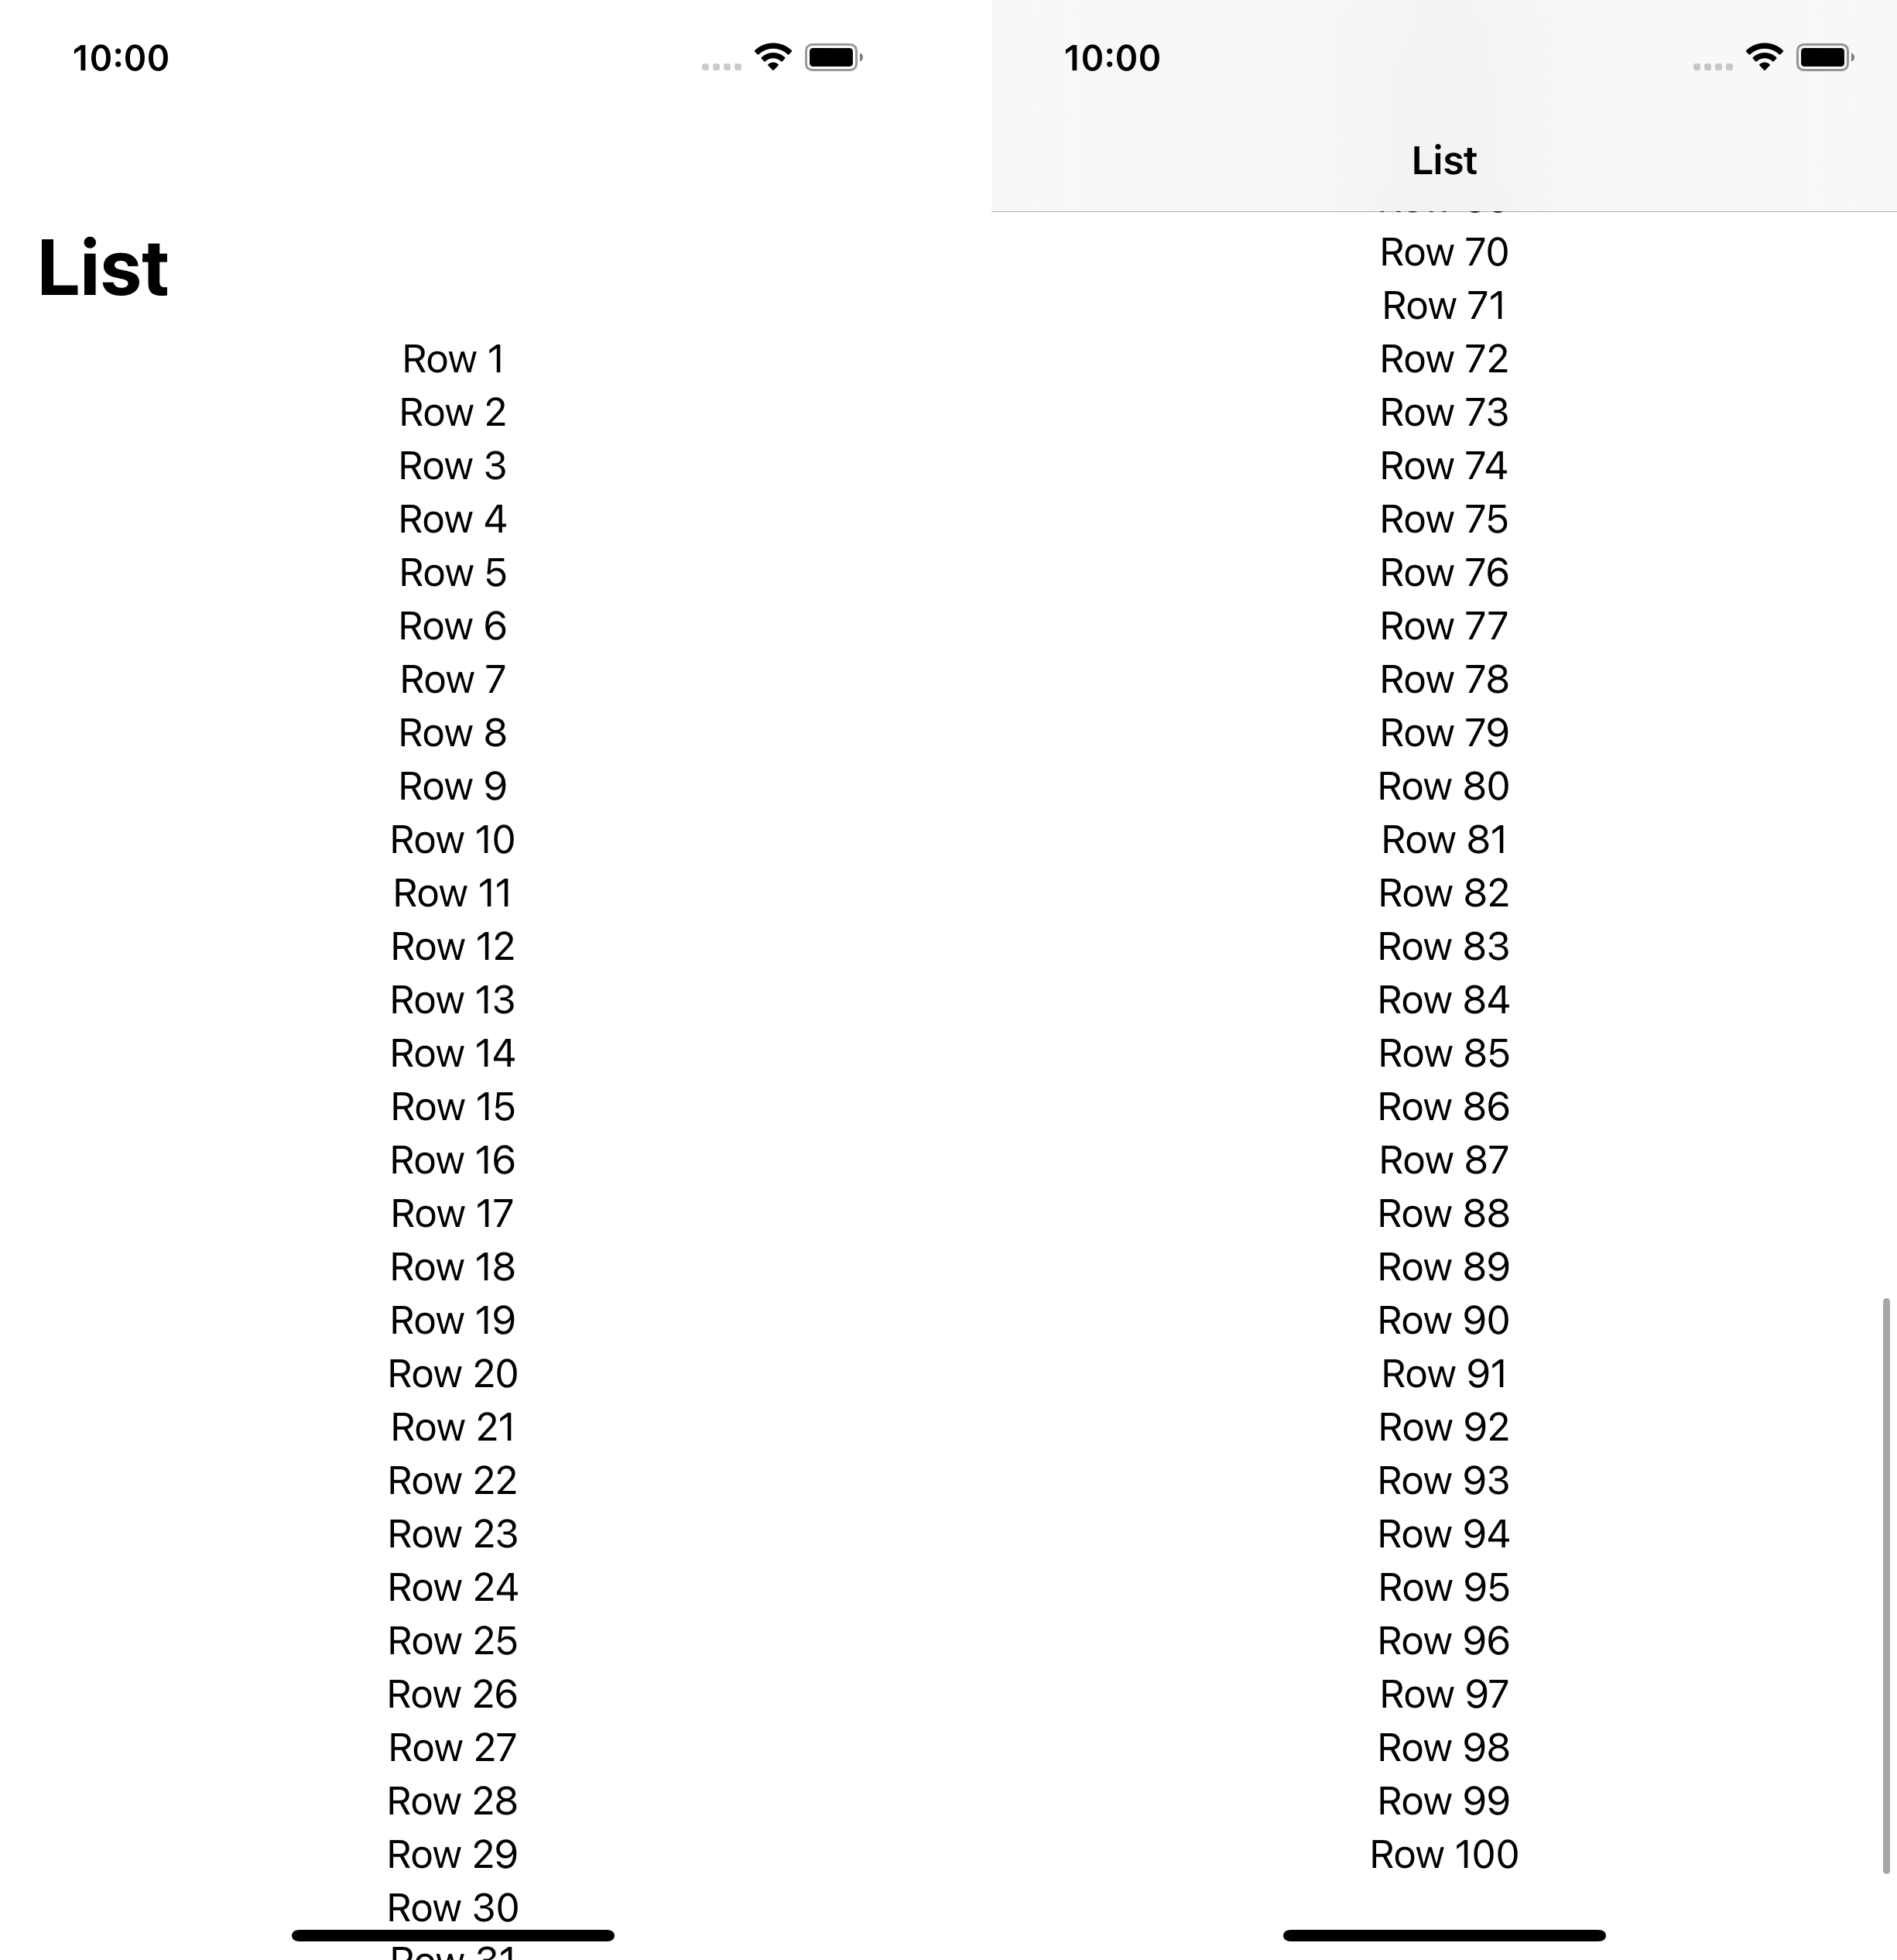
By default, the system already takes these obstacles into account and applies a safe area inset for us.
So, your content is safe to consume without extra effort.
You can easily support sarunw.com by checking out this sponsor.
AI Paraphrase:Are you tired of staring at your screen, struggling to rephrase sentences, or trying to find the perfect words for your text?
Custom content inset
If you have a custom view that might block your content, the system won't know about that and you need to add extra padding yourself.
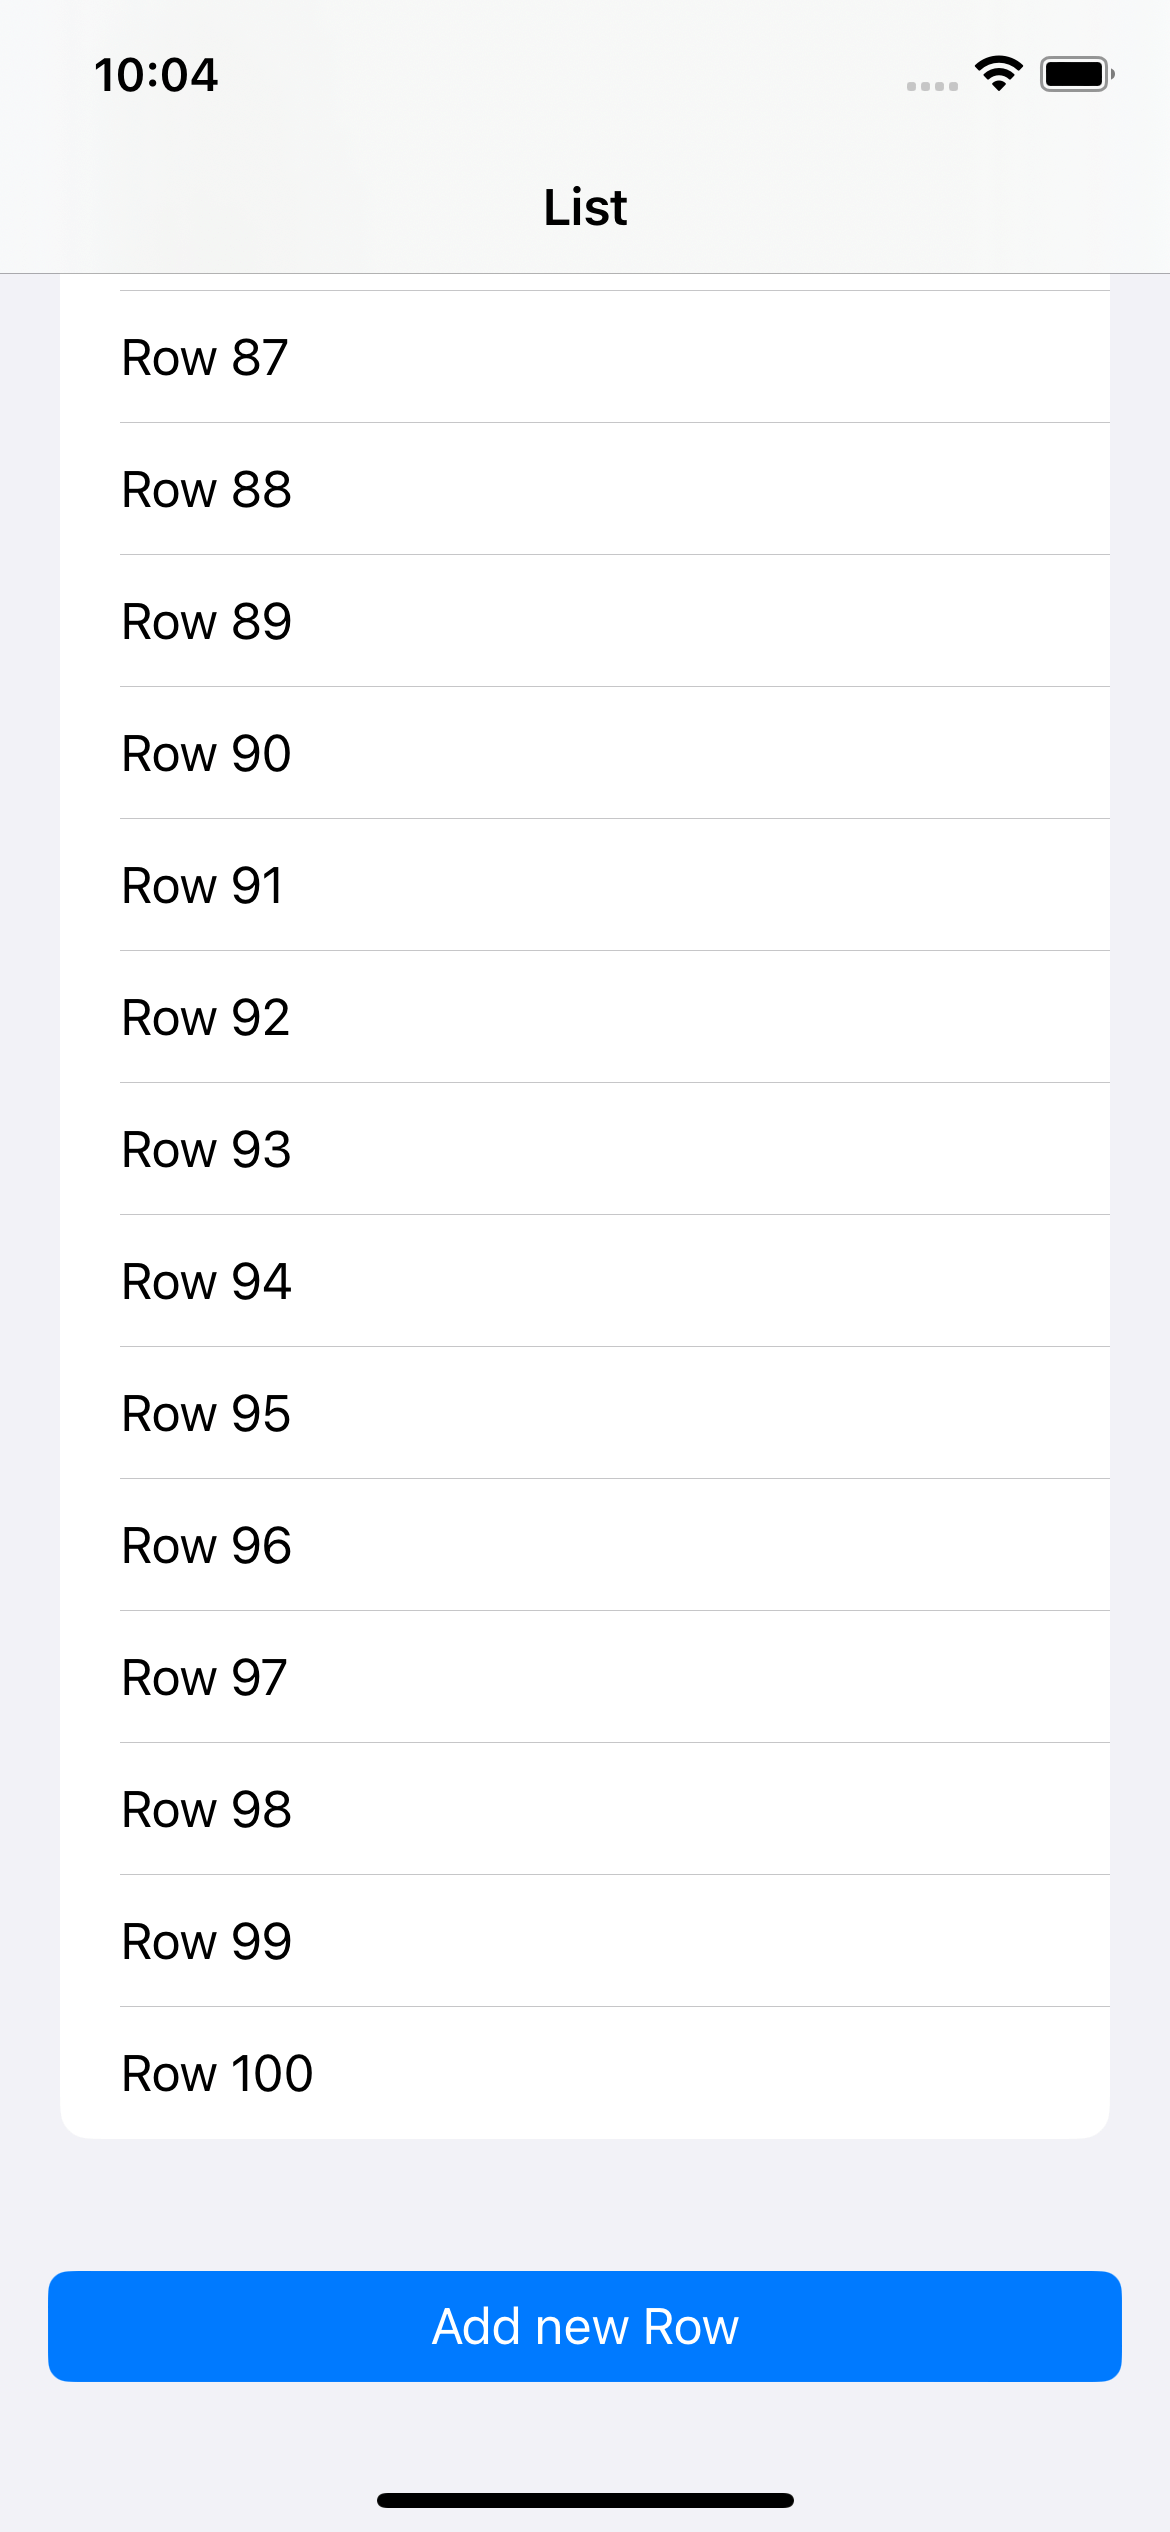
For example, you add a bottom button that blocks the bottom part of your scroll view.
UIKit
To add an extra inset in UIKit, you can assign an additional inset to contentInset property like this.
scrollView.contentInset = UIEdgeInsets(top: 0, left: 0, bottom: 30, right: 0)SwiftUI
You can't directly control an inset in SwiftUI, but you can indirectly control it by specifying a view that blocks your content in the .safeAreaInset modifier.
Here is an example of how to do it. You can read a bit more in detail from How to set ContentInsets on SwiftUI List.
List(0..<100) { i in
    Text("Row \(i + 1)")
}
// 1
.safeAreaInset(edge: .bottom, content: {
    Button {

    } label: {
        Text("Add new Row")
            .frame(maxWidth: .infinity)
    }
    .buttonStyle(.borderedProminent)
    .padding()
})
1 You put a view that will show over (block) your scrollable content inside .safeAreaInset.
Read more article about List, ScrollView, UIKit, SwiftUI, or see all available topic
Enjoy the read?
If you enjoy this article, you can subscribe to the weekly newsletter.
Every Friday, you'll get a quick recap of all articles and tips posted on this site. No strings attached. Unsubscribe anytime.
Feel free to follow me on Twitter and ask your questions related to this post. Thanks for reading and see you next time.
If you enjoy my writing, please check out my Patreon https://www.patreon.com/sarunw and become my supporter. Sharing the article is also greatly appreciated.
Become a patron Buy me a coffee Tweet Share#file behavior change in Swift 5.8
In Swift 6.0, the behavior of the #file will change. Prepare yourself for the change.
Find Callers of methods or variables in Xcode
Callers or Call Hierarchy shows you all the places where a method, function, or variable is used. You can easily find callers in Xcode.