How to simulate location in Xcode and Simulator
Table of Contents
When developing a feature that requires access to location, it can be tricky to debug on an actual device. Your best bet might be Run on wireless device feature, which isn't that reliable, and you can't physically move too far from your machine. So, it is easier to debug a location feature on a simulator.
We can simulate location from both Xcode and Simulator. Both of them can simulate location, but they serve different purposes.
The Simulator provided a quick and easy way to simulate location and movement. On the other hand, Xcode provides more customization.
Let's see how to simulate location using those tools. In the end, you will be able to pick the right tool for your needs.
How to simulate location in Simulator
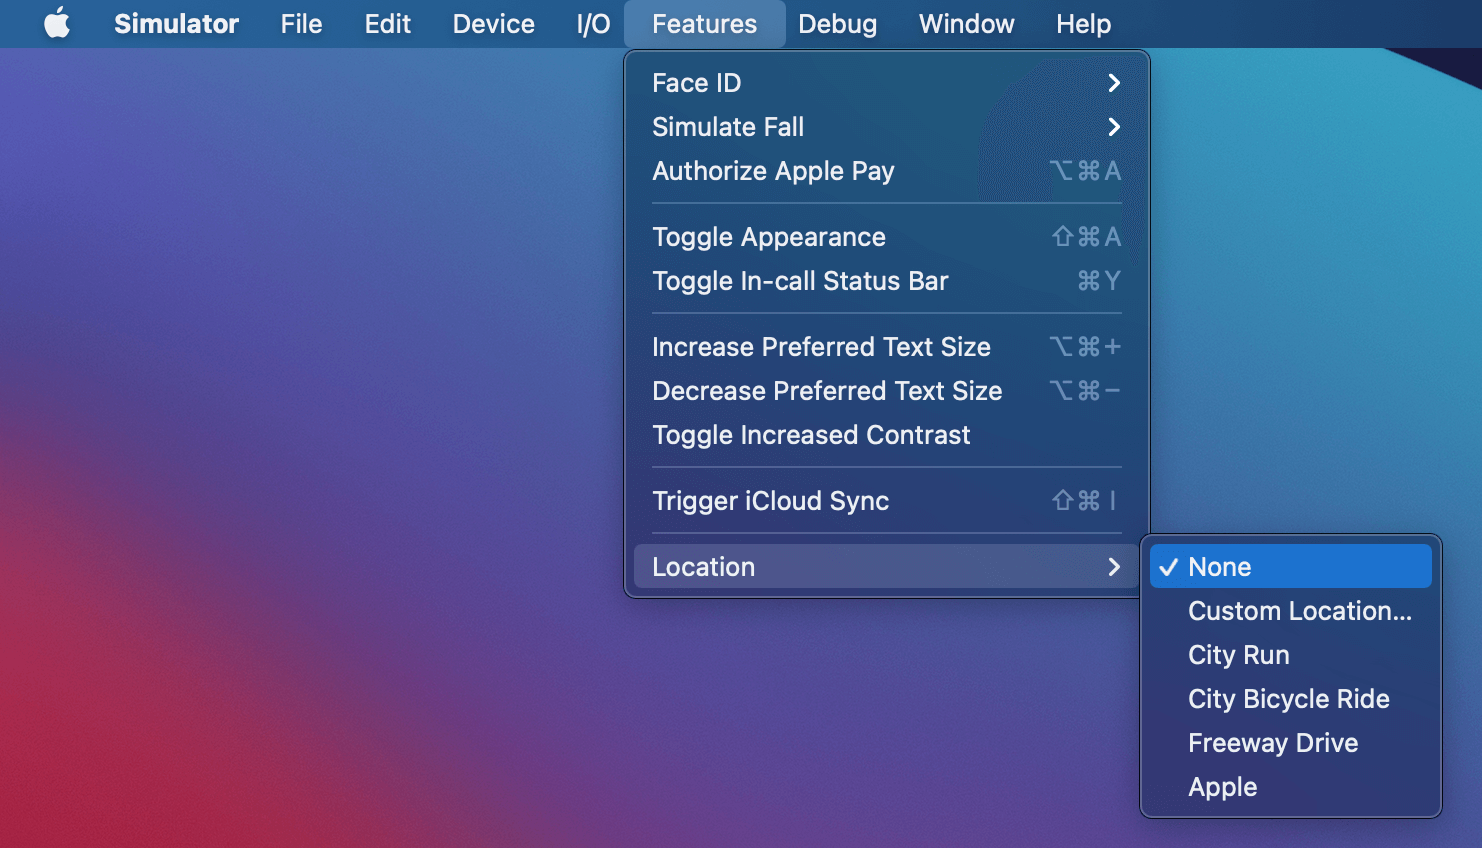
To simulate location on a Simulator, select Features menu > Location, then you will see a list of location and movement options you can simulate.
You can easily support sarunw.com by checking out this sponsor.
Localization Buddy: Easiest way to localize and update App Store metadata.
Type of location that you can simulate in Simulator
There are many predefined options of location that you simulate in a Simulator which can be categorized into three groups.
Predefined static location
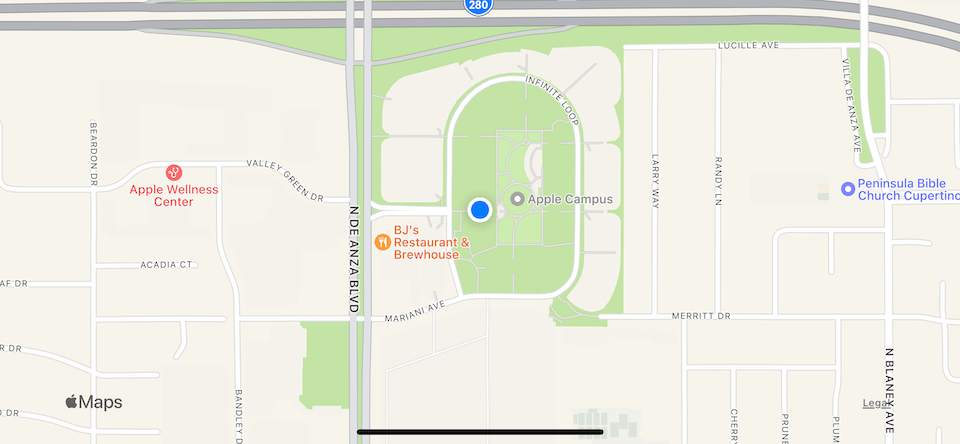
A Simulator has one predefined location, Apple, which will simulate the Apple campus location.
Custom static location
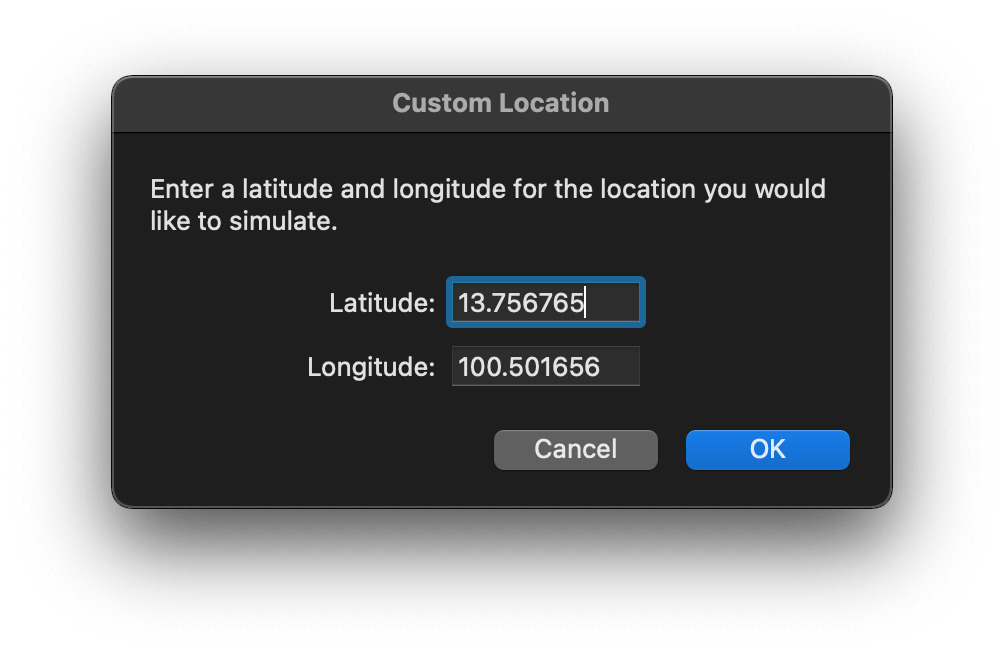
You also have an option to specify a custom location by selecting "Custom Location..." option, which will present a dialog asking for latitude and longitude for the location you would like to simulate.
Predefined movement
If you develop an app that needs to test a movement, such as a fitness app or navigator, you can use either of these three options that the Simulator provided.
- City Run
- City Bicycle Ride
- Freeway Drive
These three options will simulate a movement for running, riding, and driving (vary by speed). This is great for quick debugging based on real-world scenarios.
This is suitable for a quick test since you don't have control over the route of movement. If you want to have better control, you have to simulate movement in Xcode with a GPX file.
Caveat
Location simulated in Simulator will only last for a specific debugging session. It won't survive if you re-run the app. You have to simulate it every time. The only way to make simulated location persist for every run is using Xcode schemes.
How to simulate location in Xcode
Xcode offers three ways to simulate location.
Menu bar.
Debug bar.
Xcode schemes.
Menu bar
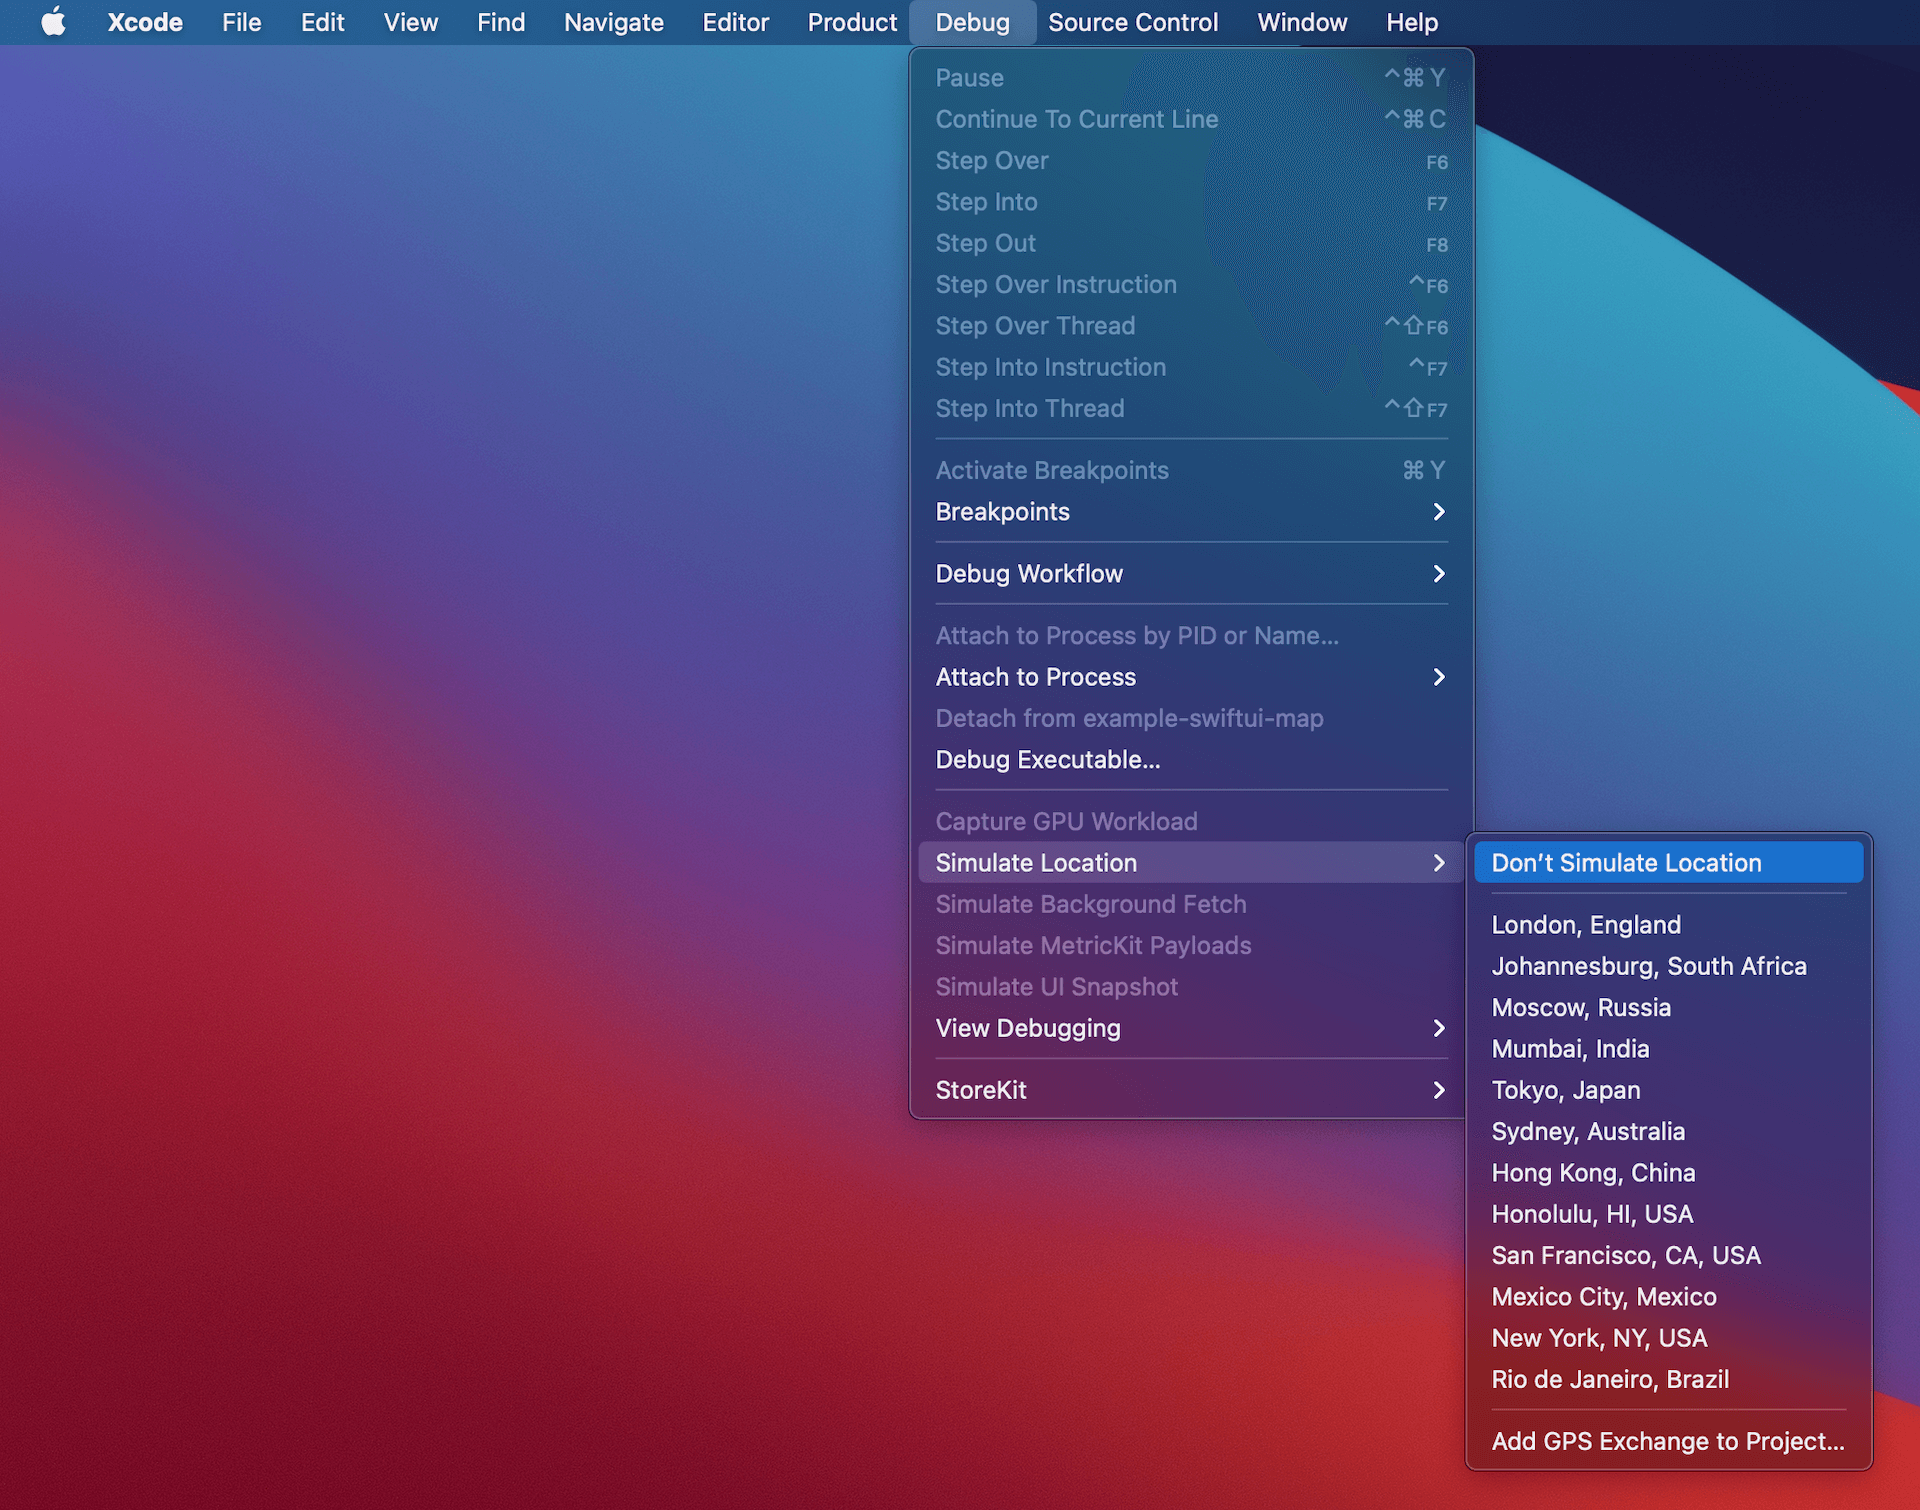
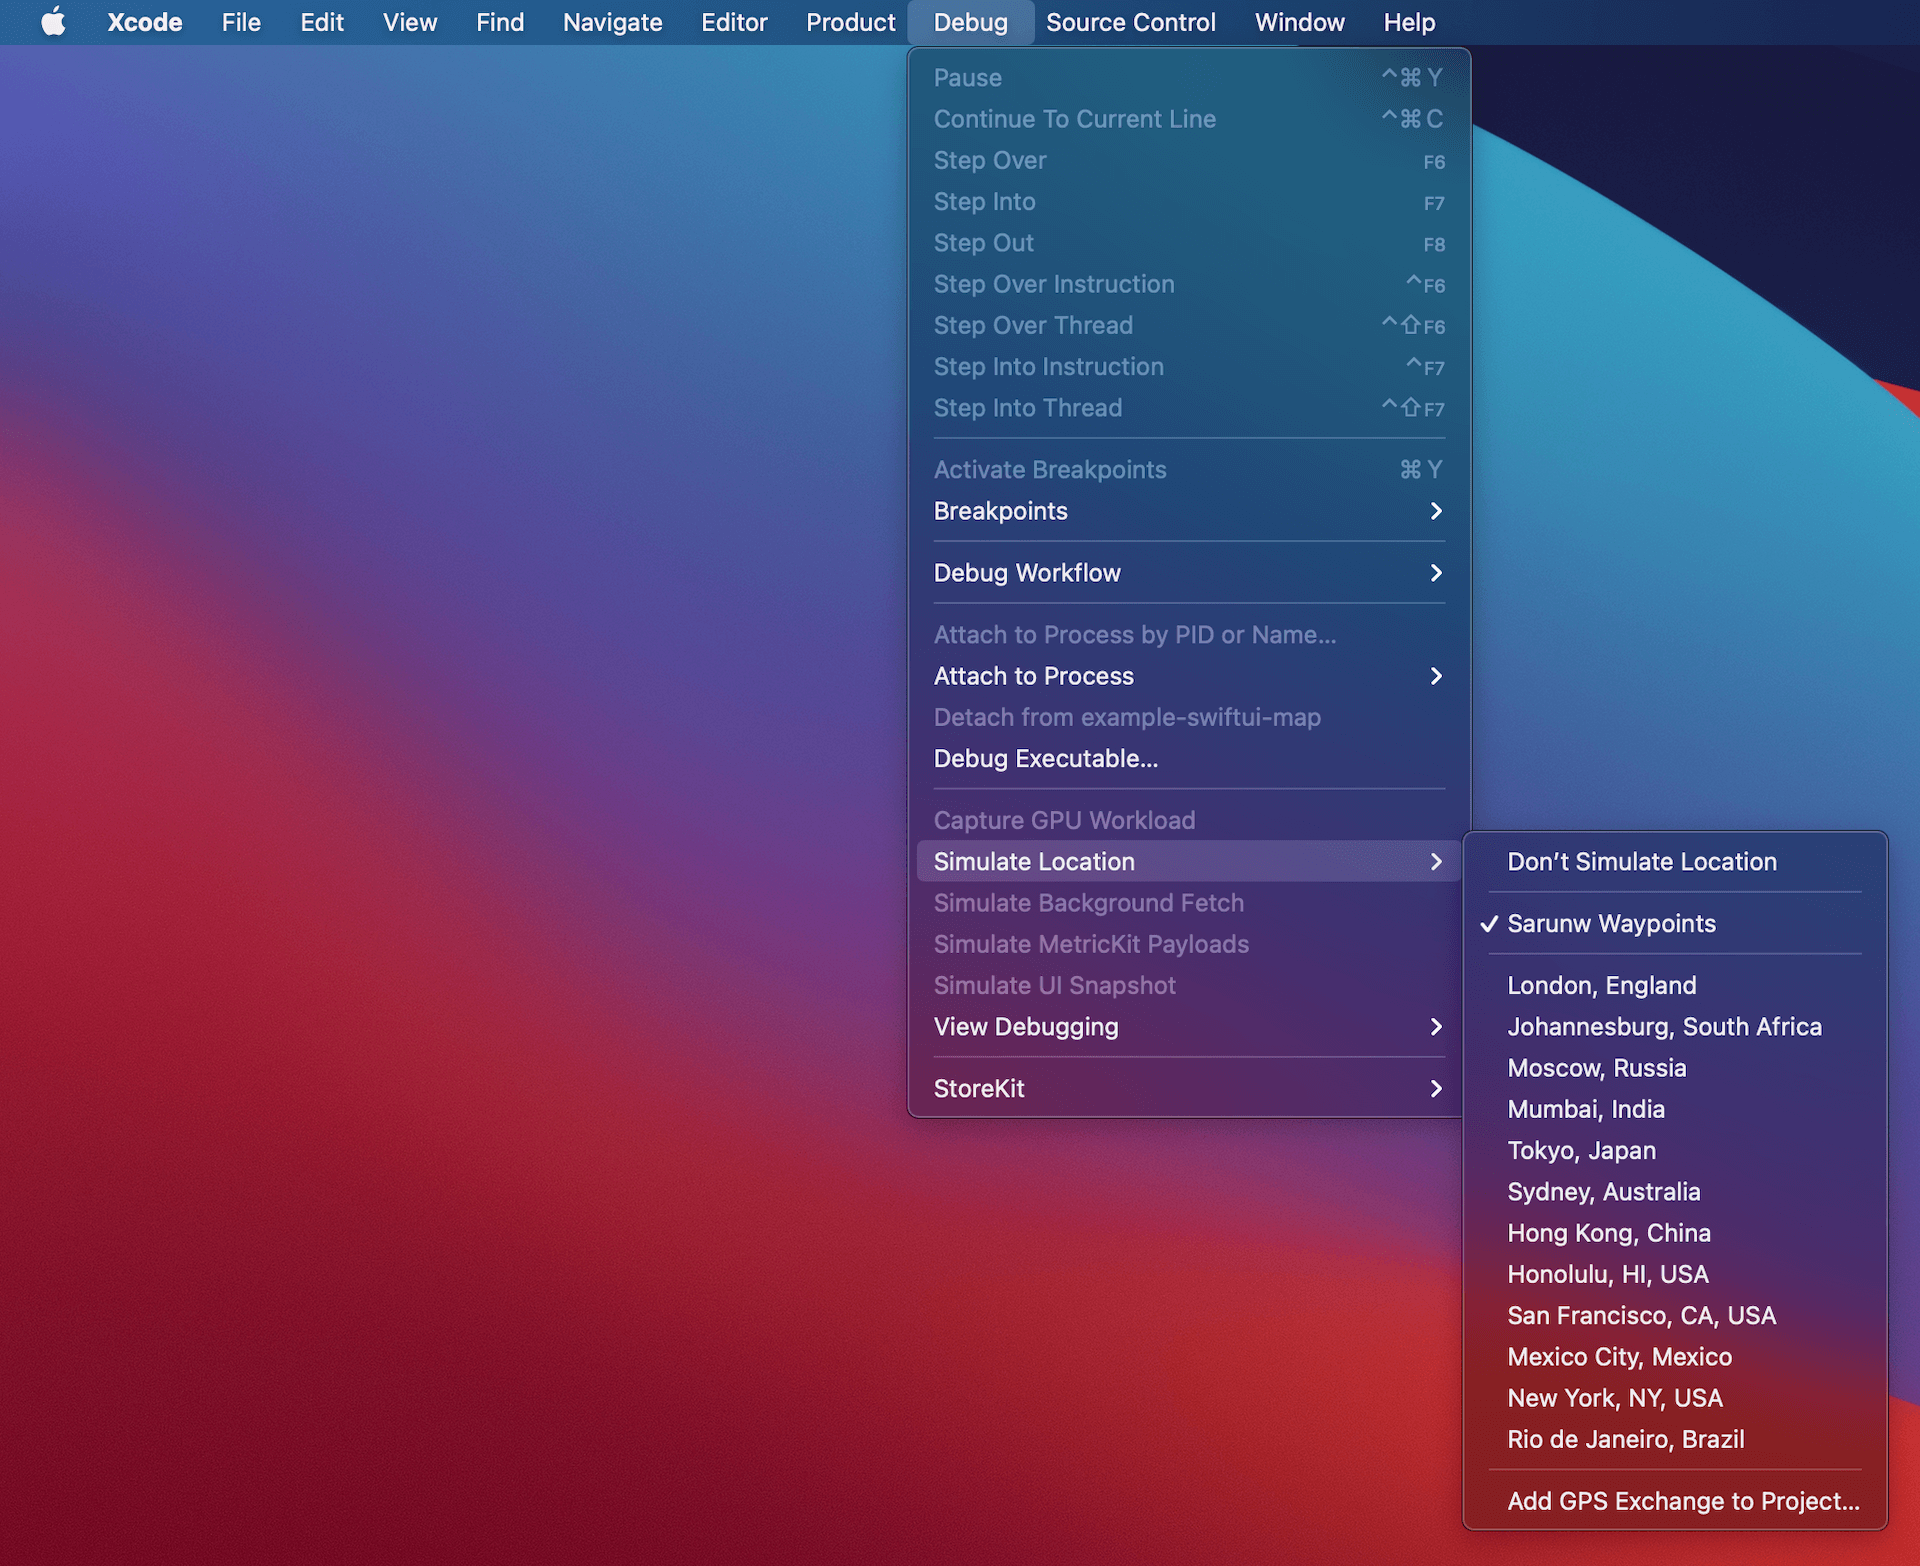
Select Debug menu > Simulate Location, then you will see a list of location options you can simulate.
Debug bar
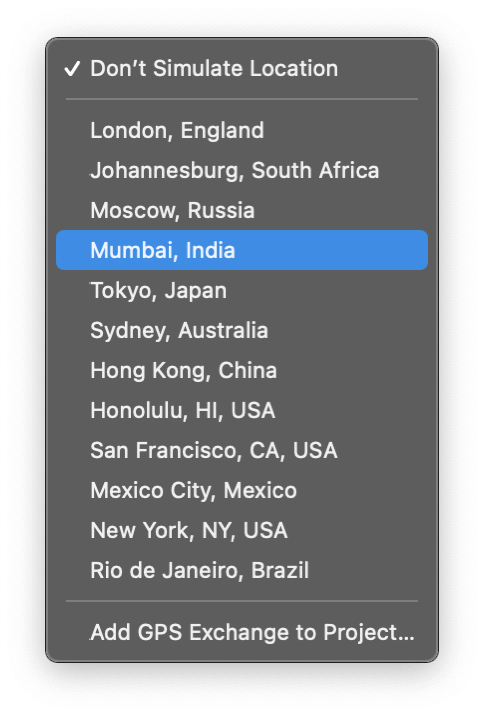
You can simulate location by clicking on the location icon on a debug bar.

Clicking it will present a list of a location you can simulate.

Xcode schemes
All methods that we use to simulate location so far are simulated temporarily. That's means you have to enable it every time you re-run your app. This easily gets tiresome if you need to test it all day long. Luckily, Xcode offers a way to simulate location on every run.
To simulate location on every run, we set a location in an Xcode scheme option.
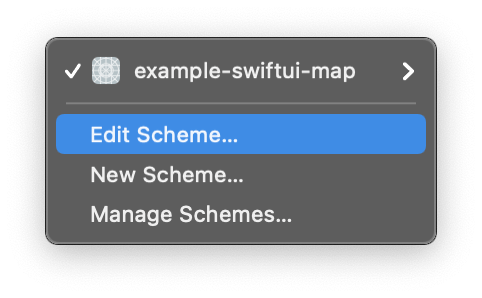
- Select Product Menu > Scheme > Edit Scheme... or Click on scheme name and select Edit Scheme.
![]()
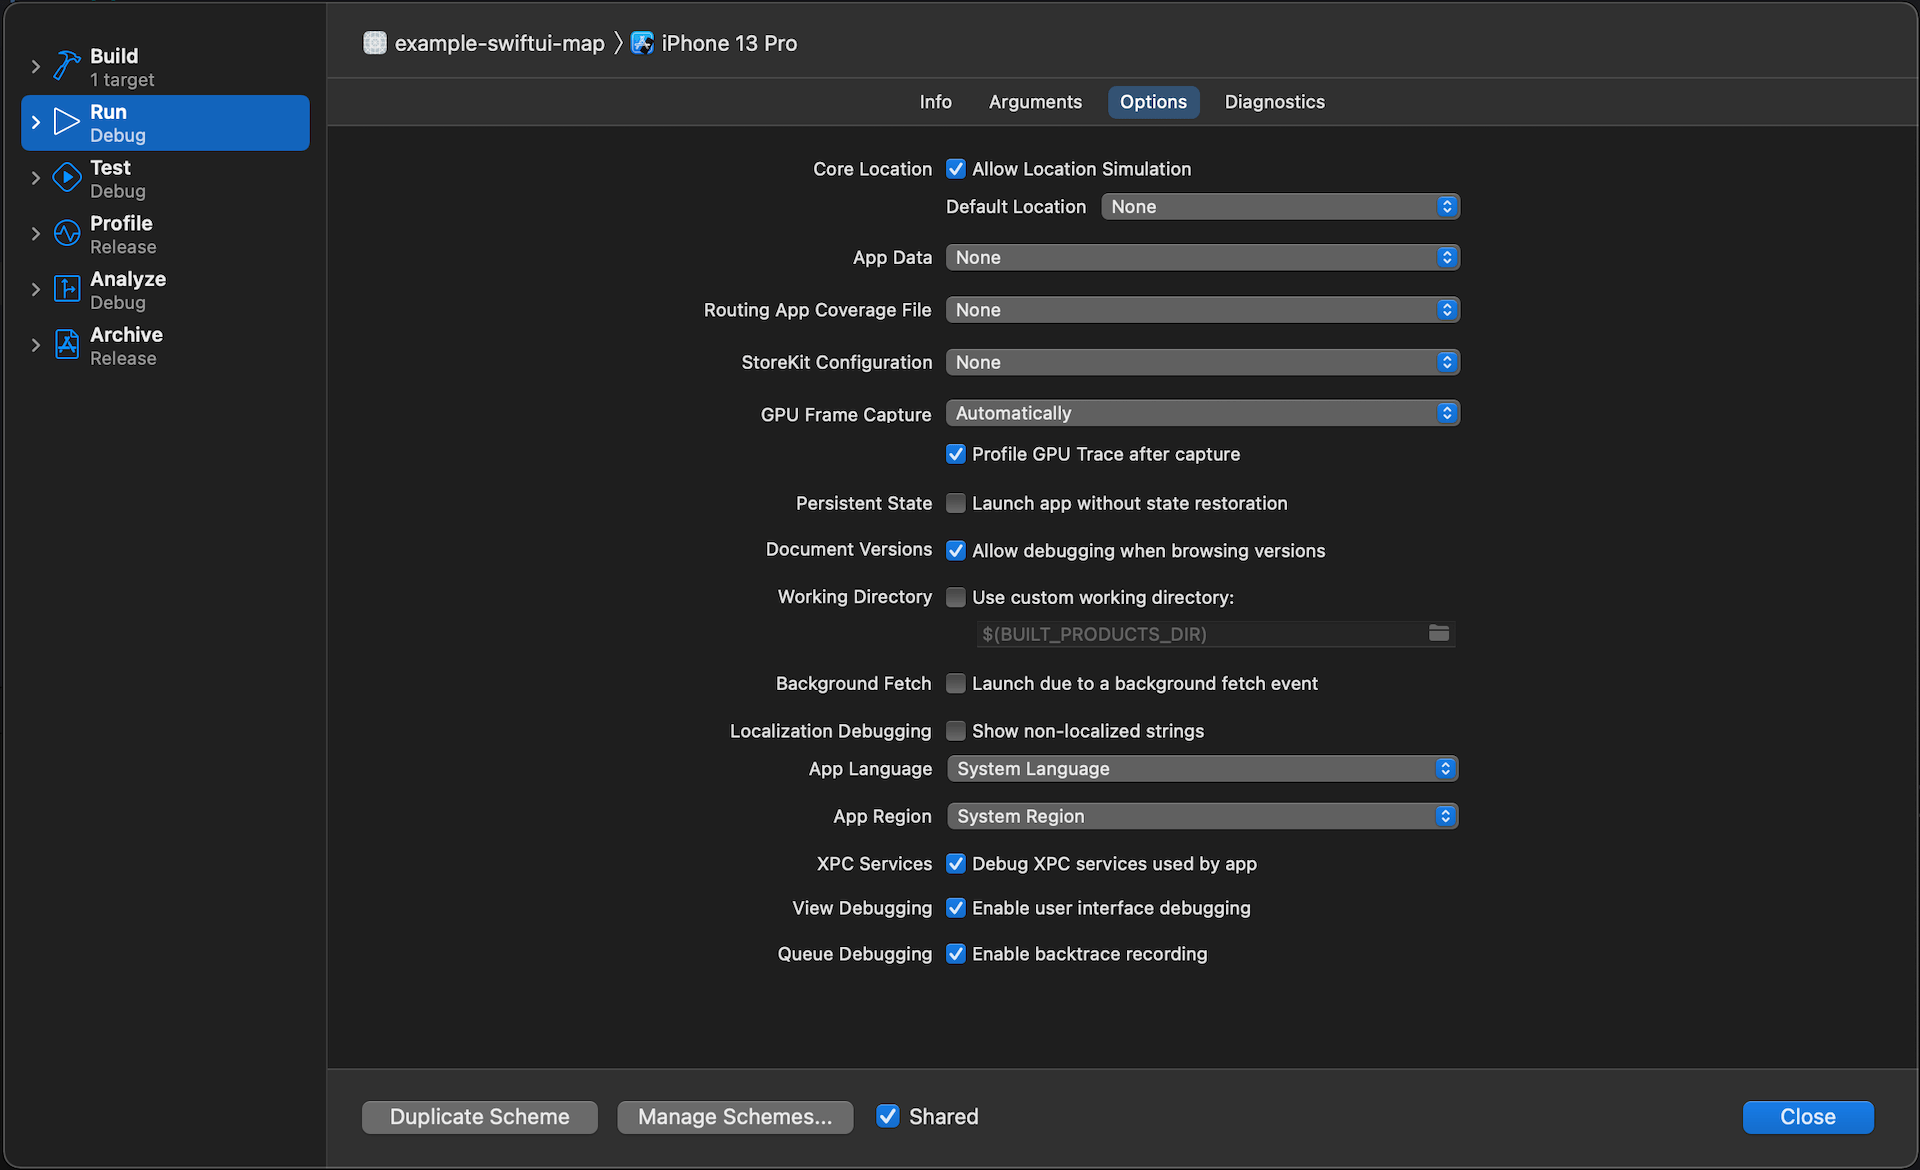
- Select Run on the left panel, then select Options tab. Make sure "Allow Location Simulation" is checked.
![]()
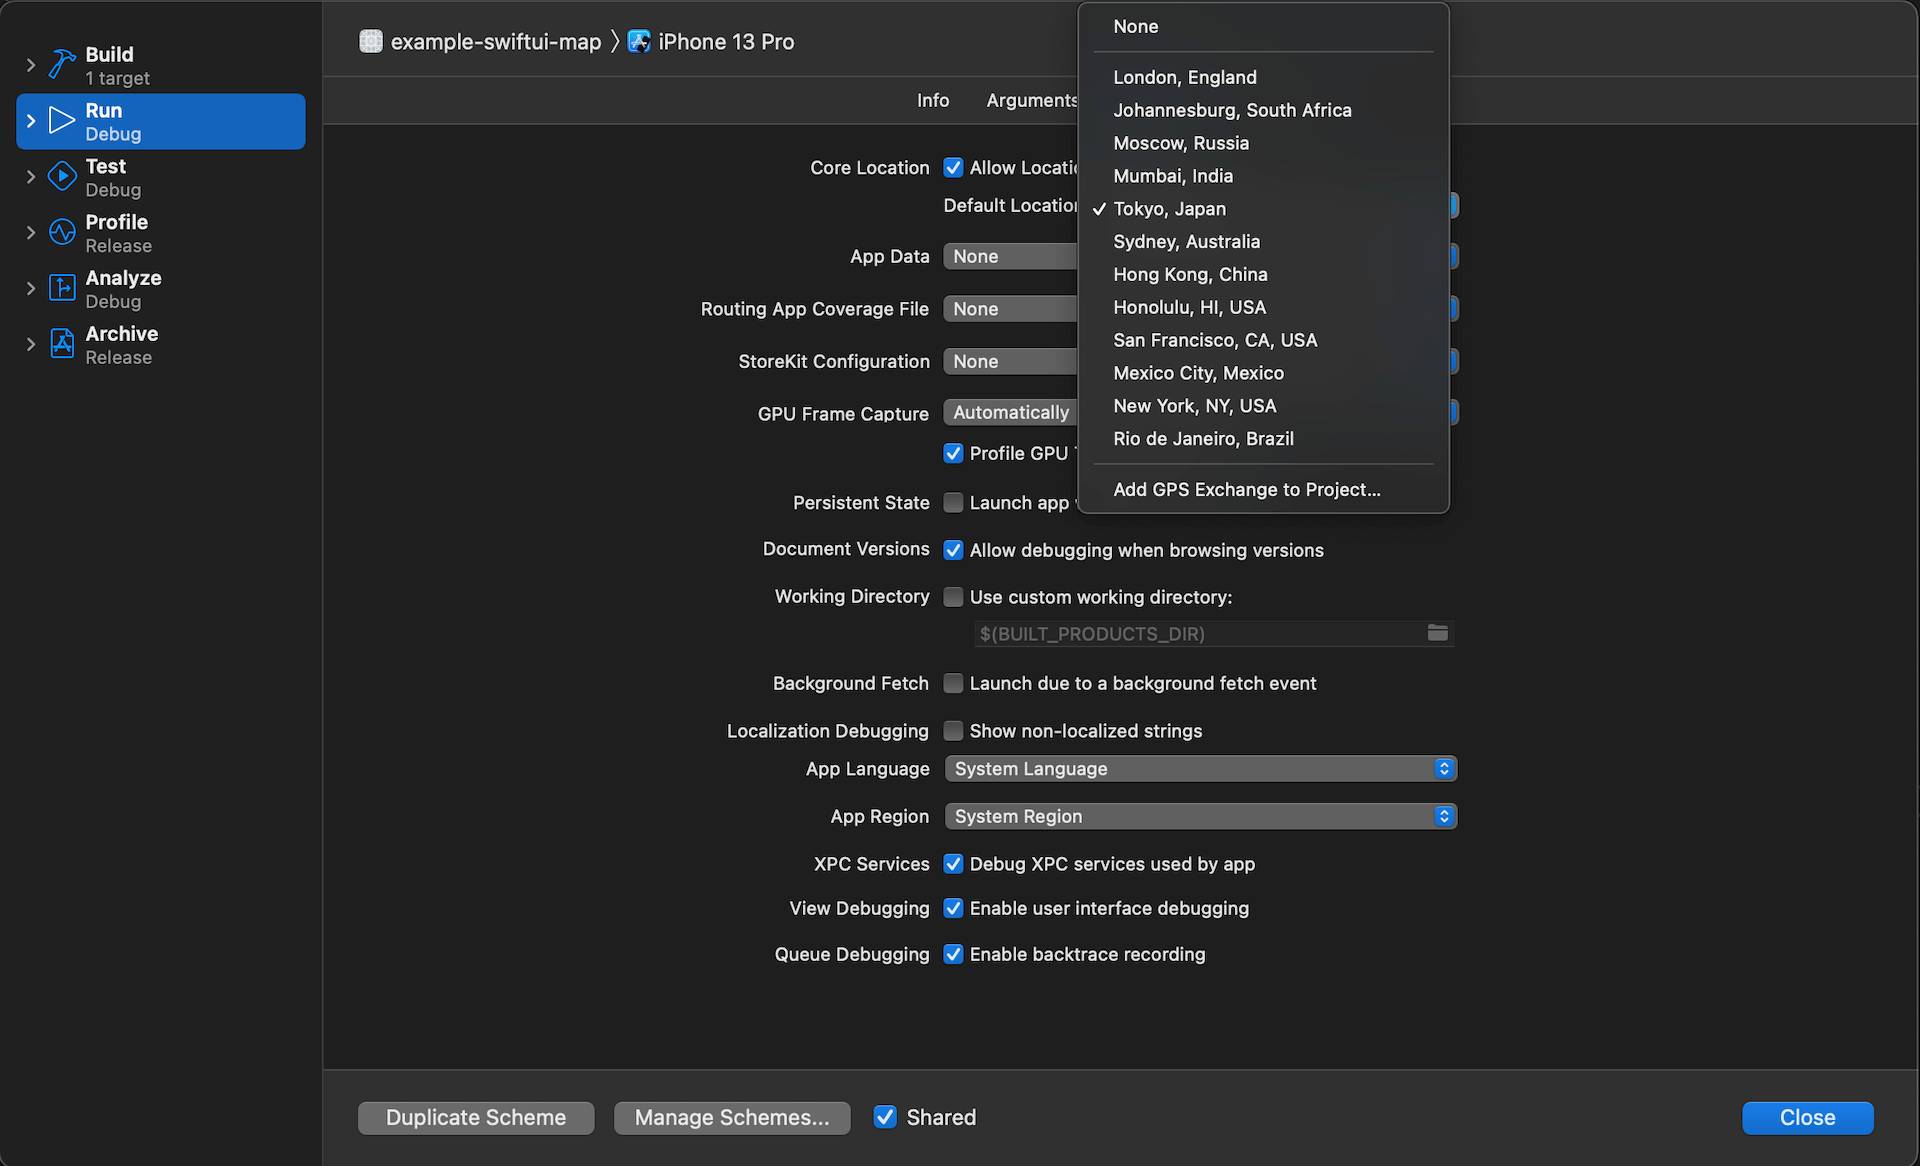
- Under Default Location, select a location that you want to simulate on every run.
![]()
You can easily support sarunw.com by checking out this sponsor.
Localization Buddy: Easiest way to localize and update App Store metadata.
Type of location that you can simulate in Xcode
You have a larger set of predefined static locations in Xcode than the one in Simulator, but we don't have a quick way to set a custom location or movement as we did in Simulator.
We have two ways to simulate location and movement in Xcode.
Predefined static location
Xcode has twelve pre-defines locations to choose from.
What is a GPX file
The way Xcode allows us to simulate custom location and movement is via a GPX file. GPX (GPS Exchange Format) is an XML schema designed as a common GPS data format.
We provide one or more waypoints (<wpt>) containing a latitude/longitude pair in this file.
If you provide one waypoint, Xcode will simulate that specific location.
If you provide multiple waypoints, Xcode will simulate a movement visiting each waypoint.
How to create a GPX file
To simulate location and movement, you need to create a GPX file to represent the location and movement.
To create a new GPX file:
- Select File menu > New > File... (⌘ - command + N).
- Select GPX File under Resource section, then click Next.
![]()
- Specify the file name and click Create. This name will show up in a location selection. I named it "Sarunw Waypoints" in this case which show as follow.
![]()


Xcode will create a GPX file with template content. It will look something like this.
<?xml version="1.0"?>
<gpx version="1.1" creator="Xcode">
    <wpt lat="37.331705" lon="-122.030237">
        <name>Cupertino</name>
        <time>2014-09-24T14:55:37Z</time>
    </wpt>

</gpx>
To use this GPX location, you select it from a Simulate Location menu. It will sit alongside other predefined ones.
The default GPX file is the location of Apple Campus.
Custom static location using GPX file
To create a static location using a GPX file, you create a GPX file with one waypoint (<wpt>) with a coordinate you want to simulate.
By default, Xcode created a waypoint with name and time, but that isn't mandatory property.
This is a valid GPX file to simulate a specific location.
<?xml version="1.0"?>
<gpx version="1.1" creator="Xcode">
    <wpt lat="37.331705" lon="-122.030237" />
</gpx>
Custom movement using GPX file
To create a movement, you create a GPX file with multiple waypoints. Time (<time>) is needed in this case to simulate realistic movement. Xcode will interpolate movement at a rate of speed based on the time elapsed between each waypoint. If you do not provide a time element, then Xcode will use a fixed rate of speed.
This is an example of a GPX file that simulate movement between two waypoints.
<?xml version="1.0"?>
<gpx version="1.1" creator="Xcode">
    <wpt lat="13.756764561640793" lon="100.5016561347755">
        <name>Point 1</name>
        <time>2014-09-24T14:55:37Z</time>
    </wpt>
    <wpt lat="13.756605174138276" lon="100.48294934831506">
        <name>Point 2</name>
        <time>2014-09-24T14:56:00Z</time>
    </wpt>
</gpx>
As you can see, time doesn't have to be the current date. Xcode calculates elapsed time between each waypoint.
Read more article about Xcode, Development, Debugging, or see all available topic
Enjoy the read?
If you enjoy this article, you can subscribe to the weekly newsletter.
Every Friday, you'll get a quick recap of all articles and tips posted on this site. No strings attached. Unsubscribe anytime.
Feel free to follow me on Twitter and ask your questions related to this post. Thanks for reading and see you next time.
If you enjoy my writing, please check out my Patreon https://www.patreon.com/sarunw and become my supporter. Sharing the article is also greatly appreciated.
Become a patron Buy me a coffee Tweet ShareHow to add custom fonts to iOS app
In iOS, you can add and use a custom font to your app and use it like other assets. The process is not hard, but it might not be straightforward as adding an image. Let's learn how to do it.
How to create a macOS app without storyboard or xib files
macOS is tightly coupled with storyboard and xib than iOS. To build your UI entirely in code, we have to do some initial setup.