Intrinsic content size in SwiftUI
How to define intrinsic content size in SwiftUI
Table of Contents
When I learn SwiftUI, I try to find out how to do things I can do in UIKit. Today we going to explore one of the essential parts when you make a custom view on UIKit, intrinsicContentSize.
What is an intrinsic content size?
For those who have experienced in UIKit and Auto Layout[1], you can skip to the next section.
Intrinsic content size is an instance property in UIView. Following is a description from Apple Documentation:
The natural size for the receiving view, considering only properties of the view itself.
It is easier to understand this property from the real examples. The natural size of UILabel is the size of the text it contains. The natural size of UIActivityIndicatorView is fixed at 20x20 points. The value from intrinsicContentSize is an amount of space the view needs for its content to display in an ideal state. The value return from intrinsicContentSize isn't final. You can override this value to whatever you want by setting width or height constraints.
When I make custom views, I always use intrinsicContentSize. In SwiftUI, it even easier to create a custom view, and Apple seems to encourage us to make one, so I want to know if SwiftUI has something equivalent or similar.
Fortunately, the answer is yes.
You can easily support sarunw.com by checking out this sponsor.
Screenshot Studio: Create App Store screenshots in seconds not minutes.
.frame
To define an intrinsic content size in SwiftUI view, you need frame(minWidth:idealWidth:maxWidth:minHeight:idealHeight:maxHeight:alignment:).
func frame(minWidth: CGFloat? = nil, idealWidth: CGFloat? = nil, maxWidth: CGFloat? = nil, minHeight: CGFloat? = nil, idealHeight: CGFloat? = nil, maxHeight: CGFloat? = nil, alignment: Alignment = .center) -> some ViewYou can ignore most of its parameters. What we need here are idealHeight and idealWidth.
struct CustomView: View {
    var body: some View {
        Rectangle()
            .frame(idealWidth: 200, idealHeight: 200)
            .foregroundColor(Color.pink)
    }
}
In the above example, we create a custom view with the ideal size of 200x200 points. Replace Rectangle with the view we just created.
struct ContentView: View {
    var body: some View {
        CustomView()
    }
}
Even we define ideal width and height, SwiftUI doesn't respect that, as you can see in the following screenshot:

.fixedSize
Setting view ideal size is a way to modify the view property. To enforce the ideal size, you have to use .fixedSize function.
From the Apple Document, .fixedSize fixes the view at its ideal size. This is what we need to apply the ideal size.
Fixes the view at its ideal size.
struct ContentView: View {
    var body: some View {
        CustomView()
            .fixedSize()
    }
}
There is another variation fixedSize(horizontal:vertical:) which fixes the view at its ideal size in the specified dimensions.
Fixes the view at its ideal size in the specified dimensions.
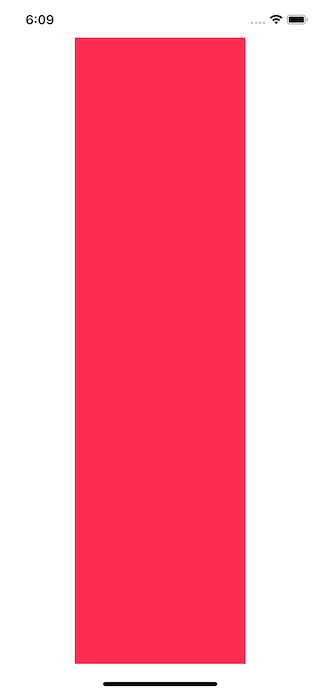
The following are the samples of fixed horizontal and vertical.
Fixed horizontal:
struct ContentView: View {
    var body: some View {
        CustomView()
            .fixedSize(horizontal: true, vertical: false)
    }
}
Fixed vertical:
struct ContentView: View {
    var body: some View {
        CustomView()
            .fixedSize(horizontal: false, vertical: true)
    }
}
Override the size
If you want to override the ideal size, you just set a view .frame without .fixedSize modifier.
CustomView()
    .frame(width: 50, height: 50)
Or if you want just one axis of ideal size, you can fix one axis and set .frame to another one.
Fixed horizontal and override height:
CustomView()
    .fixedSize(horizontal: true, vertical: false)
    .frame(height: 50)
Fixed vertical and override width:
CustomView()
    .fixedSize(horizontal: false, vertical: true)
    .frame(width: 50)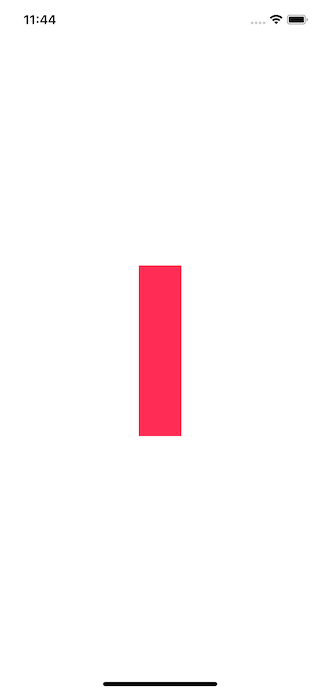
You can easily support sarunw.com by checking out this sponsor.

Screenshot Studio: Create App Store screenshots in seconds not minutes.
Related Resources
SwiftUI's ViewModifier
Auto Layout Guide
intrinsicContentSize
frame(minWidth:idealWidth:maxWidth:minHeight:idealHeight:maxHeight:alignment:)
fixedSize()
Auto Layout is a constraint-based layout system. It allows developers to create an adaptive interface that responds appropriately to changes in screen size and device orientation. https://developer.apple.com/library/archive/documentation/UserExperience/Conceptual/AutolayoutPG/index.html#//apple_ref/doc/uid/TP40010853-CH7-SW1 ↩︎
Read more article about SwiftUI, Layout, or see all available topic
Enjoy the read?
If you enjoy this article, you can subscribe to the weekly newsletter.
Every Friday, you'll get a quick recap of all articles and tips posted on this site. No strings attached. Unsubscribe anytime.
Feel free to follow me on Twitter and ask your questions related to this post. Thanks for reading and see you next time.
If you enjoy my writing, please check out my Patreon https://www.patreon.com/sarunw and become my supporter. Sharing the article is also greatly appreciated.
Become a patron Buy me a coffee Tweet ShareSign in with Apple Tutorial, Part 4: Web and Other Platforms
Part forth in a series Sign in with Apple. Use Sign in with Apple JS to let users set up accounts and sign in to your website and apps on other platforms.
SwiftUI basic Shape operations
Most complex custom views can be made by composing many basic shapes together. Today we will learn basic operations that we can do with them. It may seem trivial, but knowing these basics will benefit you in the future.