List view, a UITableView equivalent in SwiftUI
Table of Contents
Part 3 in the series "Building Lists and Navigation in SwiftUI". We will explore a List, UITableView equivalent in SwiftUI.
What is List
List is a container that presents rows of data arranged in a single column. It is a UIKit's UITableView equivalent in SwiftUI.
You can easily support sarunw.com by checking out this sponsor.
Offline Transcription: Fast, privacy-focus way to transcribe audio, video, and podcast files. No data leaves your Mac.
Creation
List exposes the same and simple initialization interface as ScrollView. We will start with the simplest form, which accepts a view builder as an argument.
Static Content
To create a static content list view, we create a list view and passing child views as a content argument.
struct ContentView: View {
    var body: some View {
        List {
            Text("First")
            Text("Second")
            Text("Third")
            Text("Fourth")
            Text("Fifth")
            Text("Sixth")
            Text("Seventh")
            Text("Eighth")
            Text("Ninth")
            Text("Tenth")
        }.font(.largeTitle)
    }
}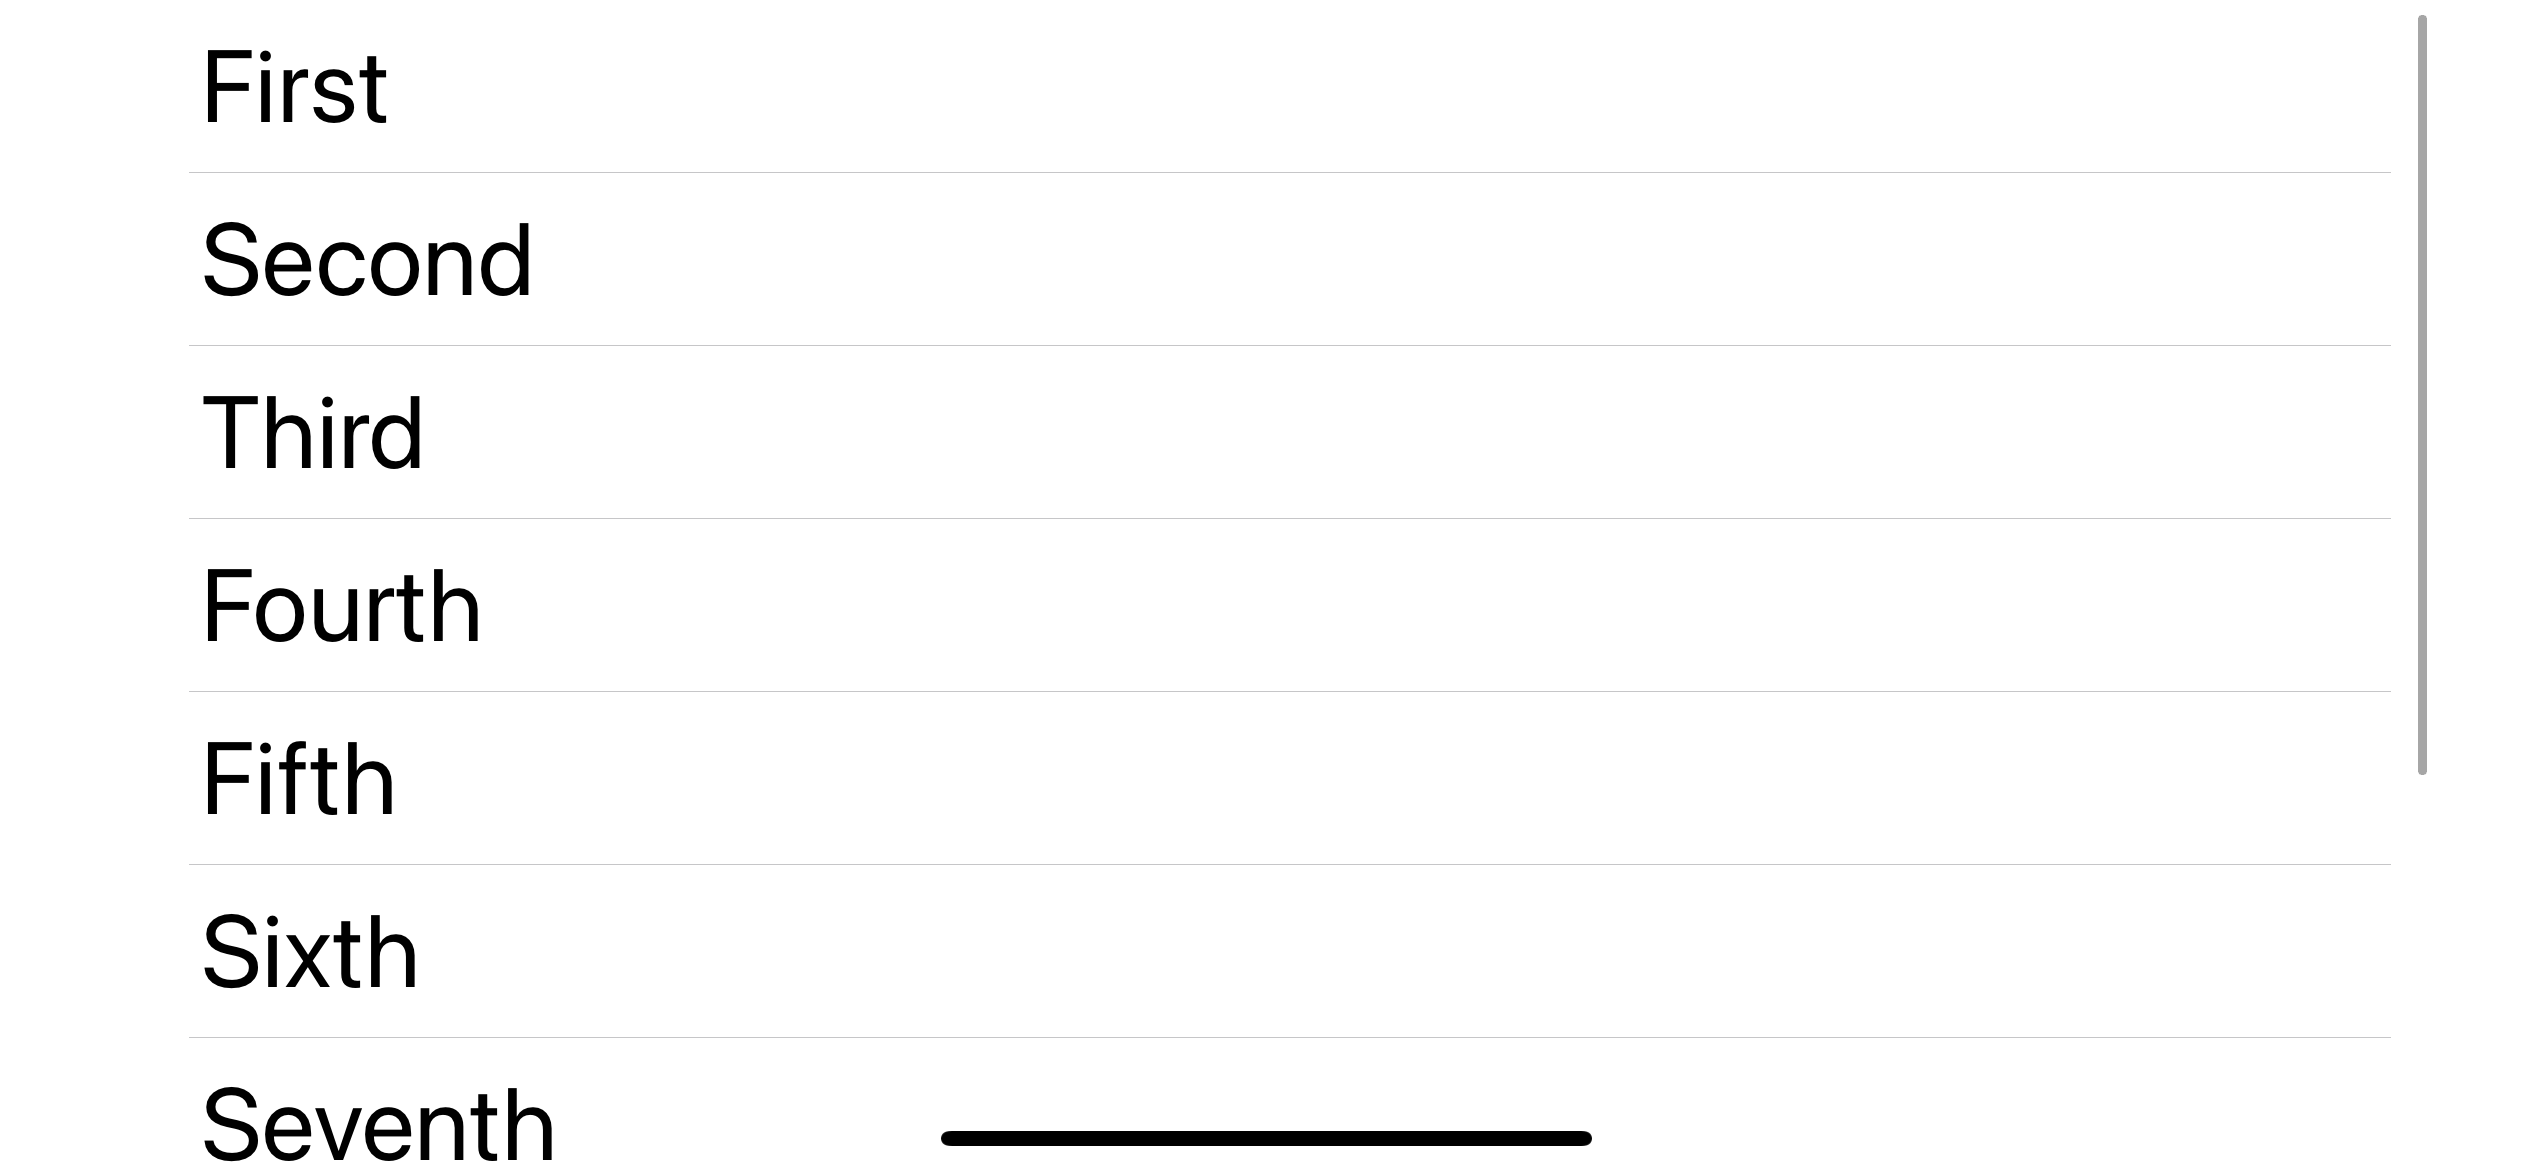
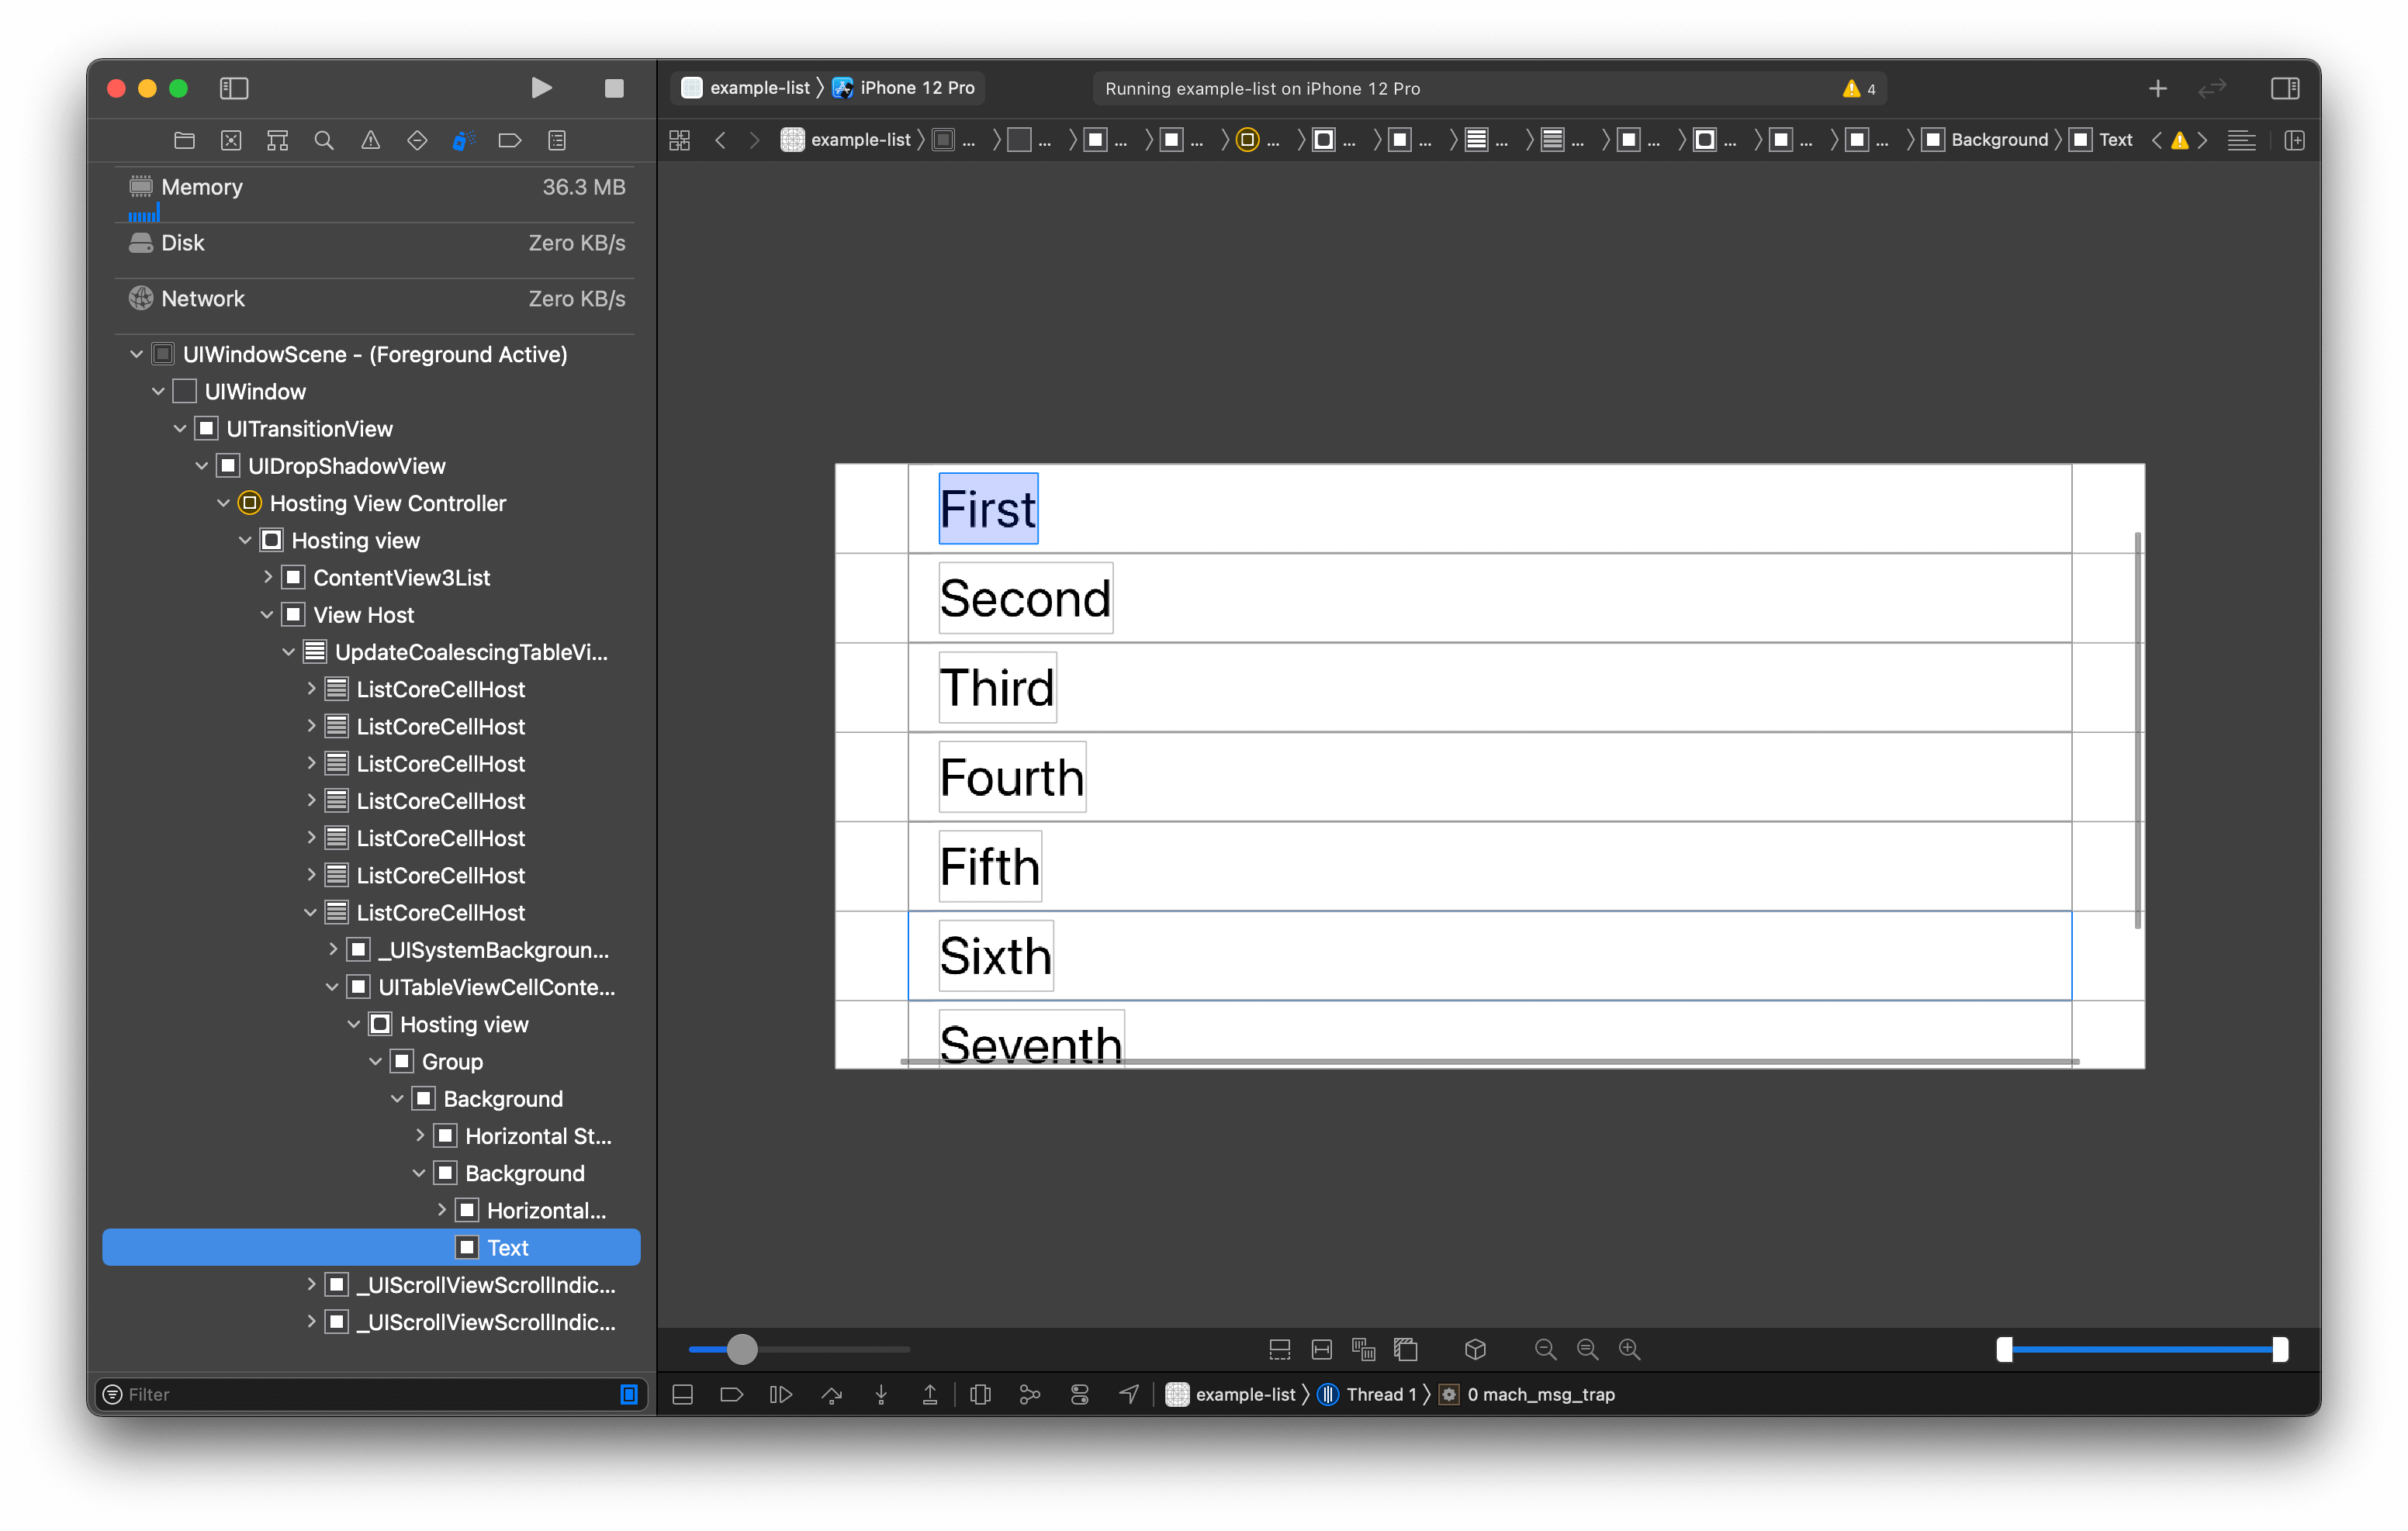
List view will layout its child to the maximum width and layout the content for each row to the left of the horizontal space. If you open up the View hierarchy debugger, you can see that List does a lot of work wrapping up each row into a nested structure, which is far more complex than the ScrollView.
Compare this to the ScrollView hierarchy. You can see that a scroll view is more straightforward, which resembles what we do in UIScrollView.
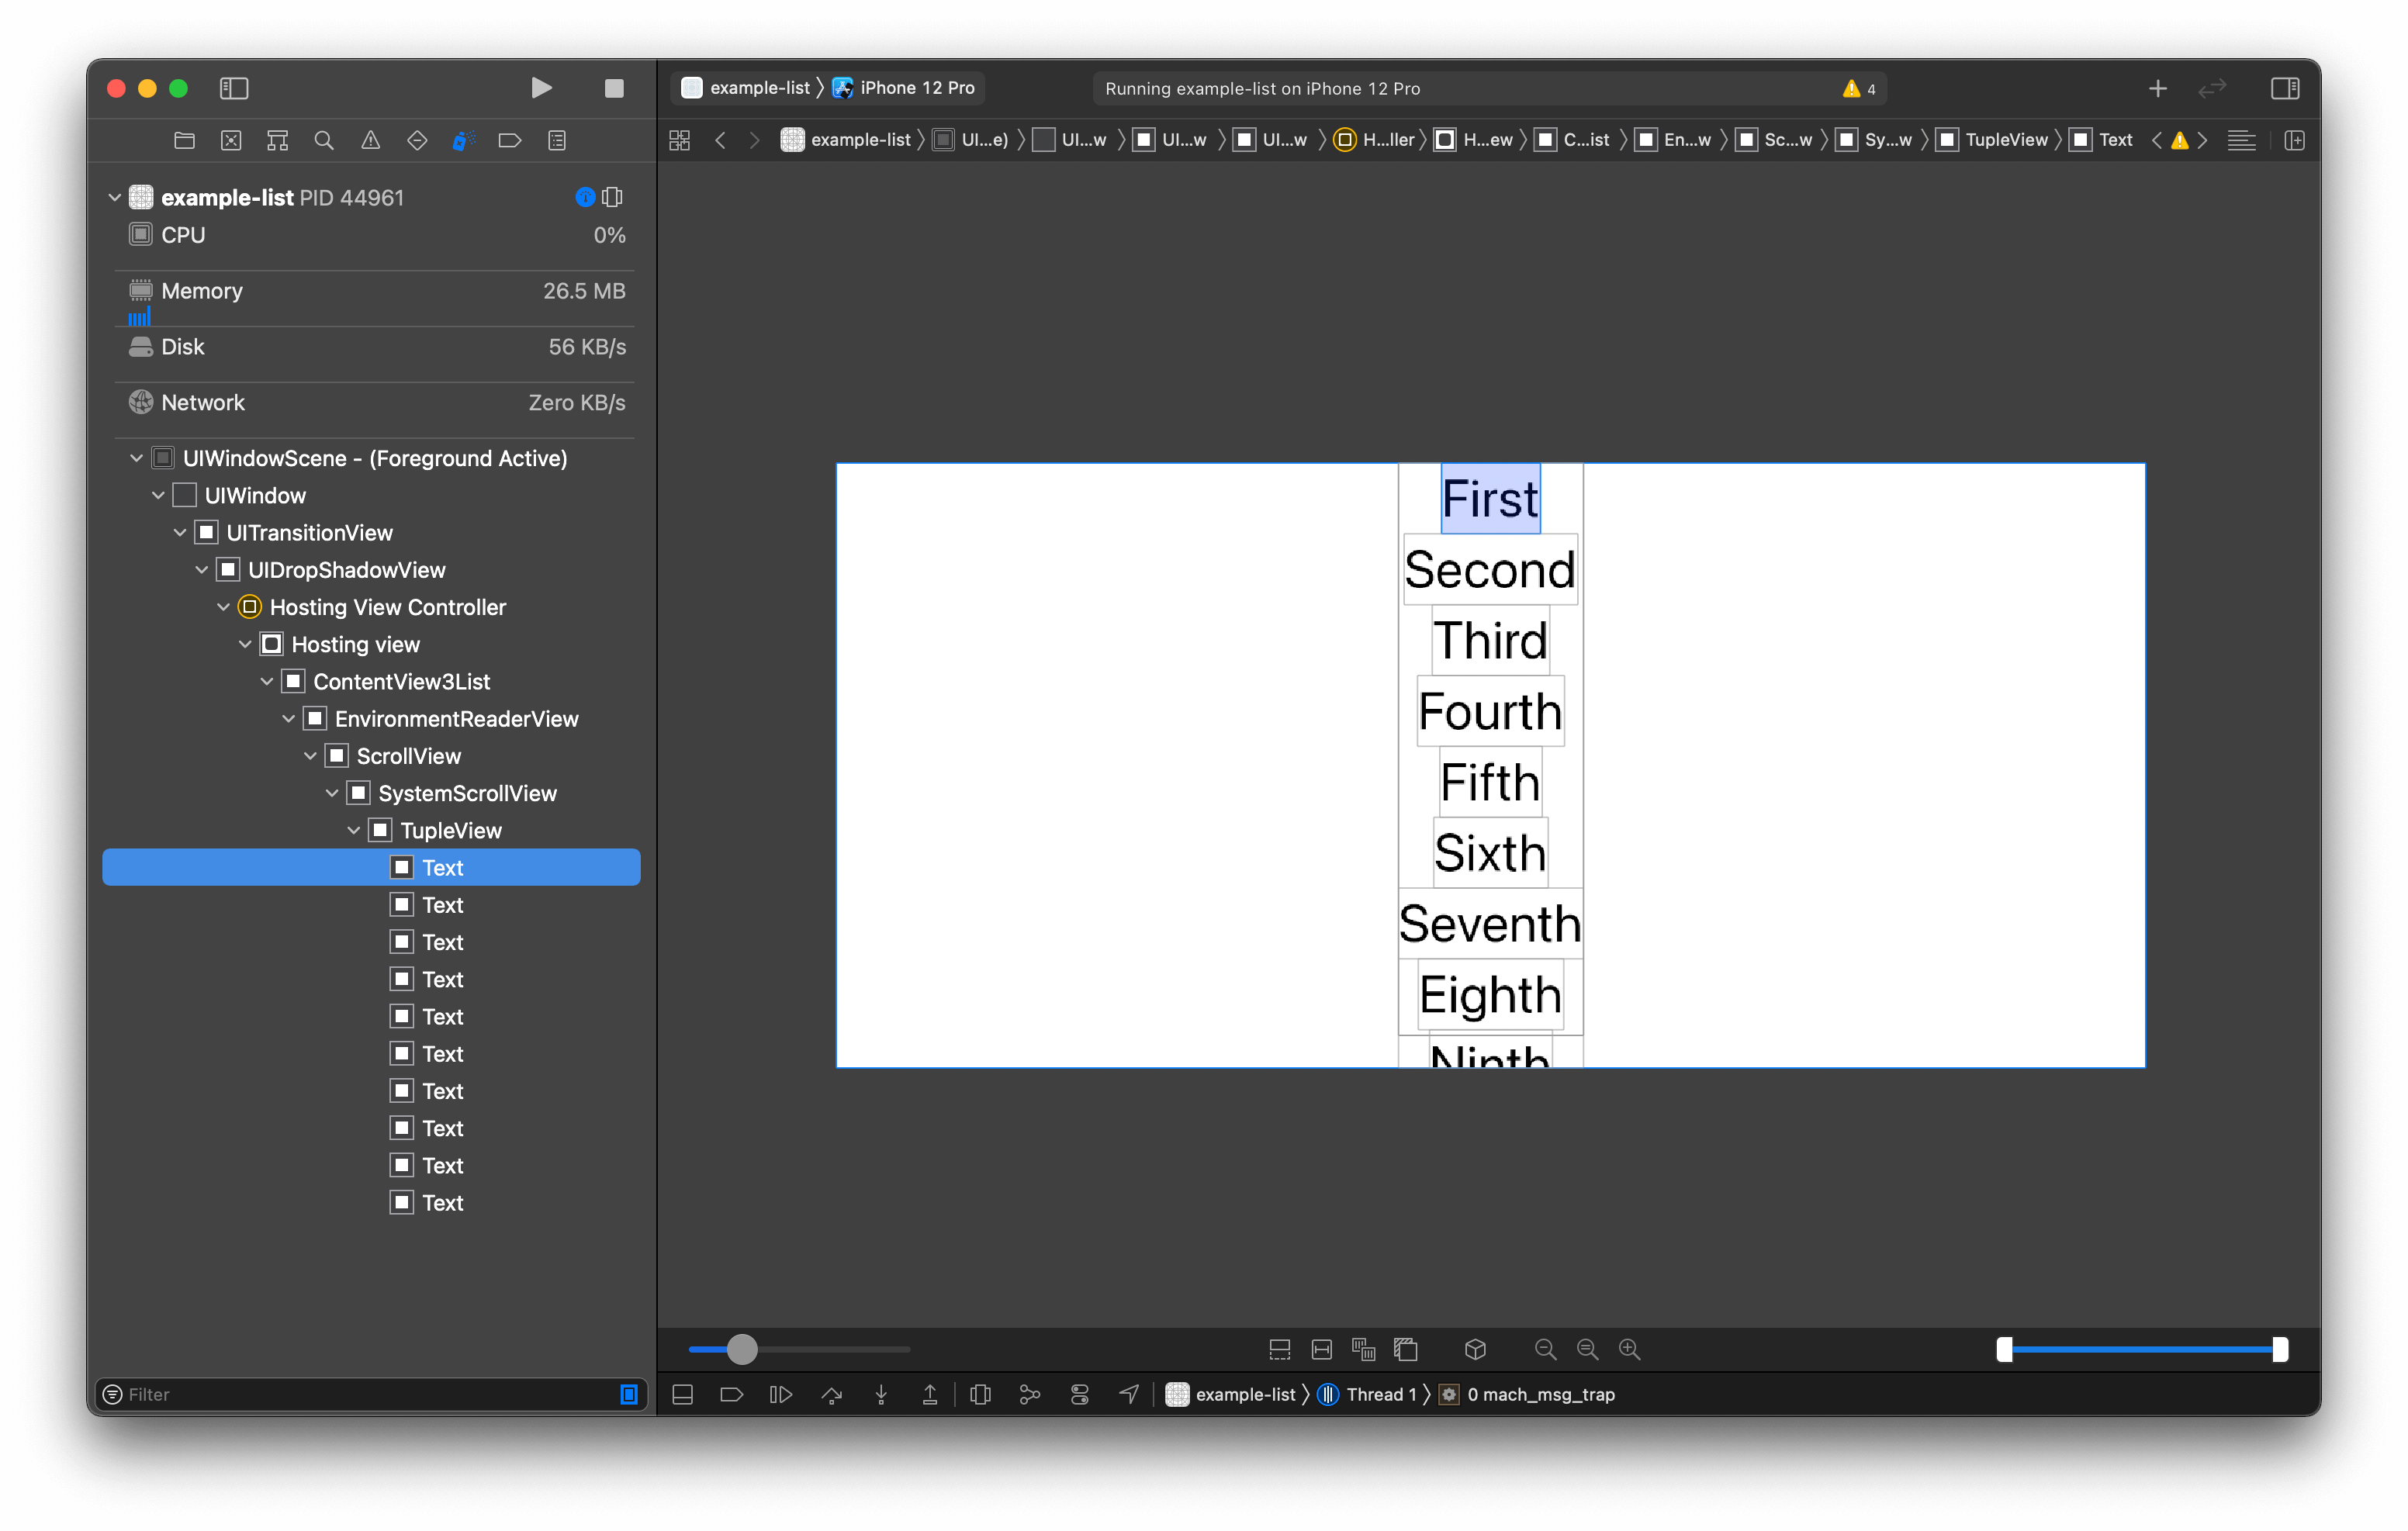
You can see that List wrap each TupleView's child view into a row-like structure (ListCoreCellHost), which resembles UITableView. While ScrollView put every child views under one container view, this resembles UIScrollView.
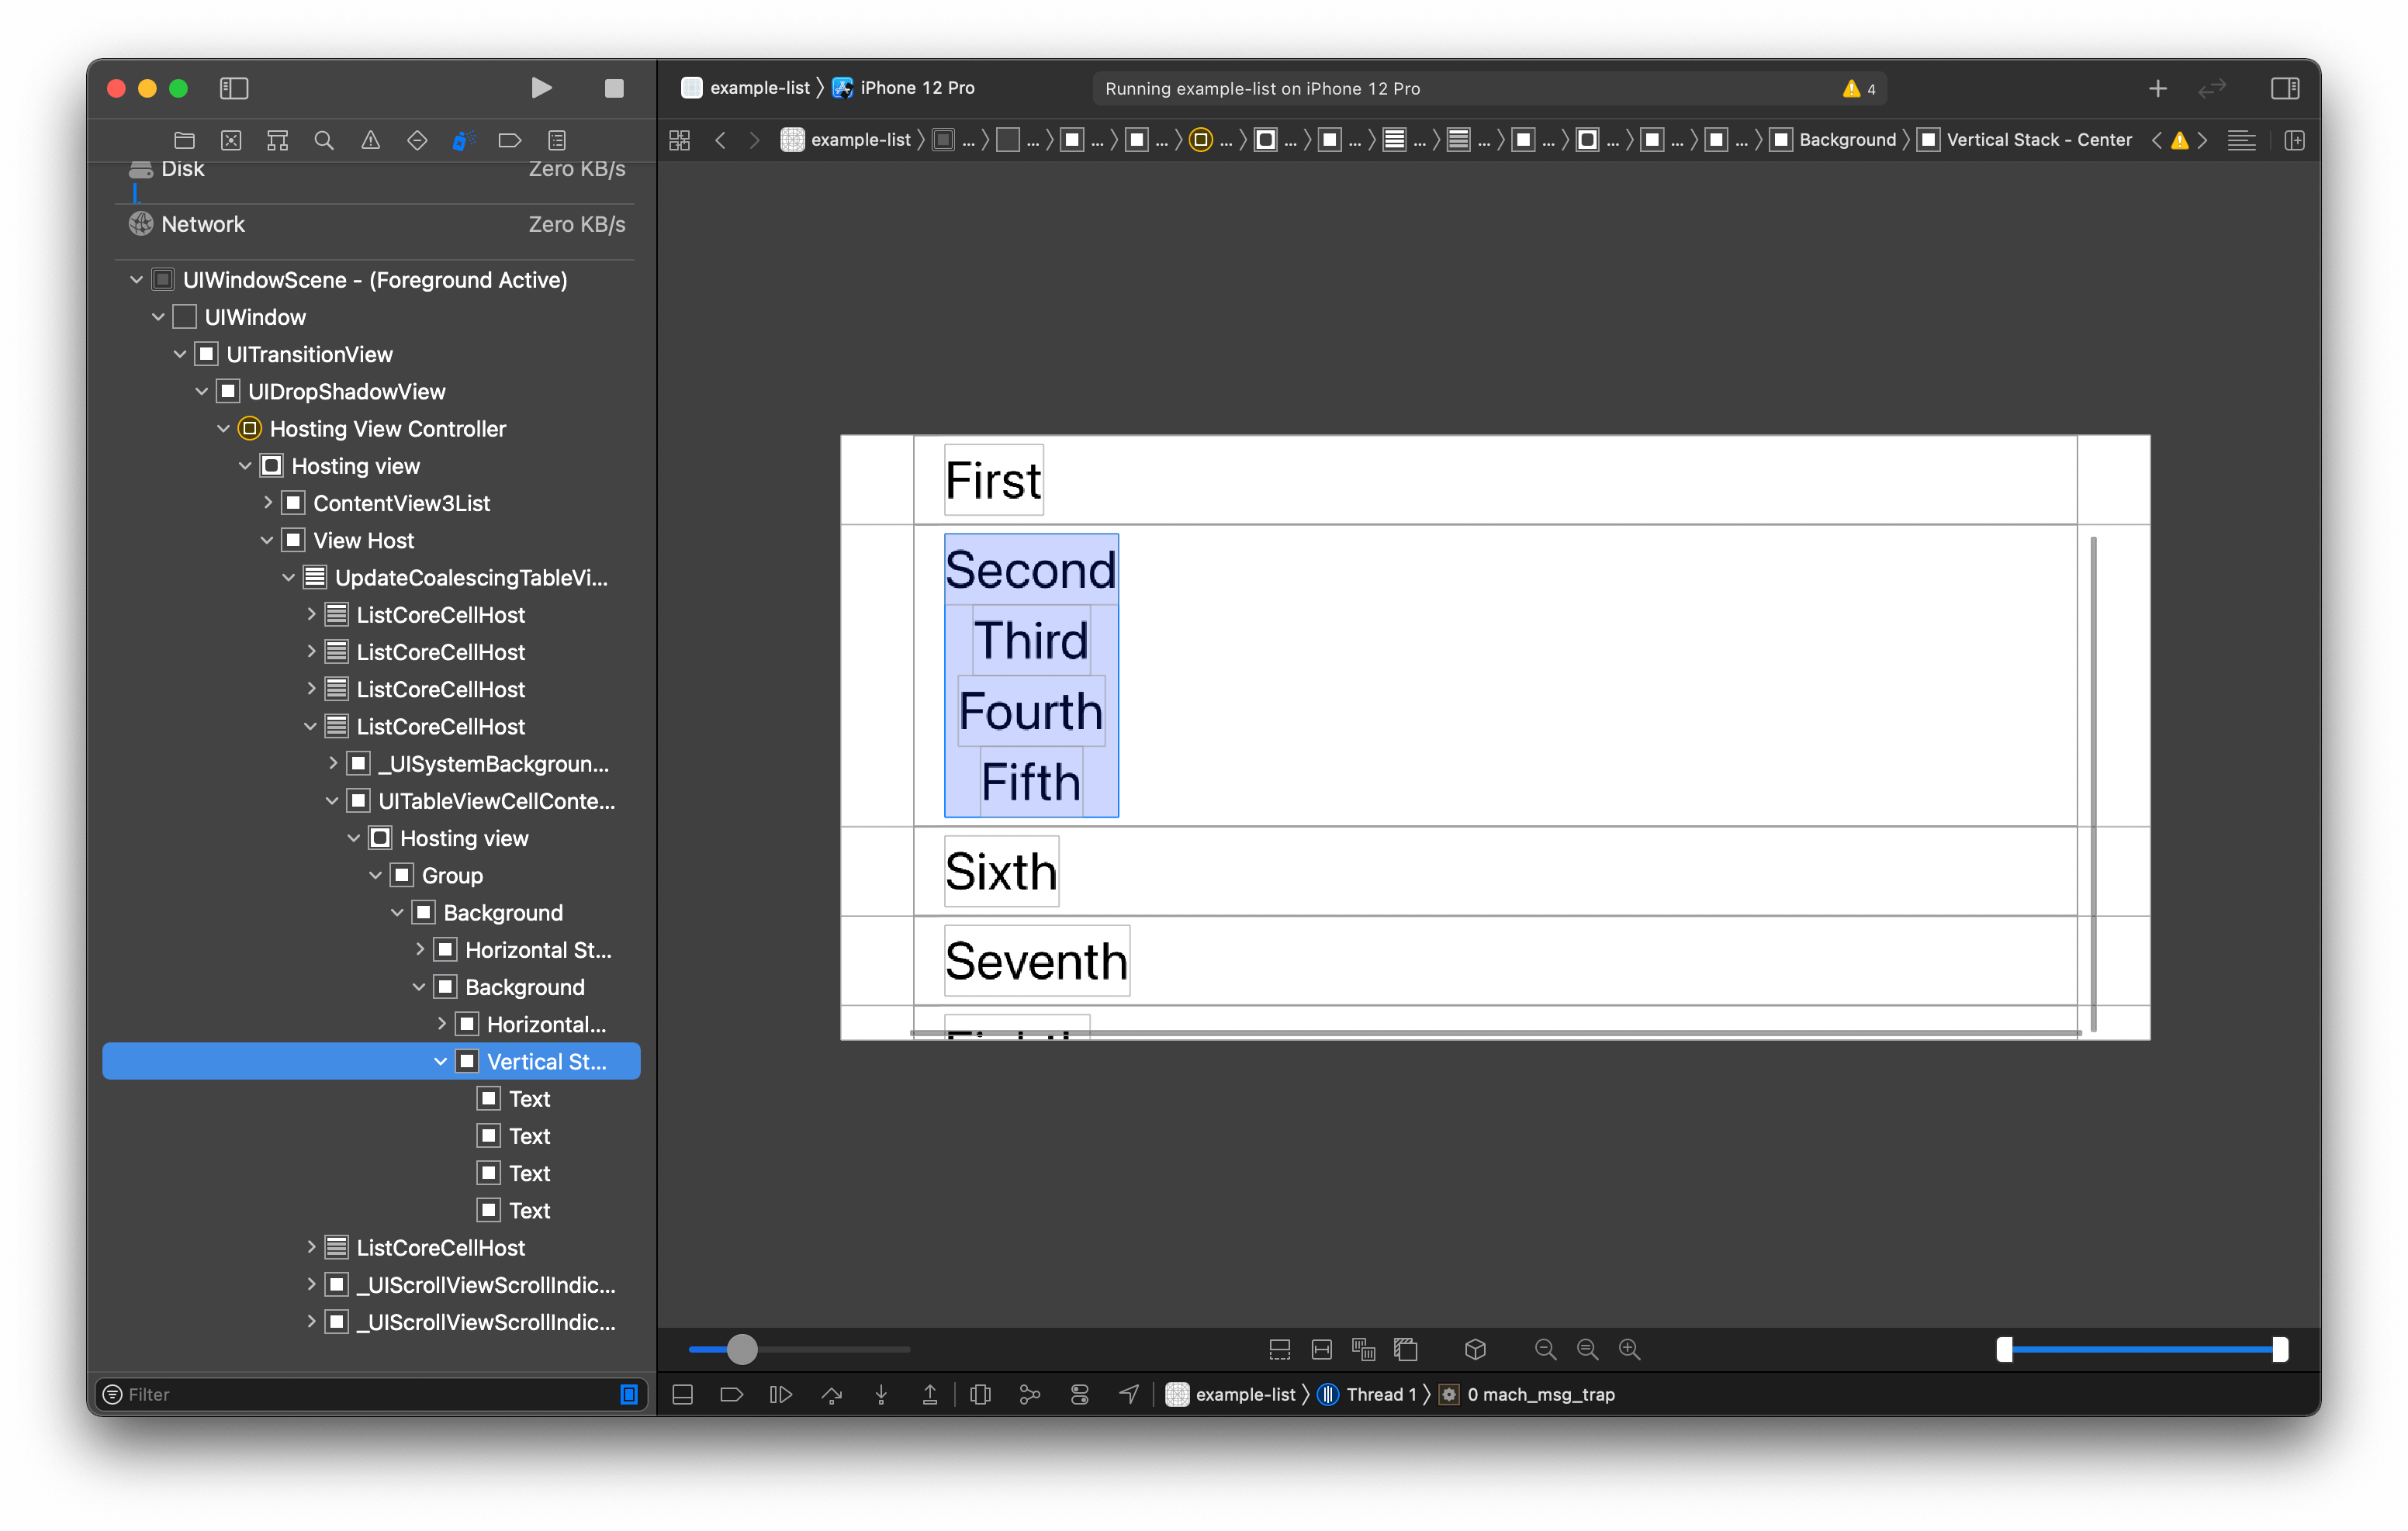
Each child view occupies a row in the list view. Let's try another example where one of the child views is VStack.
struct ContentView: View {
    var body: some View {
        List {
            Text("First")
            VStack { // <1>
                Text("Second")
                Text("Third")
                Text("Fourth")
                Text("Fifth")
            }
            Text("Sixth")
            Text("Seventh")
            Text("Eighth")
            Text("Ninth")
            Text("Tenth")
        }
        .font(.largeTitle)
    }
}
<1> VStack is a view, so it also occupies one row just like its sibling.
VStack and its children occupy one row and align to the left just like its sibling's text view.
Dynamic Content
There are many ways to add dynamic content to a list view. We will start with the one we are accustomed to, ForEach.
struct ContentView: View {
    var body: some View {
        List {
            ForEach(1..<20) { index in
                Text("\(index)")
            }
        }
        .font(.largeTitle)
    }
}
There are also other variation for creating List from ForEach content. We will revisit this in Dynamic Content with ForEach section.
Mixed Content
You don't have to choose between static or dynamic content. You can mix both content types based on your need.
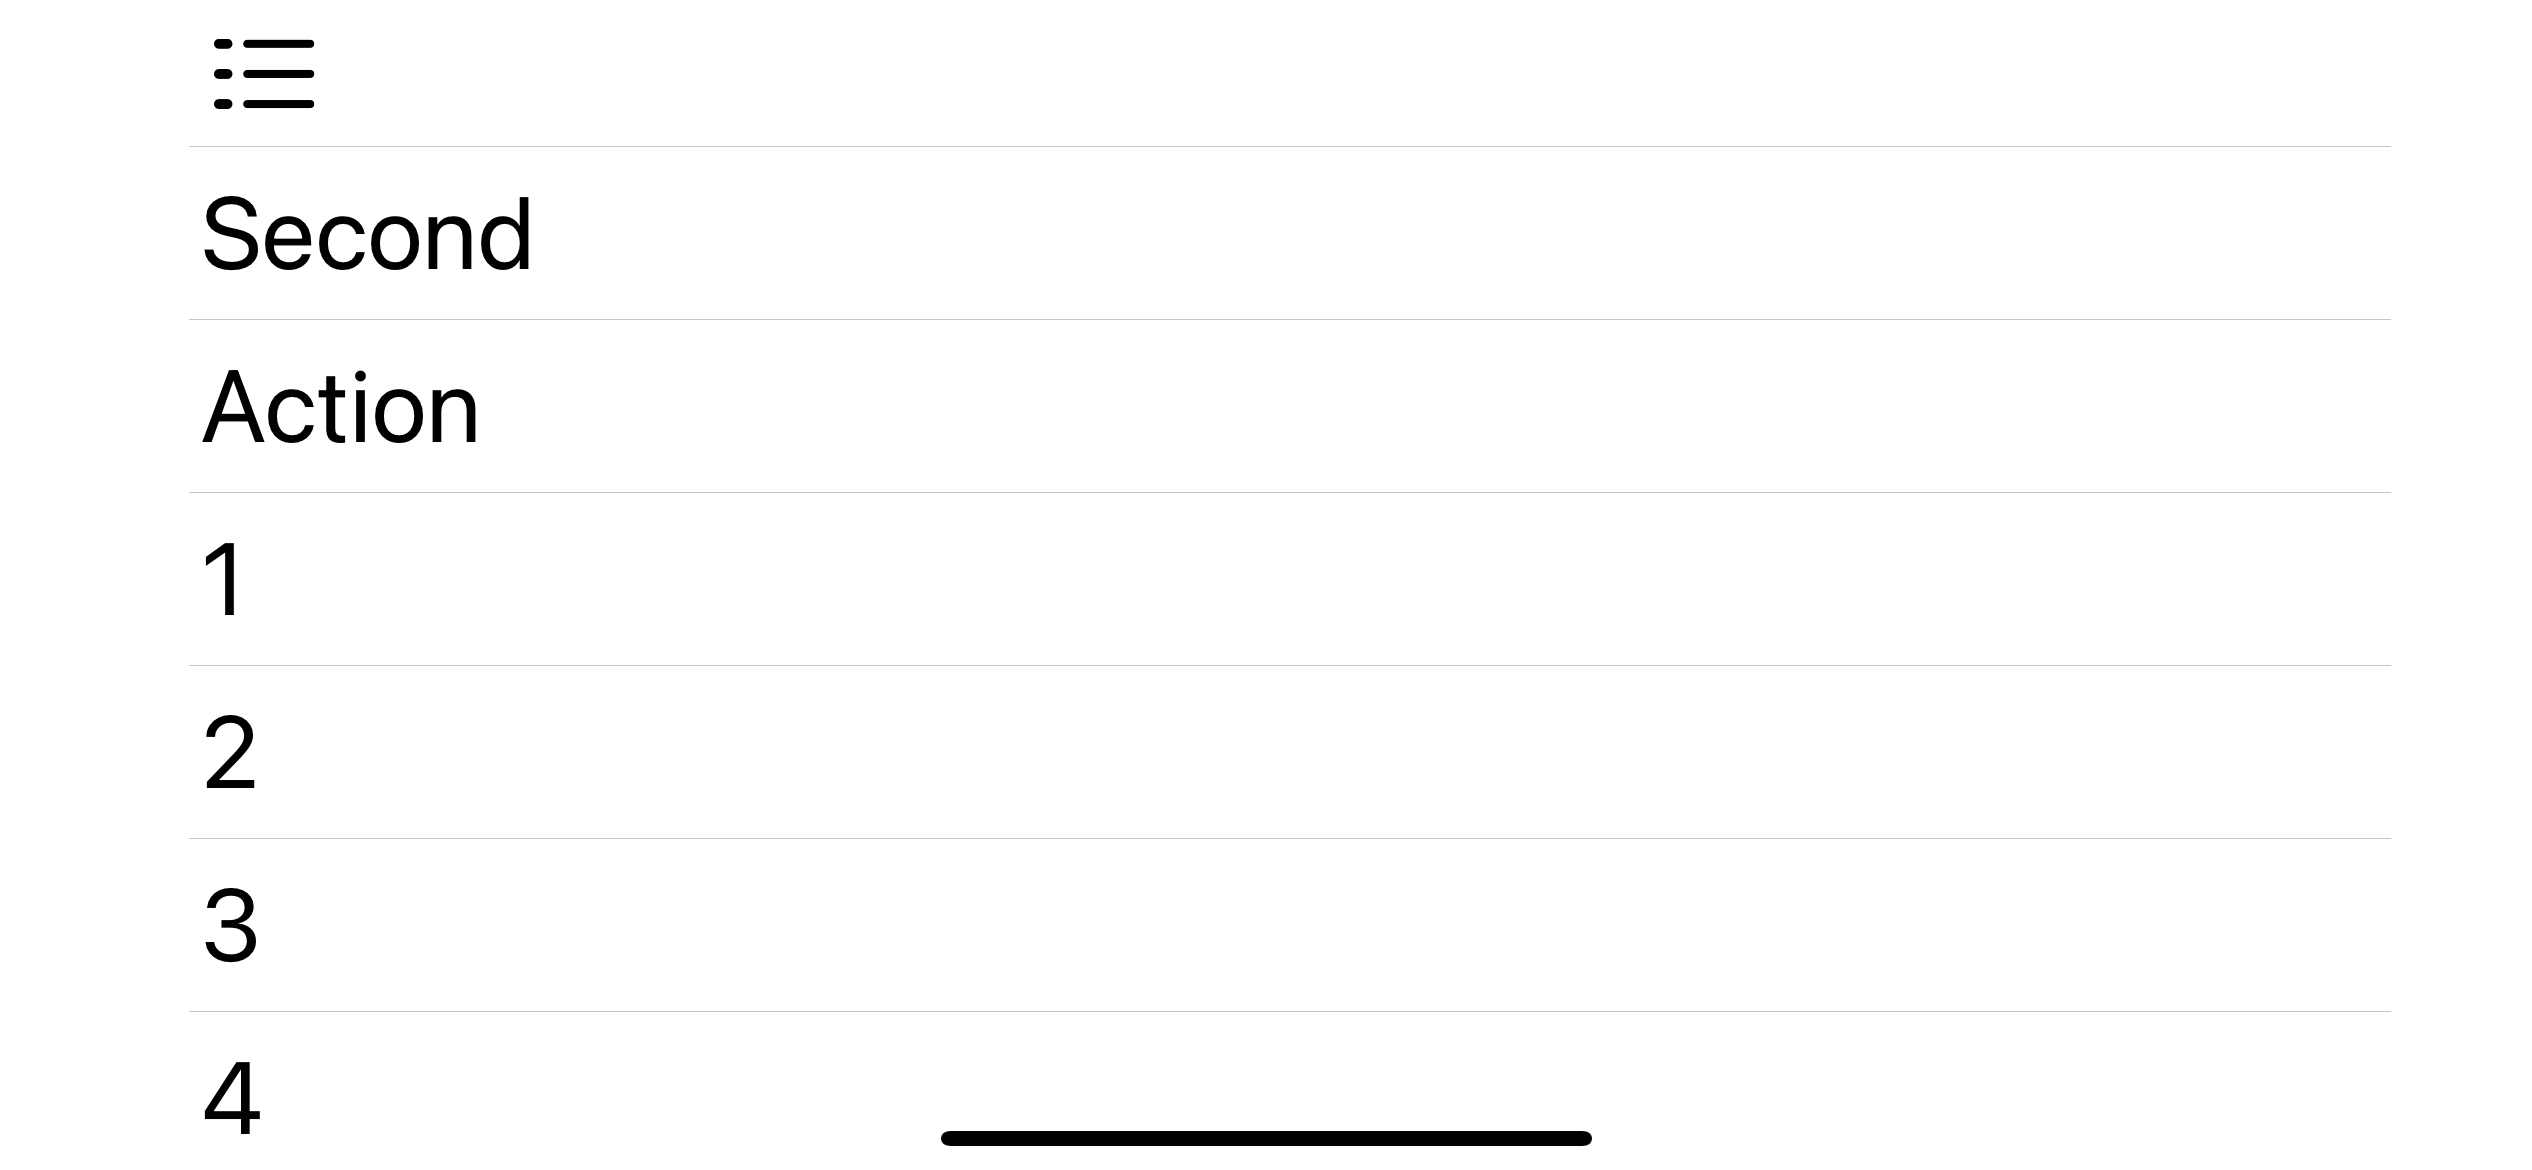
The following example builds content from both static and dynamic.
struct ContentView: View {
    var body: some View {
        List {
            Image(systemName: "list.dash")
            Text("Second")
            Button(action: {
                print("Action")
            }) {
                Text("Action")
            }
            ForEach(1..<20) { index in
                Text("\(index)")
            }
        }
        .font(.largeTitle)
    }
}
Results:
Nested Content
The content of a list doesn't have to be a simple view. It can be as complex as you want.
Here is an example, we make each row a horizontal scroll view.
struct ContentView: View {
    let positions = ["First", "Second", "Third"]

    var body: some View {
        List {
            ForEach(positions, id: \.self) { position in
                Text(position)
            }
            ScrollView(.horizontal) { // <1>
                HStack {
                    ForEach(1..<30) { index in
                        Text("\(index)")
                    }

                }
            }
        }
        .font(.largeTitle)
    }
}
<1> Scroll view will become a row of the horizontal text view.
Result:

Dynamic Content with ForEach
You can use ForEach to create dynamic content along with static content as you can see in Mixed Content and Nested Content sections. But if your list contains only ForEach, List has initializers that matched the signature of ForEach, making your code shorter. Let's go through them one by one.
Content from a specific number of times
If you use ForEach which loop over a range of number to create a content like this:
struct ContentView: View {
    let positions = ["First", "Second", "Third"]

    var body: some View {
        List {
            ForEach(0..<positions.count) { index in
                Text(positions[index])
            }
        }
        .font(.largeTitle)
    }
}
You can use this List initializer which also accept range of int as an arugment.
struct ContentView: View {
    let positions = ["First", "Second", "Third"]

    var body: some View {
        List(0..<positions.count, rowContent: { index in
            Text(positions[index])
        })
        .font(.largeTitle)
    }
}
Content from an array of any data
If you use ForEach to loop over an array of data uniquely identified by the provided key path like this:
struct ContentView: View {
    let positions = ["First", "Second", "Third"]

    var body: some View {
        List {
            ForEach(positions, id: \.self) { position in
                Text(position)
            }
        }
        .font(.largeTitle)
    }
}
You can use this List initializer which the same signature as the ForEach.
struct ContentView: View {
    let positions = ["First", "Second", "Third"]

    var body: some View {
        List(positions, id: \.self, rowContent: { position in
            Text(position)
        })
        .font(.largeTitle)
    }
}
Content from an array of Identifiable data
If you use ForEach to loop over a collection of Identifiable protocol element like this:
struct Position: Identifiable {
    let id: Int
    let name: String
}

struct ContentView: View {
    let positions = [
        Position(id: 1, name: "First"),
        Position(id: 2, name: "Second"),
        Position(id: 3, name: "Third")
    ]

    var body: some View {
        List {
            ForEach(positions) { position in
                Text(position.name)
            }
        }
        .font(.largeTitle)
    }
}
List also has that covered.
struct ContentView: View {
    let positions = [
        Position(id: 1, name: "First"),
        Position(id: 2, name: "Second"),
        Position(id: 3, name: "Third")
    ]

    var body: some View {
        List(positions, rowContent: { position in
            Text(position.name)
        })
        .font(.largeTitle)
    }
}
List has initializers that match all the possible initializers of ForEach. If you don't mix static and dynamic content, using this form of list initializer would save you some keystrokes.
Styling
Not like a scroll view, list view do some hard work wrapping each child into a row with some styling like the separator and content inset. Just like UITableView, which has many styles such as .plain, .grouped, and .insetGrouped, you can set a style to a List view. To change the style, we set it via the .listStyle(_:) view modifier.
In iOS 13, we have PlainListStyle and GroupedListStyle, then in iOS 14, we have two inset version of plain and group style (InsetListStyle, InsetGroupedListStyle) and a sidebar style (SidebarListStyle).
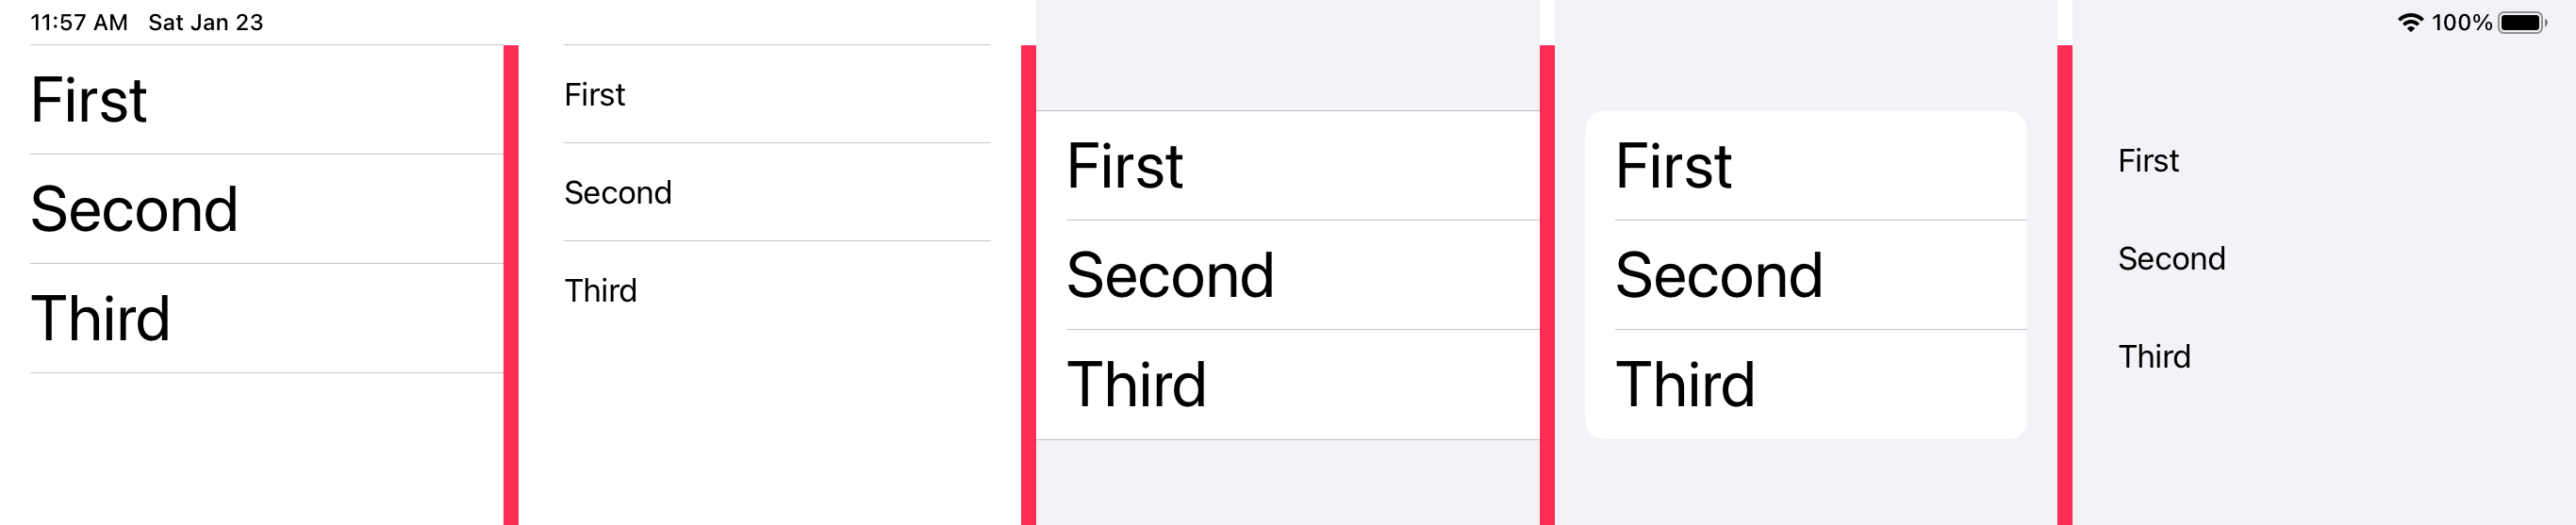
We create five list views and apply different style for each of them.
struct ContentView: View {
    let positions = [
        Position(id: 1, name: "First"),
        Position(id: 2, name: "Second"),
        Position(id: 3, name: "Third")
    ]

    var body: some View {
        HStack {
            List(positions, rowContent: { position in
                Text(position.name)
            }).listStyle(PlainListStyle())

            List(positions, rowContent: { position in
                Text(position.name)
            }).listStyle(InsetListStyle())

            List(positions, rowContent: { position in
                Text(position.name)
            }).listStyle(GroupedListStyle())

            List(positions, rowContent: { position in
                Text(position.name)
            }).listStyle(InsetGroupedListStyle())

            List(positions, rowContent: { position in
                Text(position.name)
            }).listStyle(SidebarListStyle())
        }
        .font(.largeTitle) // <1>
        .background(Color.pink)
    }
}
<1> We set font to .largeTitle, but it doesn't effect InsetListStyle and SidebarListStyle.
Results:
Horizontal Scrolling
Just like UITableView, List has no horizontal scrolling support. You might need to use ScrollView, LazyVGrid, or LazyHGrid.
Showing / Hiding scroll indicator
As far as I know, there is no option to show/hide the scrolling indicator.
You can easily support sarunw.com by checking out this sponsor.
Offline Transcription: Fast, privacy-focus way to transcribe audio, video, and podcast files. No data leaves your Mac.
Conclusion
Even though both scroll views and list views add a scrolling capability, the list view is doing much more under the hood. While a ScrollView provides a simple container view with scrolling functionality, the List view provides the ability to move, delete, insert rows into a list (Which we won't talk about in this series).
If you follow the series from the beginning, you can see the power of SwiftUI and its declarative syntax. We can keep our list's content the same the whole time. The only thing that needs to change is usage intention, whether we mean it to be a non scrollable list (VStack, HStack), a simple scrolling (ScrollView), or a list List. We declare our intention and leave SwiftUI worry about the implementation detail.
VStack {
    Text("First")
    Text("Second")
    Text("Third")
}

ScrollView {
    Text("First")
    Text("Second")
    Text("Third")
}

List {
    Text("First")
    Text("Second")
    Text("Third")
}
The next part would be the final part of this series. We will talk about navigation in SwiftUI.
Read more article about SwiftUI, List, Navigation, or see all available topic
Enjoy the read?
If you enjoy this article, you can subscribe to the weekly newsletter.
Every Friday, you'll get a quick recap of all articles and tips posted on this site. No strings attached. Unsubscribe anytime.
Feel free to follow me on Twitter and ask your questions related to this post. Thanks for reading and see you next time.
If you enjoy my writing, please check out my Patreon https://www.patreon.com/sarunw and become my supporter. Sharing the article is also greatly appreciated.
Become a patron Buy me a coffee Tweet ShareHow to create custom operators and do operators overloading in Swift
Learn how to overload existing operators such as +, -, *, / or create a custom one (such as .^.).
How to sort by multiple properties in Swift
Learn how to sort an array of objects with multiple criteria.