How to use ScrollView in SwiftUI
Table of Contents
Part 2 in the series "Building Lists and Navigation in SwiftUI". We will explore a ScrollView, UIScrollView equivalent in SwiftUI.
List view is a view that contains child views and displays them in a scrollable manner. SwiftUI offers two views with this capability, ScrollView and List.
In the previous post, we learned two ways to populate a list view's content. We put our content in something called view builder. @ViewBuilder will pack all child views into a tuple for a parent to work with. The default behavior of View will simply layout them vertically, which is not scrollable. In this article, we will visit one of a list view, ScrollView.
What is ScrollView
ScrollView displays its content within the scrollable content region. It is a UIKit's UIScrollView equivalent in SwiftUI.
You can easily support sarunw.com by checking out this sponsor.
Localization Buddy: Easiest way to localize and update App Store metadata.
Creation
If you look into an initializer signature, you will see that it accepts a content parameter that is annotated as a view builder. So you can populate it the same way we did in the last post.
public init(_ axes: Axis.Set = .vertical, showsIndicators: Bool = true, @ViewBuilder content: () -> Content)Static Content
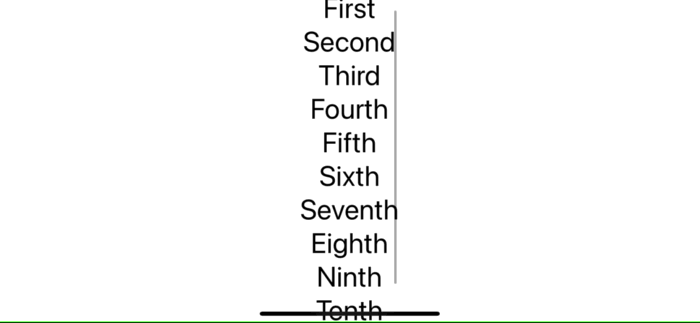
To create a static content scroll view, we create a scroll view passing child views as a content argument.
struct ContentView: View {
    var body: some View {
        ScrollView {
            Text("First")
            Text("Second")
            Text("Third")
            Text("Fourth")
            Text("Fifth")
            Text("Sixth")
            Text("Seventh")
            Text("Eighth")
            Text("Ninth")
            Text("Tenth")
        }.font(.largeTitle)
    }
}
By default, scroll view size will equal the space of its largest child needed. If you want to change that, you can use the frame() modifier.
struct ContentView: View {
    var body: some View {
        ScrollView {
            Text("First")
            Text("Second")
            Text("Third")
            Text("Fourth")
            Text("Fifth")
            Text("Sixth")
            Text("Seventh")
            Text("Eighth")
            Text("Ninth")
            Text("Tenth")
                .frame(maxWidth: .infinity)
        }.font(.largeTitle)
    }
}
We set one of the scroll view children to occupy maximum width, making the scroll view occupy the same space. As you can see, the scroll view frame and scroll indicator are push to the edge.
Dynamic Content
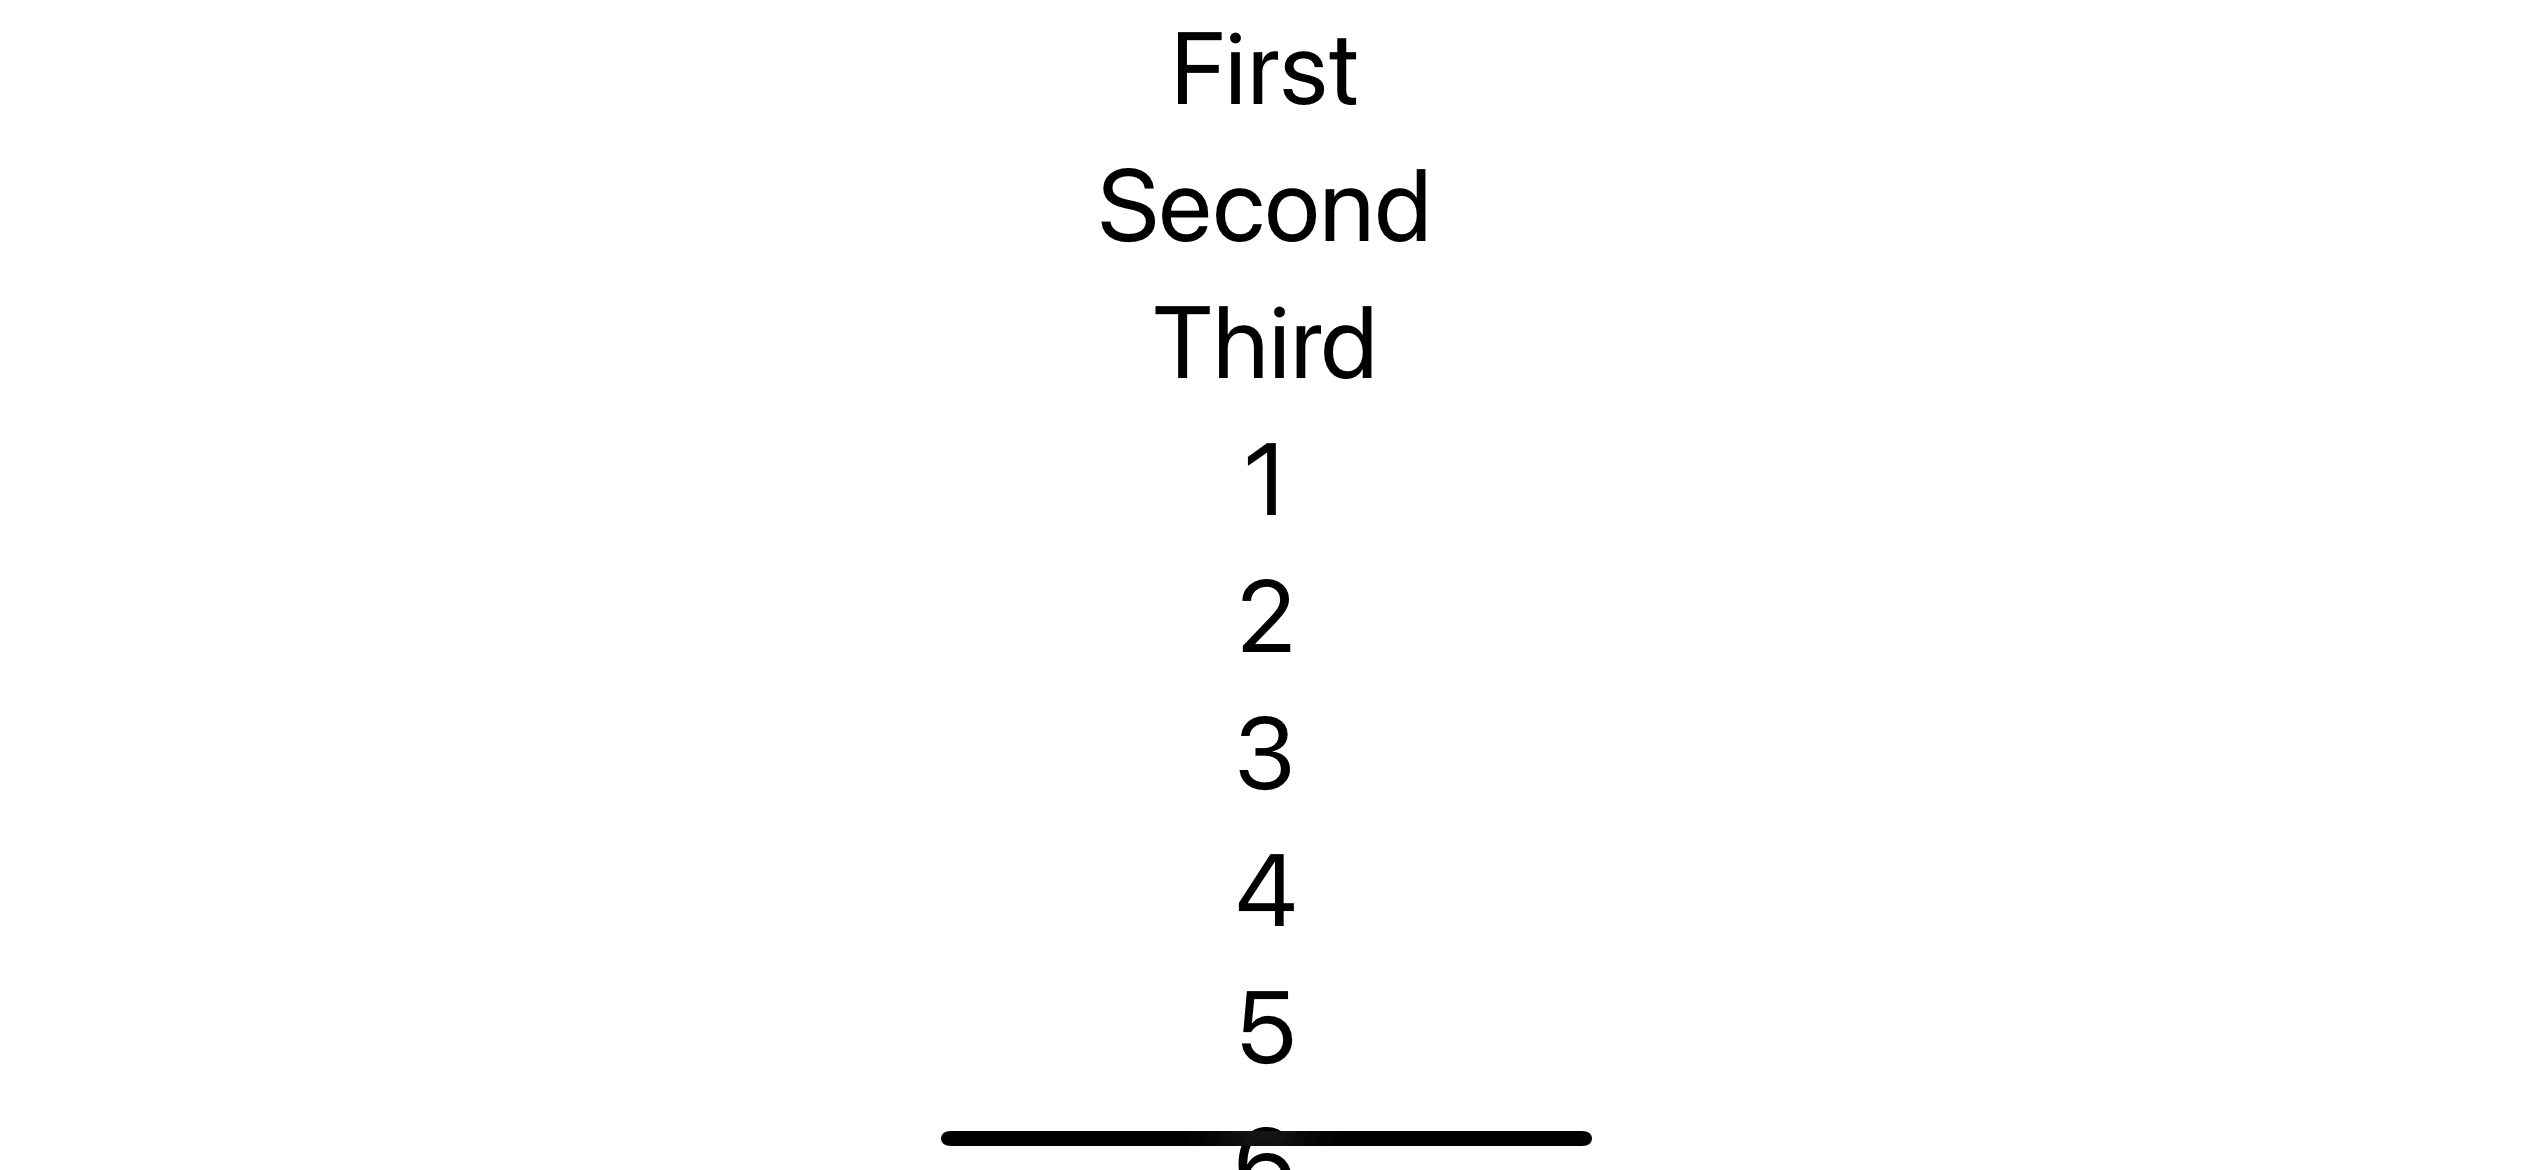
Using dynamic content is as easy as static with the help of ForEach.
struct ContentView2: View {
    var body: some View {
        ScrollView {
            ForEach(1..<20) { index in
                Text("\(index)")
            }
        }.font(.largeTitle)
    }
}
Mixed Content
You don't have to choose between static or dynamic content. You can mix both content types based on your need.
The following example builds content from both static and dynamic.
struct ContentView2: View {
    var body: some View {
        ScrollView {
            Text("First")
            Text("Second")
            Text("Third")
            ForEach(1..<20) { index in
                Text("\(index)")
            }
        }.font(.largeTitle)
    }
}
Nested Content
From our previous example where we try to make a scroll view expand to full width with .frame(maxWidth: .infinity), it works, but it looks kind of ugly to put a frame modifier at a random child view.
struct ContentView: View {
    var body: some View {
        ScrollView {
            Text("First")
            Text("Second")
            Text("Third")
            Text("Fourth")
            Text("Fifth")
            Text("Sixth")
            Text("Seventh")
            Text("Eighth")
            Text("Ninth")
            Text("Tenth")
                .frame(maxWidth: .infinity)
        }.font(.largeTitle)
    }
}
We can create a parent view for all of our content, the same way as a contentView property in UIScrollView, and put a frame modifier there.
In the following example, we wrap content views in a VStack and set frame modifier there.
struct ContentView: View {
    var body: some View {
        ScrollView {
            VStack {
                Text("First")
                Text("Second")
                Text("Third")
                Text("Fourth")
                Text("Fifth")
                Text("Sixth")
                Text("Seventh")
                Text("Eighth")
                Text("Ninth")
                Text("Tenth")
            }.frame(maxWidth: .infinity) // <1>
        }.font(.largeTitle)
    }
}
<1> We set frame modifier on the parent view of our content view.
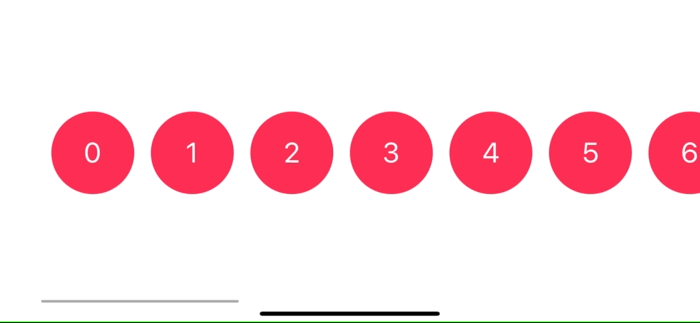
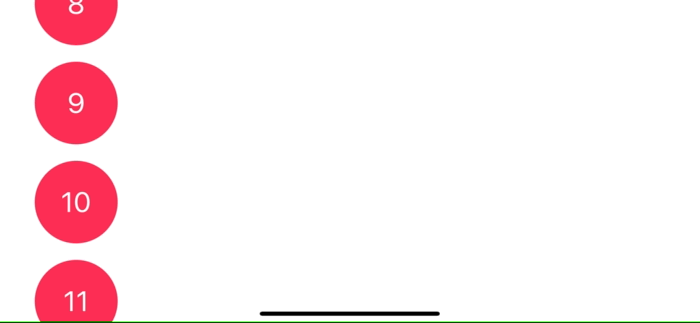
Vertical Scrolling
By default, a scroll view initialize view with Axis.Set.vertical, which will create a vertical scrolling scroll view.
This is what we use in the examples so far.
struct ContentView: View {
    var body: some View {
        ScrollView {
            VStack(spacing: 20) {
                ForEach(0..<20) { index in
                    Text("\(index)")
                        .foregroundColor(.white)
                        .frame(width: 100, height: 100)
                        .background(Color.pink)
                        .cornerRadius(50)
                }
            }.frame(maxWidth: .infinity)
        }.font(.largeTitle)
    }
}
Horizontal Scrolling
To make a scroll view scroll horizontally, you passing Axis.Set.horizontal as axes argument.
struct ContentView: View {
    var body: some View {
        ScrollView(.horizontal) { // <1>
            HStack(spacing: 20) { // <2>
                ForEach(0..<20) { index in
                    Text("\(index)")
                        .foregroundColor(.white)
                        .frame(width: 100, height: 100)
                        .background(Color.pink)
                        .cornerRadius(50)
                }
            }.frame(maxHeight: .infinity)
        }.font(.largeTitle)
    }
}
<1> Set axes as .horizontal to enable horizontal scrolling.
<2> We use HStack instead of VStack here to align our child views horizontally.
Setting an axes to .horizontal here doesn't magically change your view layout to horizontal layout. It just makes our scroll view support horizontal axis scrolling.
Let's try .horizontal scroll view with VStack content view.
struct ContentView: View {
    var body: some View {
        ScrollView(.horizontal) { // <1>
            VStack(spacing: 20) { // <2>
                ForEach(0..<20) { index in
                    Text("\(index)")
                        .foregroundColor(.white)
                        .frame(width: 100, height: 100)
                        .background(Color.pink)
                        .cornerRadius(50)
                }
            }
        }.font(.largeTitle)
    }
}
<1> Set axes as .horizontal to enable horizontal scrolling.
<2> We use VStack here.
The result is a content view layout vertically according to VStack, which results in some parts got clip off. The horizontal scroll view doesn't change the layout. It just makes our view support horizontal scrolling.
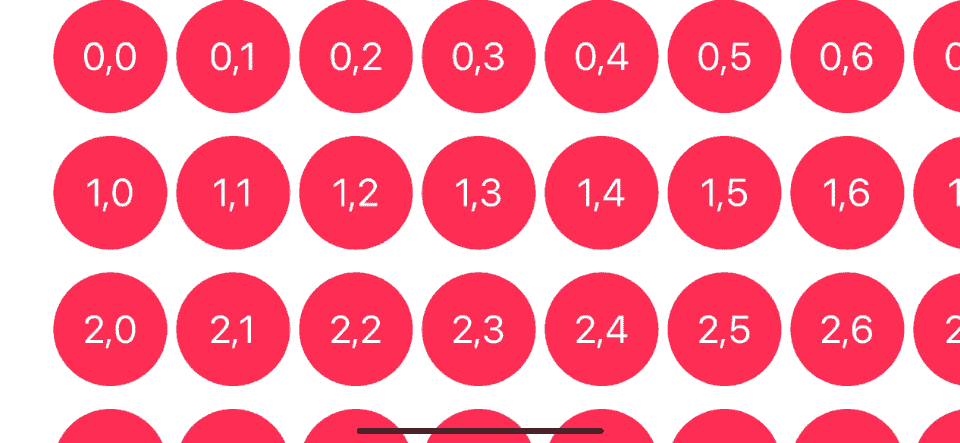
Multiple Axes
Since the scroll view parameter is Axis.Set, which is a set, we can support scrolling in both axes simultaneously using [.horizontal, .vertical].
Here is an example where I nested HStack view in a VStack to present a grid like views.
struct ContentView: View {
    var body: some View {
        ScrollView([.horizontal, .vertical]) { // <1>
            VStack(spacing: 20) { // <2>
                ForEach(0..<20) { row in
                    HStack {  // <3>
                        ForEach(0..<20) { column in
                            Text("\(row),\(column)") // <4>
                                .foregroundColor(.white)
                                .frame(width: 100, height: 100)
                                .background(Color.pink)
                                .cornerRadius(50)
                        }
                    }
                }
            }.frame(maxWidth: .infinity)
        }.font(.largeTitle)
    }
}
<1> Set axes to [.horizontal, .vertical].
<2> The root of the content view is VStack.
<3> For each row of the vertical stack, we render a horizontal layout content with HStack.
<4> The innermost view is a text view with the content of row and column number.
Showing/Hiding scroll indicator
In UIScrollView, we have showsHorizontalScrollIndicator and showsVerticalScrollIndicator property to controls whether the scroll indicator is visible or not. In SwiftUI, scroll view we can control with showsIndicators parameter.
ScrollView(showsIndicators: false) {
    ....
}
Conclusion
This article shows how easy it is to put our content view into a scroll view and make a scrollable list out of it. In the next article, we will visit another view with a similar capability, List.
You can easily support sarunw.com by checking out this sponsor.
Localization Buddy: Easiest way to localize and update App Store metadata.
Related Resources
- Apple Documentation
Read more article about SwiftUI, List, Navigation, ScrollView, or see all available topic
Enjoy the read?
If you enjoy this article, you can subscribe to the weekly newsletter.
Every Friday, you'll get a quick recap of all articles and tips posted on this site. No strings attached. Unsubscribe anytime.
Feel free to follow me on Twitter and ask your questions related to this post. Thanks for reading and see you next time.
If you enjoy my writing, please check out my Patreon https://www.patreon.com/sarunw and become my supporter. Sharing the article is also greatly appreciated.
Become a patron Buy me a coffee Tweet ShareWhat is @Environment in SwiftUI
Learn how SwiftUI shares application settings and preference values across the app.
How to create custom operators and do operators overloading in Swift
Learn how to overload existing operators such as +, -, *, / or create a custom one (such as .^.).