Record iOS Simulator video as mp4 and GIF with Xcode
Table of Contents
Record a video or GIF of your app is an essential task than you might think.
- You might need it for a marketing team to make an App Previews for the App Store.
- You might need to record a GIF for your pull requests or an issue ticket.
- Or you might need to record a GIF for your blog posts.
Whatever reasons you got, in Xcode 12.5, you can do it right within the Simulator app without any external tools.
How to record a video
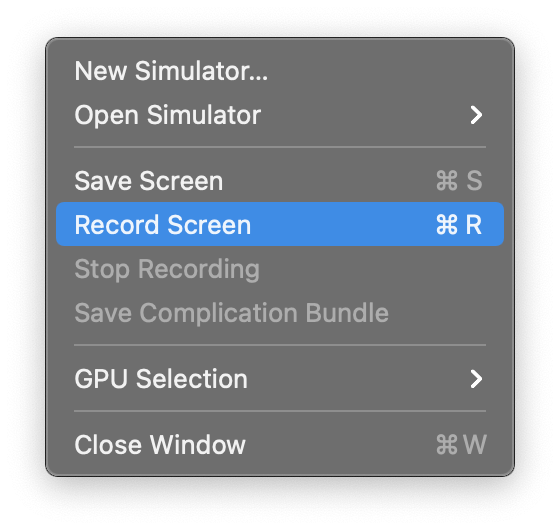
- Launch Simulator app.
- Open File menu > Record Screen or ⌘ - command + R.
![]()
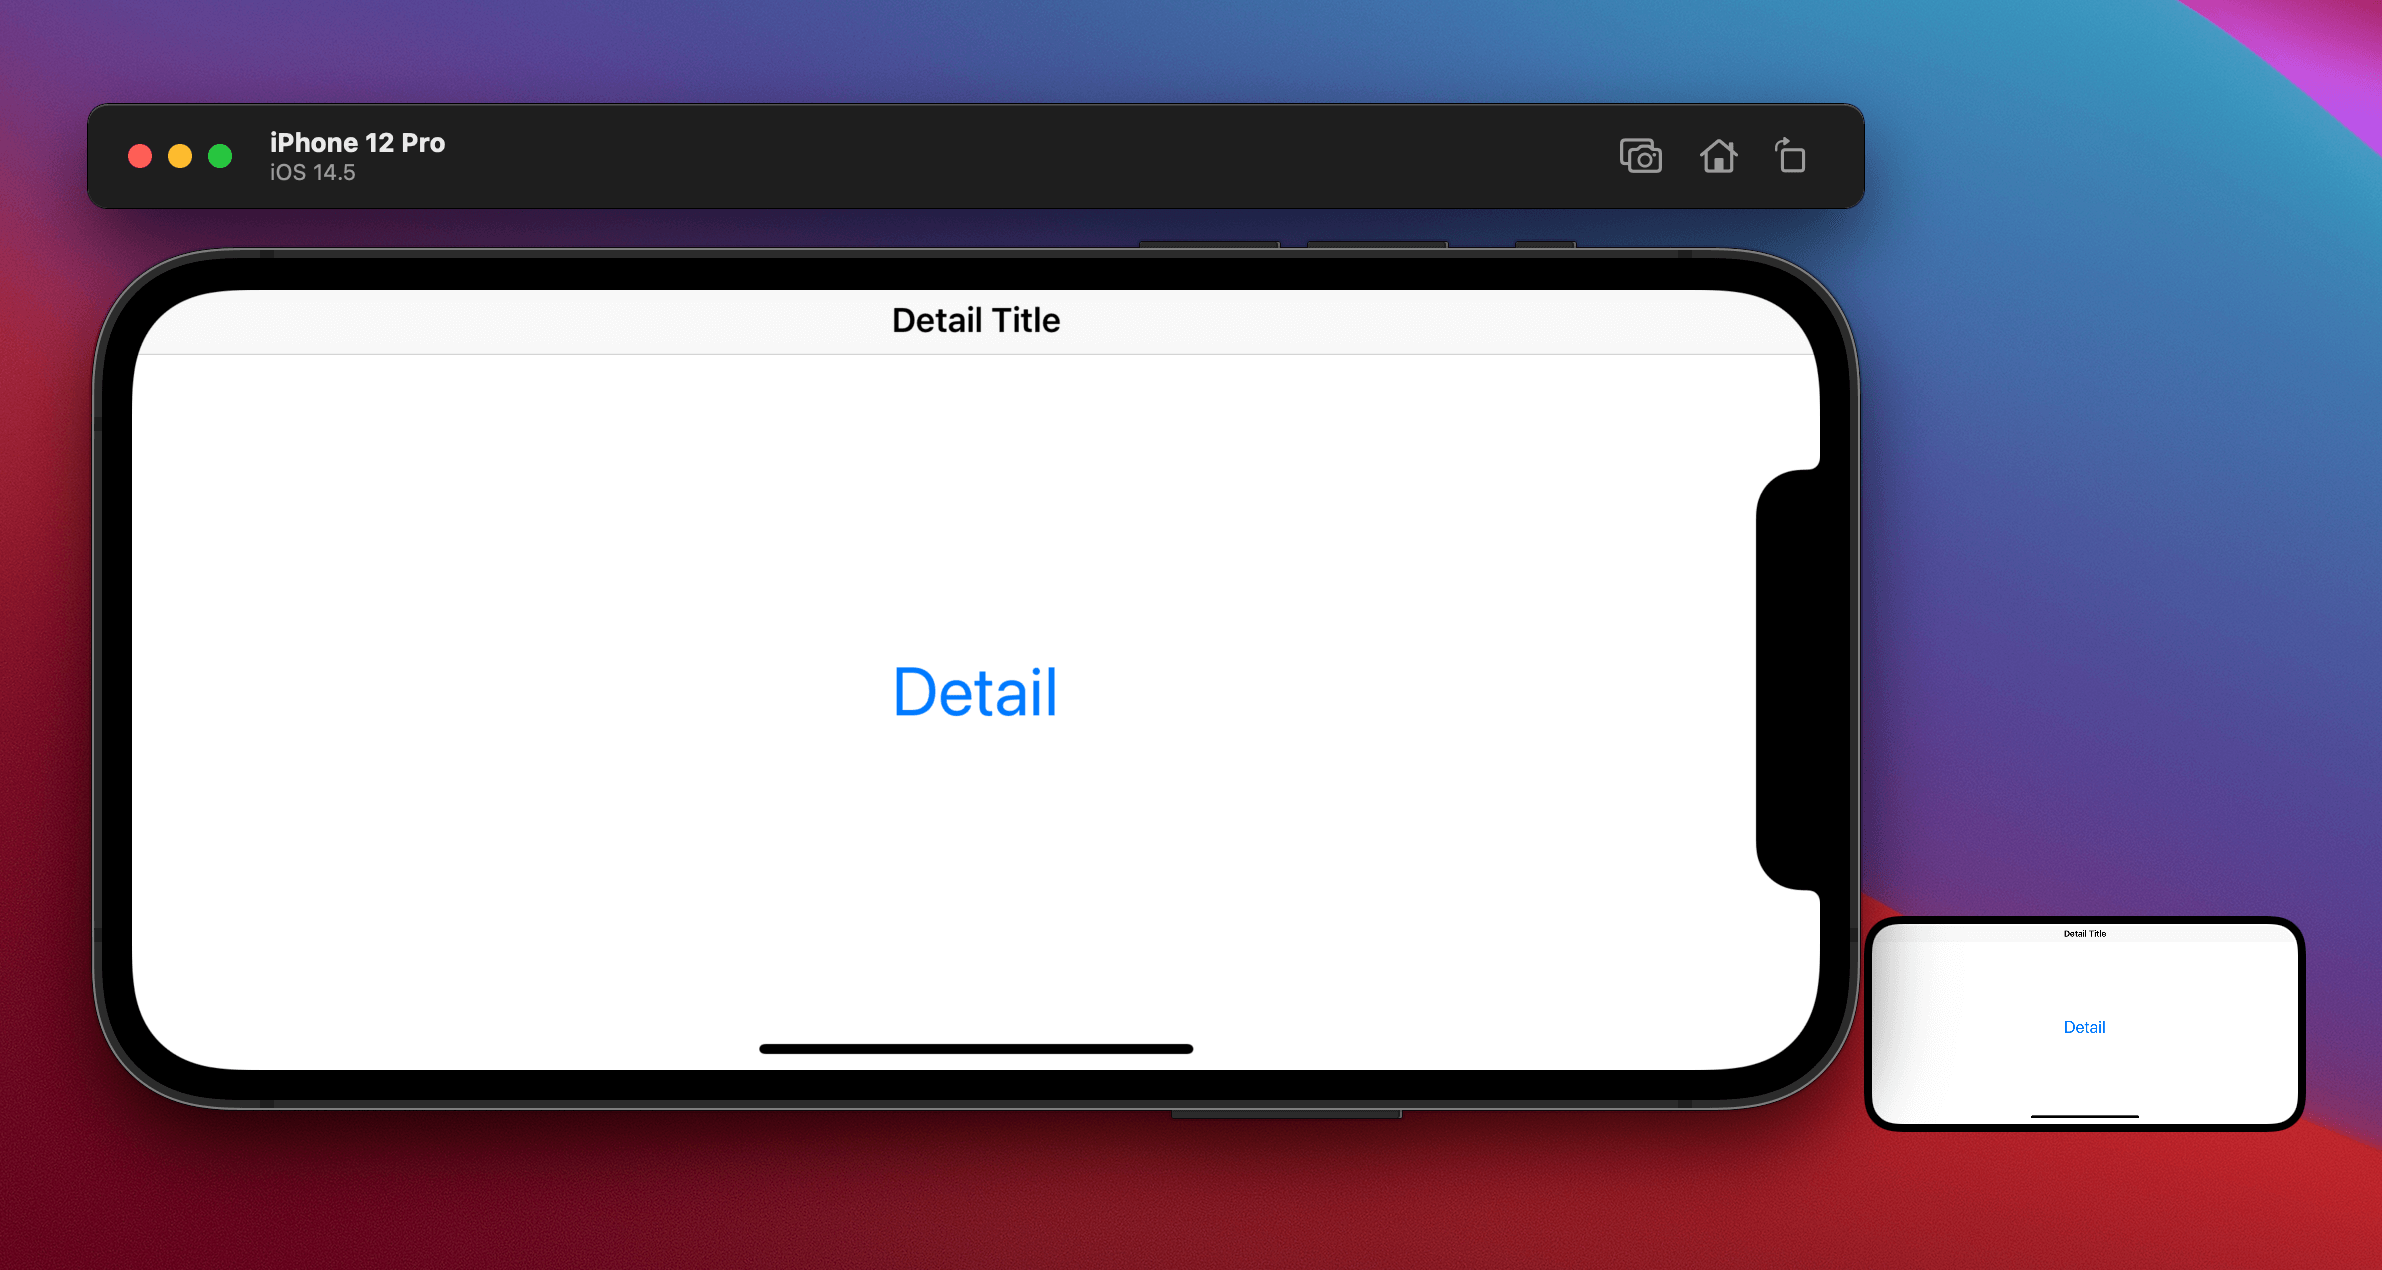
- Recording indicator will show up on the upper right of the title bar. You can begin your recording after the indicator showing up.
![]()
- After finish recording, tap the recording indicator to stop the record. Video preview will show up at the bottom-right of the simulator.
![]()
- After a while, the video preview will dismiss, and the video file will save on your Desktop.

The default file format is mp4, but you also save it as Animated GIF right out of the box without finding other tools.
You can easily support sarunw.com by checking out this sponsor.
Screenshot Studio: Create App Store screenshots in seconds not minutes.
How to record a GIF
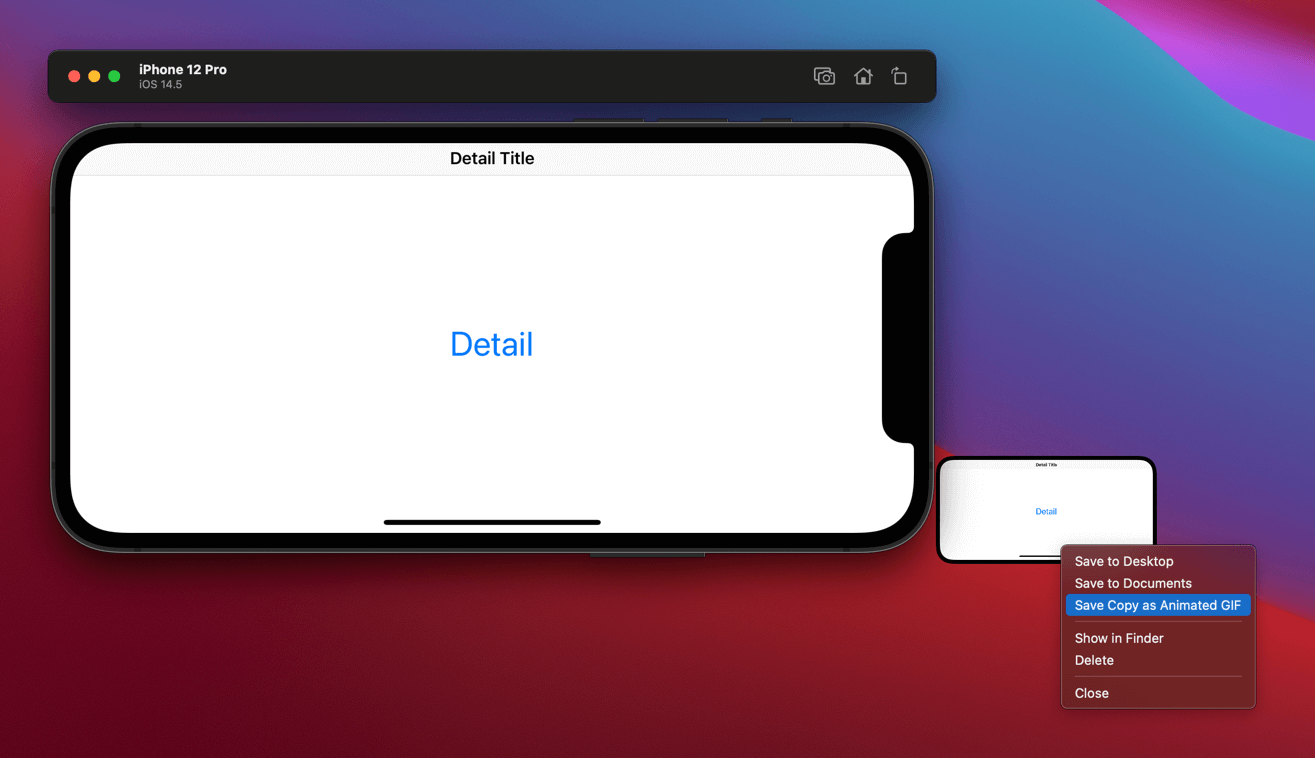
To save our video as a GIF, you follow the same steps in How to record a video. After finished recording (Step 4.) and the video preview showing up, right-click on the video preview, then select Save as Animated GIF.
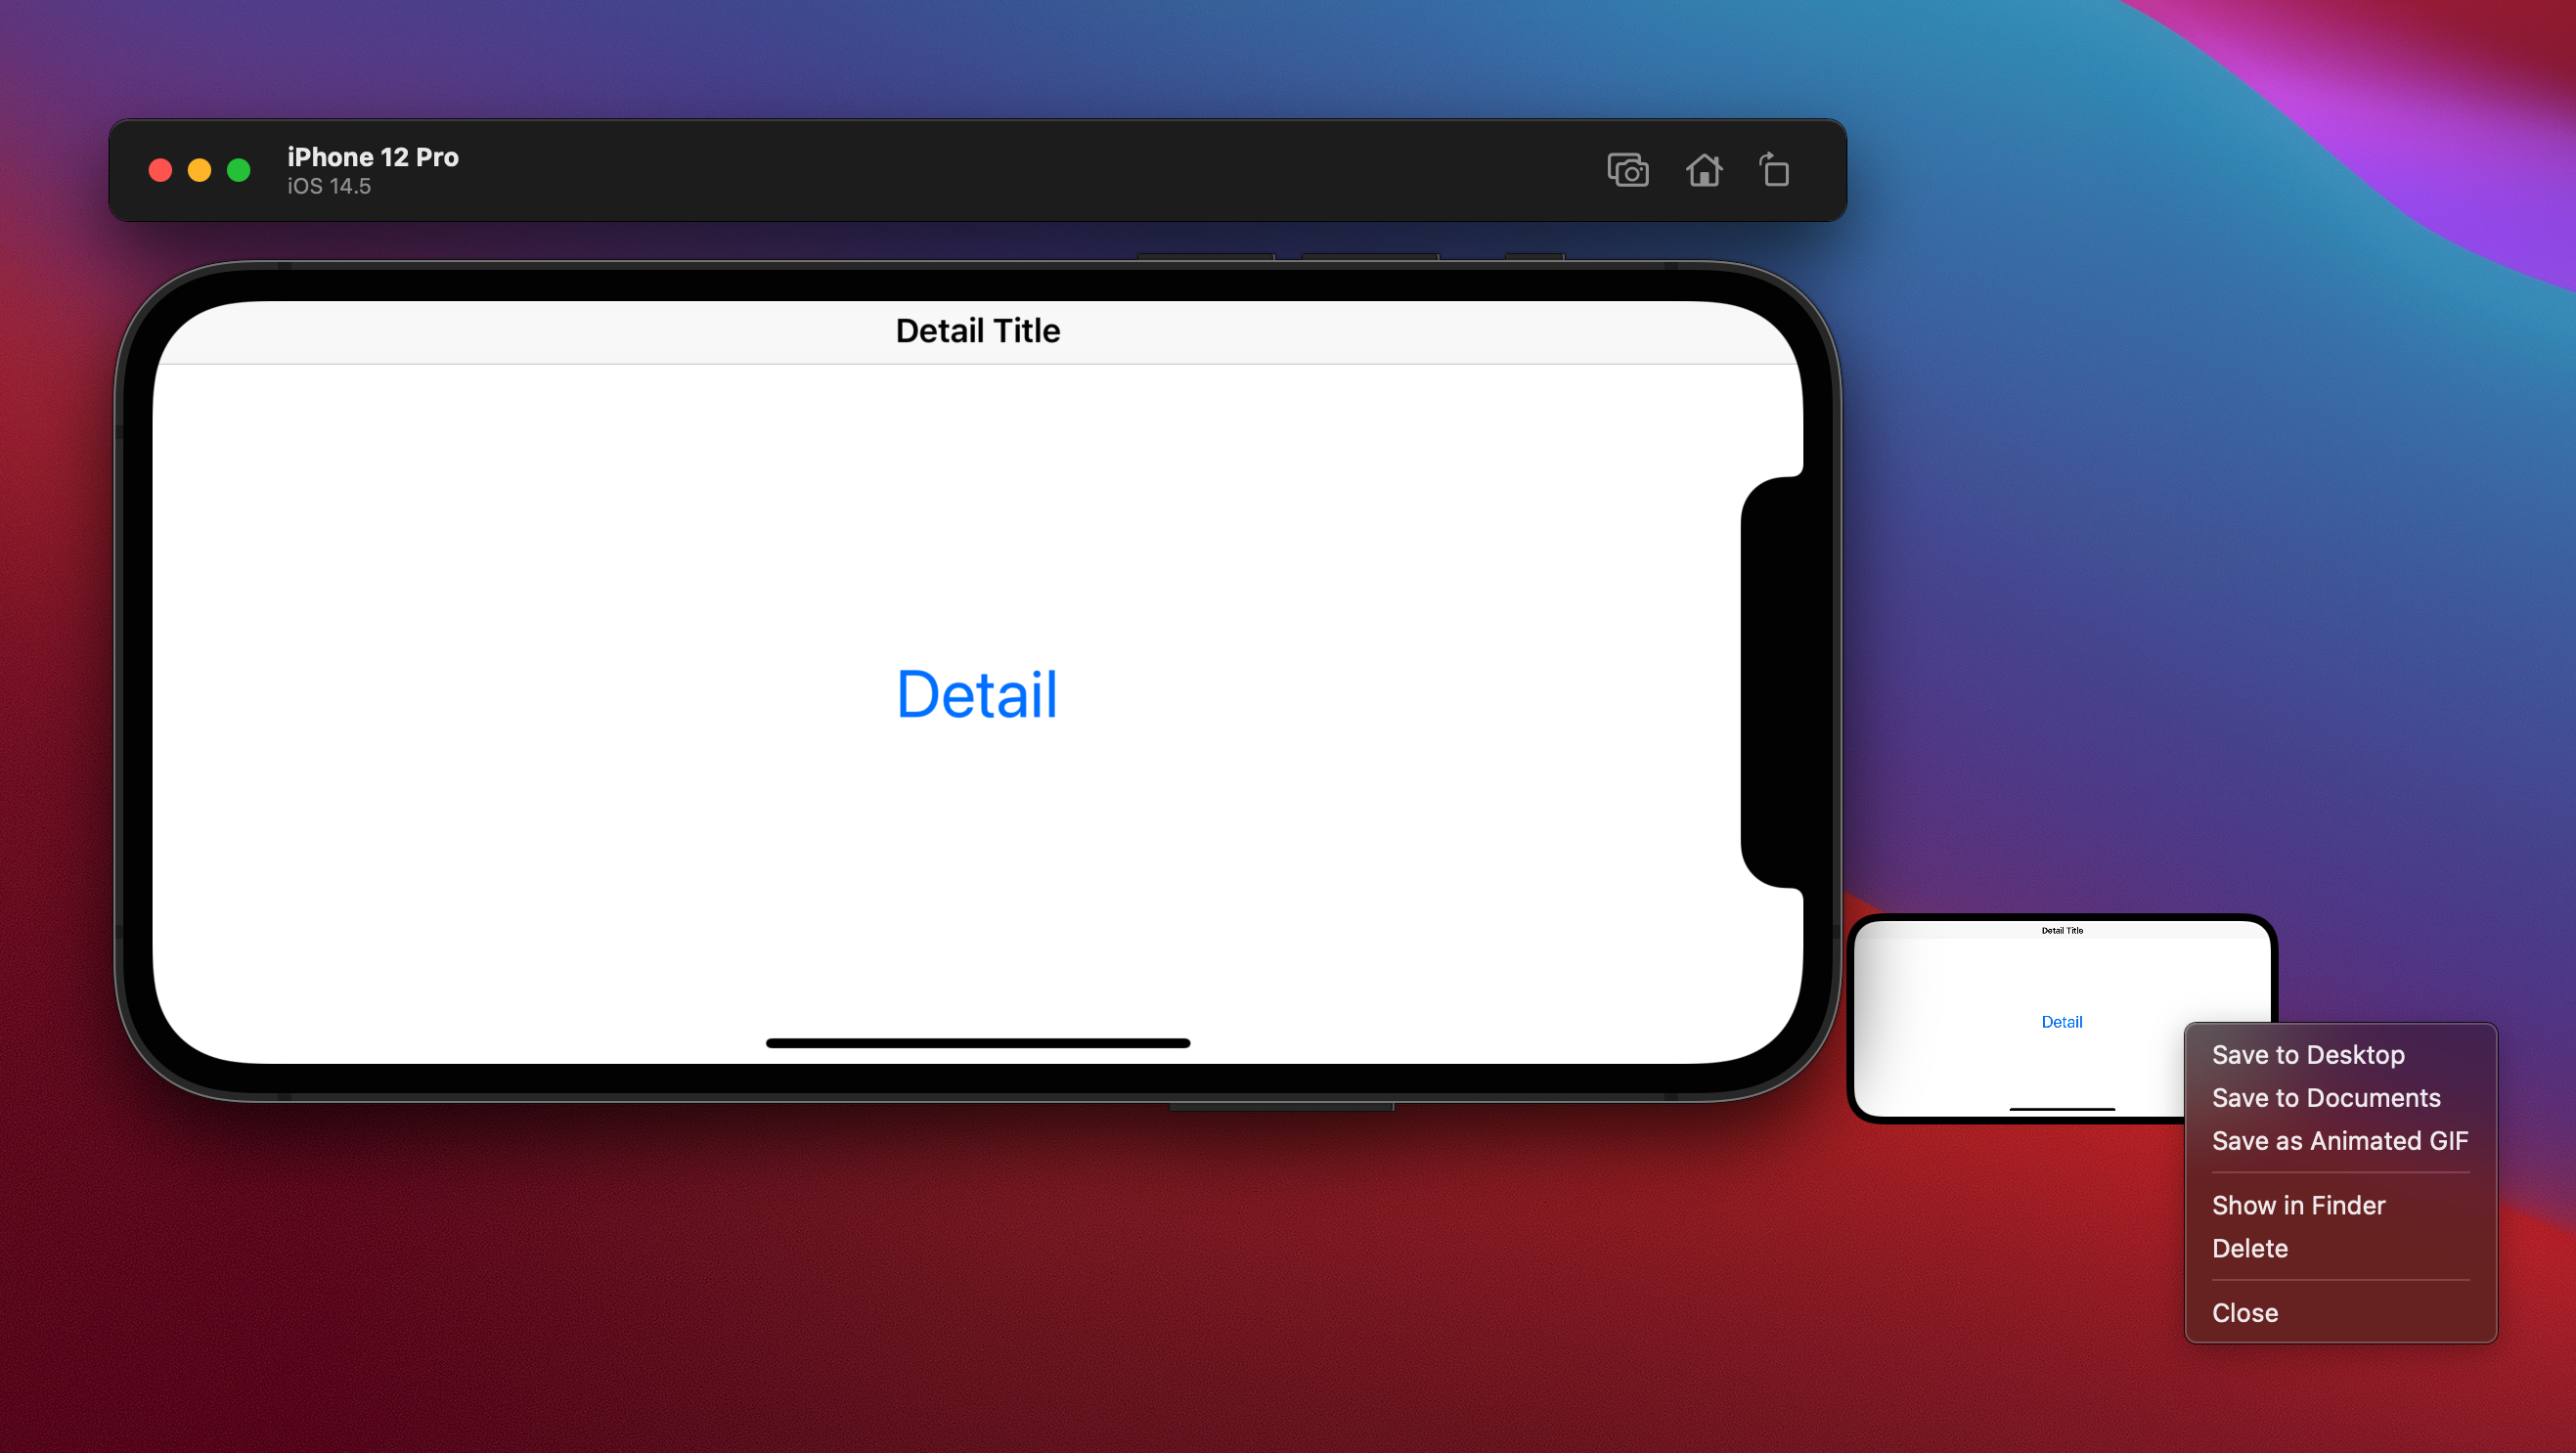
Choose Save as Animated GIF will save your video as a GIF on your Desktop and immediately dismiss the preview. If you want to have both formats (mp4 and GIF), press and hold ⌥ – Option and select Save Copy as Animated GIF. (Save as Animated GIF option will change to Save Copy as Animated GIF while holding down an Option key).
Preferences
You have a few options to control your GIF file and the appearance of the simulator. You can find the option in Simulator preferences. To access it, click on Simulator menu > Preferences... or ⌘ - command + ,.
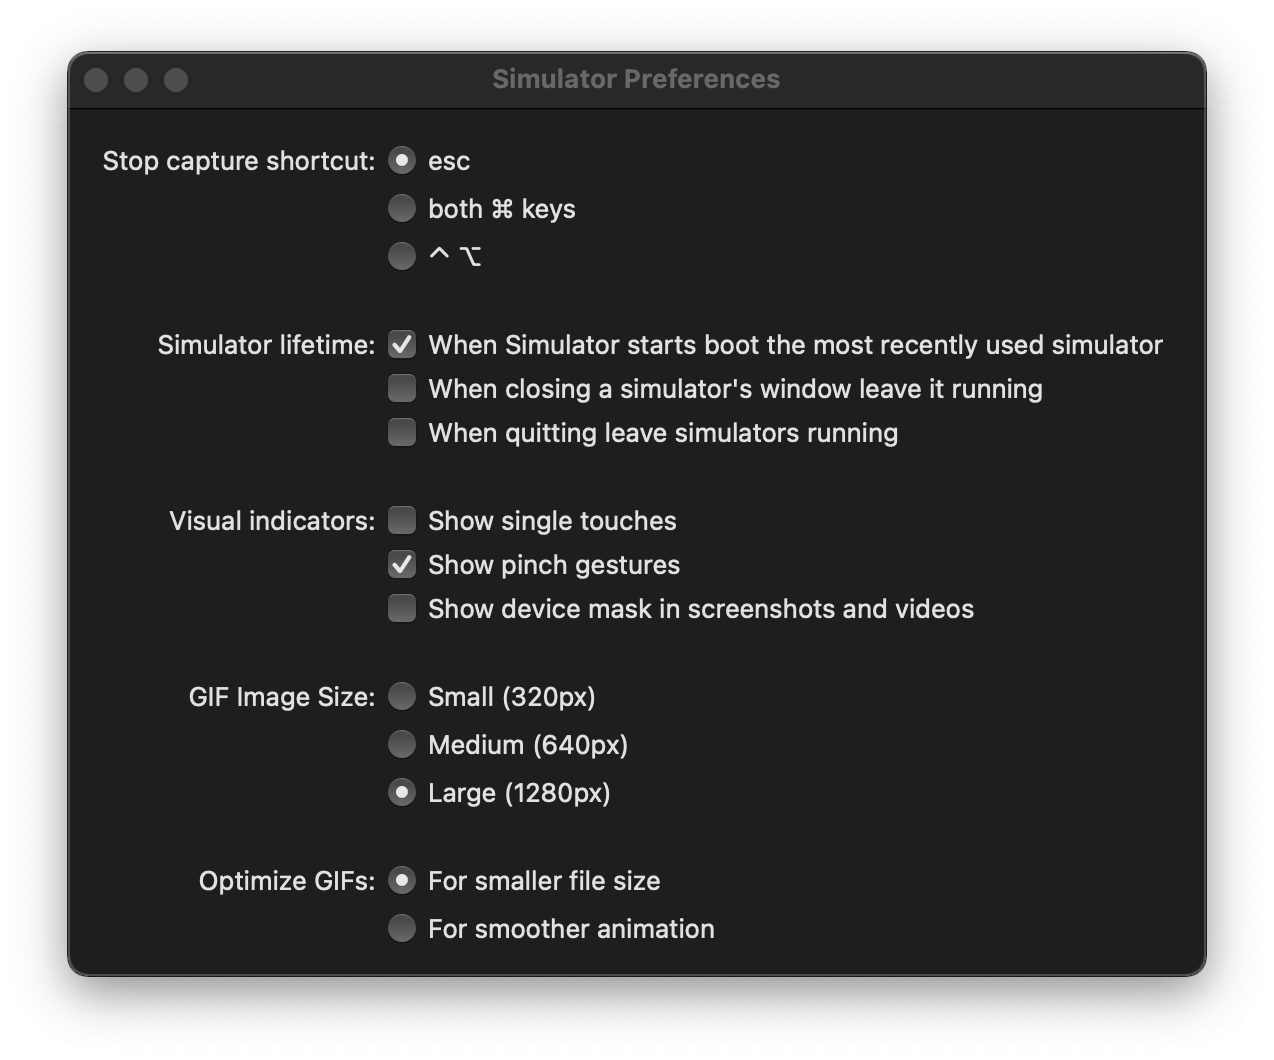
You can adjust three things.
- Show device mask in screenshots and videos. Enable this option will mask your screenshots and videos according to the device model, such as round corners and notch.
- GIF Image Size. We have three choice to choose form.
- Small (320px)
- Medium (640px)
- Large (1280px)
- Optimize GIFs. We have two choices here.
- For smaller file size. This will result in low FPS and low color range.
- For smoother animation. This will result in better FPS and color range, which also increases the file size.


Caveats
- The video file and GIF are not respecting the device orientation and always show as a portrait.
- Quite limited preferences. You have only a few options as we already discussed.

You can easily support sarunw.com by checking out this sponsor.
Screenshot Studio: Create App Store screenshots in seconds not minutes.
Conclusion
Xcode 12.5 is still in beta at the moment. I will update the post again if there is a change in the public release. If you don't have Xcode beta right now, you can record a video with the command line.
Read more article about Xcode, Simulator, Video, or see all available topic
Enjoy the read?
If you enjoy this article, you can subscribe to the weekly newsletter.
Every Friday, you'll get a quick recap of all articles and tips posted on this site. No strings attached. Unsubscribe anytime.
Feel free to follow me on Twitter and ask your questions related to this post. Thanks for reading and see you next time.
If you enjoy my writing, please check out my Patreon https://www.patreon.com/sarunw and become my supporter. Sharing the article is also greatly appreciated.
Become a patron Buy me a coffee Tweet ShareNavigation in SwiftUI
Part 4 in the series "Building Lists and Navigation in SwiftUI". We will explore a NavigationView, UINavigationController equivalent in SwiftUI.
Does Swift enum retain its associated value
An easy question that you might overlook. Learn this simple fact together in this article.