How to make SwiftUI button with buttonStyle expand to full width
Table of Contents
SwiftUI got many beautiful built-in button styles. One problem you might get is it isn't obvious how to control the size of it.
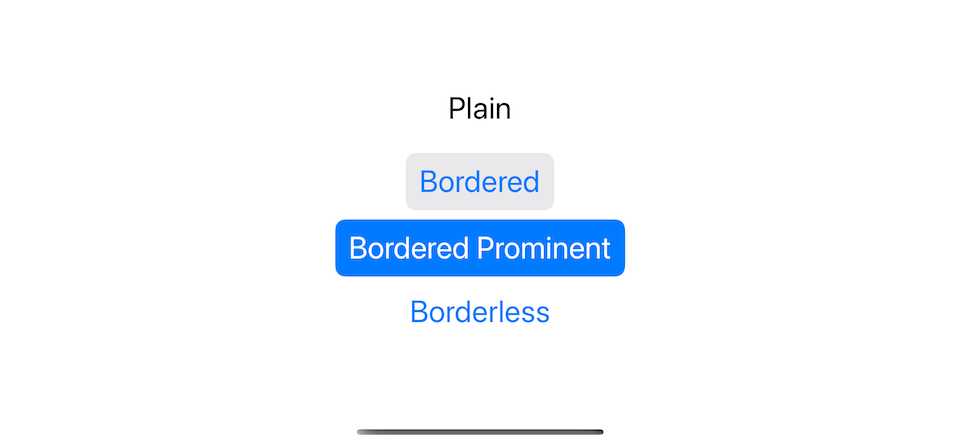
The following are the four built-in button styles.

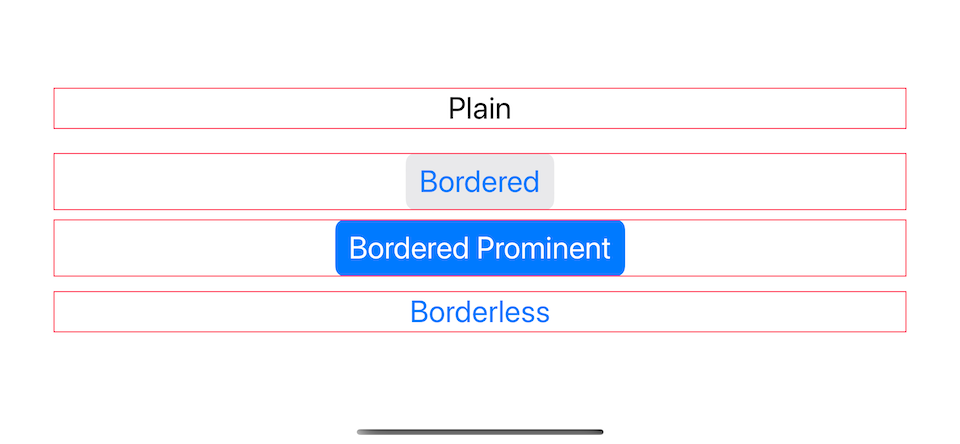
If you try to make a full-width button using .frame(maxWidth: .infinity), you will see that the button styling isn't respecting the new frame and show at its ideal size.
VStack {
    Button("Plain") {}
        .buttonStyle(.plain)
        .frame(maxWidth: .infinity)
        .border(.pink)
    Button("Bordered") {}
        .buttonStyle(.bordered)
        .frame(maxWidth: .infinity)
        .border(.pink)
    Button("Bordered Prominent") {}
        .buttonStyle(.borderedProminent)
        .frame(maxWidth: .infinity)
        .border(.pink)
    Button("Borderless") {}
        .buttonStyle(.borderless)
        .frame(maxWidth: .infinity)
        .border(.pink)
}
.font(.title)
We try to expand a button to the full width with .frame(maxWidth: .infinity), but the button style doesn't follow the frame (pink border).

This is because the frame modifier creates a new frame around the button (as dictated by the pink border), which happens after the button style is applied.
You can easily support sarunw.com by checking out this sponsor.

Localization Buddy: Easiest way to localize and update App Store metadata.
How to change the width of a button with a button style
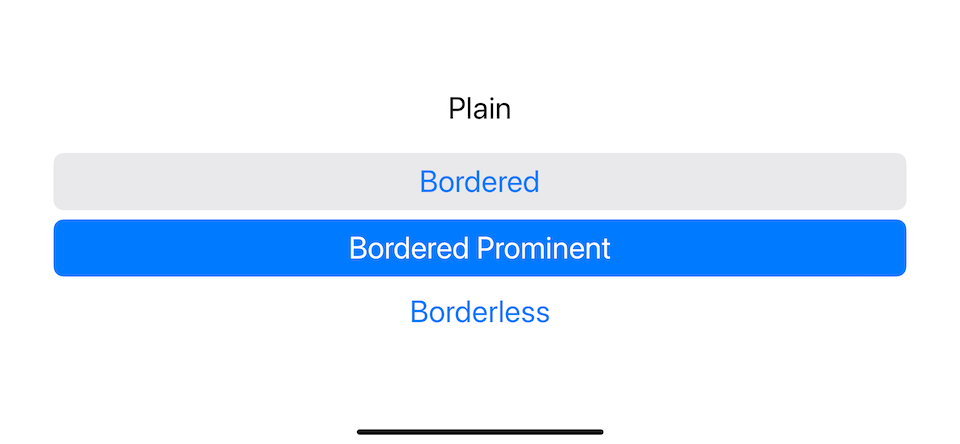
To change a button width, we need to apply .frame(maxWidth: .infinity) before we apply a button style.
To do that
- We create a button with an initializer that allows us to **modify the button's content, **
init(action:label:). - And put
.frame(maxWidth: .infinity)there.
Button {

} label: {
    Text("Bordered Prominent")
        .frame(maxWidth: .infinity)
}
.buttonStyle(.borderedProminent)
Since .frame(maxWidth: .infinity) appllied before the button style, the style will respect the specify frame.

Read more article about SwiftUI, Button, ButtonStyle, or see all available topic
Enjoy the read?
If you enjoy this article, you can subscribe to the weekly newsletter.
Every Friday, you'll get a quick recap of all articles and tips posted on this site. No strings attached. Unsubscribe anytime.
Feel free to follow me on Twitter and ask your questions related to this post. Thanks for reading and see you next time.
If you enjoy my writing, please check out my Patreon https://www.patreon.com/sarunw and become my supporter. Sharing the article is also greatly appreciated.
Become a patron Buy me a coffee Tweet ShareLoop n times in Swift
There are many ways to loop in Swift. In this post, I will show you how I do when I want to loop for a specific number of times.